Publishing data to snowflake
After transforming your data, you can publish your dataset to your Snowflake instance.
General Information#
Definition of Terms#
Datameer View
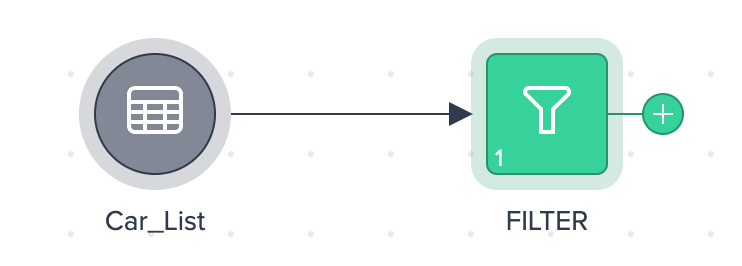
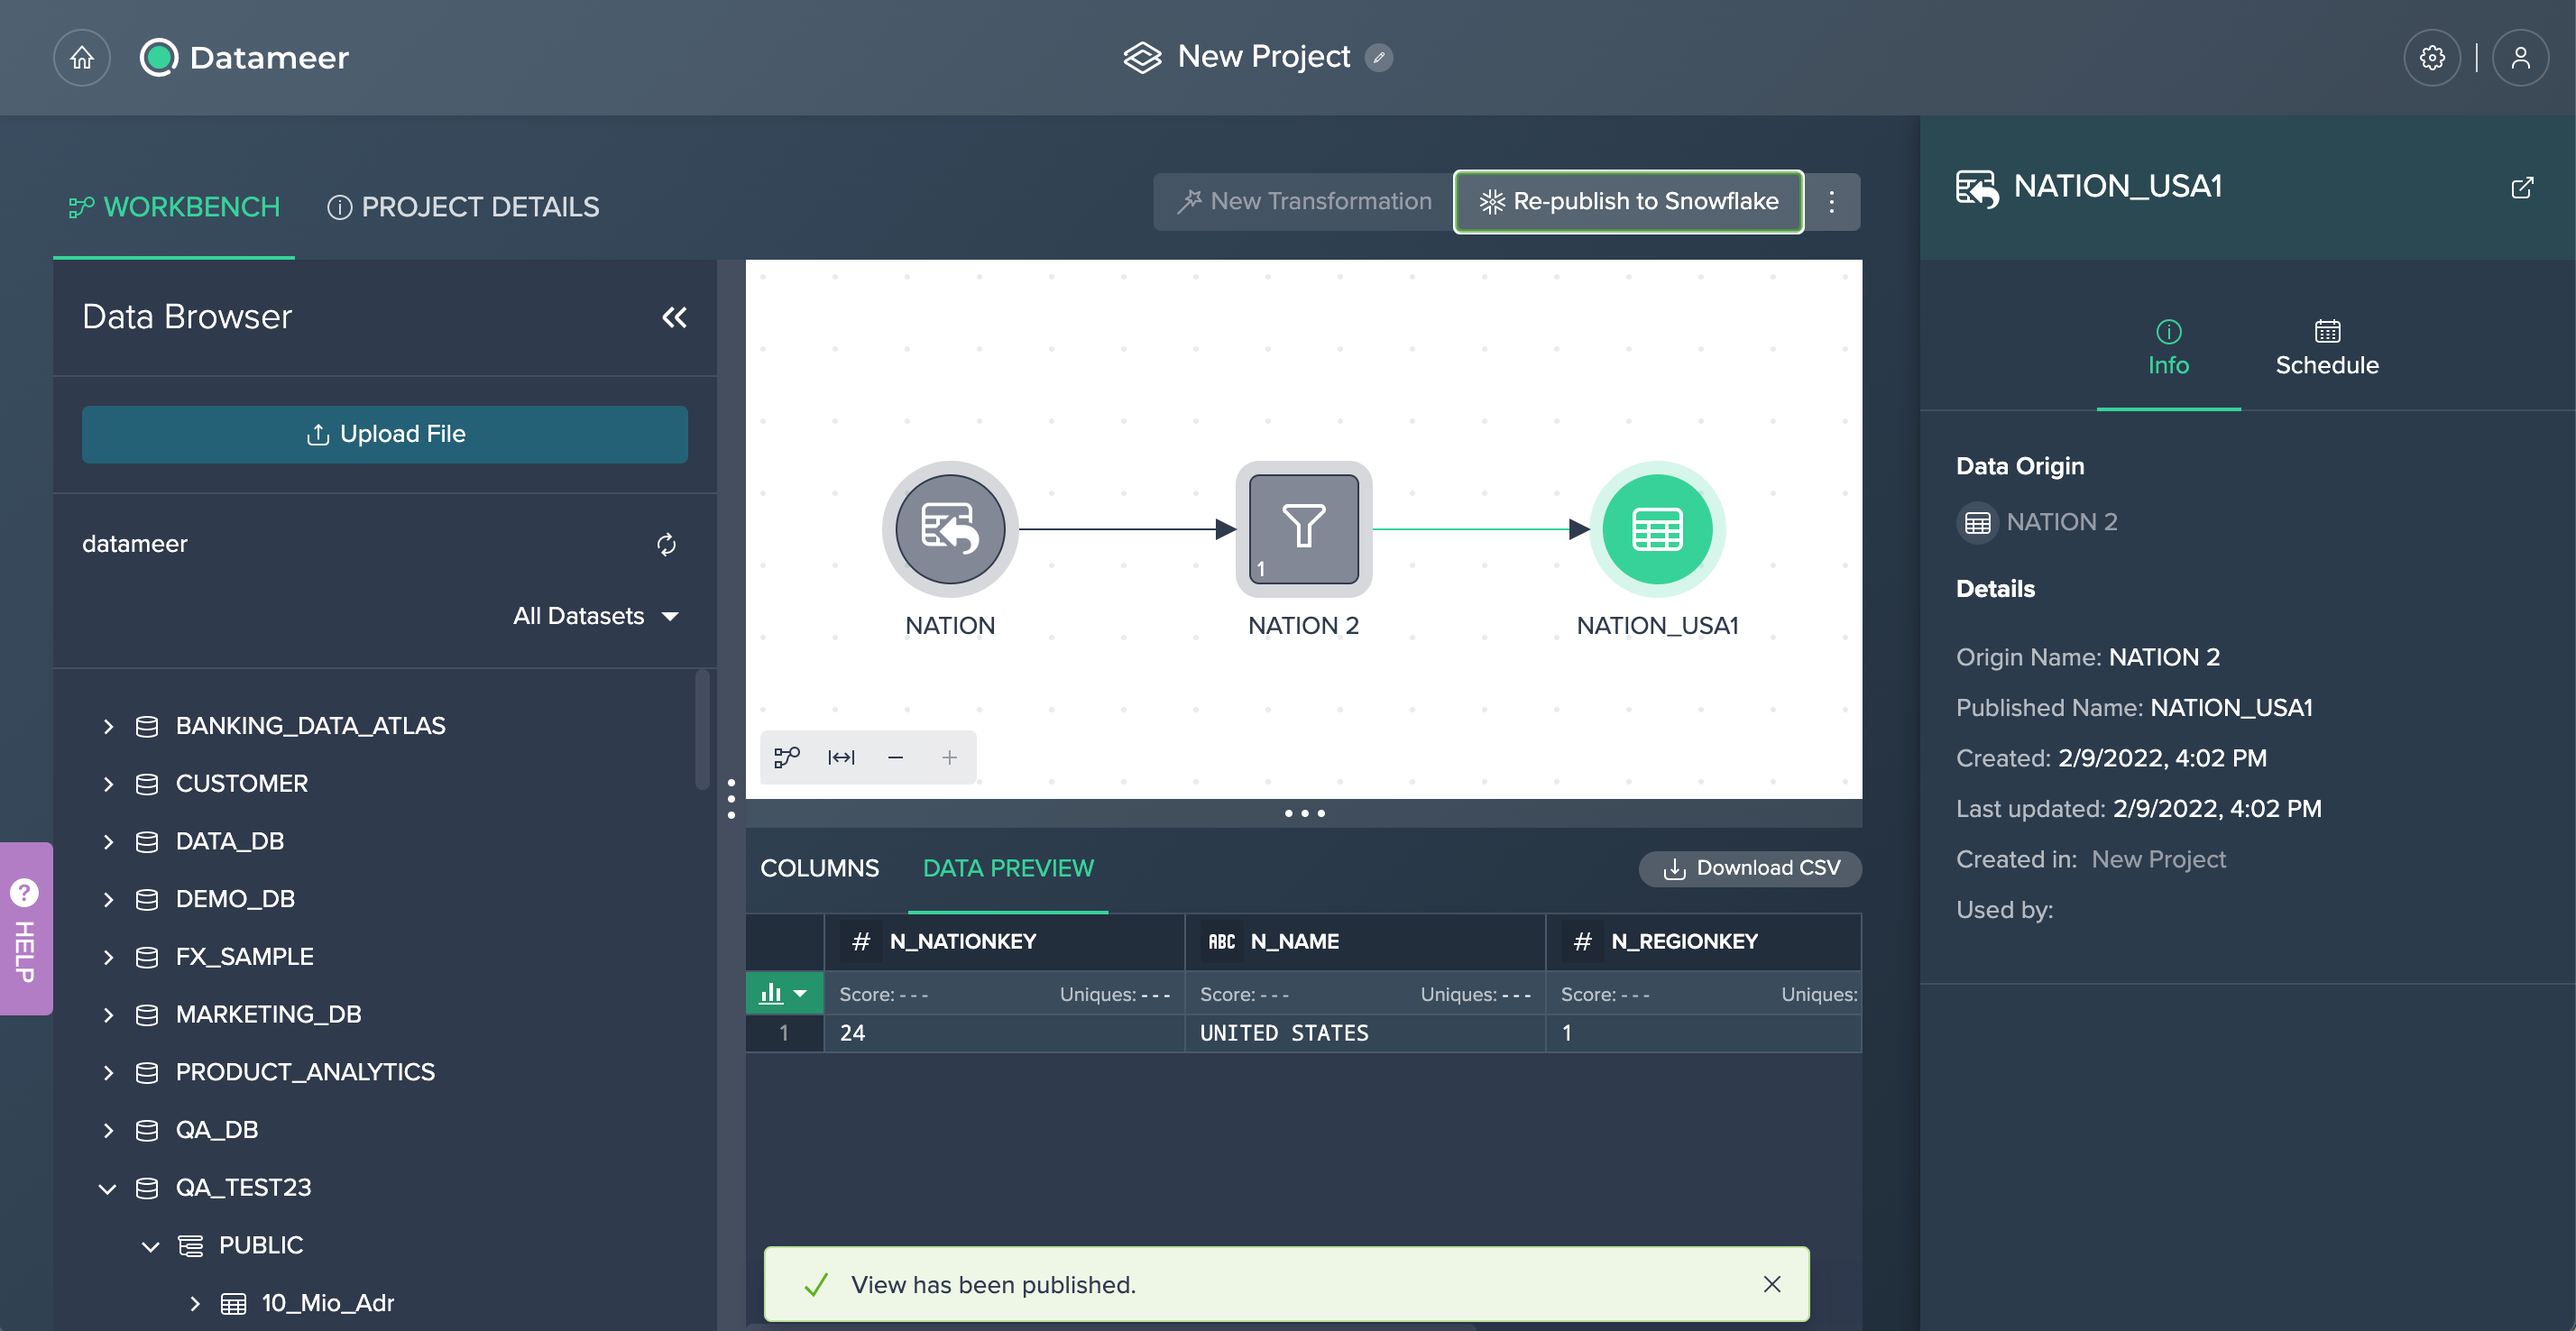
A view is basically a named definition of a transformed dataset in Datameer.
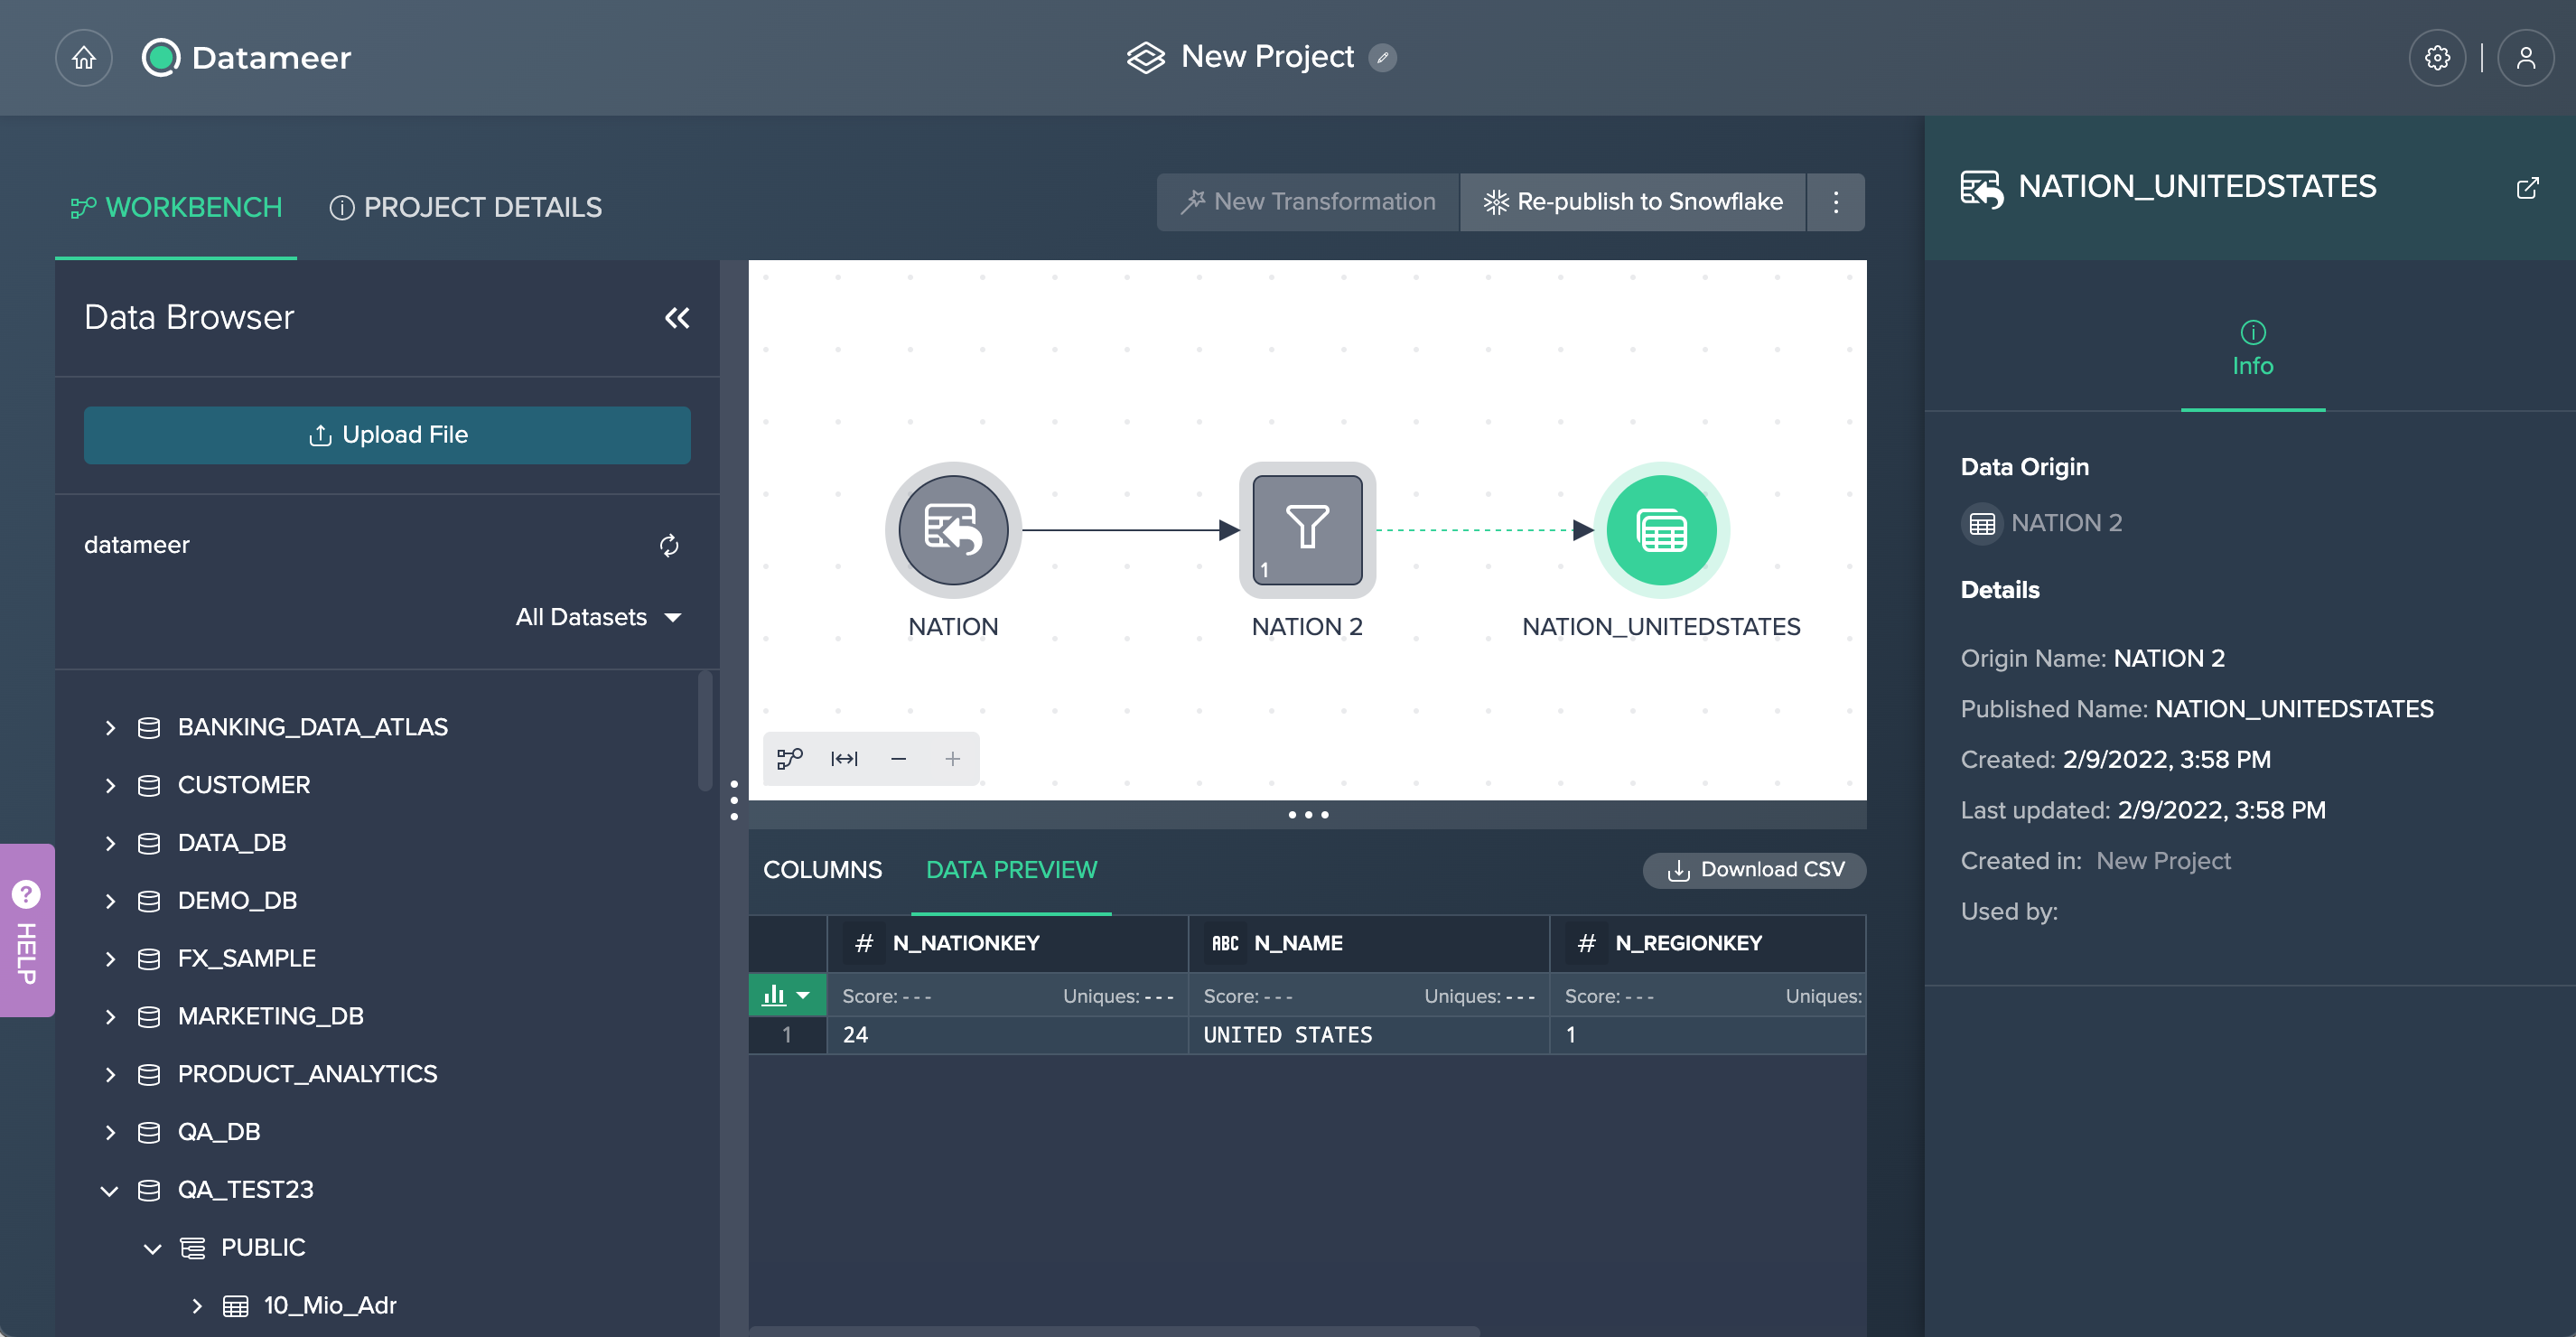
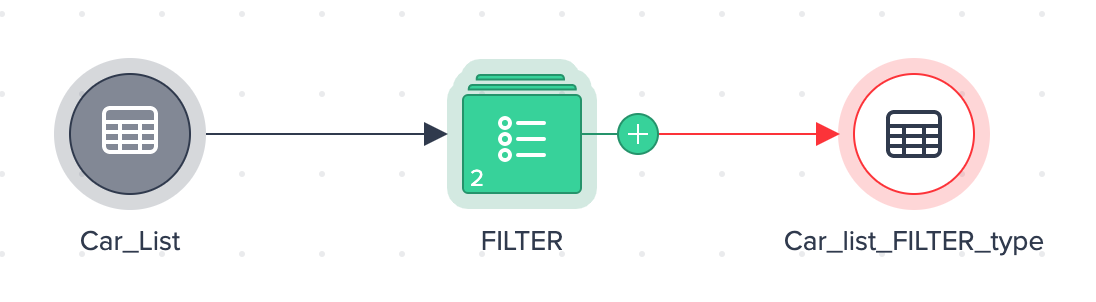
Example: Your source dataset is called 'Car_List' and you apply a filter to the asset. The output is the Datameer View 'FILTER'. The Datameer view is not published to your Snowflake instance. The new asset can be deleted from here, published to Snowflake or one can open the asset details page.
Snowflake Views and Tables
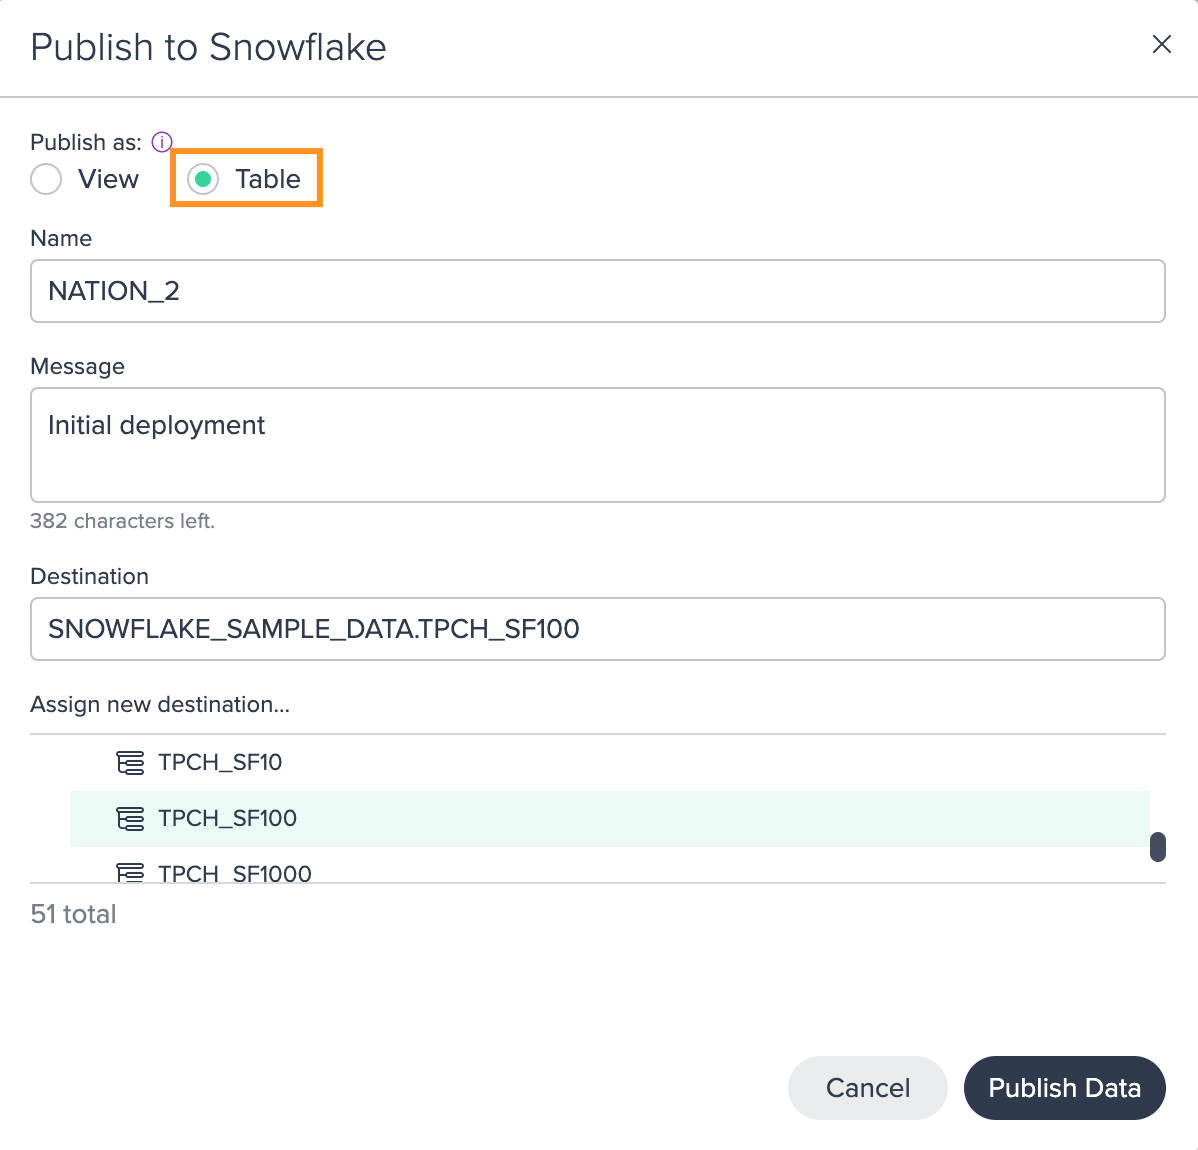
In Datameer you can publish both a Snowflake view or table.
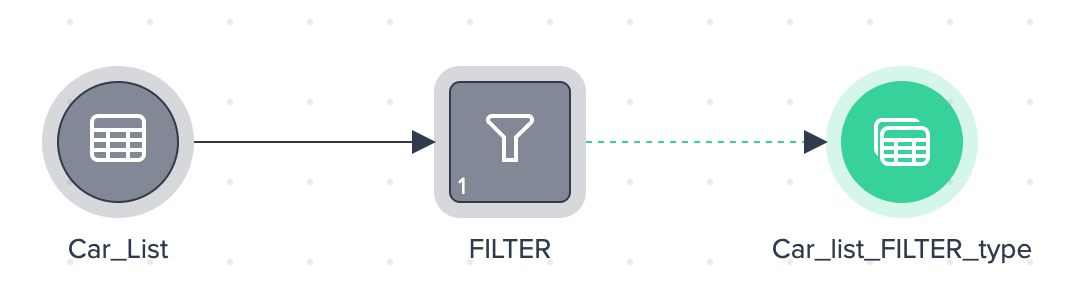
- Views in Snowflake are a point-in-time of the view in Datameer and defined as 'basically a named definition of a query' in Snowflake. Views enable you to consume just a portion of the data in a table. The performance is slower than tables and the results are not stored for the future use.
- A view that was created in Snowflake is a 'CREATE VIEW', not materialized and not a table.
-
Example: Filtering data from a table results in a Datameer view and then can be published to a Snowflake view.
-
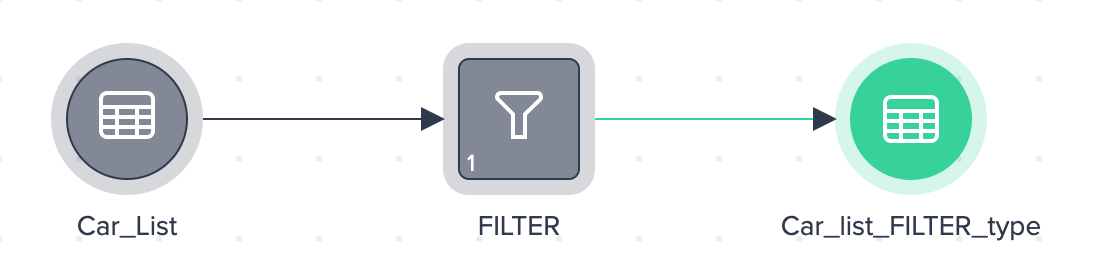
Tables in Snowflake are static artifacts which are stored in a columnar format, e.g. a fix table with historical data.
- This allows faster access, but requires storage space and active maintenance.
- A table that was created in Snowflake is a 'CREATE TABLE' and materialized.
-
Example: Filtering data from a table results in a Datameer view and then can be published to a Snowflake view.
Find more information about the Snowflake definition of terms here and here.
Publishing Requirements#
- The location chosen for the view or table must be an existing database and schema. The available schemas are configured on the 'Snowflake Settings' page (admin only). You are not allowed to create a new schema at this time.
- Published views and tables appear in both Snowflake and Datameer immediately. These assets can be shared across other Projects as well.
- If a referring dataset becomes out of sync with the published view/ table in Snowflake due to changes in the Project, the asset is highlighted and must be re-published. Note that using an asset from Project A as the source from Project B requires active maintenance when Project B is not scheduled.
- Overwriting an existing view/ table is not allowed. To do so, you have to re-publish. Otherwise the view/ table must be renamed.
- After publishing a view or table, you can add this node again as a source to the same Project or a new Project.
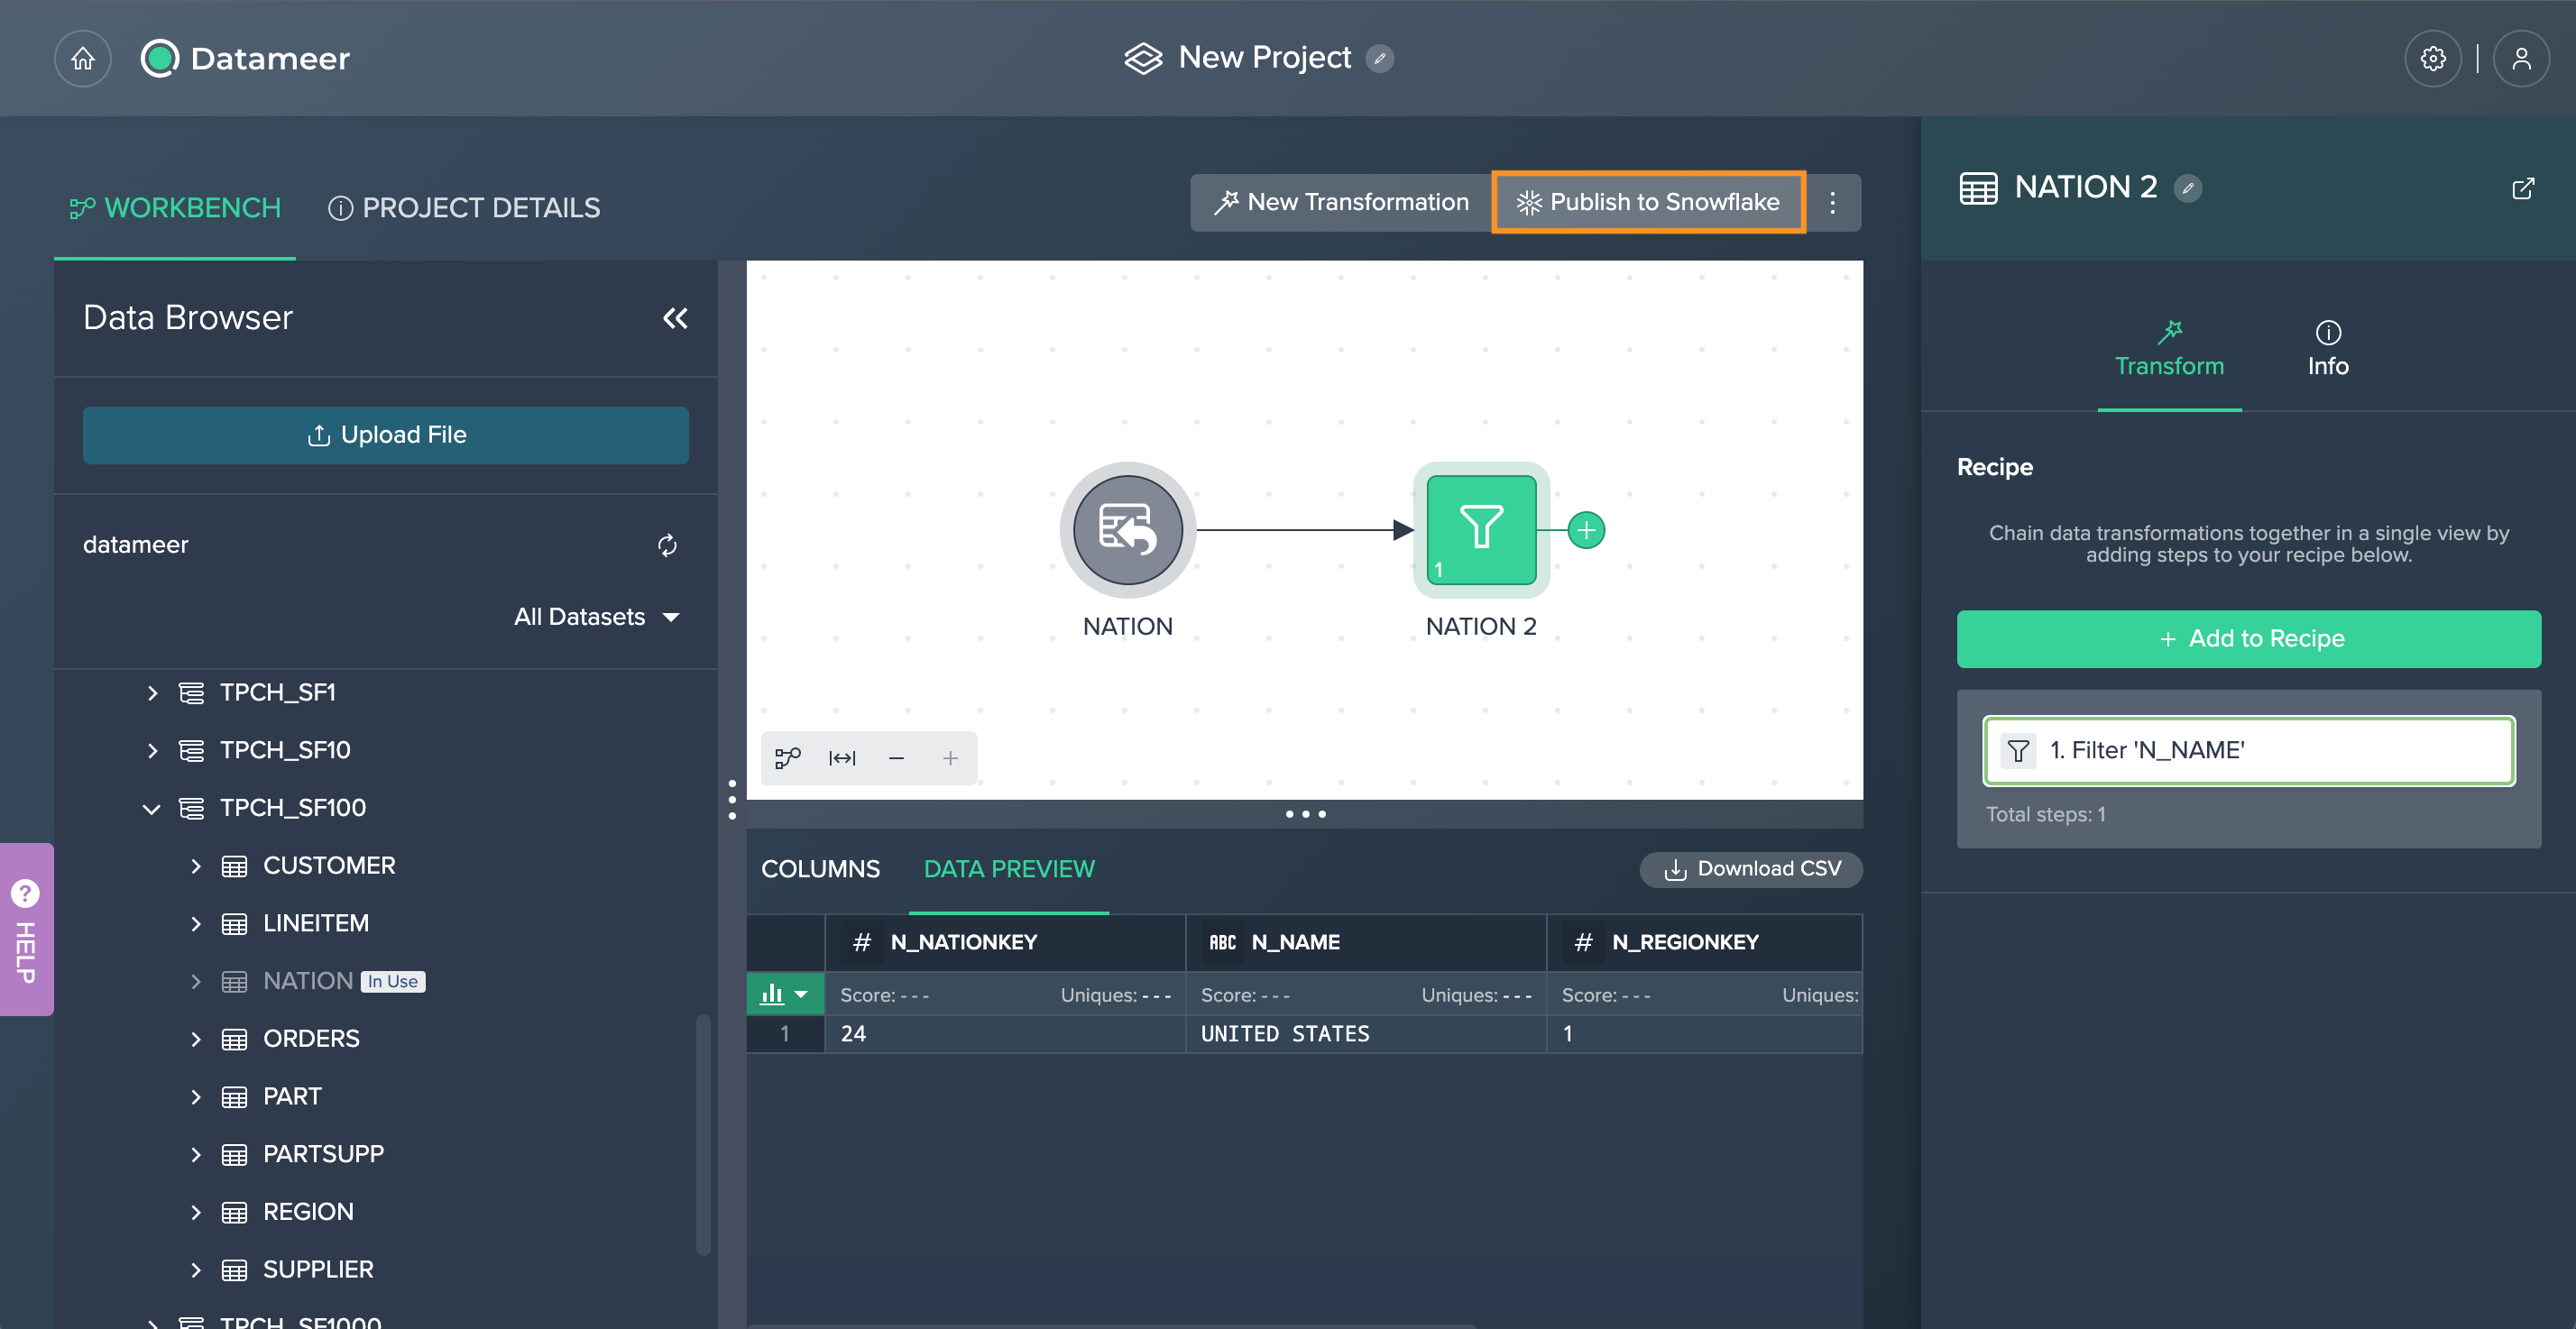
Publishing Views to Snowflake#
To publish a view to Snowflake:
-
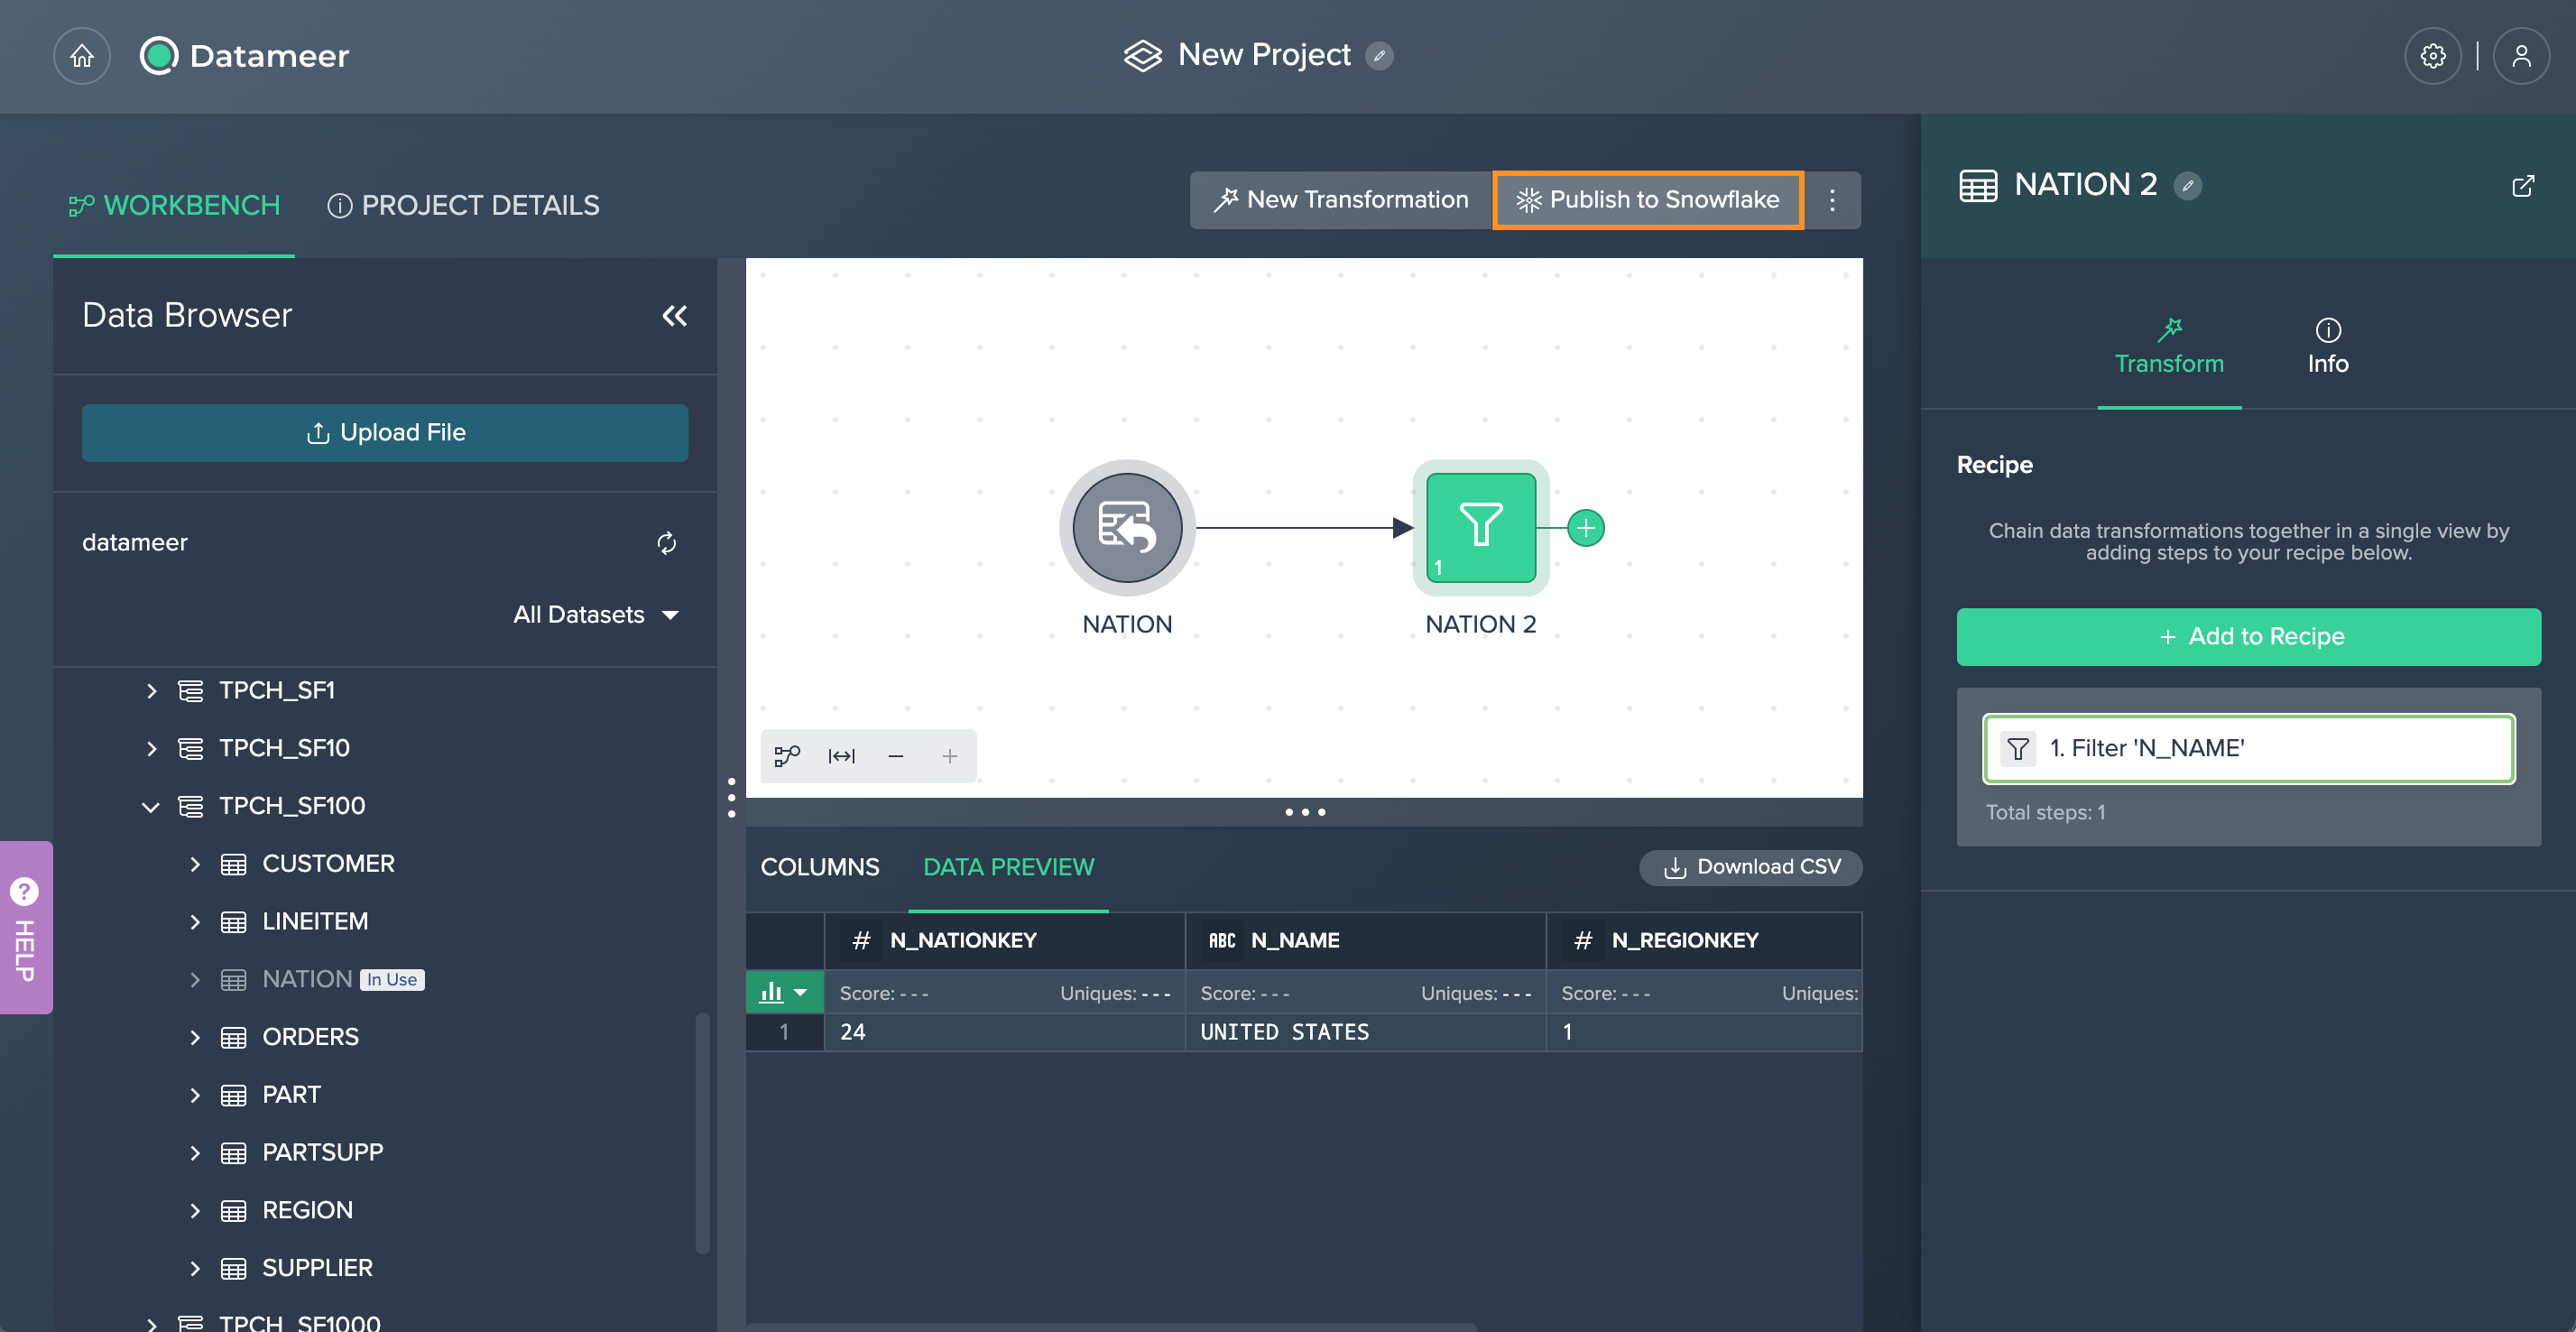
In the Project's Workbench, click on the "Publish" button on top of the Flow Area. The 'Publish to Snowflake' dialog opens.
-
Select "View".
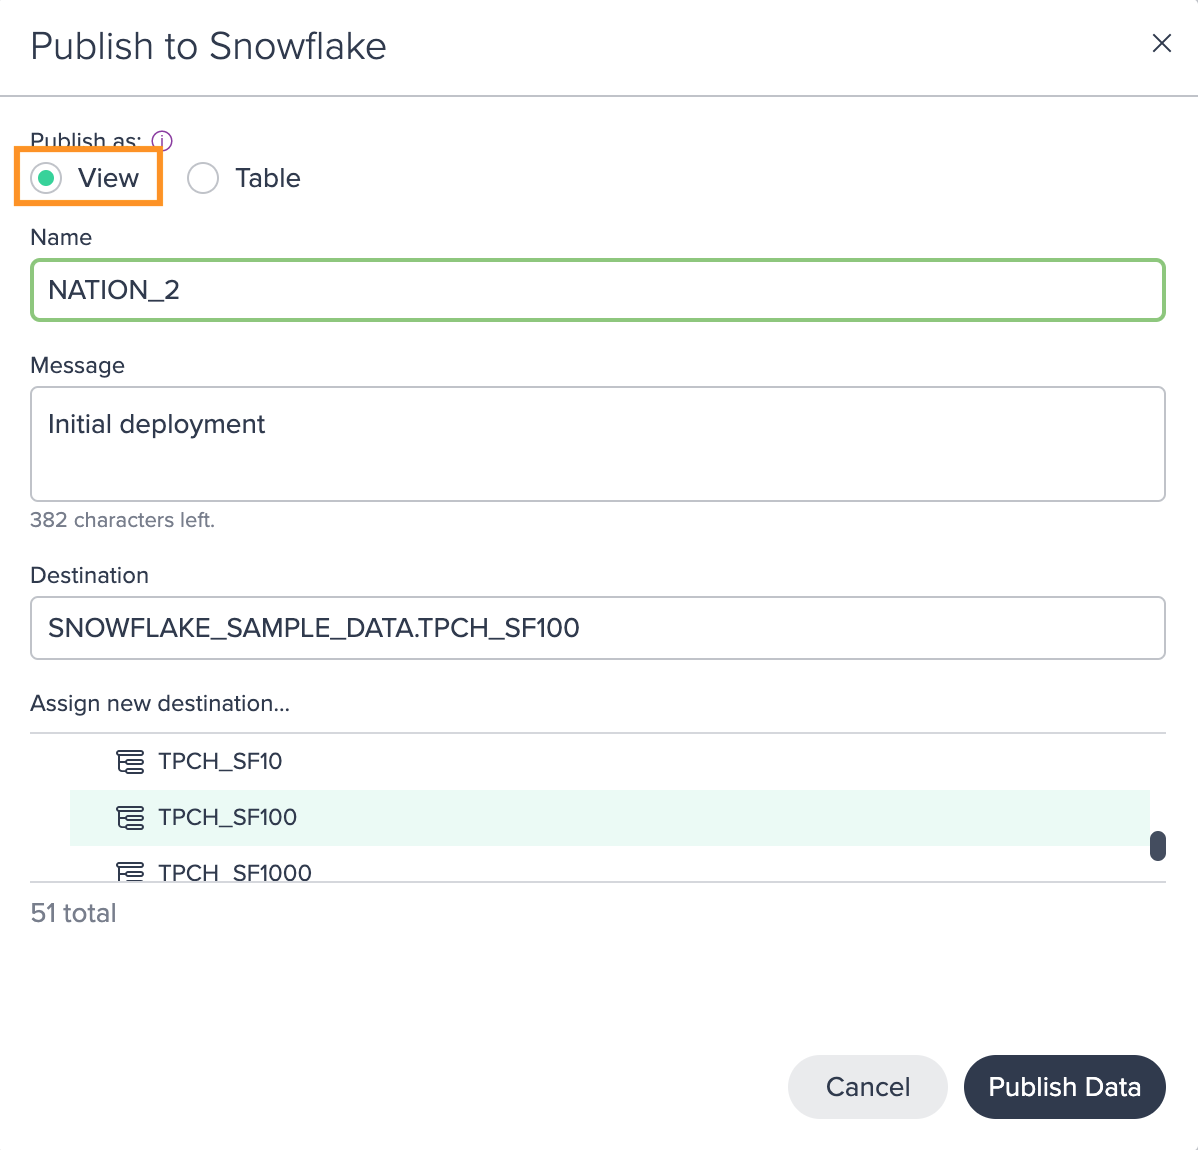
-
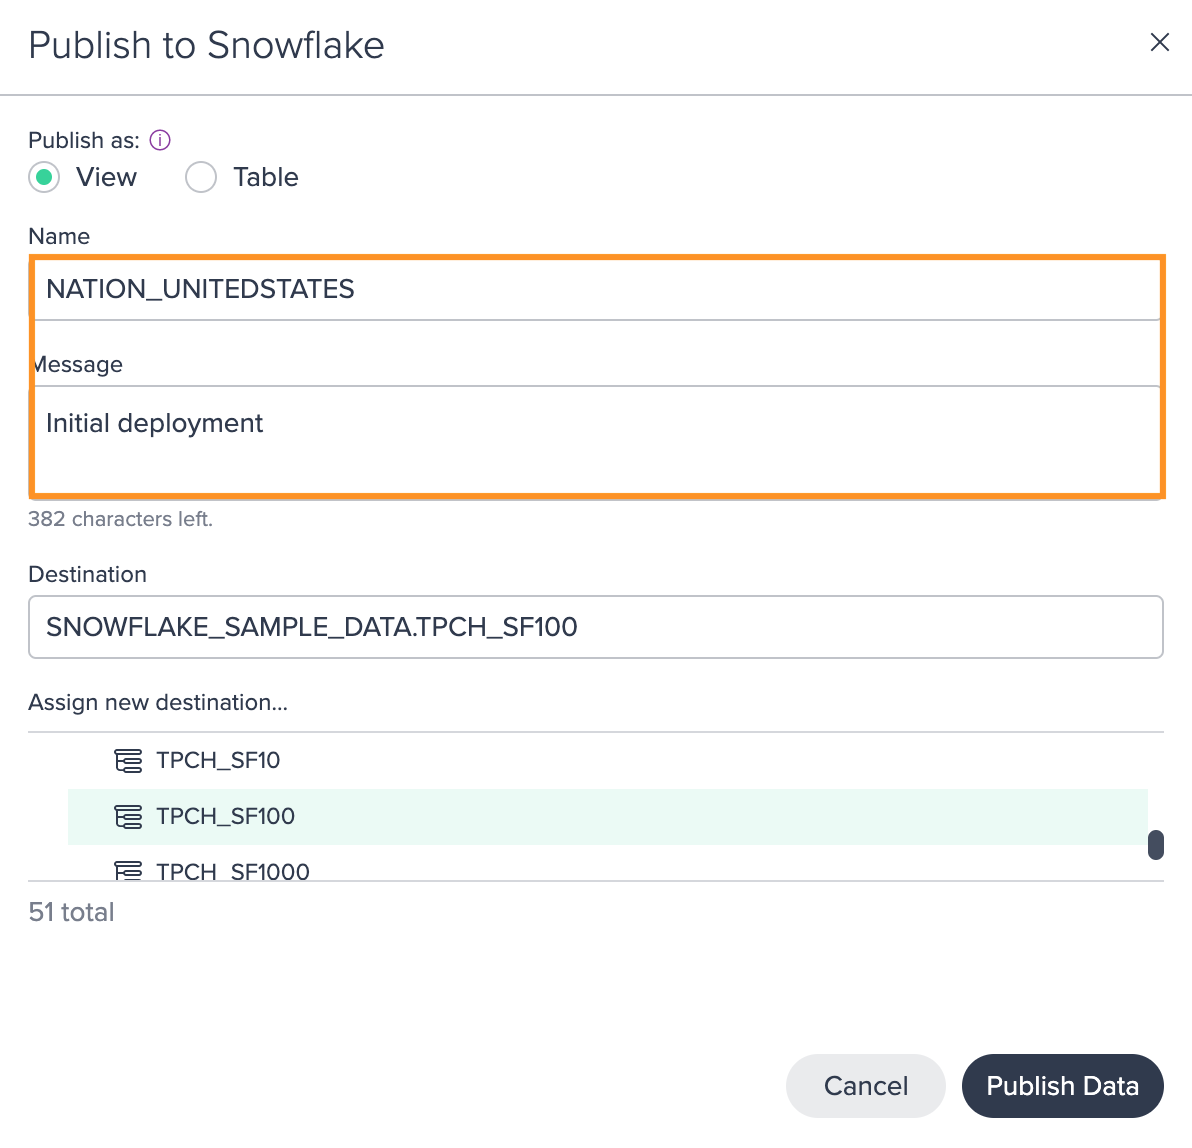
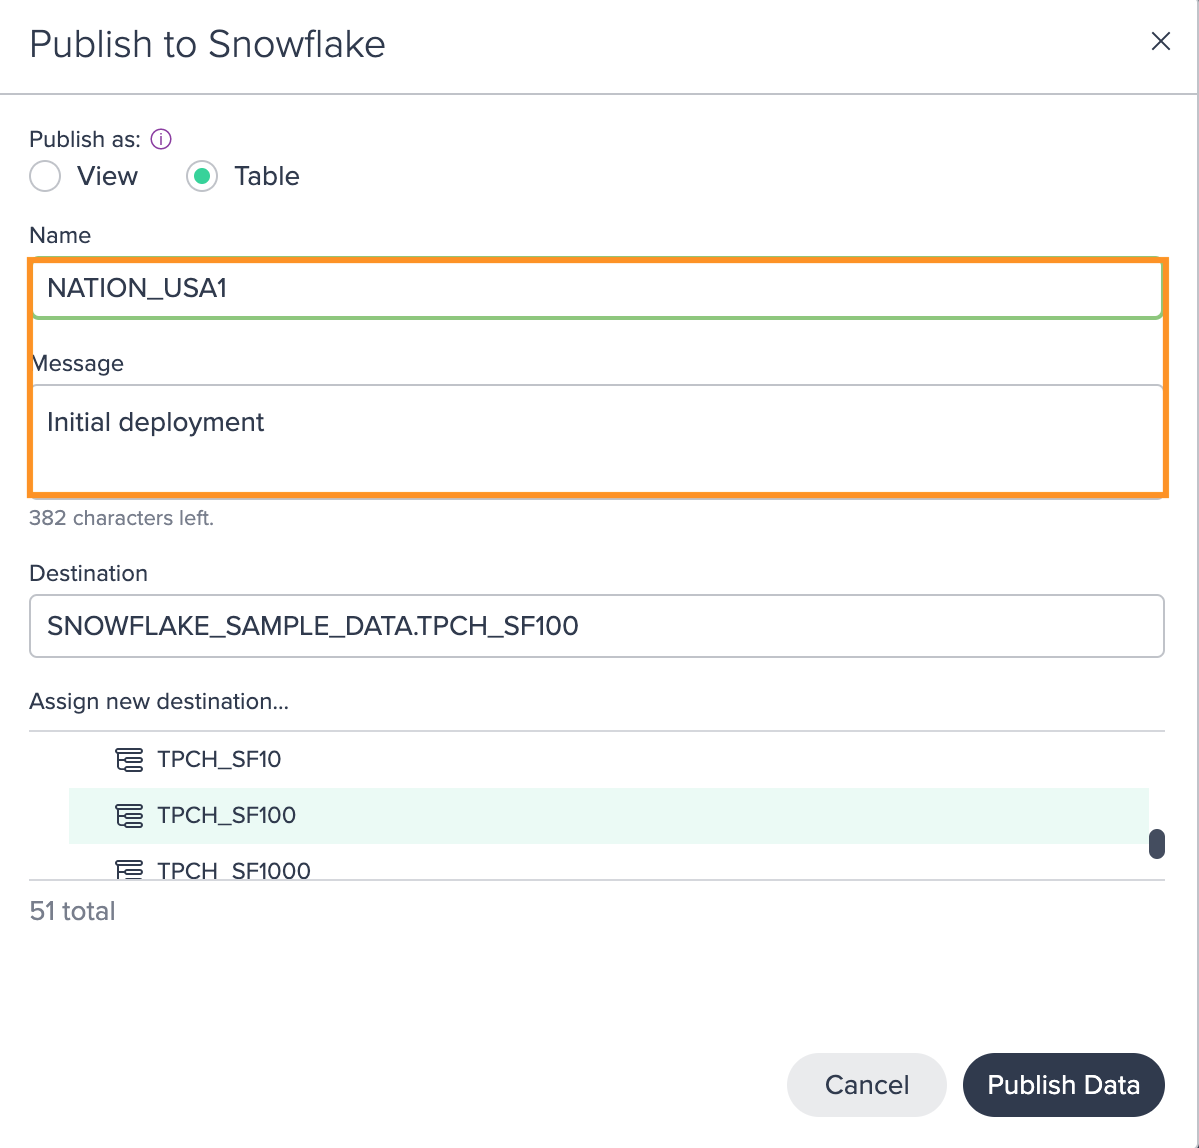
(Optional) Rename the view and enter a publishing message.
-
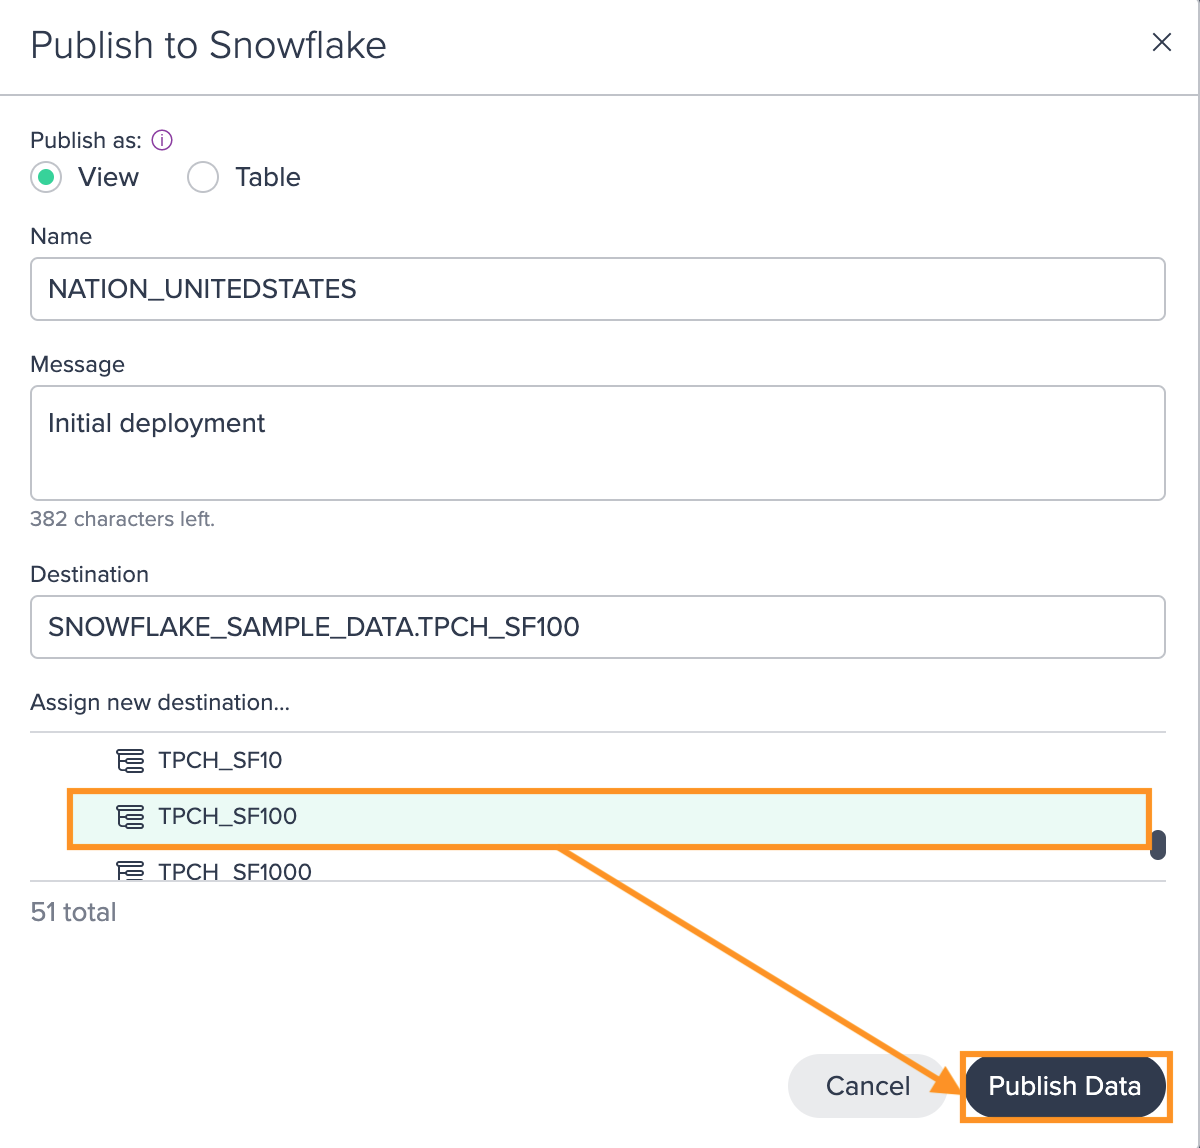
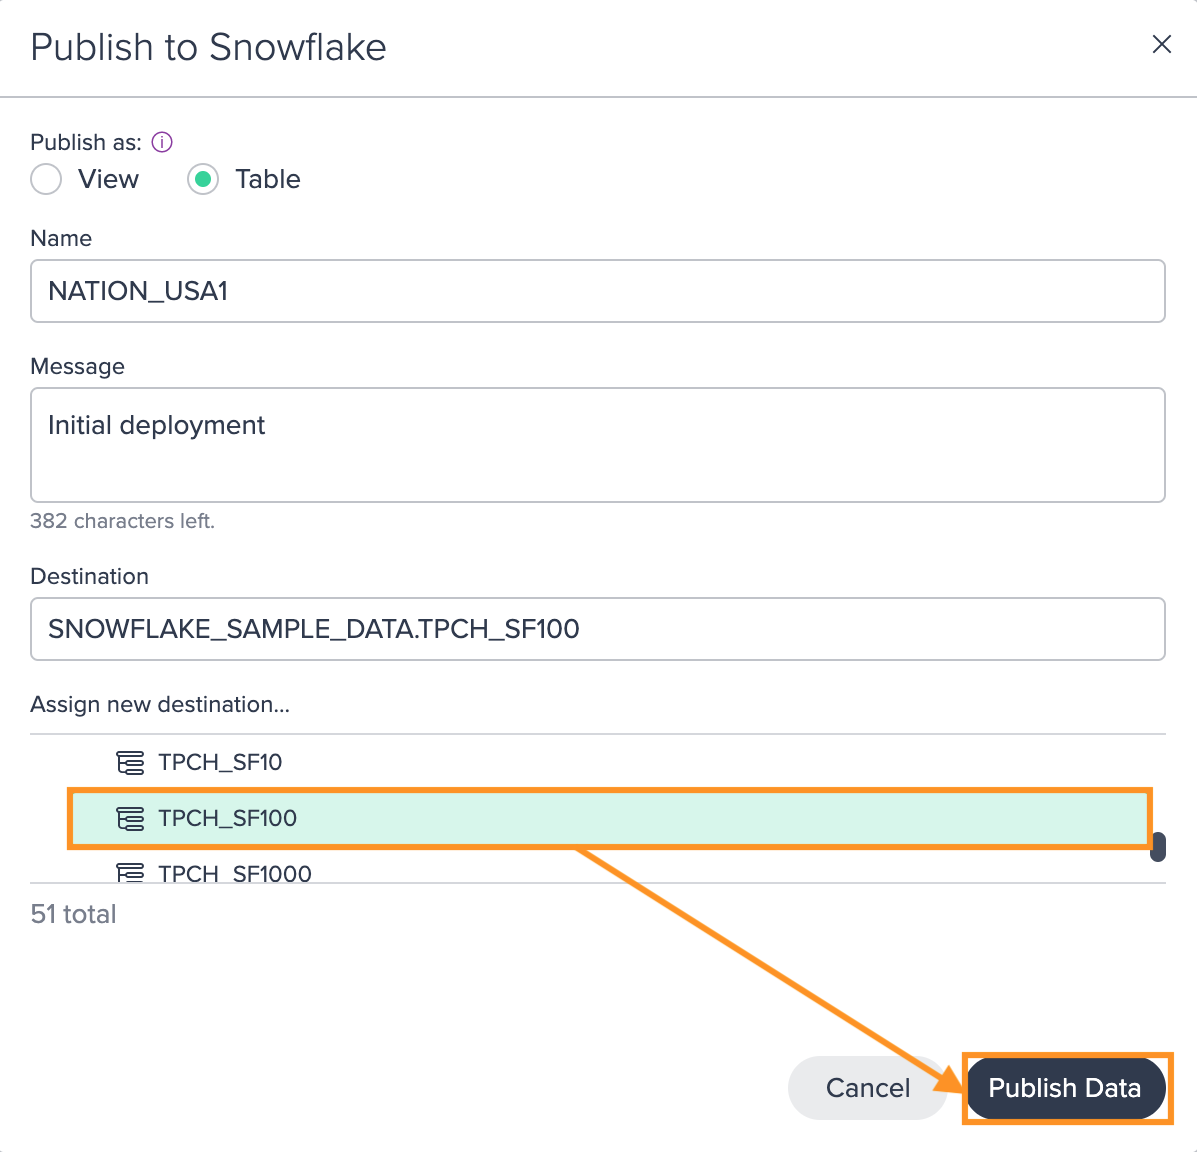
Select the target destination from the list below and confirm with "Publish Data". Publishing to Snowflake proceeds. The highlighted published view appears in the Flow Area. Datasets that are published to Snowflake maintain a visual link with the original dataset used to publish it.
Publishing Tables to Snowflake#
To publish a table:
-
In the Project's Workbench, click on the "Publish" button on top of the Flow Area. The 'Publish to Snowflake' dialog opens.
-
Select "Table".
-
(Optional) Rename the view and enter a publishing message.
-
Select the target destination from the list below and confirm with "Publish Data". Publishing to Snowflake proceeds. The highlighted published table appears in the Flow Area. Datasets that are published to Snowflake maintain a visual link with the original dataset used to publish it.
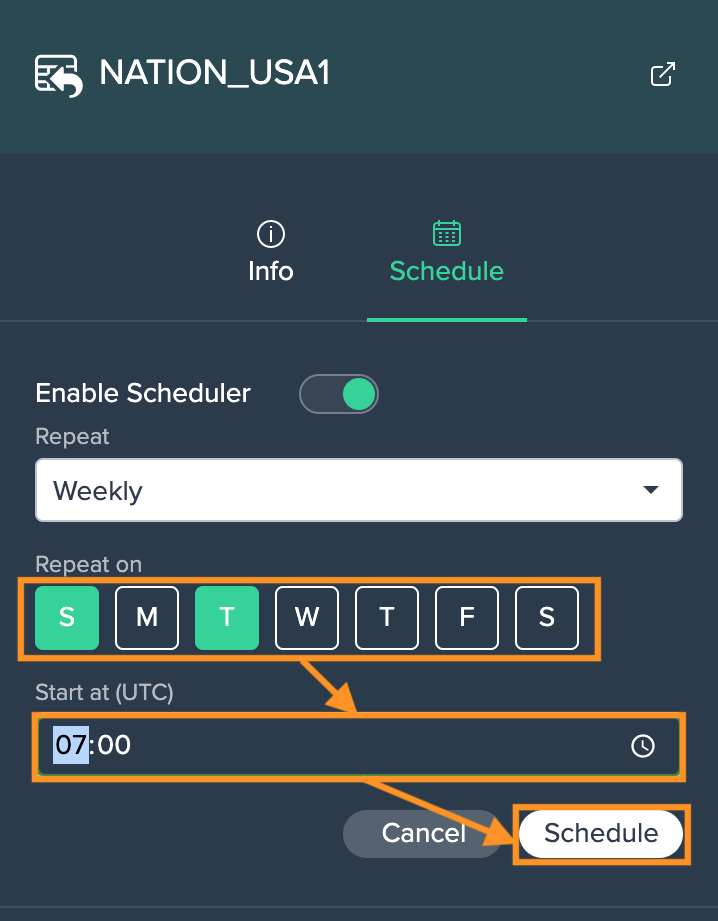
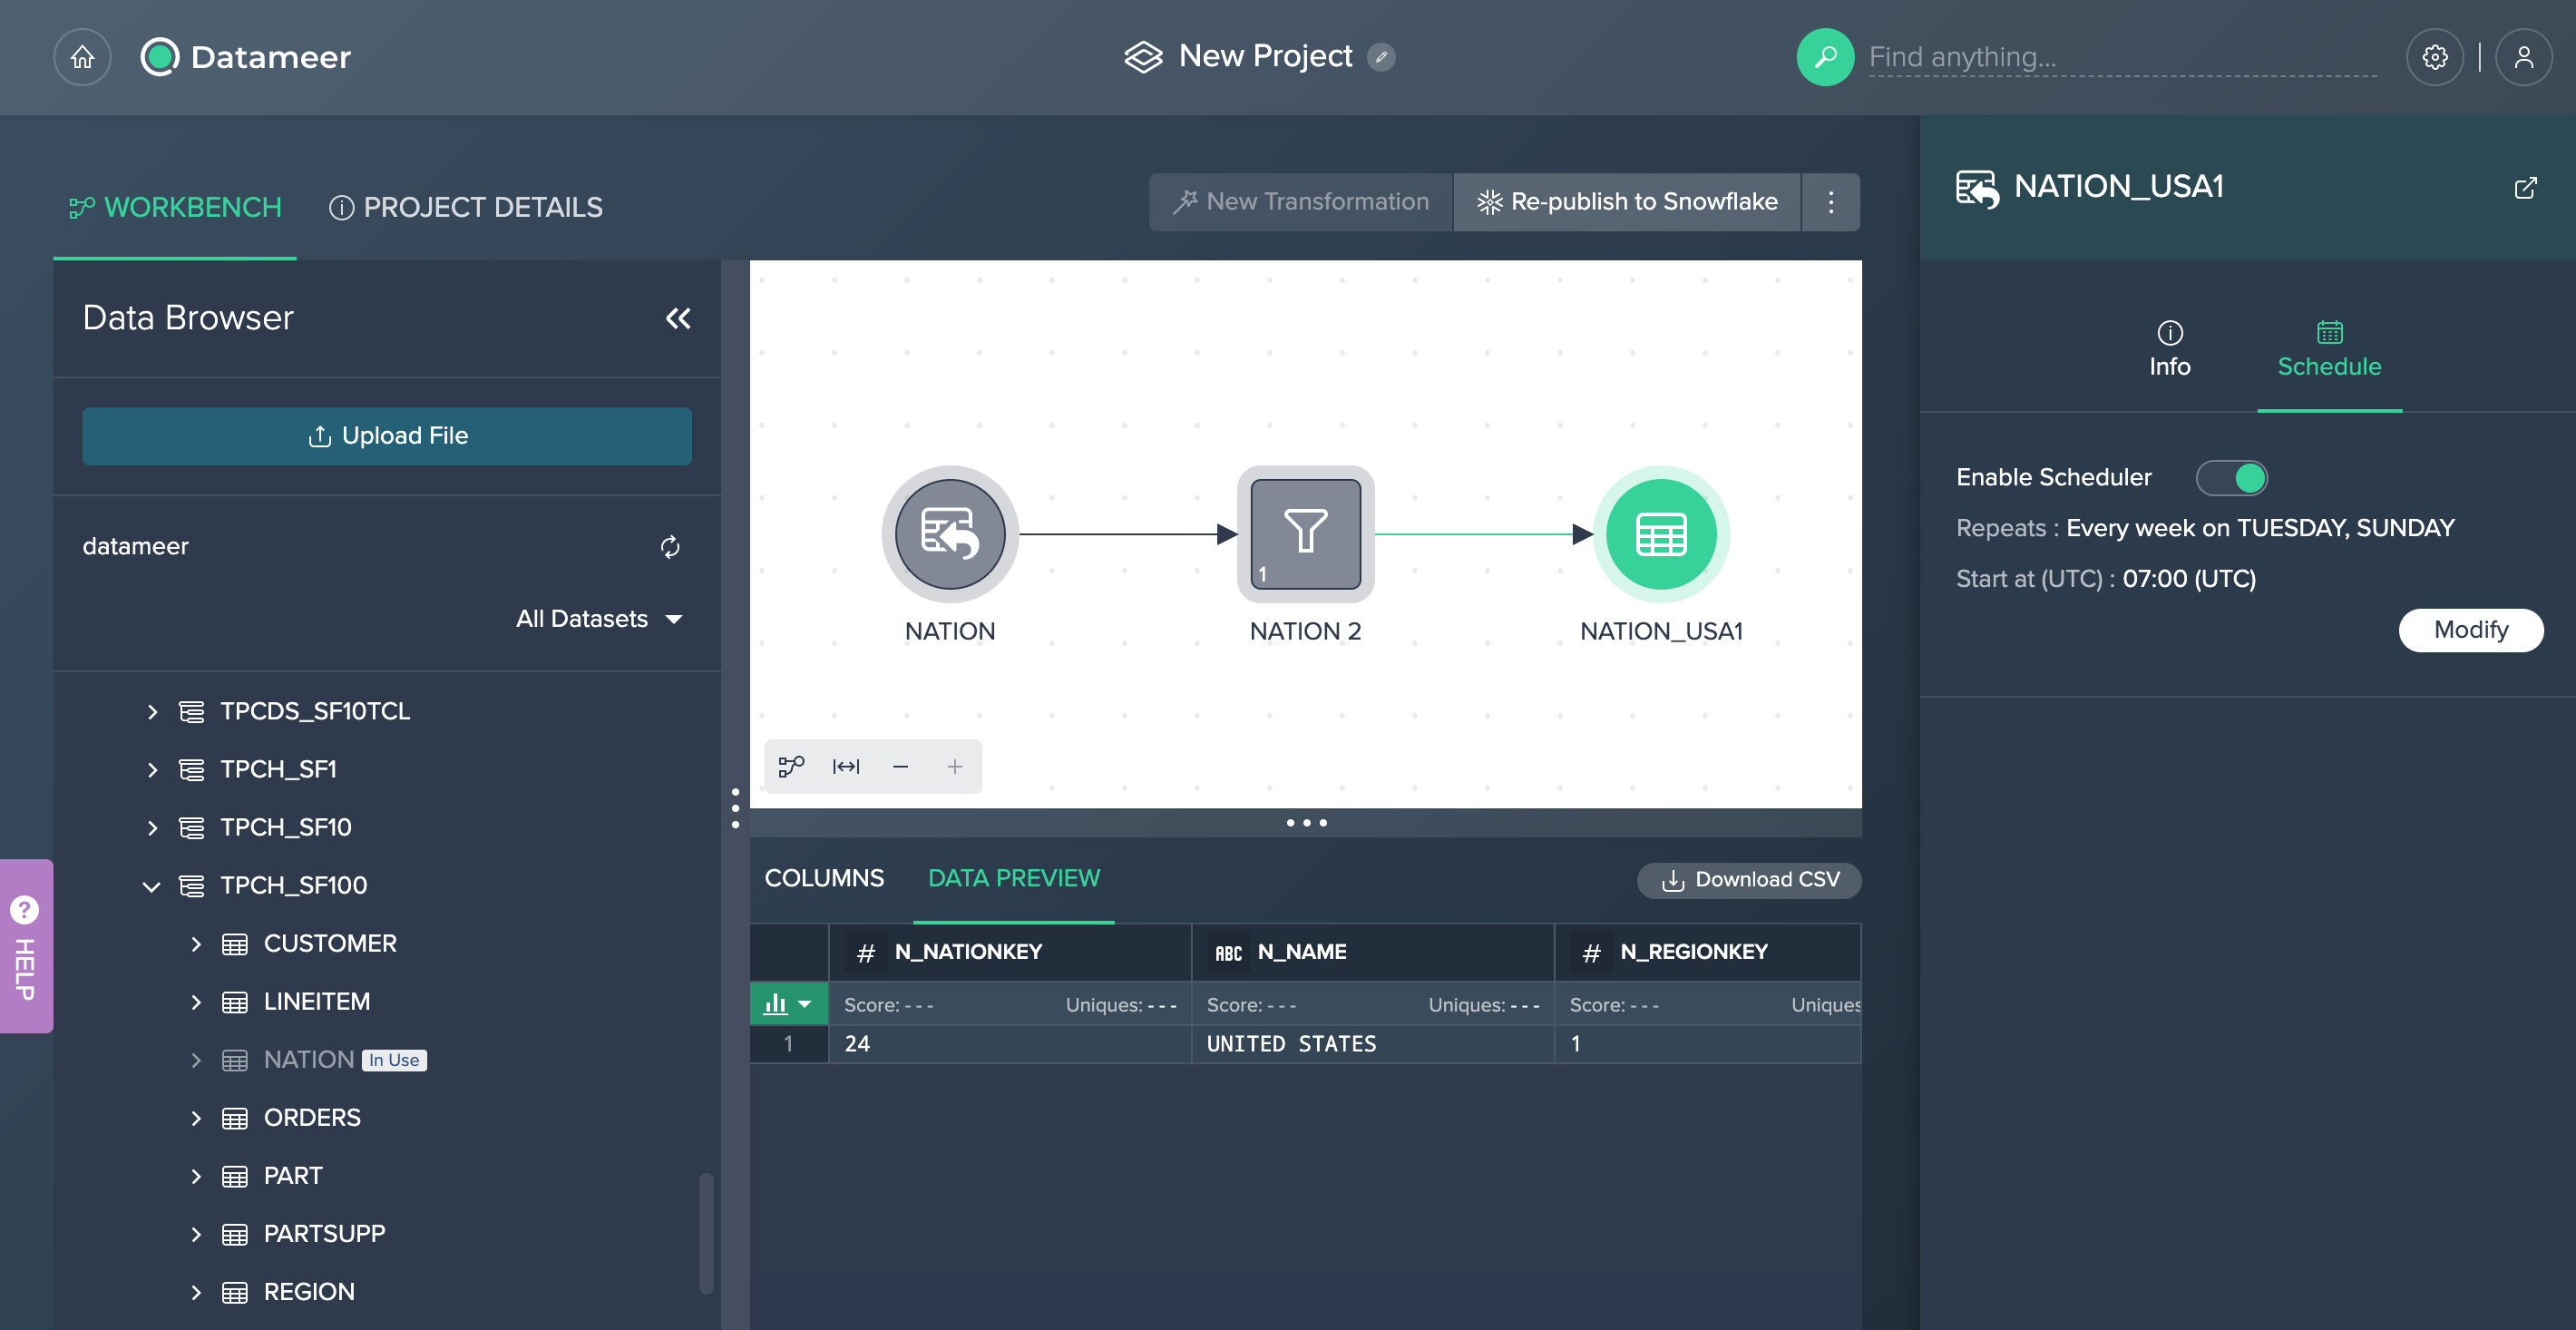
Scheduling Publishing Tables#
Scheduling the materialization from a Project allows you to keep your target Snowflake table up to date. Scheduling is possible for daily, weekly and customized publishing and is accessable and configurable in the 'Schedule' tab in the Inspector.
Requirements
To create a Snowflake task, a default warehouse is needed. If you don't have set up one, set up the default warehouse:
ALTER USER your_user SET DEFAULT_WAREHOUSE = your_warehouse;
The role that uses this warehouse needs the privileges 'EXECUTE' and 'MANAGE EXECUTE TASK':
GRANT EXECUTE TASK ON ACCOUNT TO ROLE your_role;
GRANT EXECUTE MANAGED TASK ON ACCOUNT TO ROLE your_role;
To configure scheduling:
-
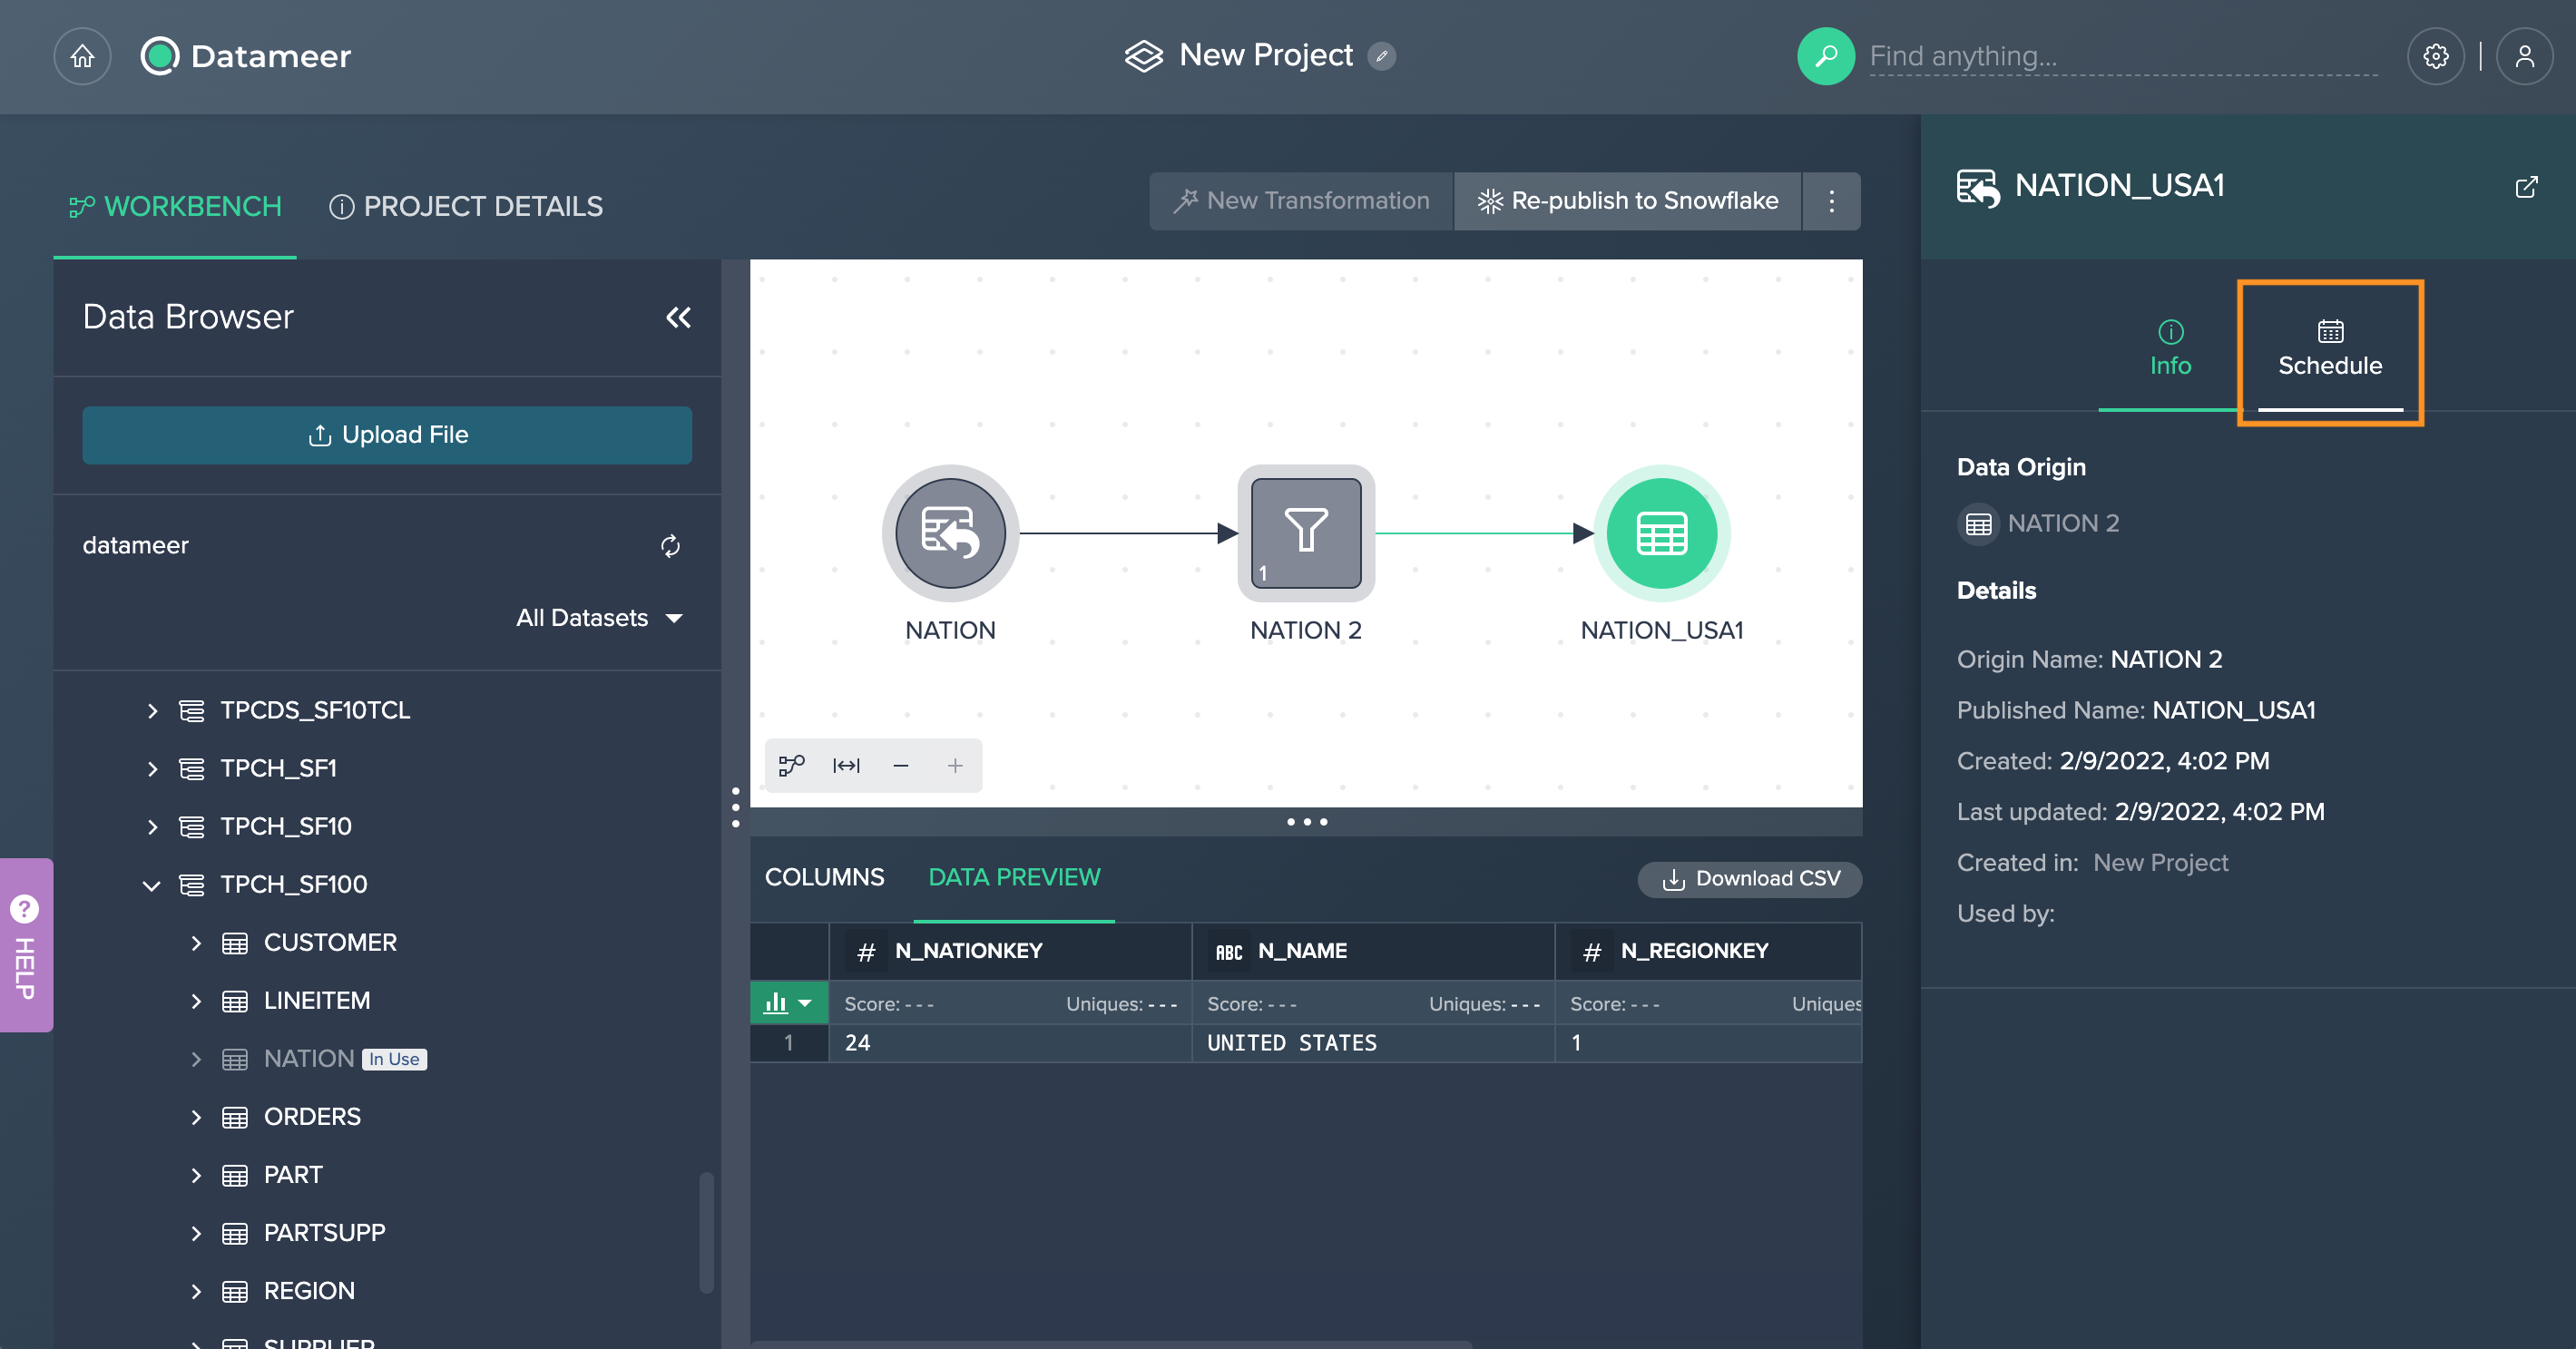
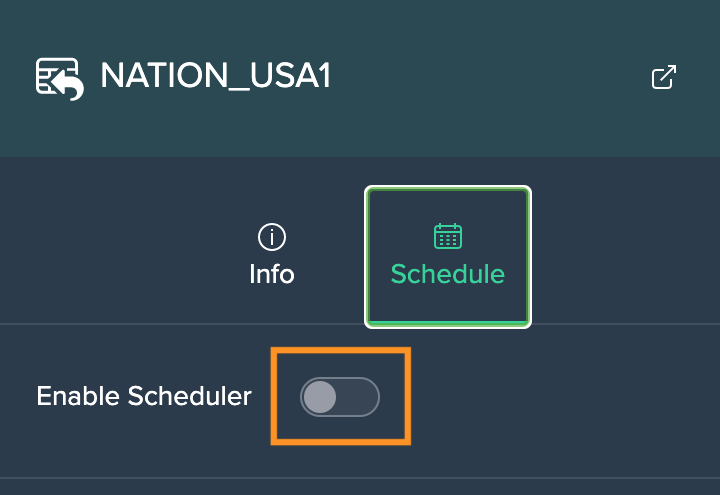
In the Inspector, switch to the "Schedule" tab.
-
Click on the "Enable Scheduler" switch. The configuration options appear below.
-
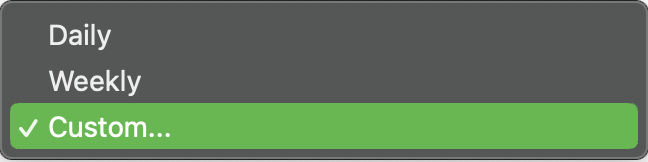
From the drop-down, select the repeat interval. You can select between 'Daily', 'Weekly' and 'Custom'. The configuration options adapt to the repeat interval.
-
Adjust the configuration to your needs, e.g. when selecting 'Weekly', mark the days and set the time, and confirm with "Schedule". The configuration is displayed in the 'Schedule' tab.
Re-publishing Datasets#
Once you published your dataset to Snowflake you might need to re-publish it again for several reasons:
- applied transformations on Datameer views have been changed, deleted or added
- the table depends on other datasets from other Projects (Note that using an asset from Project A as the source from Project B requires active maintenance when Project B is not scheduled.)
As soon as there are any reasons why the published view or table are out of sync with your Snowflake views and tables, the asset is highlighted in red in the Flow Area to let you know it is out of sync.
To republish an asset, select the asset and click on "Re-publish to Snowflake". Re-publishing proceeds. The note from the snackbar confirms the successful re-publishing.

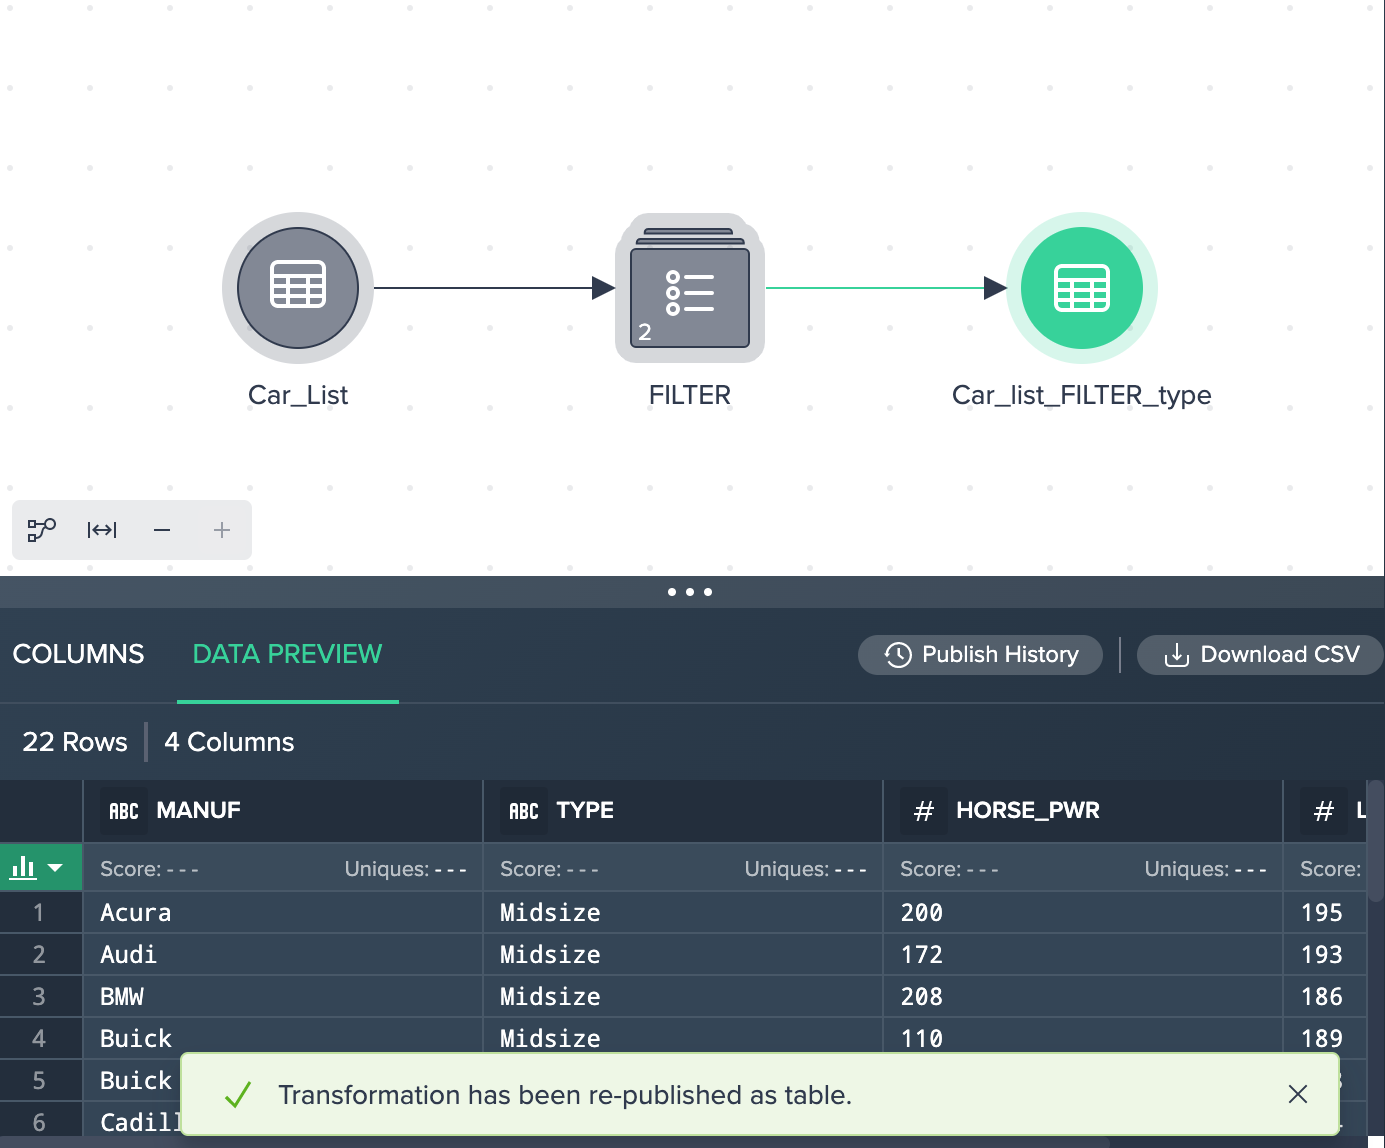
Viewing the Publishing History#
The publishing history provides information for all published nodes, such as a history timestamp or status.
You have two options to open the publishing information:
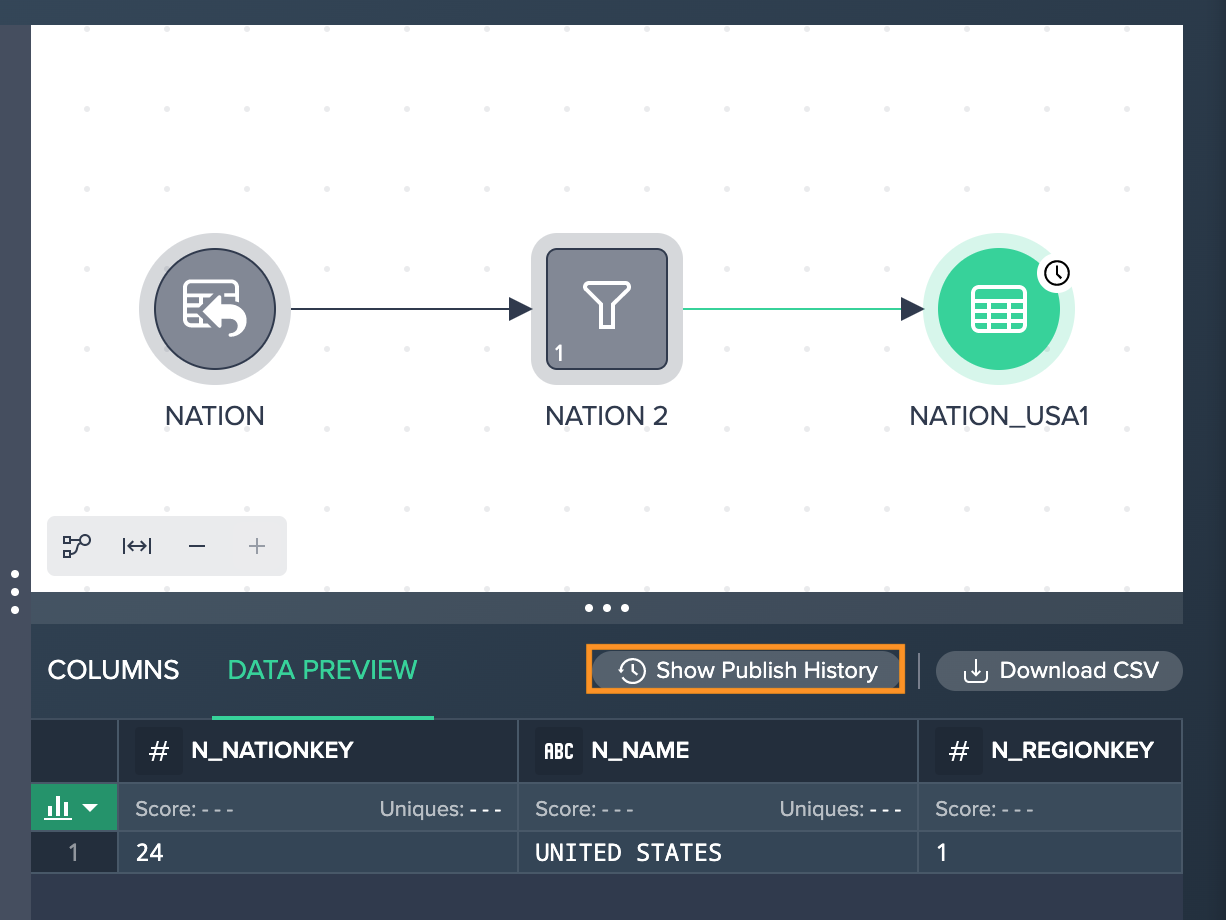
-
from the Data Grid, click on the "Show Publish History" button
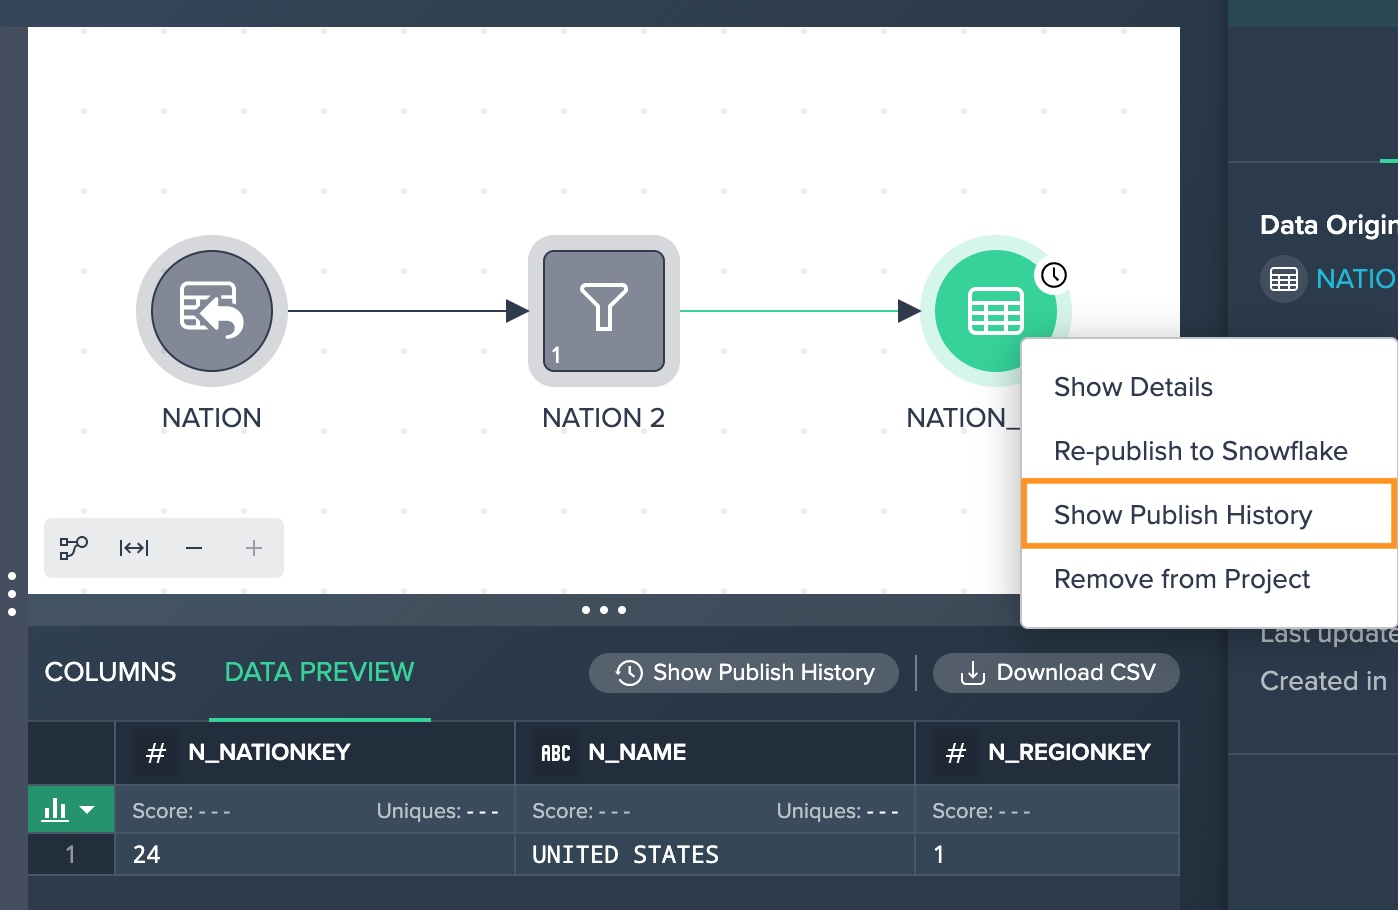
-
right-click on the published node and select "Show Publish History"
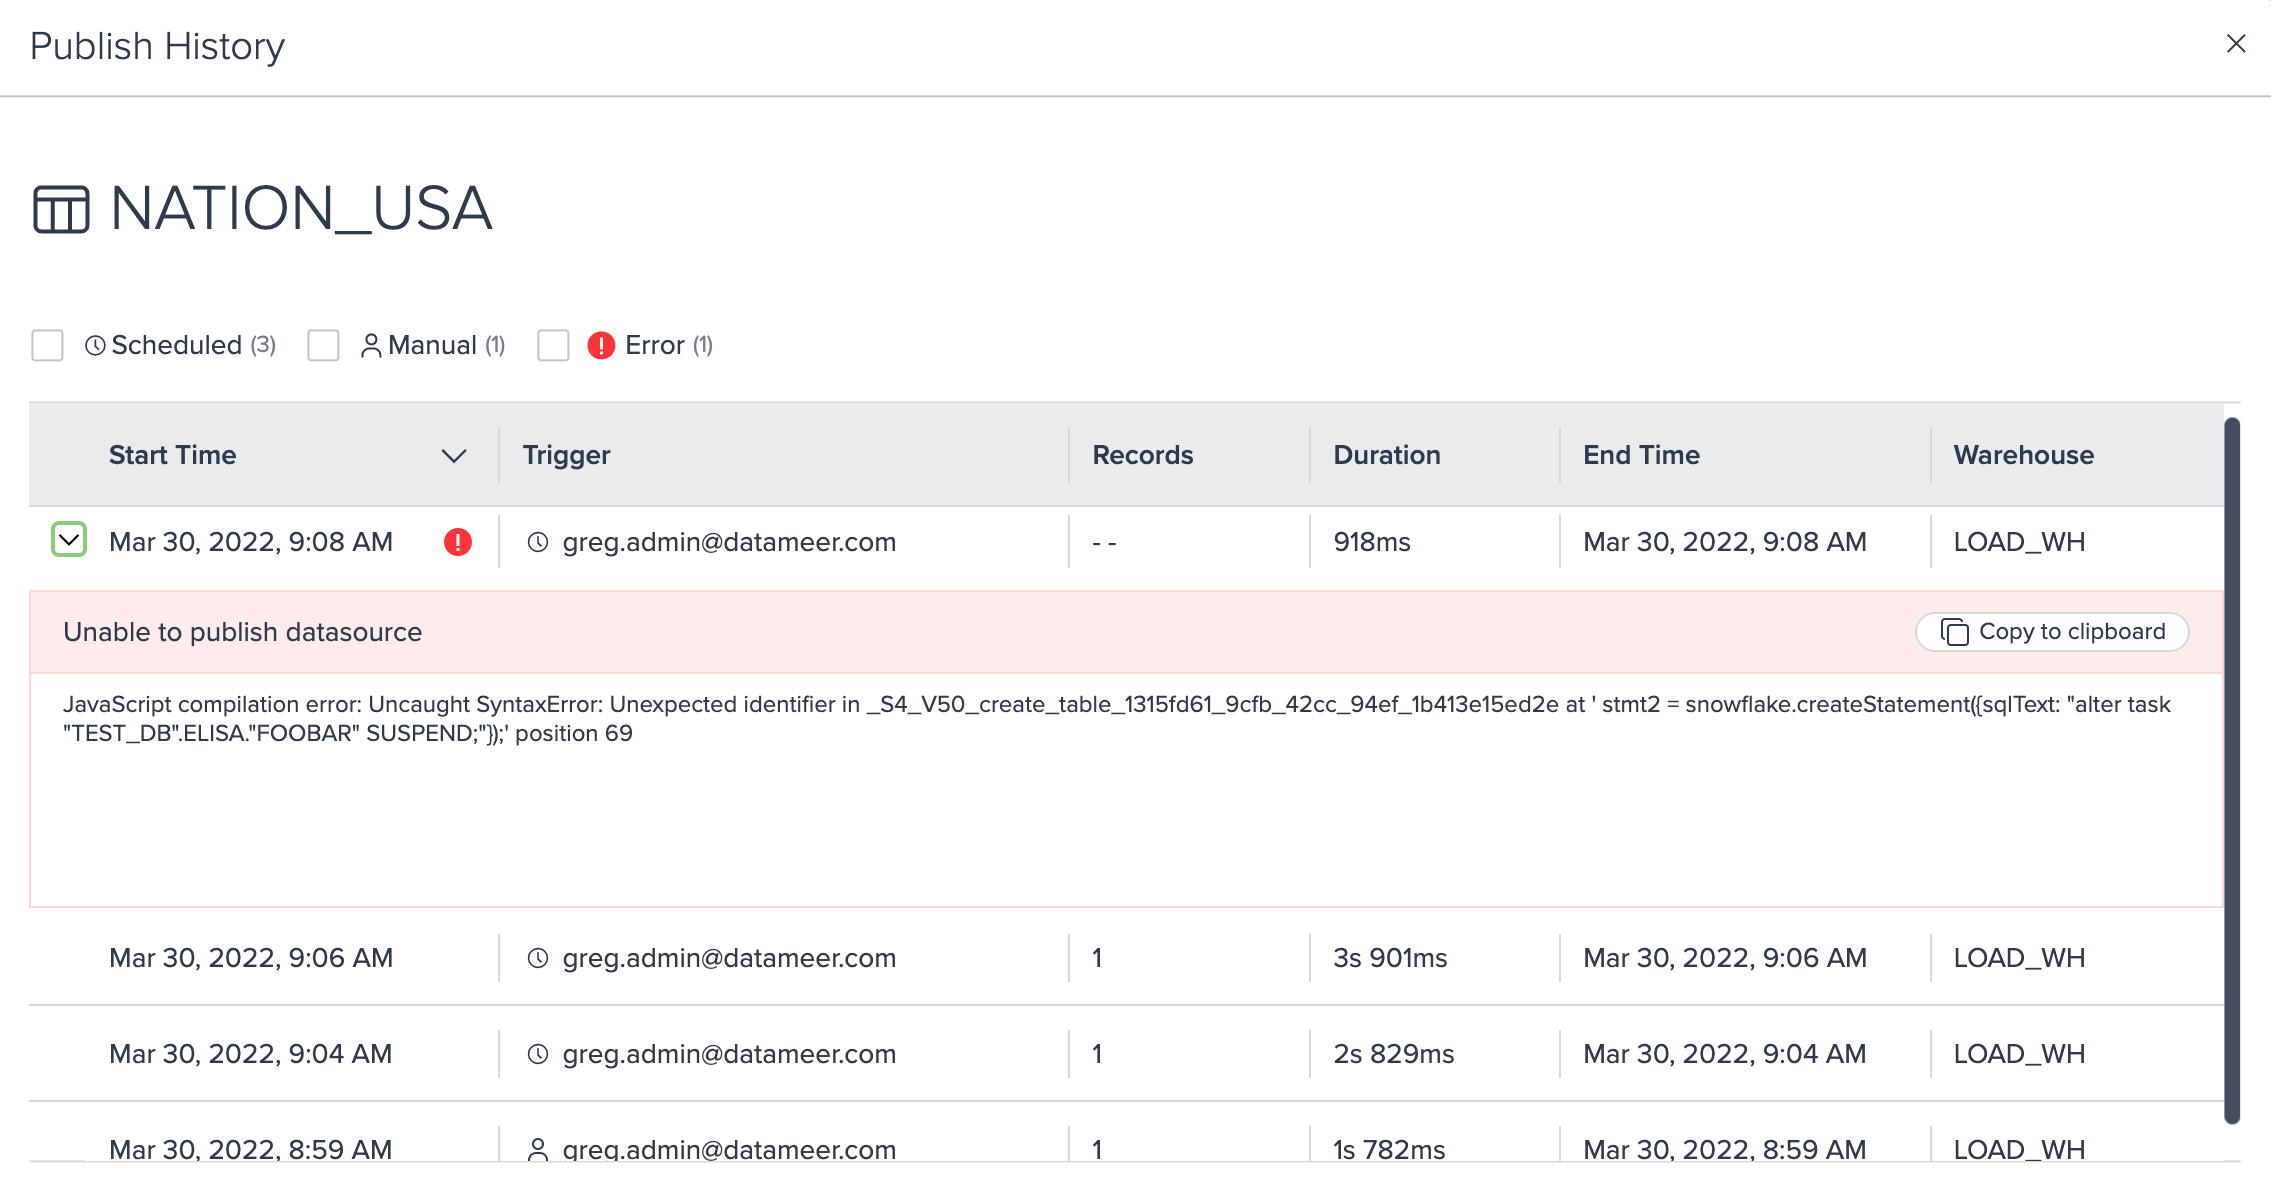
You can investigate the following information in reverse chronological order:
- timestamp of the start date and time
- trigger name
- number of records
- publishing duration
- timestamp of the end date and time
- warehouse
- error status and error details, if error case
You can filter the publish history according to:
- scheduled assets
- manual published assets
- published assets with error state
Detecting Non-Synchronized Views/ Tables#
You can simply detect when a view or table that has been published, is no longer in synchronization with the one from which the published view or table is based on. Non-synchronized views and tables are highlighted with a red border. The visual warning will persist until the view/ table is re-published or until the changes are reverted.
You can investigate the following information for the view/ table:
- last publish date
- last change date to any of the views to generate that view/ table