Deploying Data to Snowflake
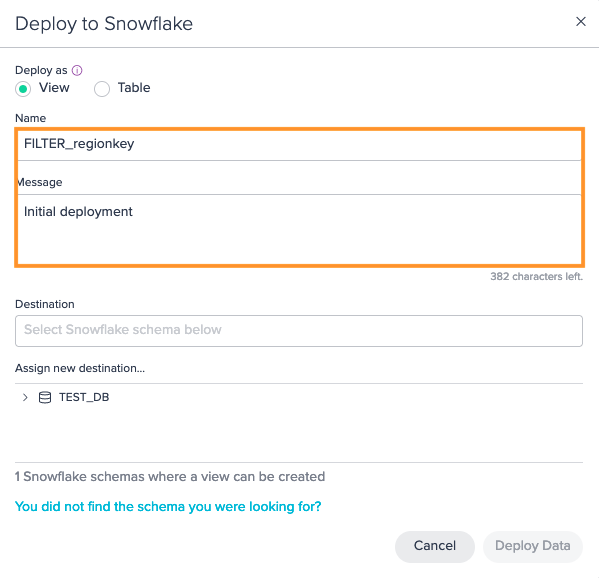
Deploying Views to Snowflake#
To deploy a view to Snowflake:
-
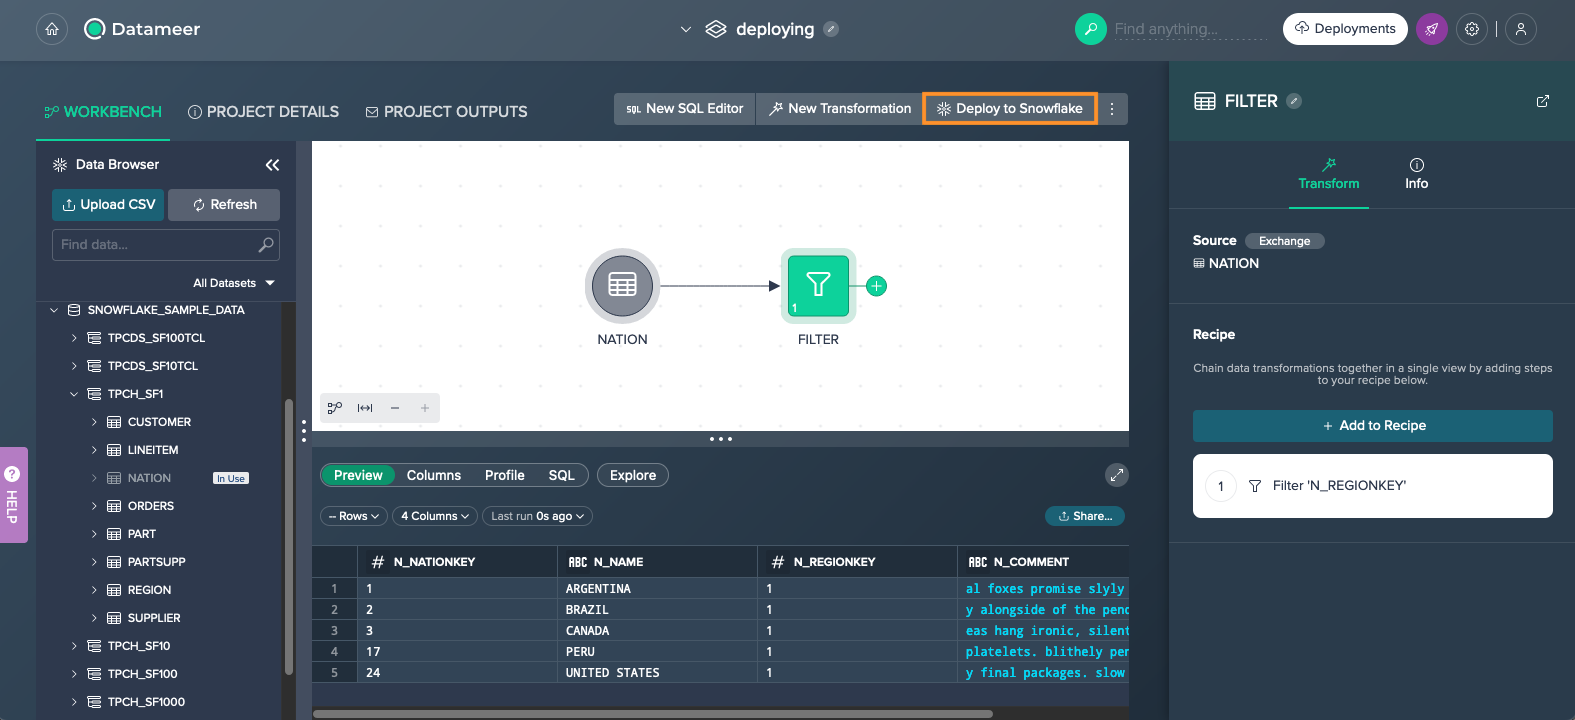
In the Project's Workbench, click on the "Deploy to Snowflake" button on top of the Flow Area. The 'Deploy to Snowflake' dialog opens.
-
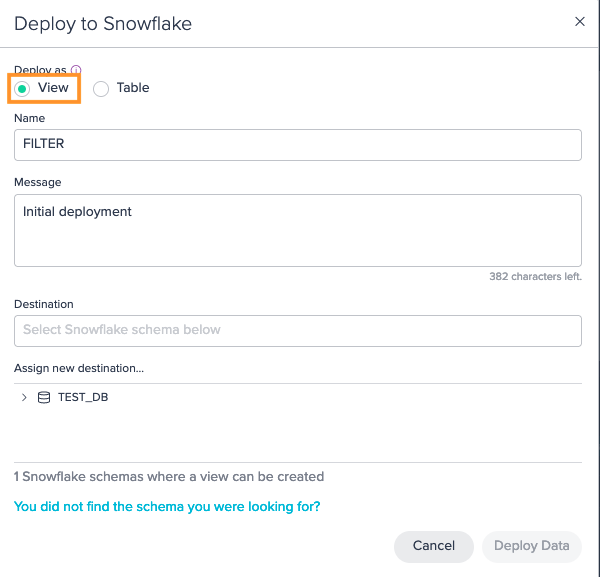
Select "View".
-
(Optional) Rename the view and enter a deploying message.
-
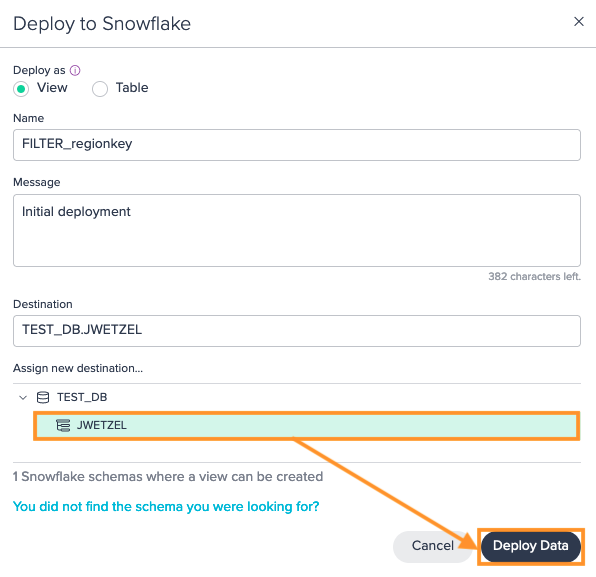
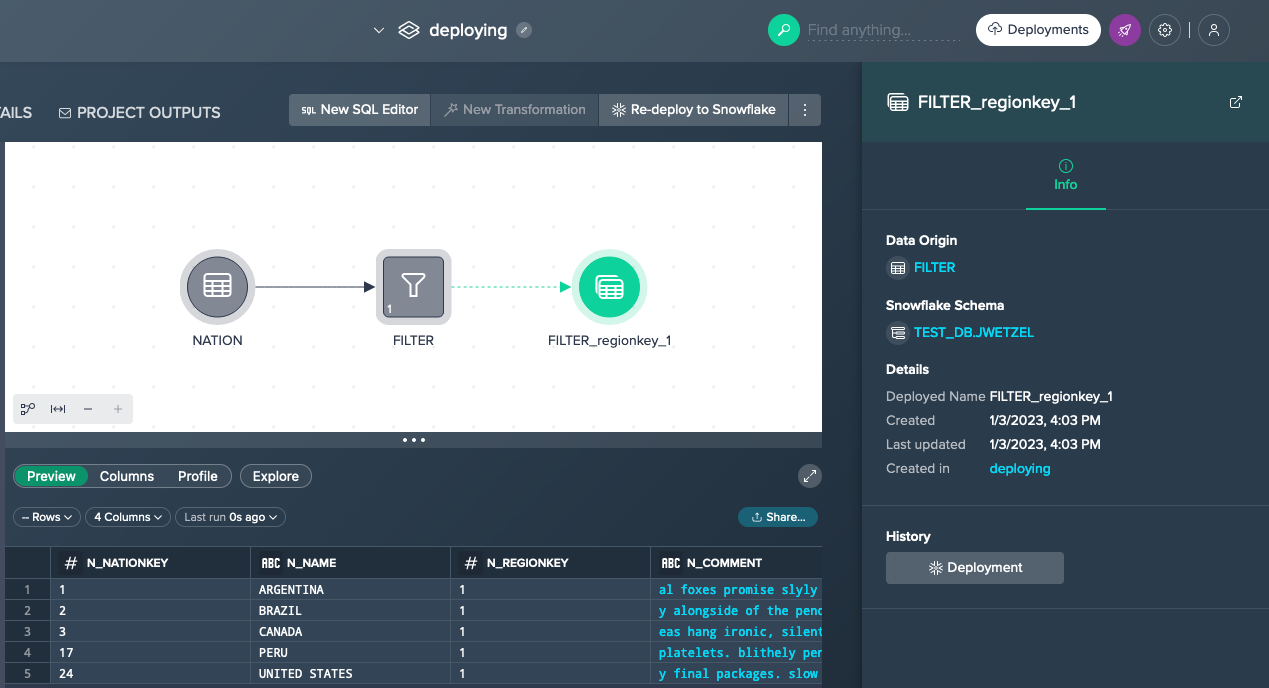
Select the target destination from the list below and confirm with "Deploy Data". Deploying to Snowflake proceeds. The highlighted deployed view appears in the Flow Area. Datasets that are deployed to Snowflake maintain a visual link with the original dataset used to deploy it.
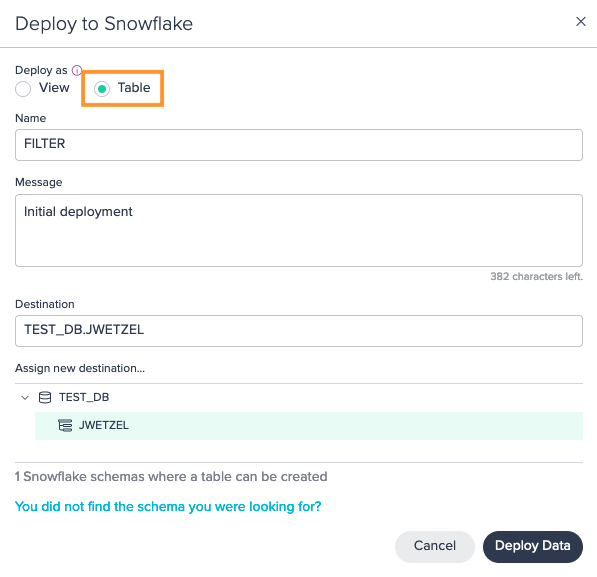
Deploying Tables to Snowflake#
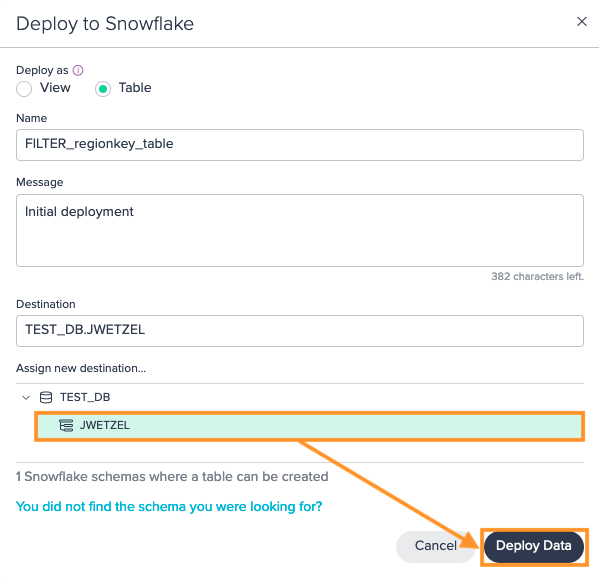
To deploy a table:
-
In the Project's Workbench, click on the "Deploy to Snowflake" button on top of the Flow Area. The 'Deploy to Snowflake' dialog opens.
-
Select "Table".
-
(Optional) Rename the view and enter a deploying message.

-
Select the target destination from the list below and confirm with "Deploy Data". Deploying to Snowflake proceeds. The highlighted deployed table appears in the Flow Area. Datasets that are deployed to Snowflake maintain a visual link with the original dataset used to deploy it.
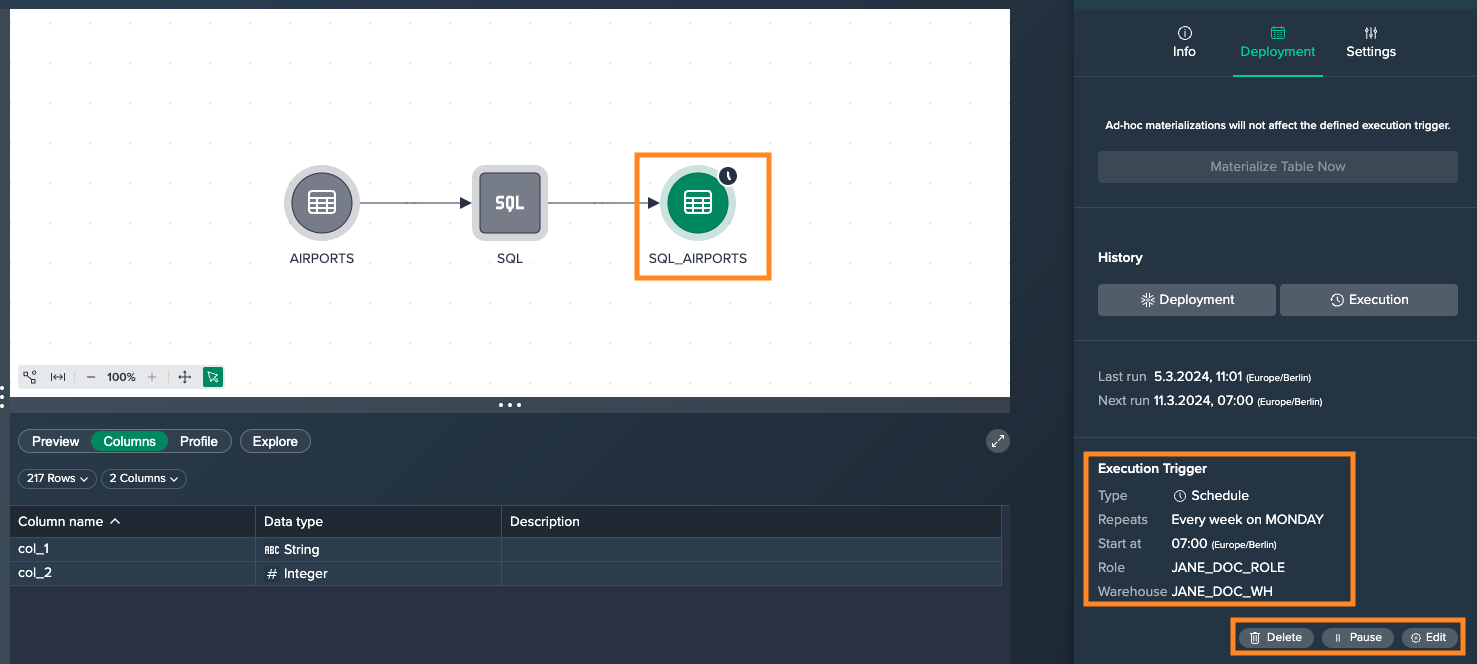
Scheduling Deploying Tables#
Scheduling the materialization from a Project allows you to keep your target Snowflake table up to date. Scheduling is possible for daily, weekly and customized deploying and is accessable and configurable in the 'Schedule' tab in the Inspector.
Requirements
To create a Snowflake task, a default warehouse is needed. If you don't have set up one, set up the default warehouse:
ALTER USER your_user SET DEFAULT_WAREHOUSE = your_warehouse;
The role that uses this warehouse needs the privileges 'EXECUTE' and 'MANAGE EXECUTE TASK':
GRANT EXECUTE TASK ON ACCOUNT TO ROLE your_role;
GRANT EXECUTE MANAGED TASK ON ACCOUNT TO ROLE your_role;
To configure scheduling:
-
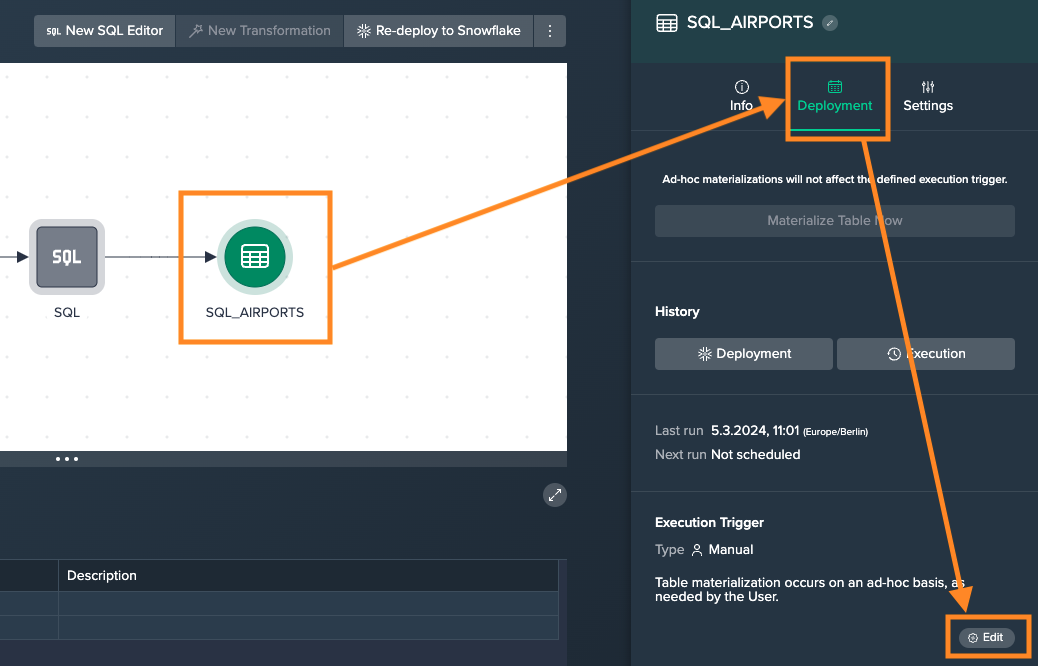
Click on the deployment node in the Inspector, switch to the "Deployment" tab and click on "Edit" in the section 'Execution Trigger'. The scheduling dialog opens.
-
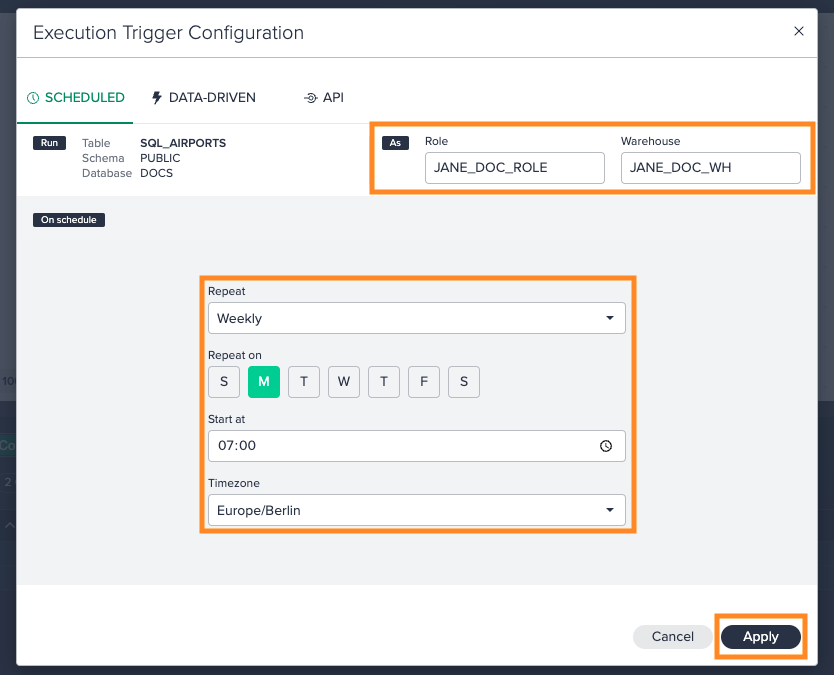
From the drop-down, select the repeat interval (in our case 'Weekly') and adjust the configuration to your needs, e.g. when selecting 'Weekly', mark the days and set the time, select your timezone. Select the 'Role' and 'Warehouse' and confirm with "Apply". The configuration is displayed in the 'Schedule' tab along with the options to pause, delete or configure the scheduling.
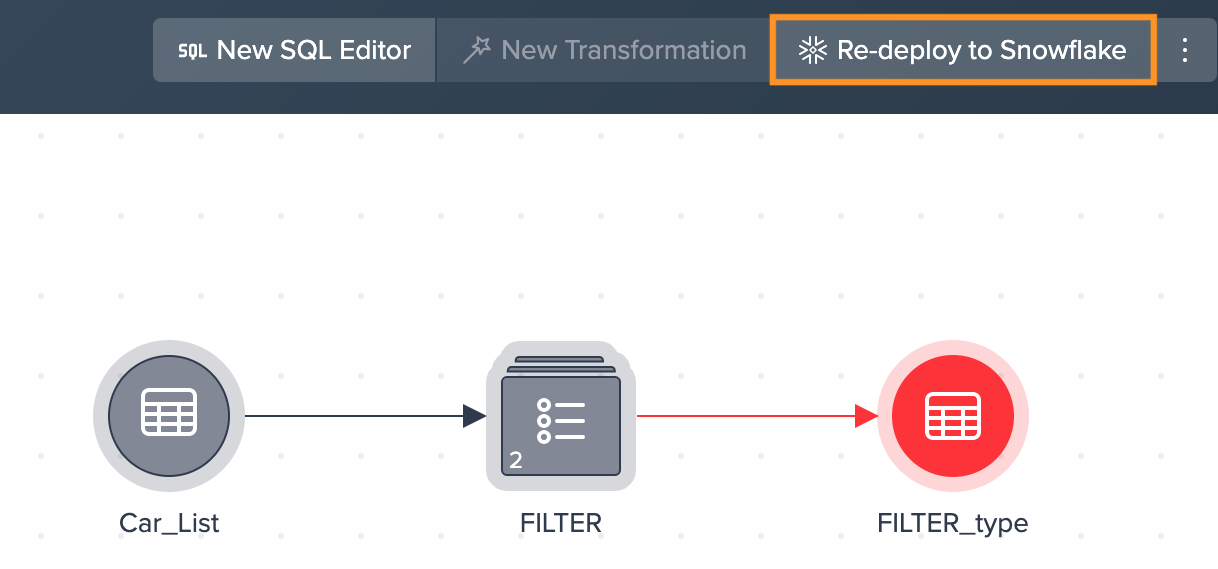
Re-deploying Datasets#
Once you deployed your dataset to Snowflake you might need to re-deploy it again for several reasons:
- applied transformations on Datameer views have been changed, deleted or added
- the table depends on other datasets from other Projects (Note that using an asset from Project A as the source from Project B requires active maintenance when Project B is not scheduled.)
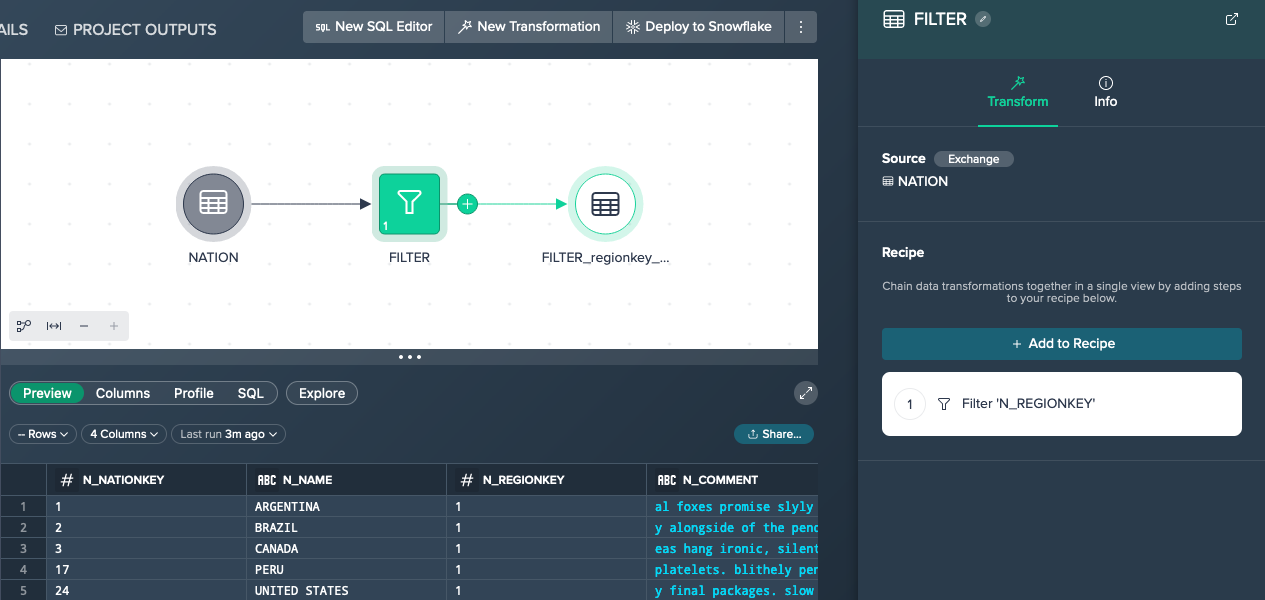
As soon as there are any reasons why the deployed view or table are out of sync with your Snowflake views and tables, the asset is highlighted in red in the Flow Area to let you know it is out of sync.

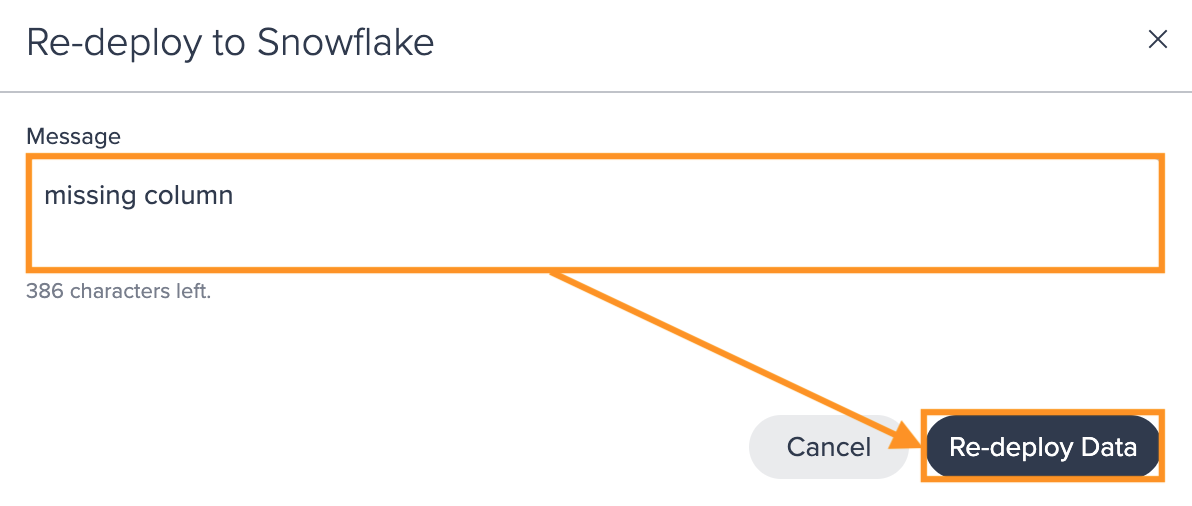
To redeploy an asset, select the asset and click on "Re-deploy to Snowflake". Re-deploying proceeds. The note from the snackbar confirms the successful re-deploying.
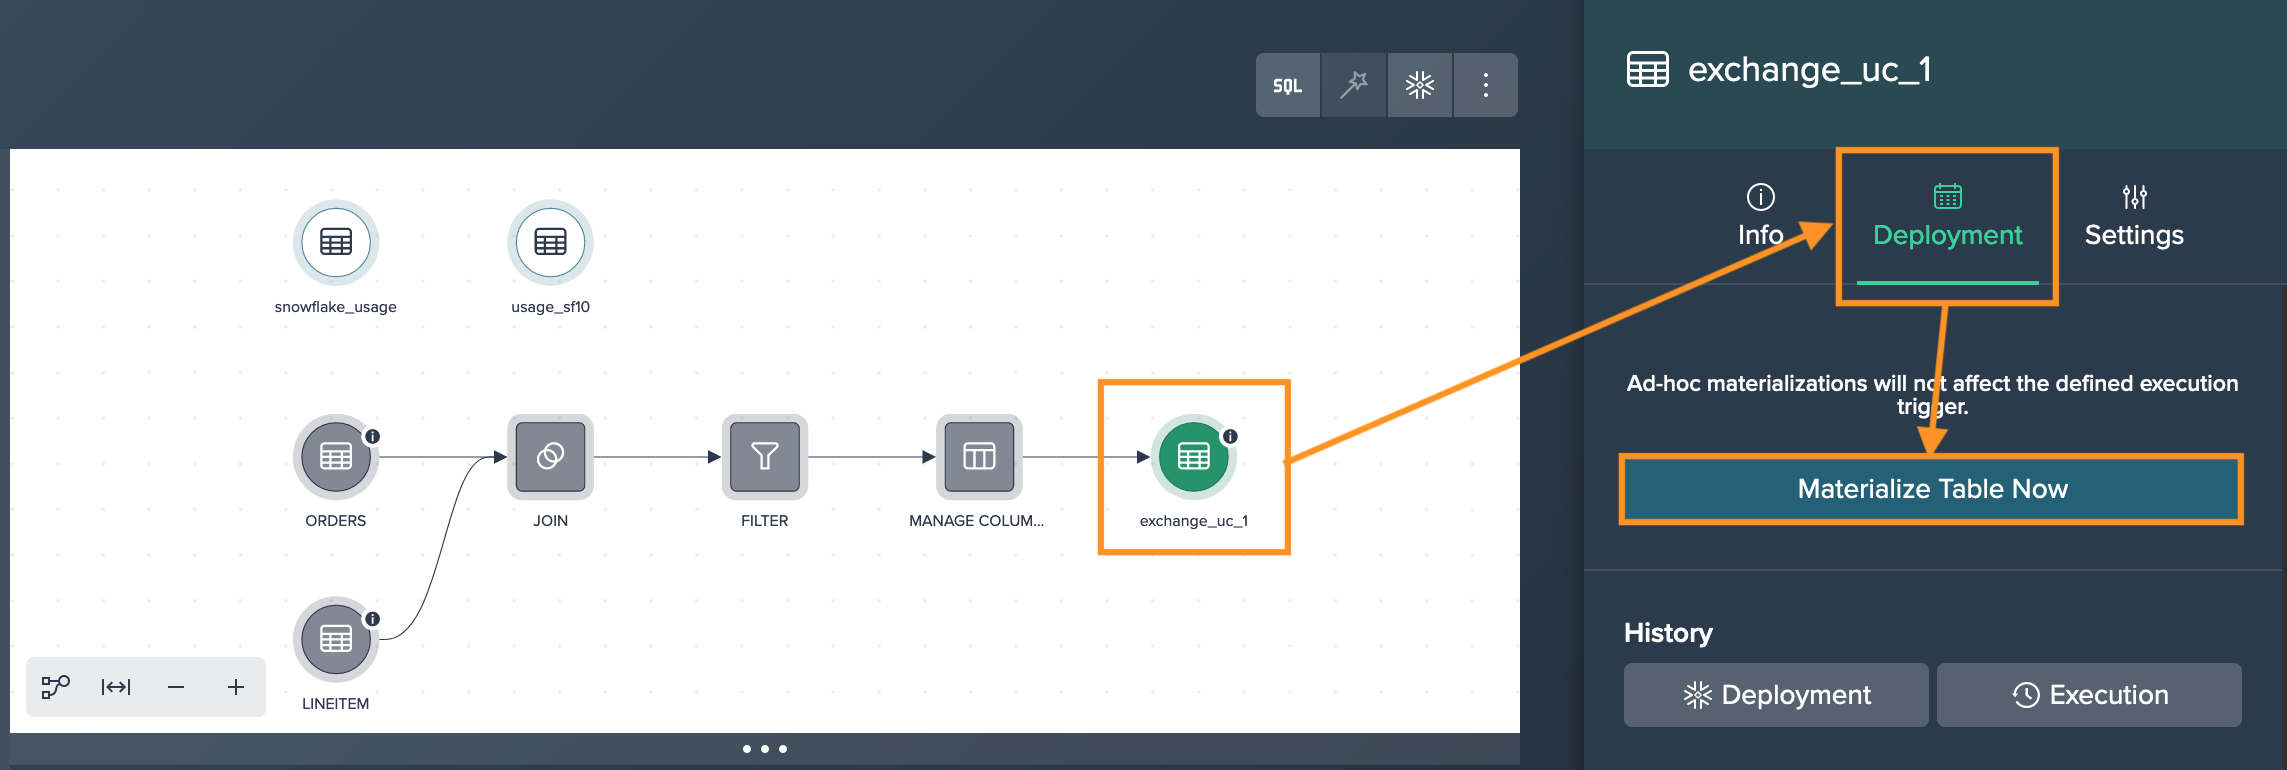
Manual Table Materialization#
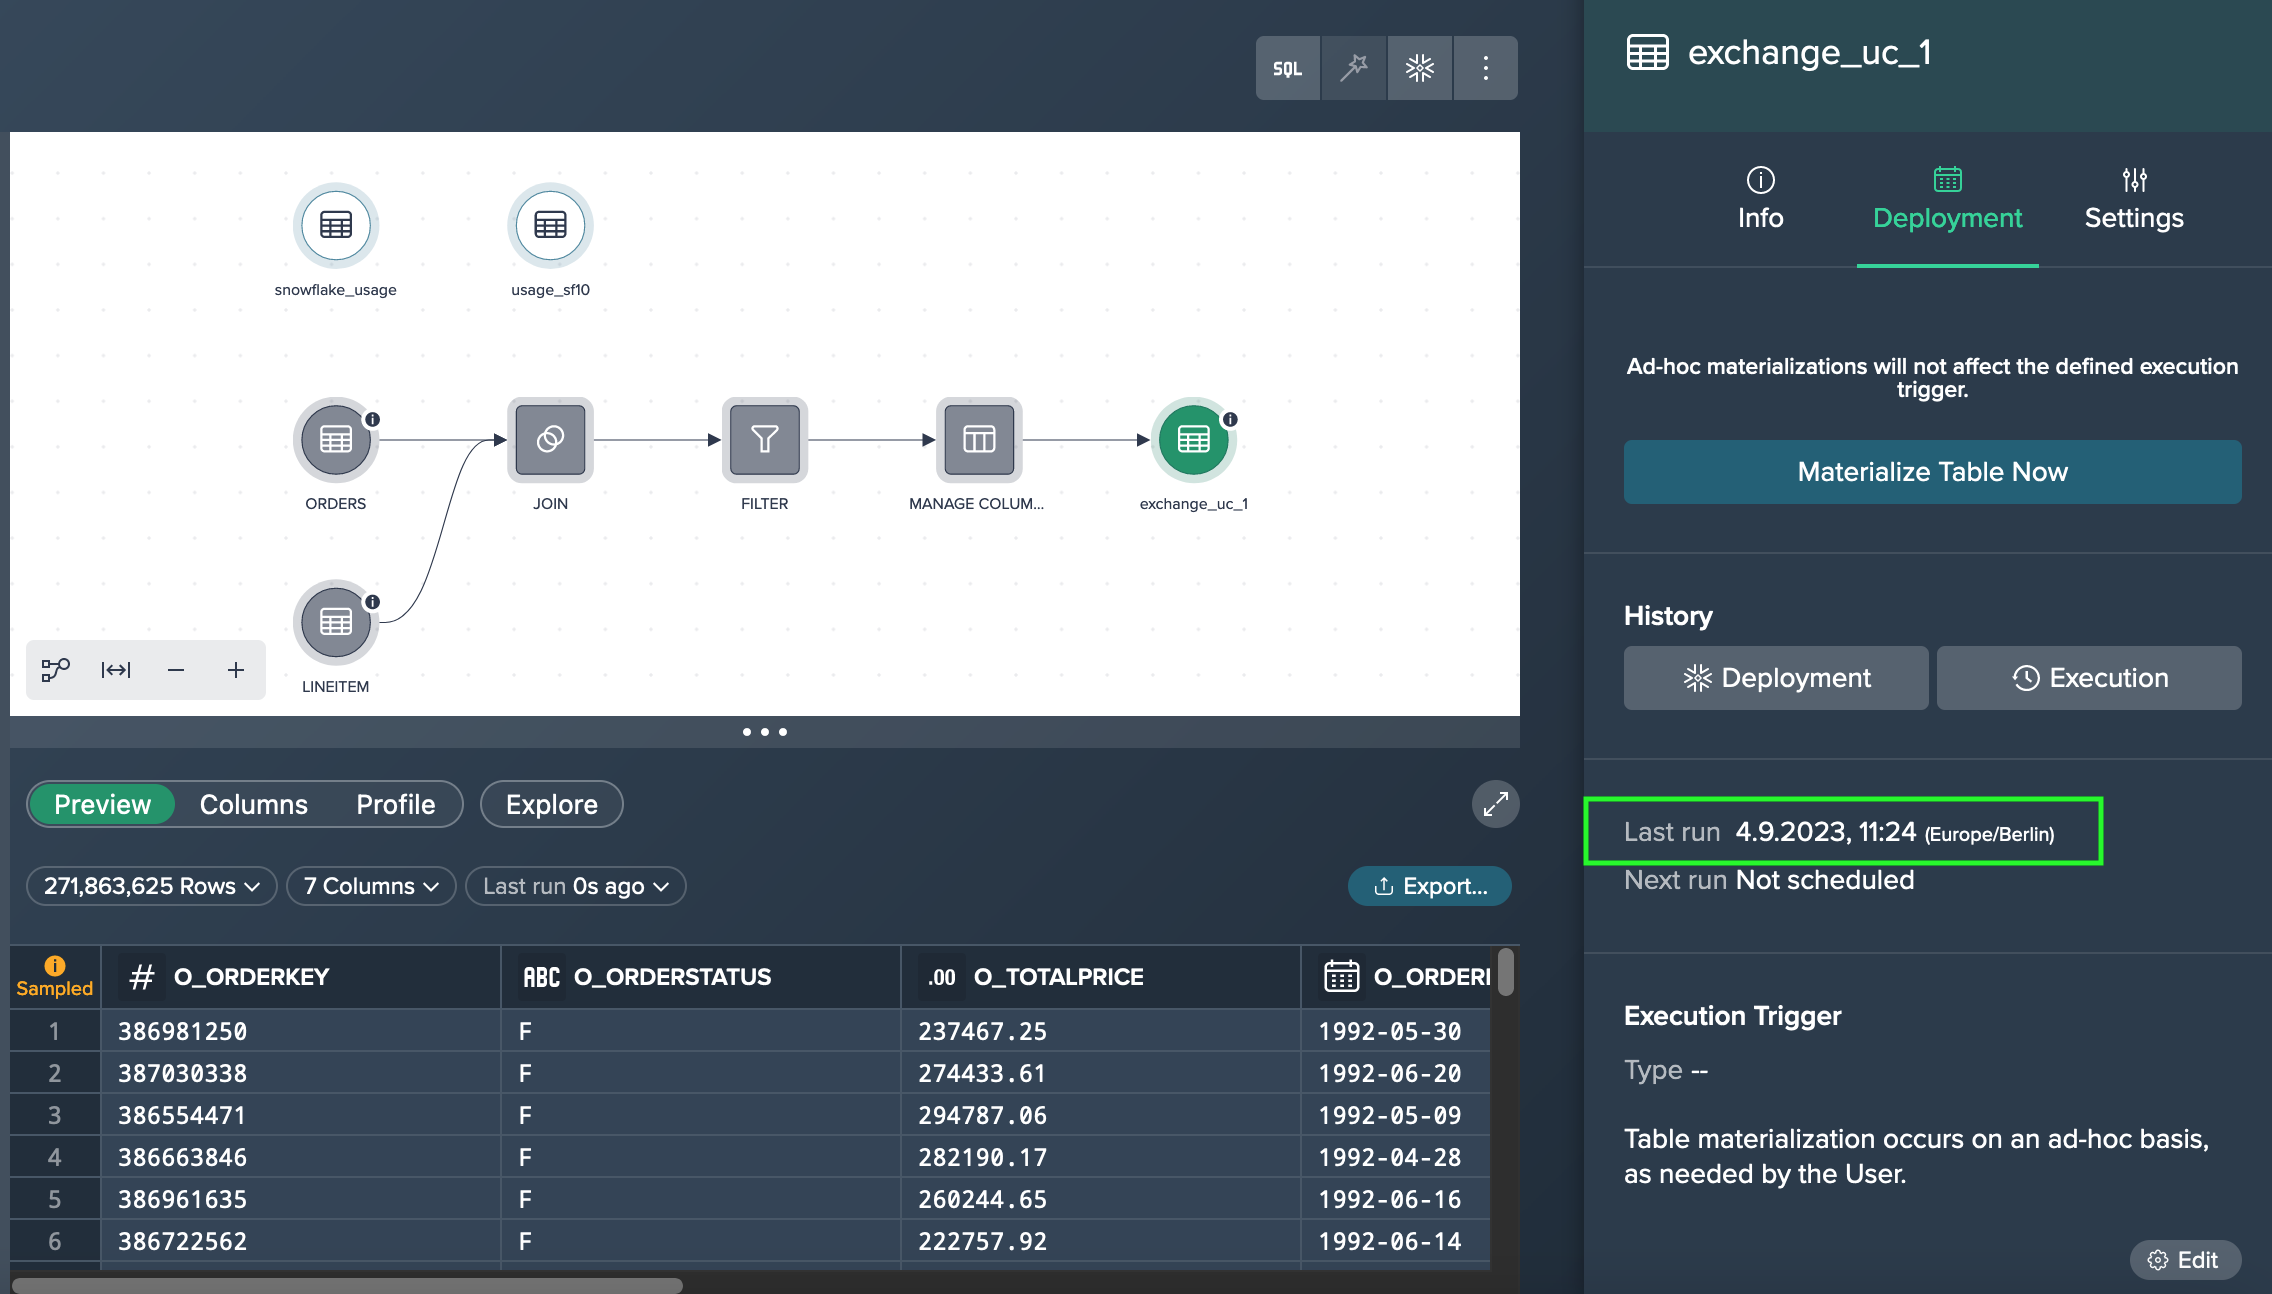
You can materialize your Datameer deployment node from the Deployment Inspector. The tab 'Deployment' offers several options and information on the node's deployment. Second option for an ad-hoc materialization is right from the node's context menu.
To materialize your node ad-hoc:
-
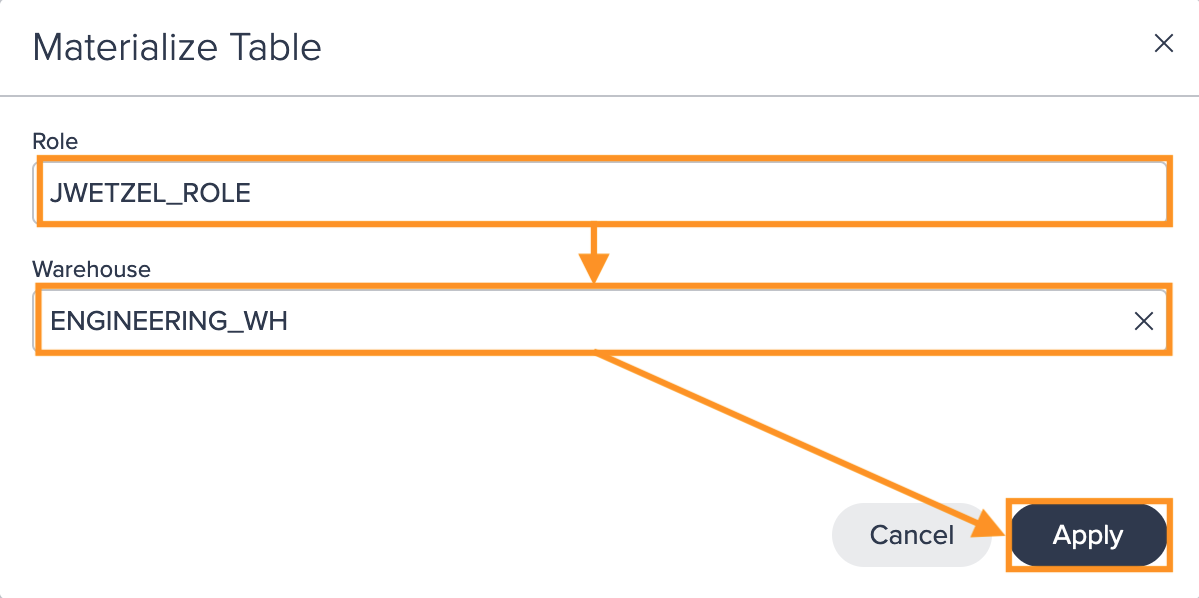
Click on the deployed node, select the 'Deployment' tab in the Inspector and click on "Materialize Table Now". The dialog 'Materialize Table' opens.
-
Select the "Role" and "Warehouse" from the drop-downs and confirm with "Apply". The materialization proceeds. The node updates and the Inspector shows the latest materialization.