How to Validate Results
Problem#
When designing pipelines in Datameer, sample data is used to accelerate the process and provide instant feedback on transformations. However, working with sample data has limitations. The preview results may not match the actual outcomes when running the pipeline with the full dataset. This makes it difficult to verify intermediate steps, hindering confidence in further transformations.
You may have specific questions about the data as they progress, such as:
- checking if the oldest record is from a certain date
- comparing record counts before and after joining data
- confirming if certain filters have been applied correctly
- validating aggregate results
- ensuring that a calculated column value doesn't exceed a certain limit
To address these challenges, Datameer offers the Exploration feature. With Exploration, you can analyze transformation results using the complete dataset from your source. By leveraging the Exploration feature, you can gain confidence in the accuracy of your transformations and make informed decisions based on the comprehensive analysis of the data.
Here are some key characteristics of an exploration:
- running the entire upstream pipeline with the full dataset
- running in the background, allowing you to continue working on other tasks
- cancelling unnecessary or time-consuming exploration queries to avoid unnecessary strain on the data warehouse
- explorations are temporary and don't impact the live pipeline's runtime
To learn more about how to valdiate data, read here and find some use cases here.
How to Validate Data Sets or Analyze the Data Ad Hoc#
For both ad-hoc analysis, which focuses on exploring and gaining insights from data, and data validation, which emphasizes ensuring data accuracy and reliability, follow these steps:
-
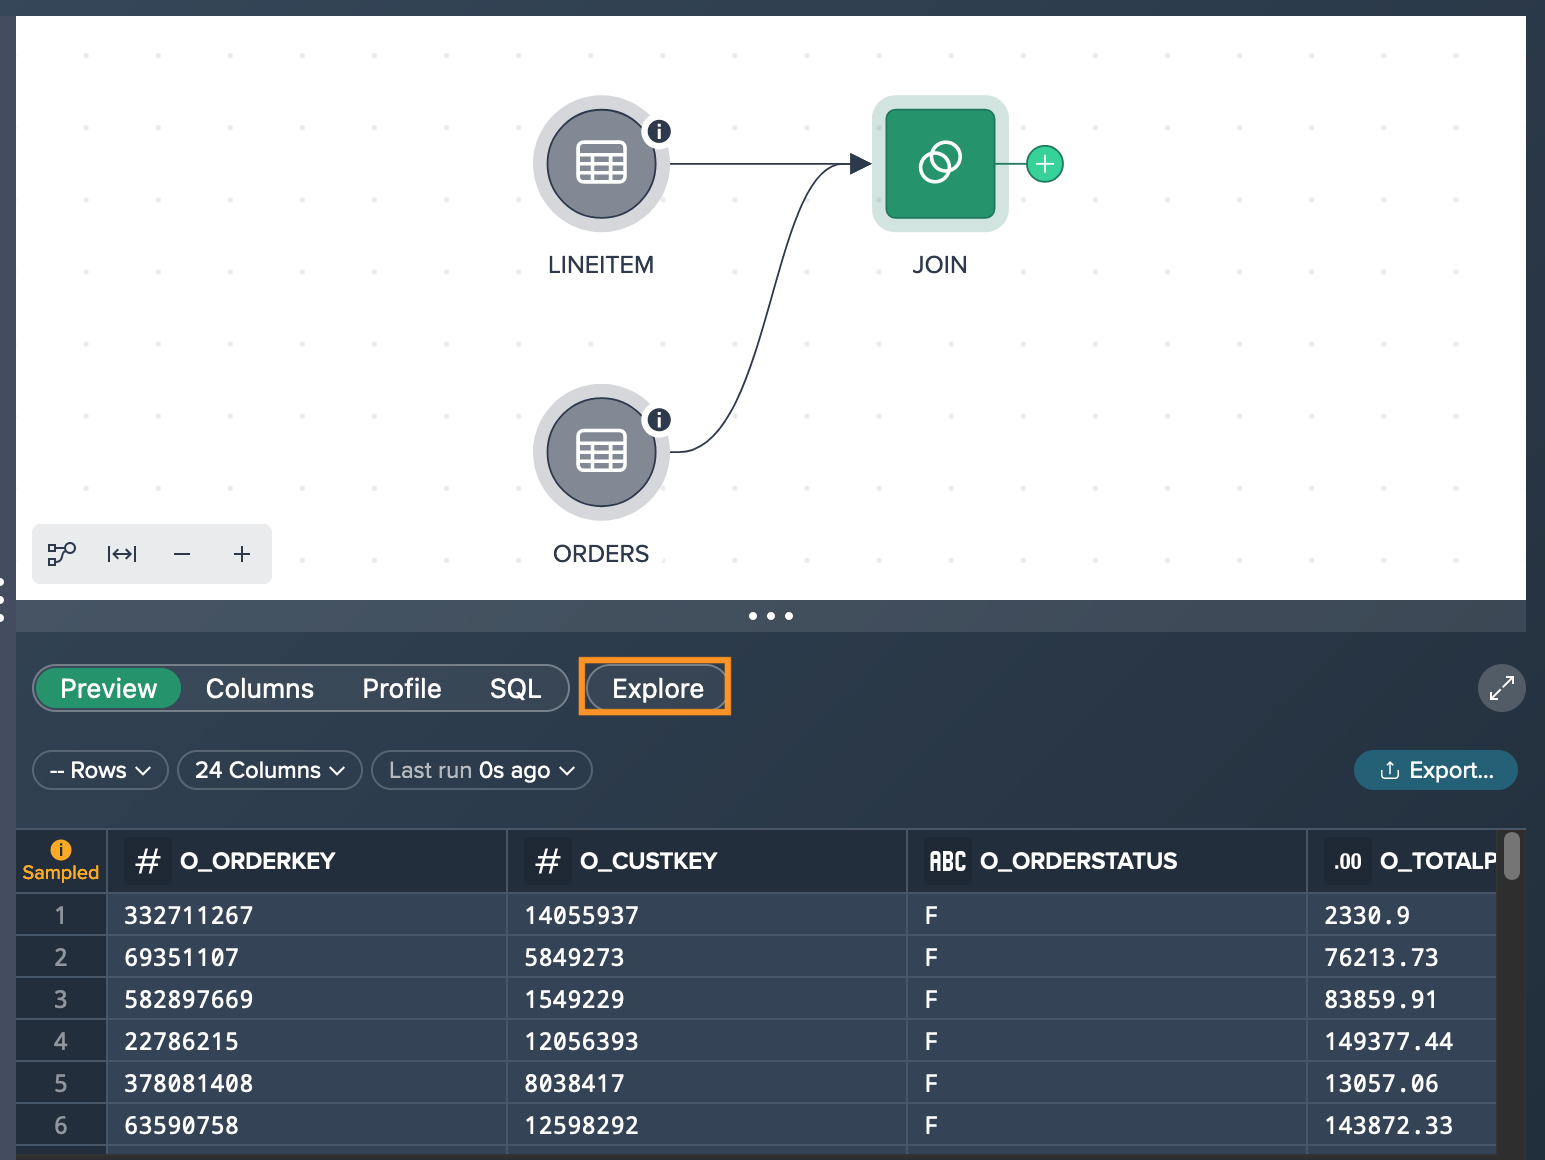
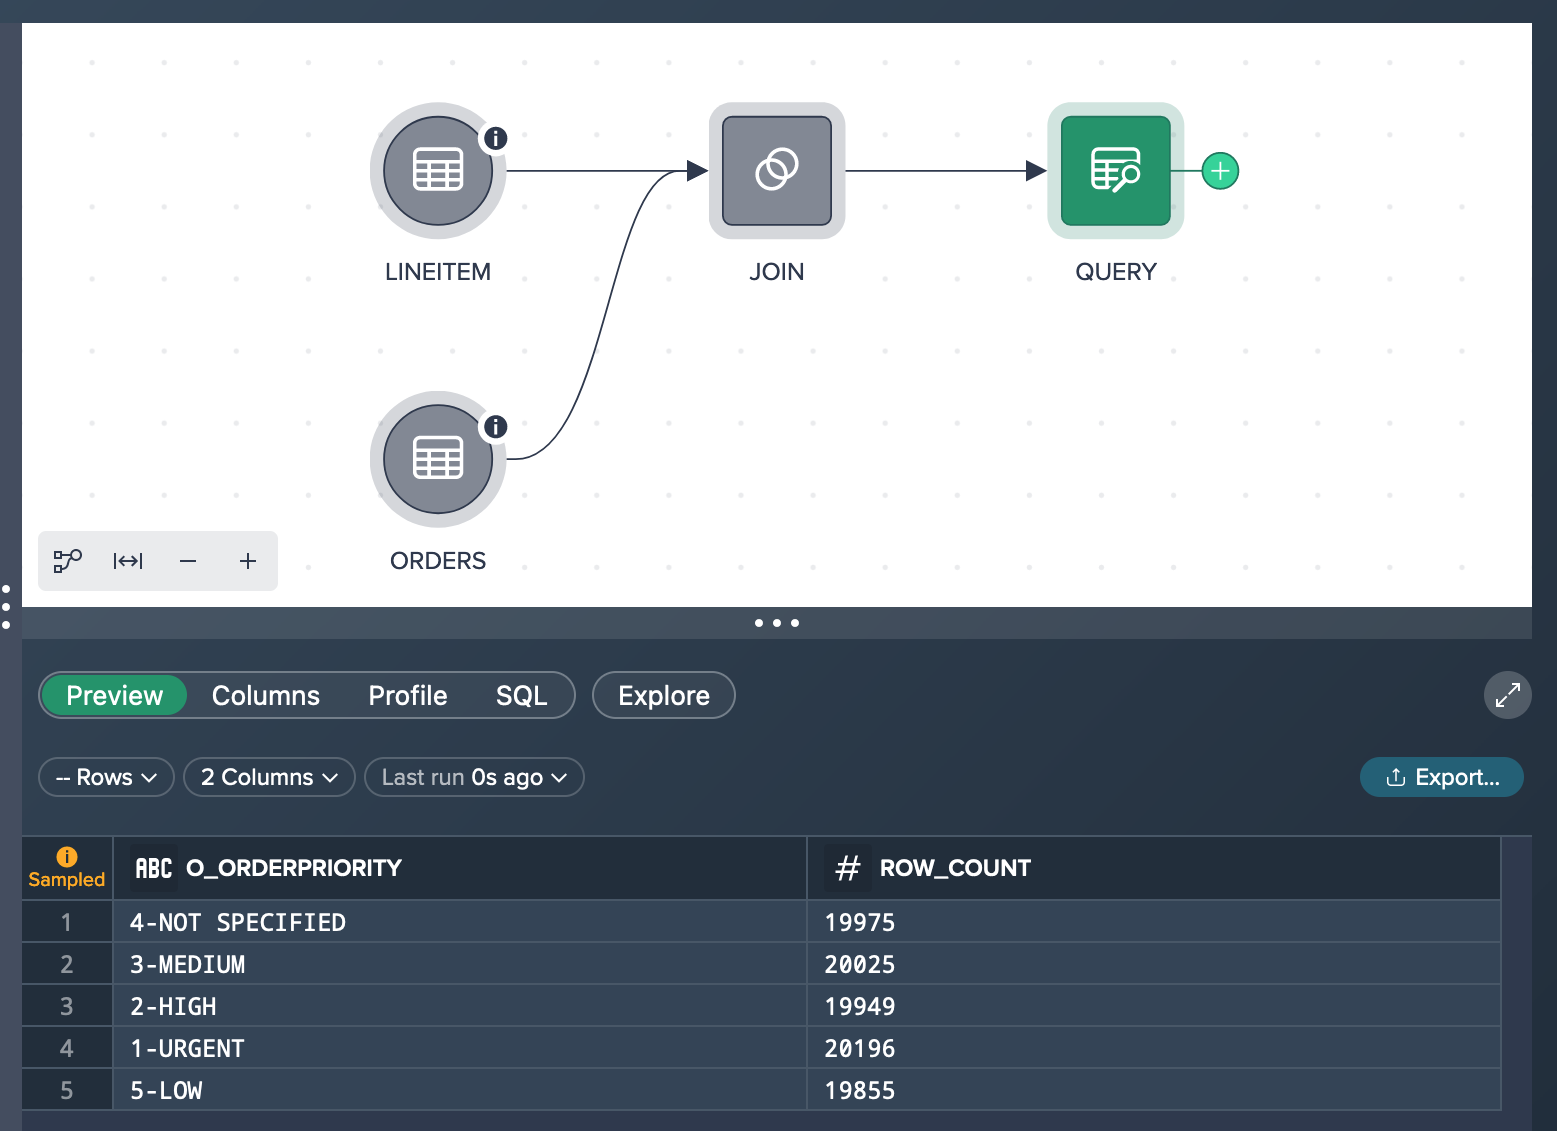
Select the desired node that you want to validate in the pipeline. Access the 'Data Grid' and click on the "Explore" pill.
-
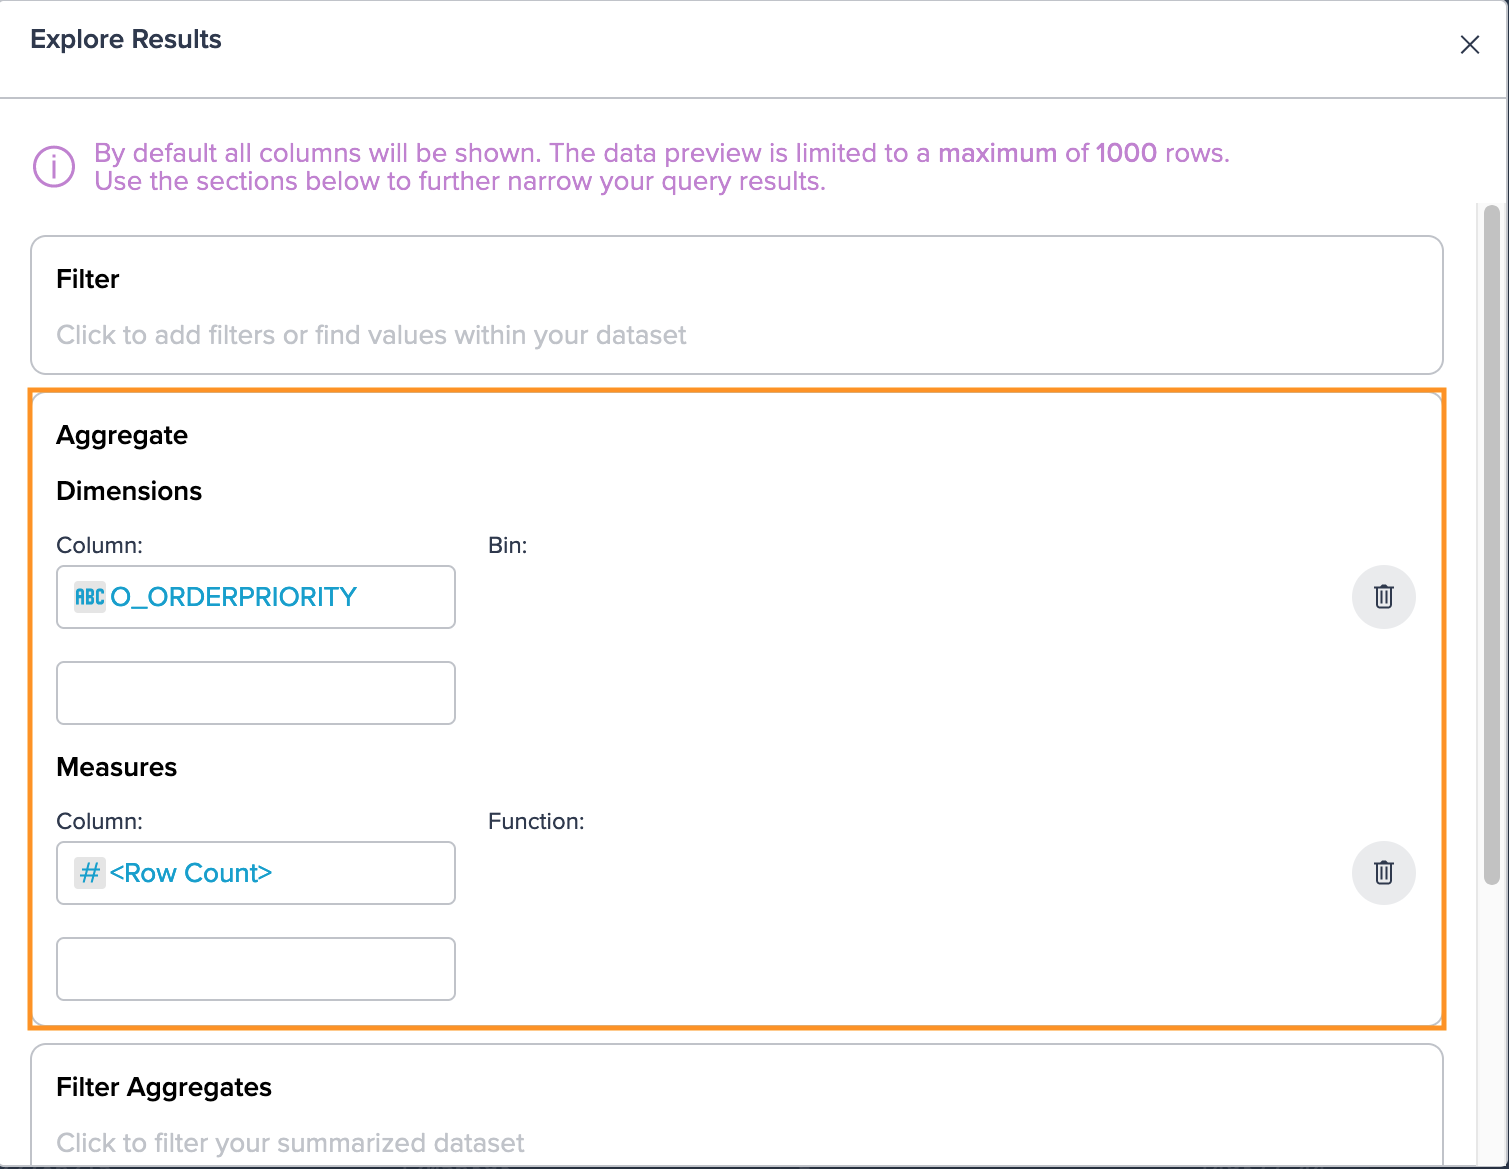
Configure the exploration settings according to your requirements, such as selecting specific columns, applying filters, or performing aggregations. Once you've made the necessary configurations, confirm by clicking "Create" to initiate the exploration.
-
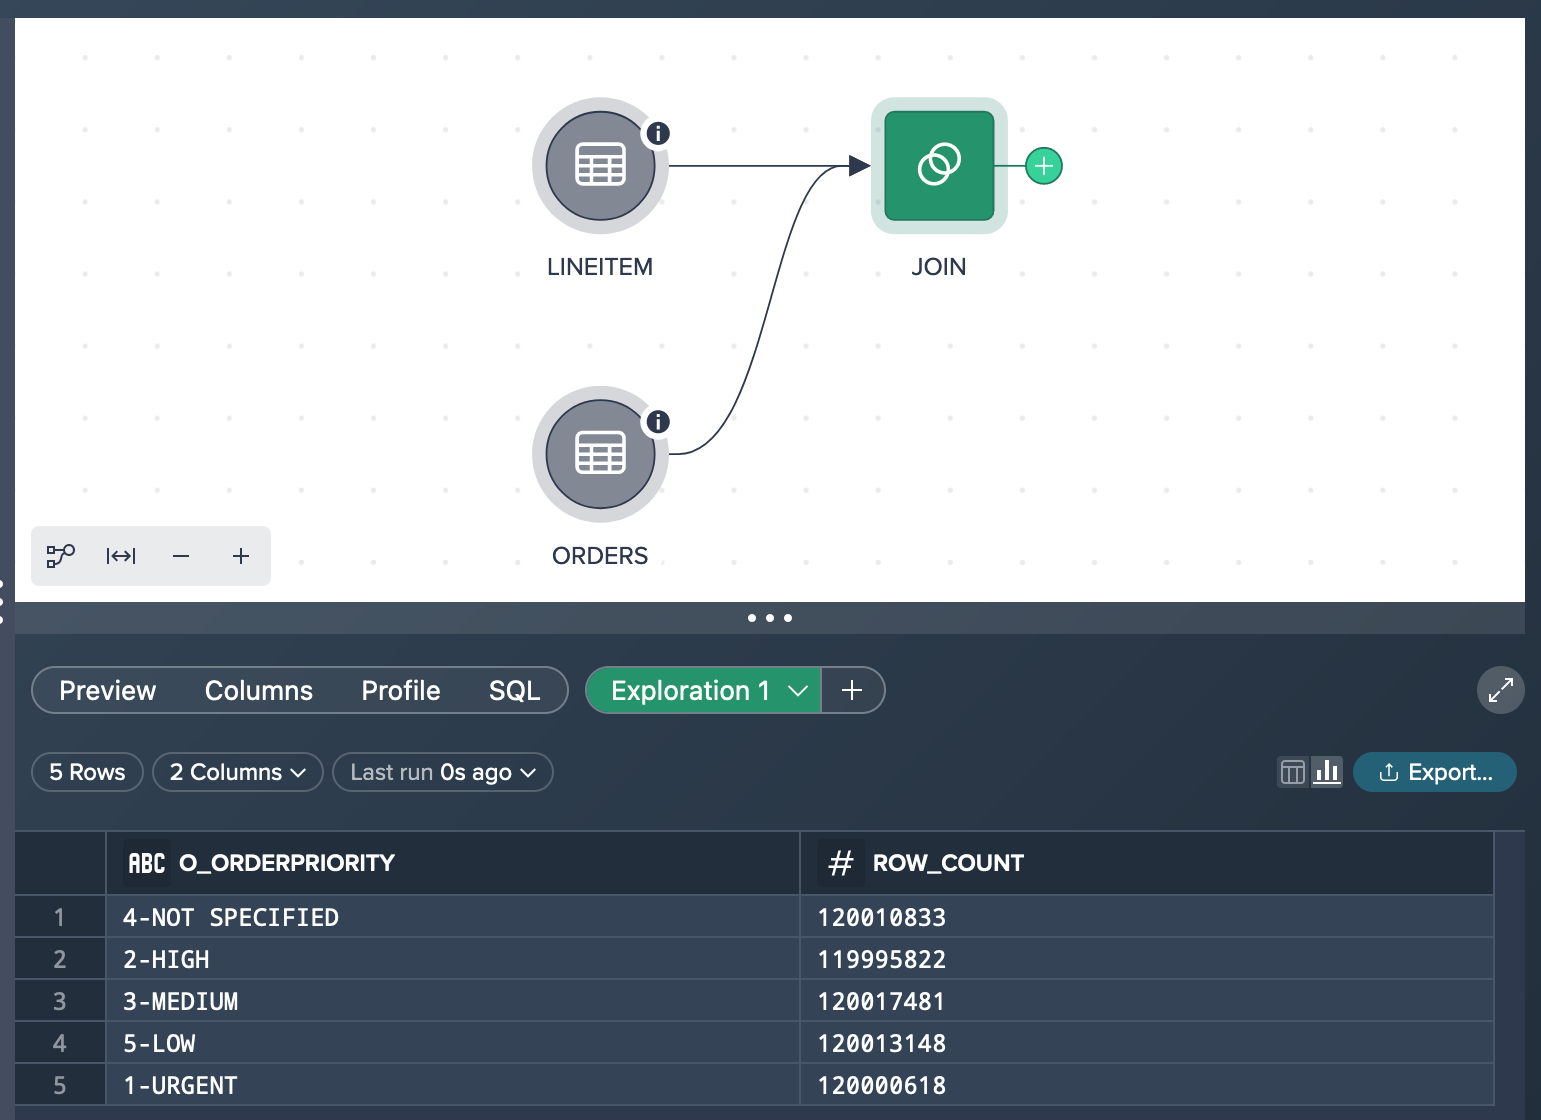
The exploration will run in the background, and once it's completed, you can view the result. Check if the expected result is included and validate the accuracy of the transformation performed by the selected node.
Converting the Exploration to a Transformation#
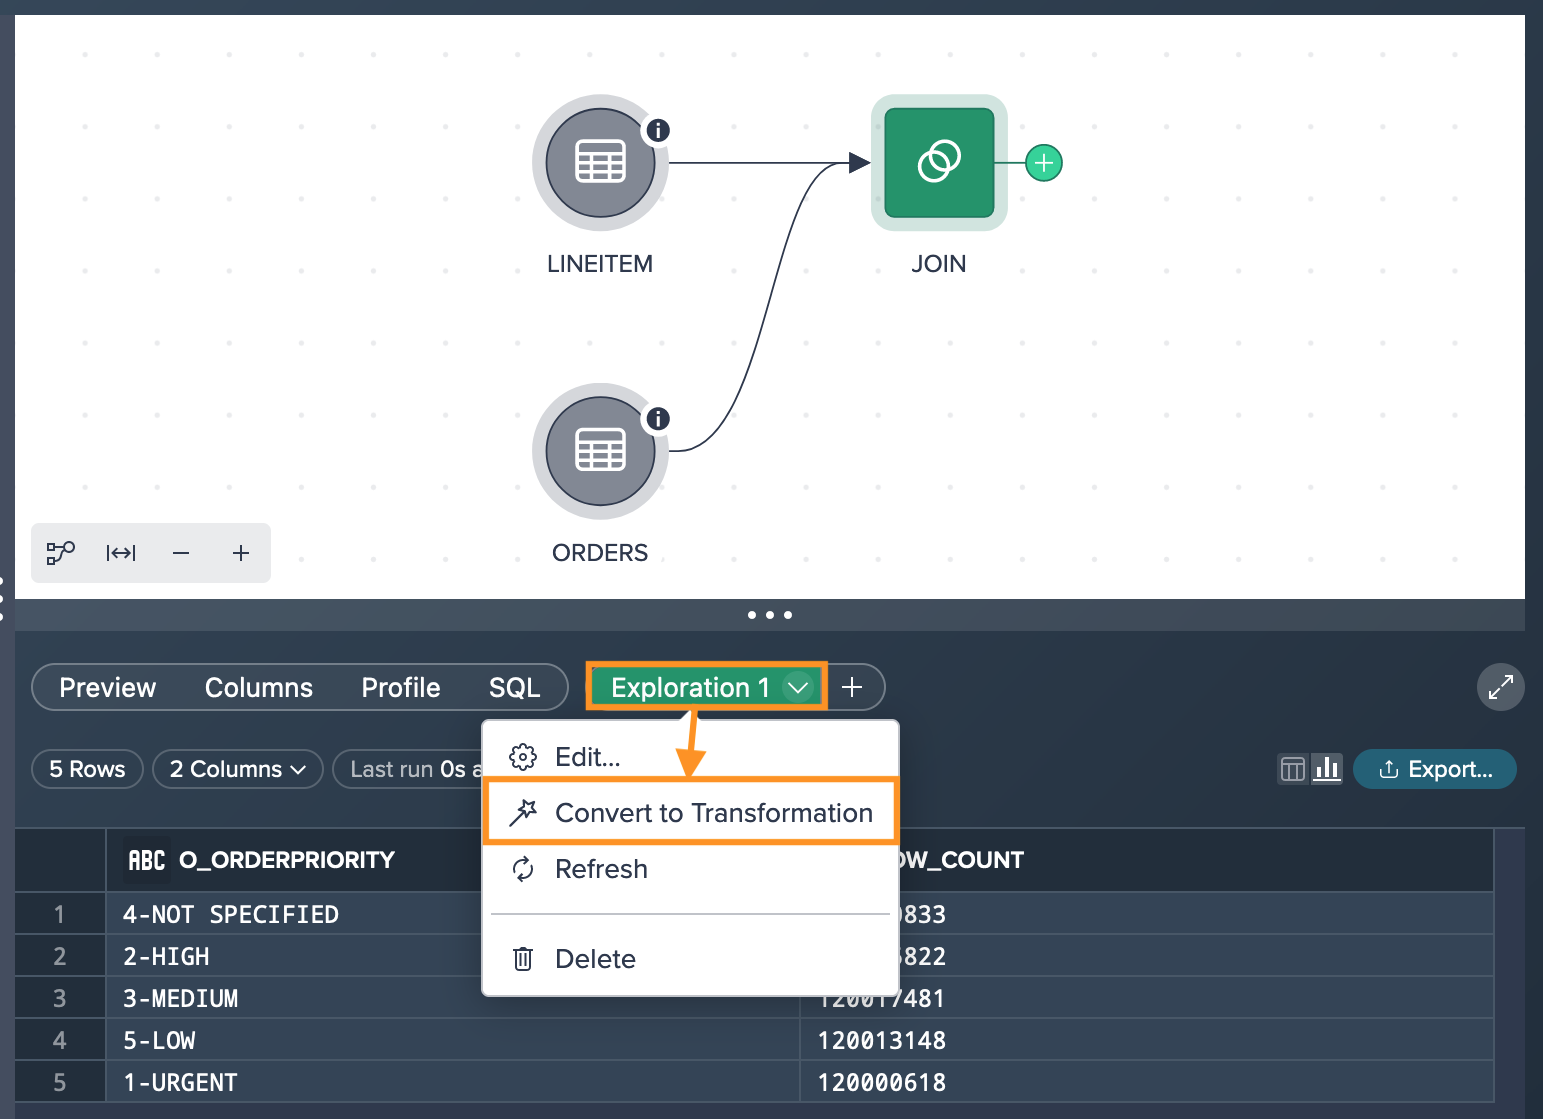
If you wish, you can convert an intermediate exploration into a transformation and seamlessly integrate it into your pipeline within the Flow Area. To do this, you have two options:
- drag and drop the "Exploration" tab directly into the Flow Area.
- open the context menu of the exploration tab and select "Convert to Transformation".
Once converted, the exploration becomes a transformation node, and it will behave like any other transformation in the pipeline. However, it's important to note that when the transformed exploration contains more than 100,000 values, it will still be sampled to maintain performance efficiency.
By converting an exploration into a transformation, you can incorporate its results into your pipeline, allowing you to build upon the analysis and continue the data transformation process with added flexibility and control.
What to Learn Next#
For a more detailed guide on supporting a migration use case that involves changing data sources and deployment targets of an existing pipeline, see How-To: Migrate from Development to Production Environments.