Exchanging Data
General Information#
When creating pipelines, Datameer allows you to replace a dataset in order to:
- modify your pipeline structure, such as adding a new transformation in between the pipeline
- move from a development environment to a production environment
The replacement process can be carried out on any transformation node within your project's pipeline and can be initiated through either the node's context menu or the Inspector.
Exchanging Limitations#
Exchanging the source node is not possible for the following operations:
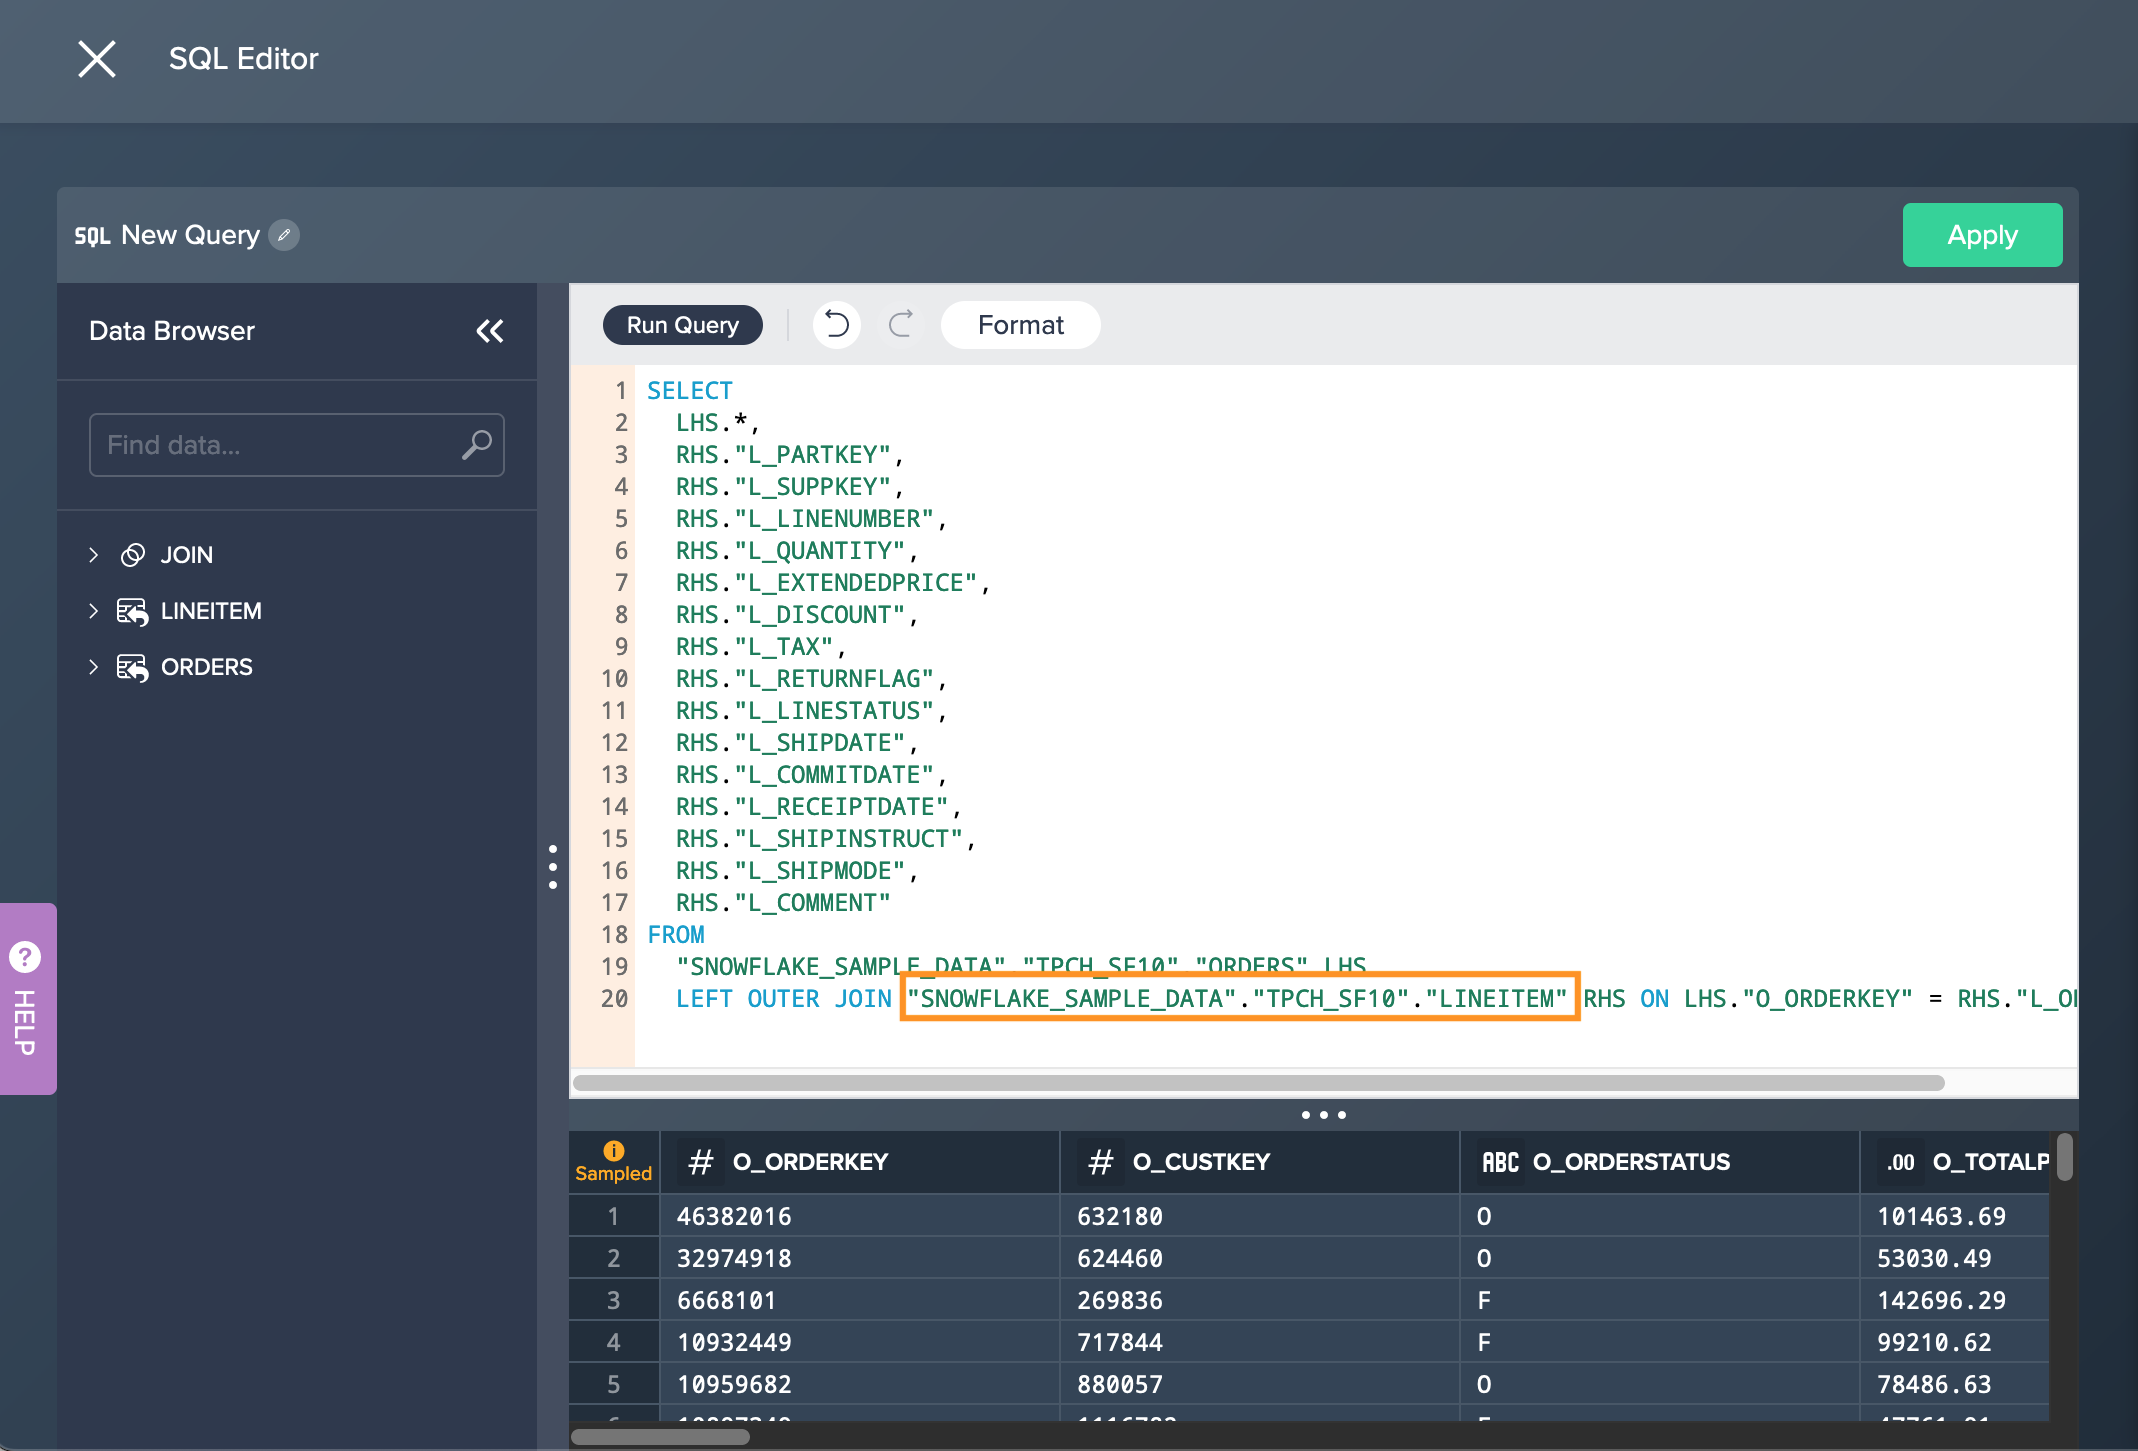
-
creating a SQL query via the SQL Editor: changing the source node happens right in the SQL Editor
-
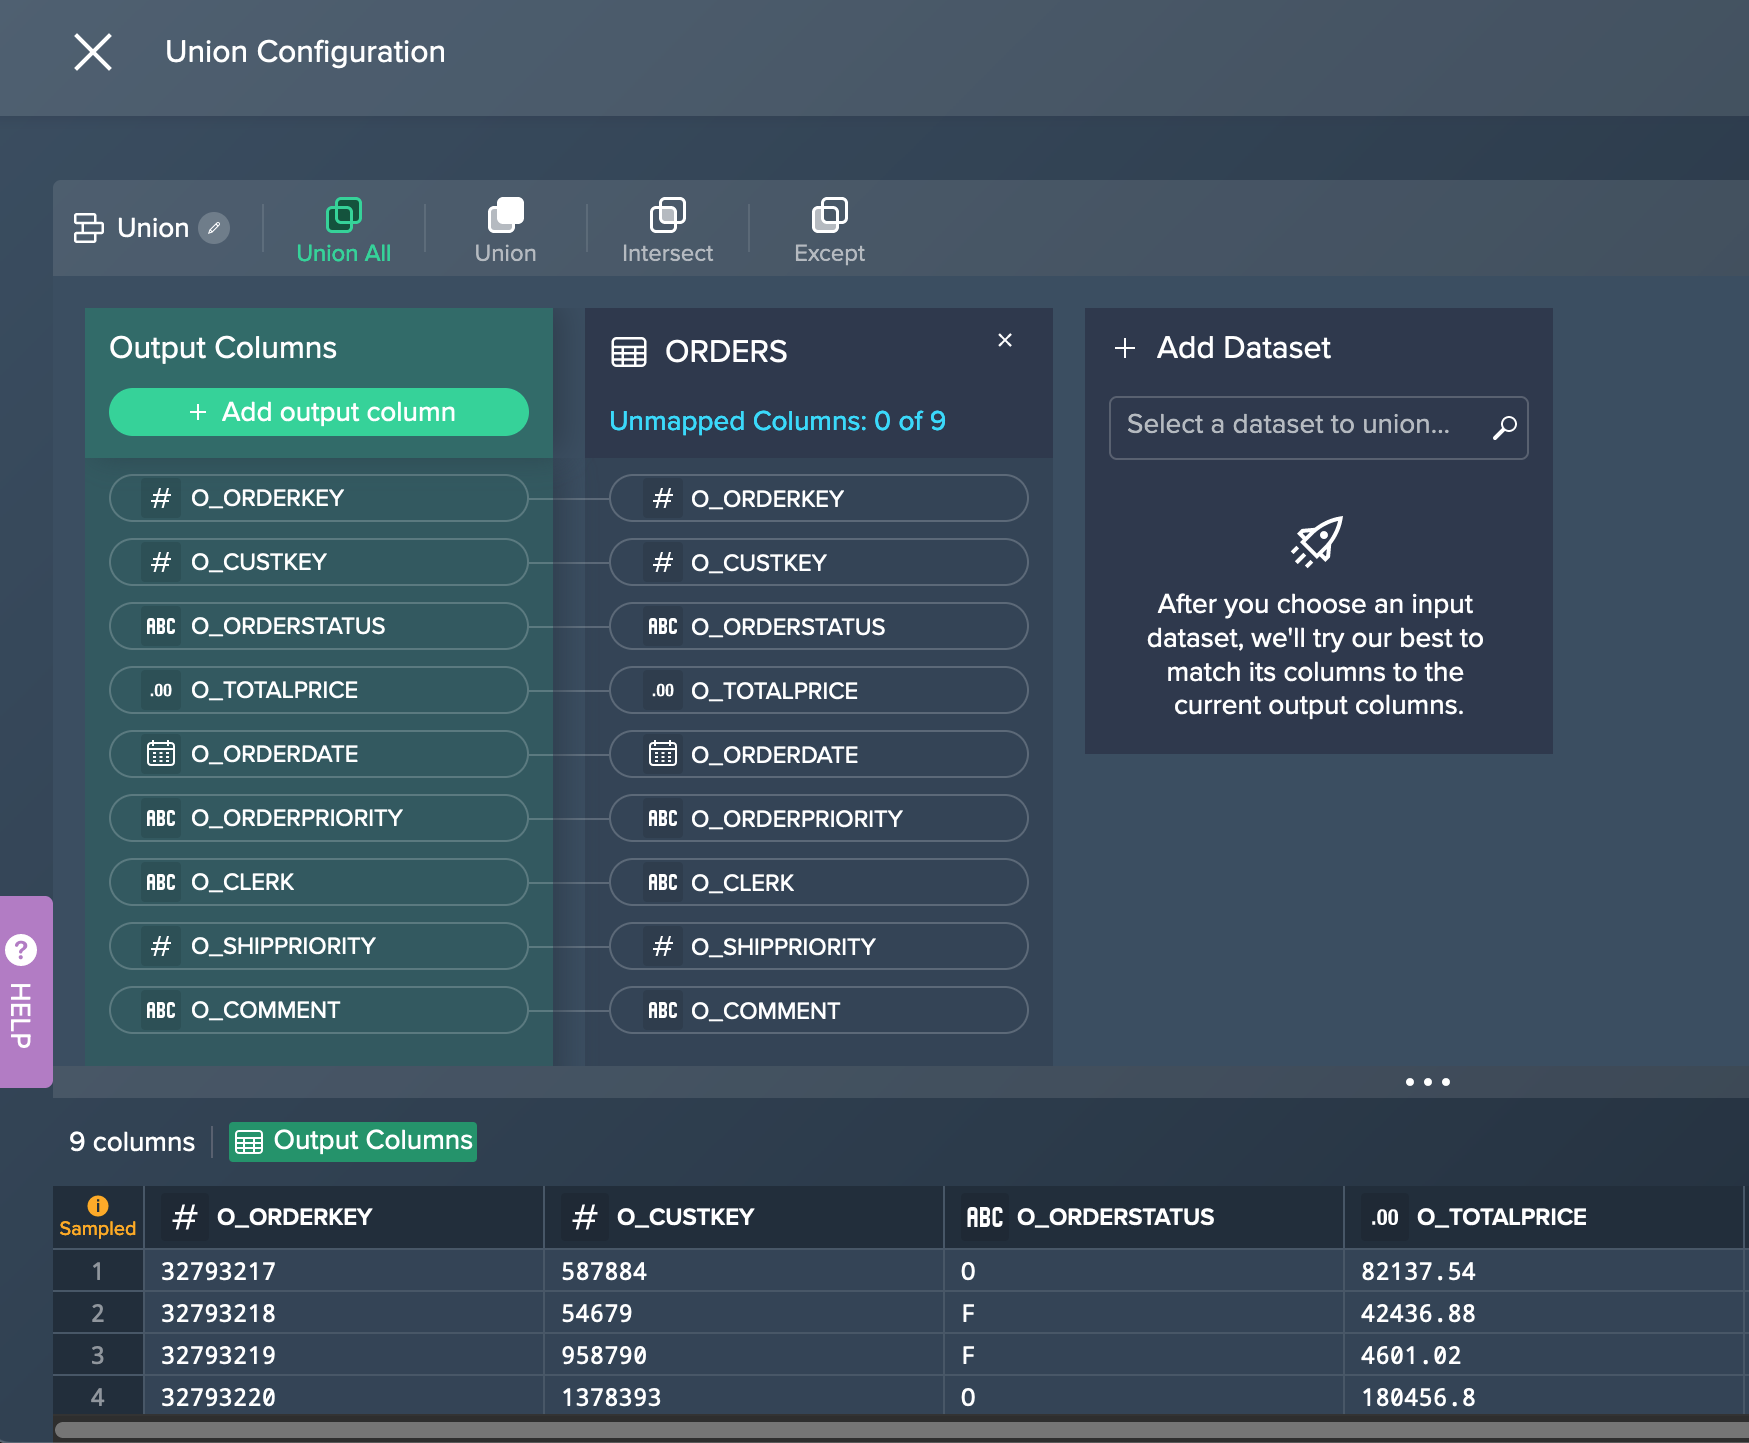
light data preparation transformation 'UNION': changes need to be applied directly in the 'UNION' configuration
-
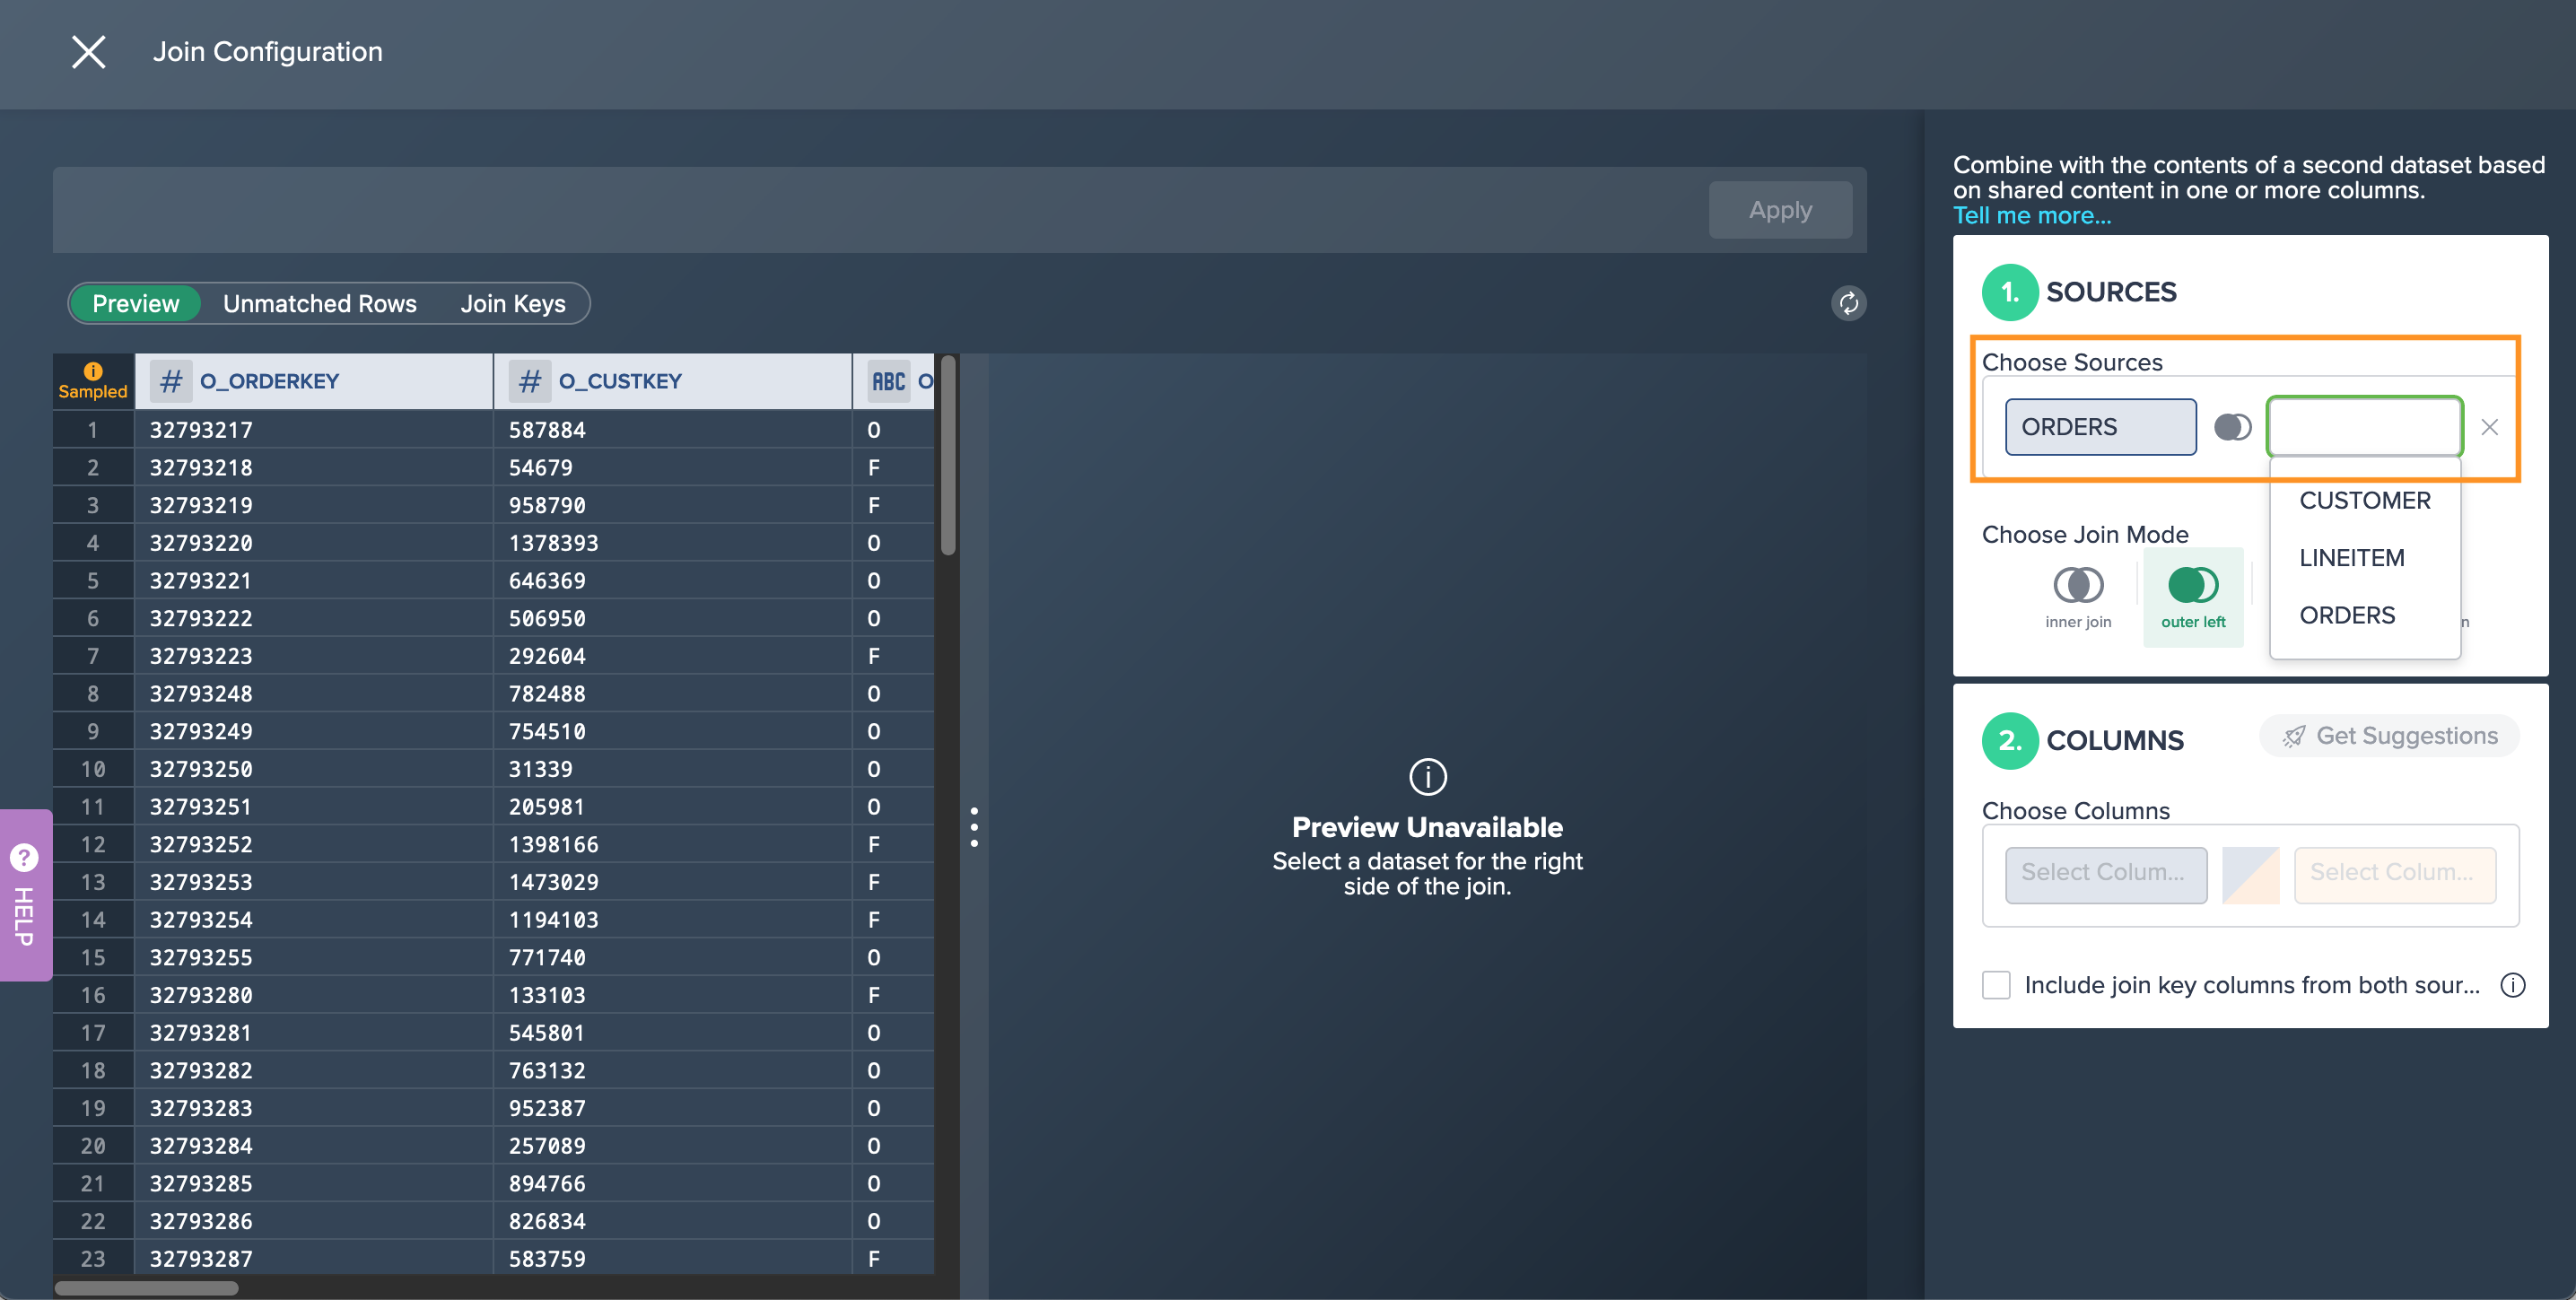
light data preparation transformation 'JOIN': changes need to be applied directly in the 'JOIN' configuration
Exchanging the Data Node#
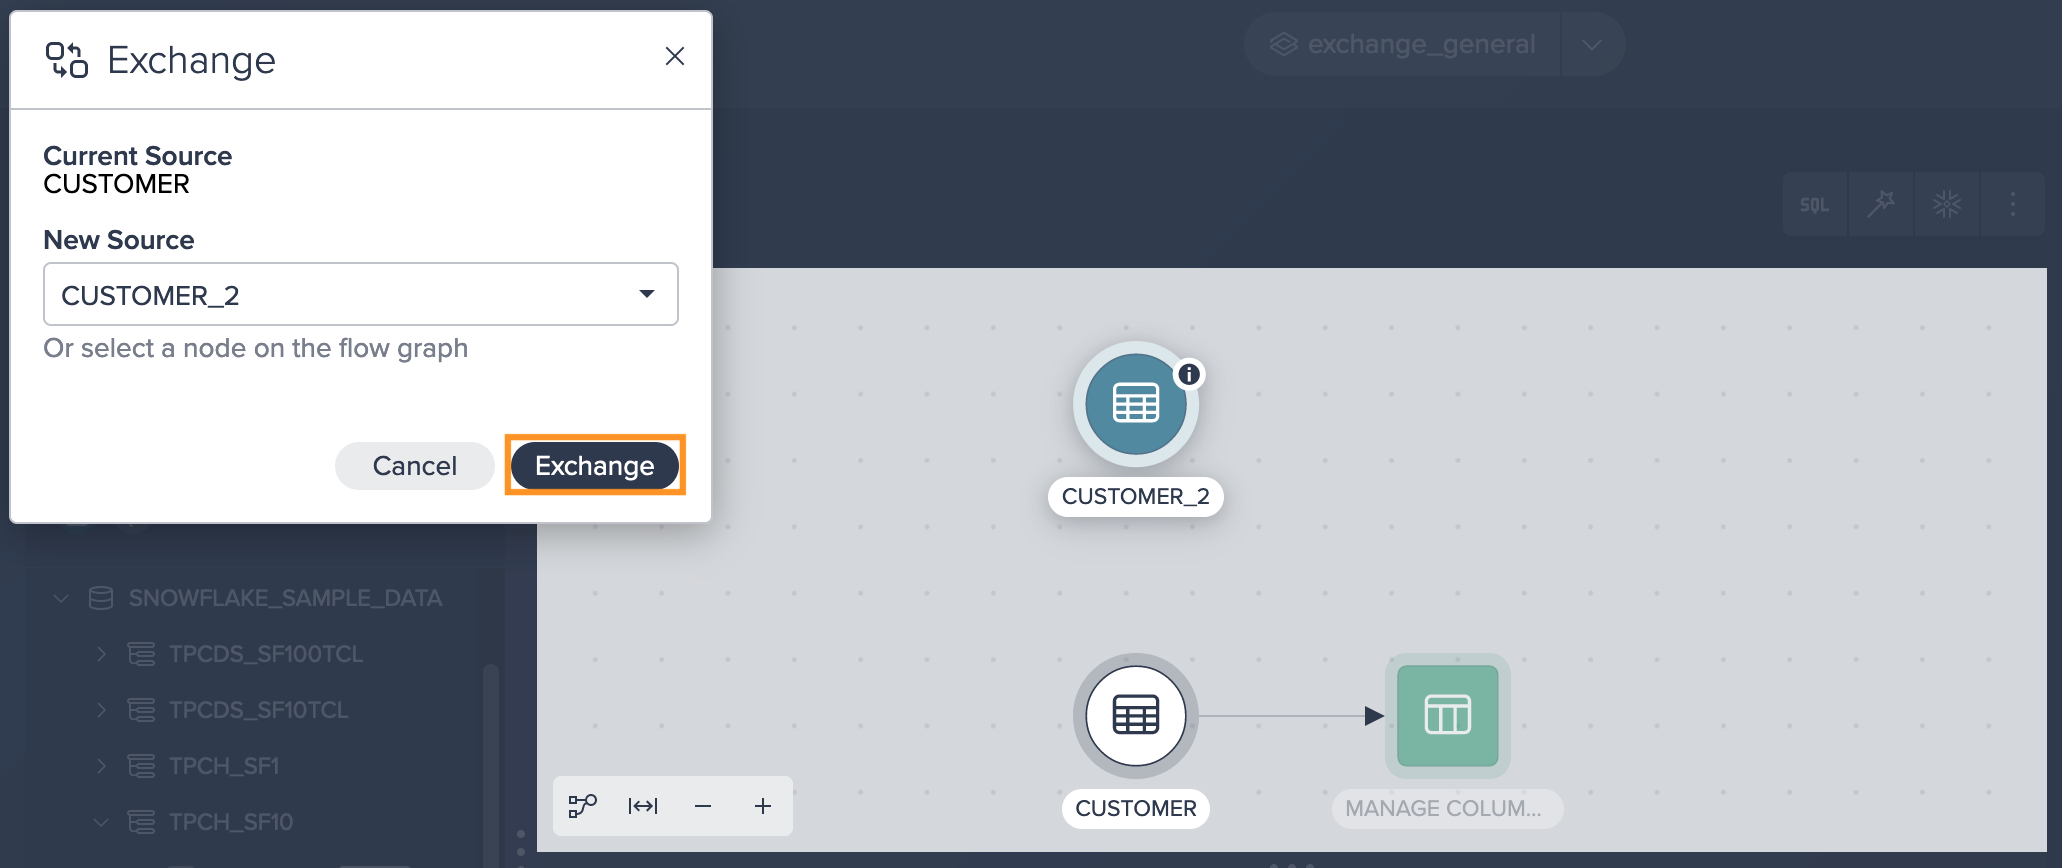
To exchange a source node:
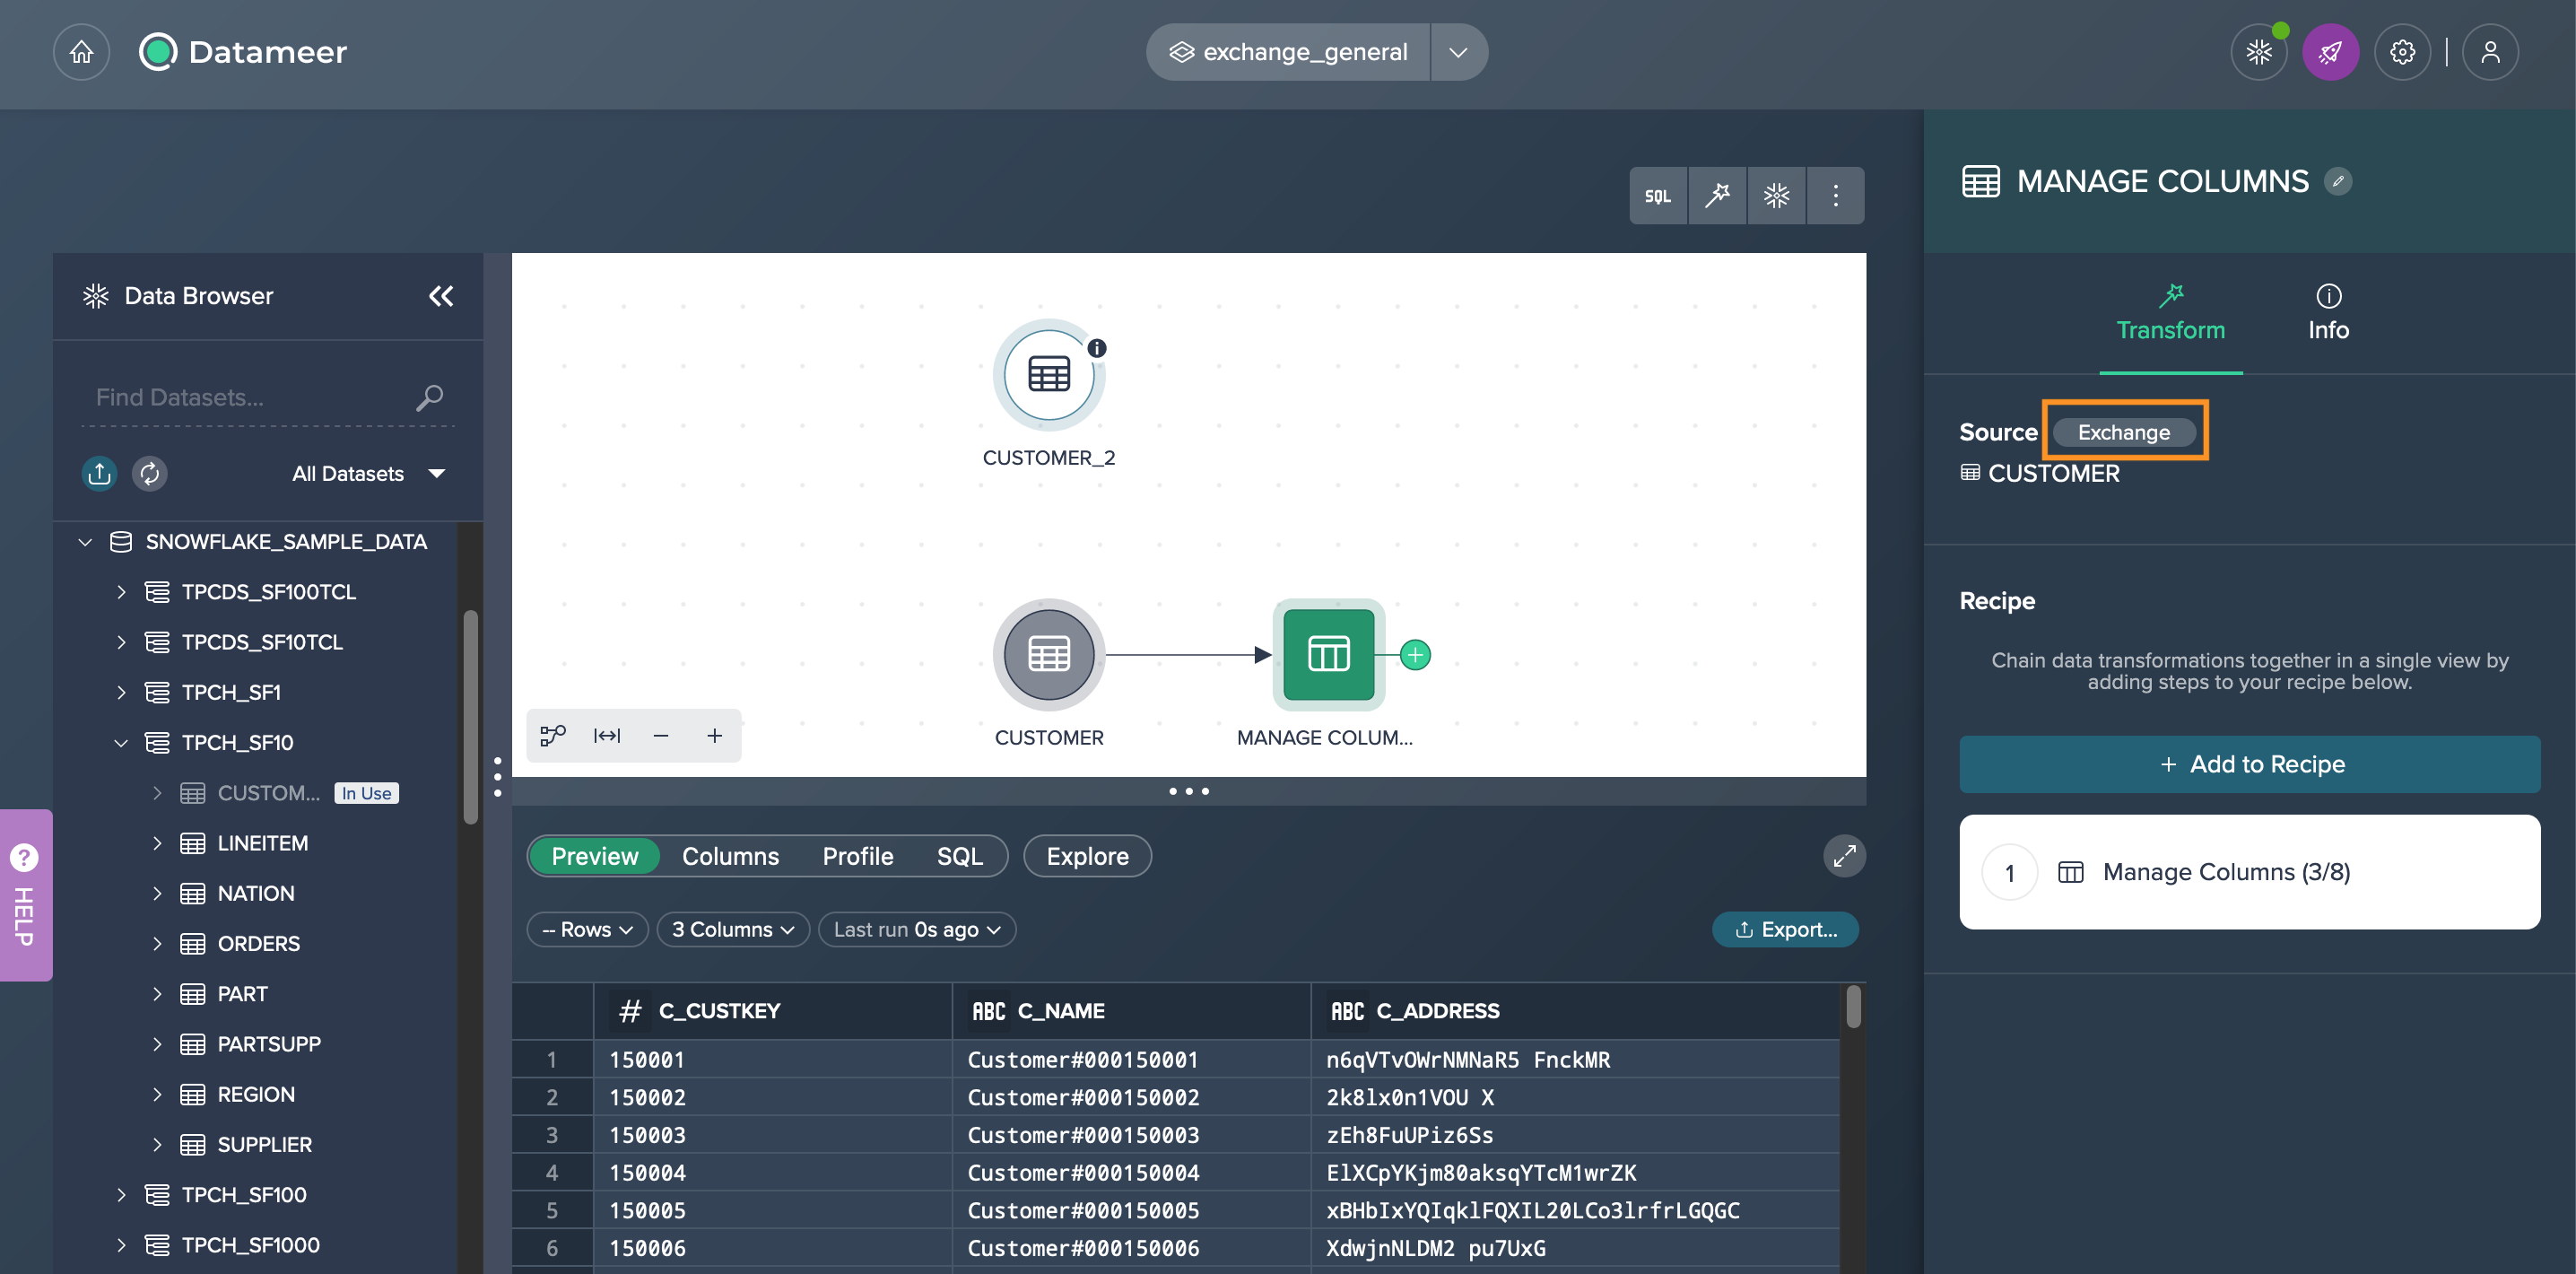
-
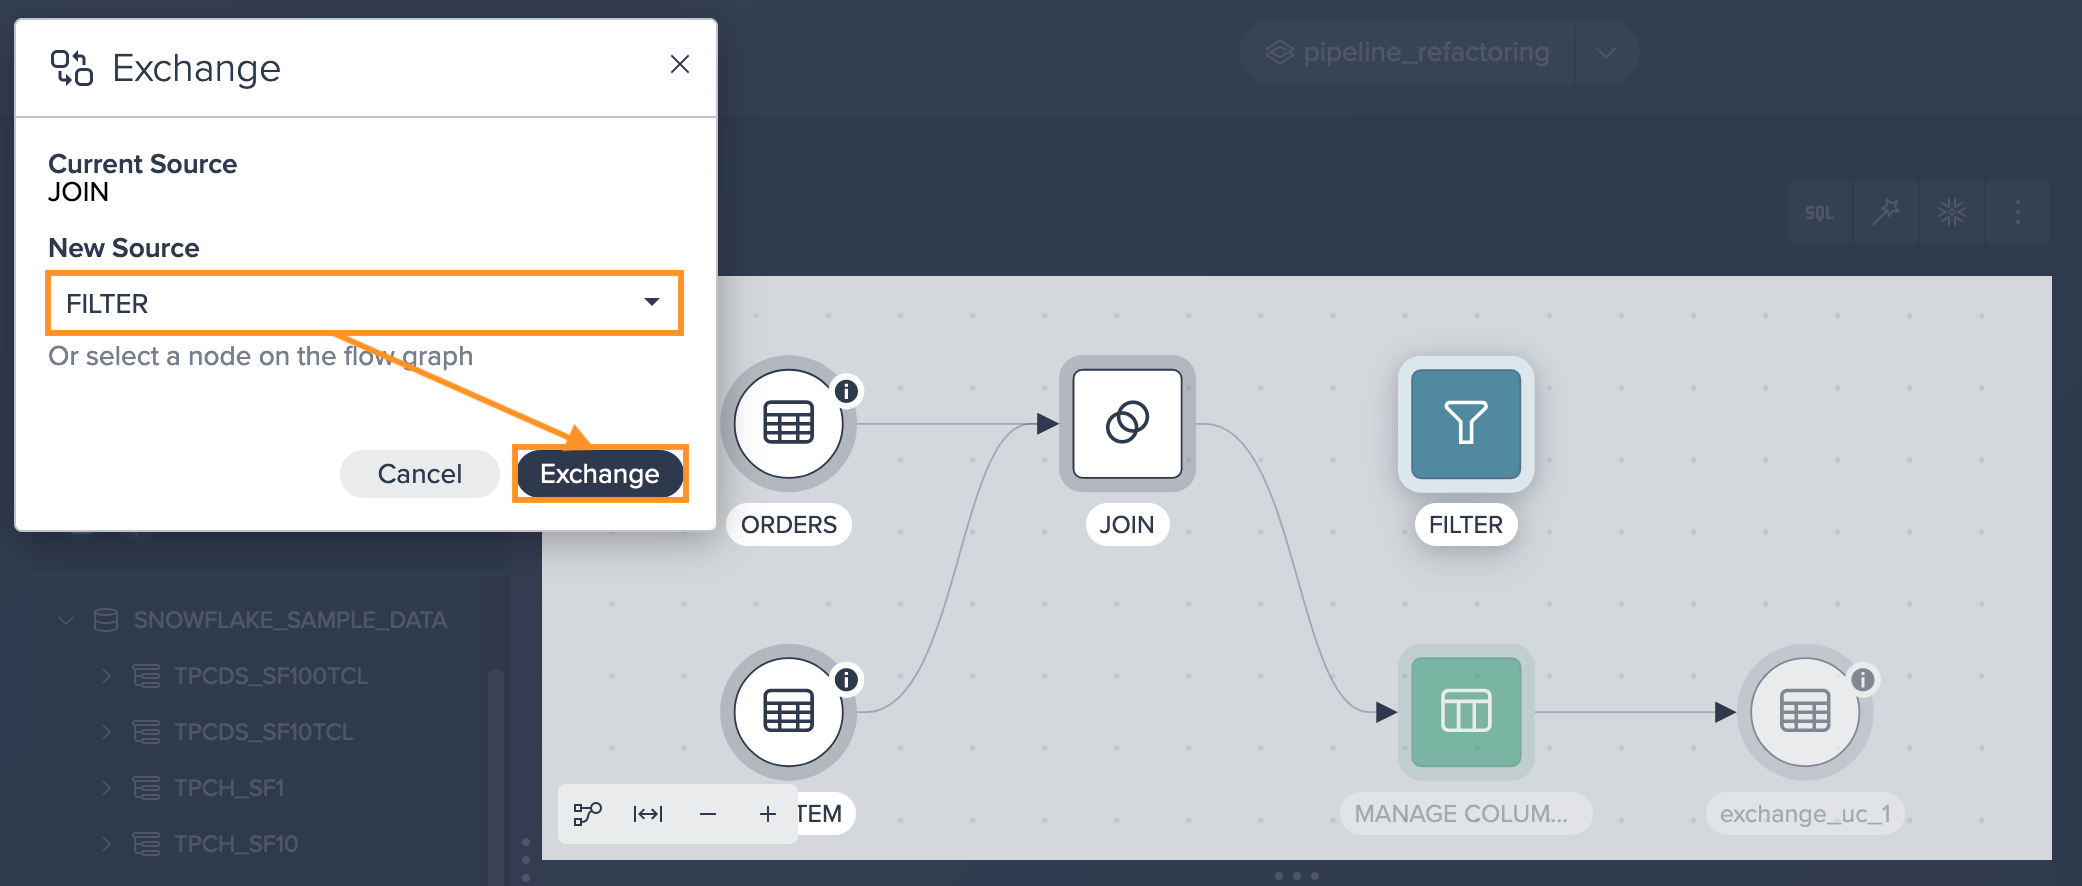
Click on the node and then click on "Exchange Source" from the Inspector. The dialog 'Exchange' opens.
-
Select the new source from the drop-down or click on the required node in the Flow Area. The new source is listed in the dialog.
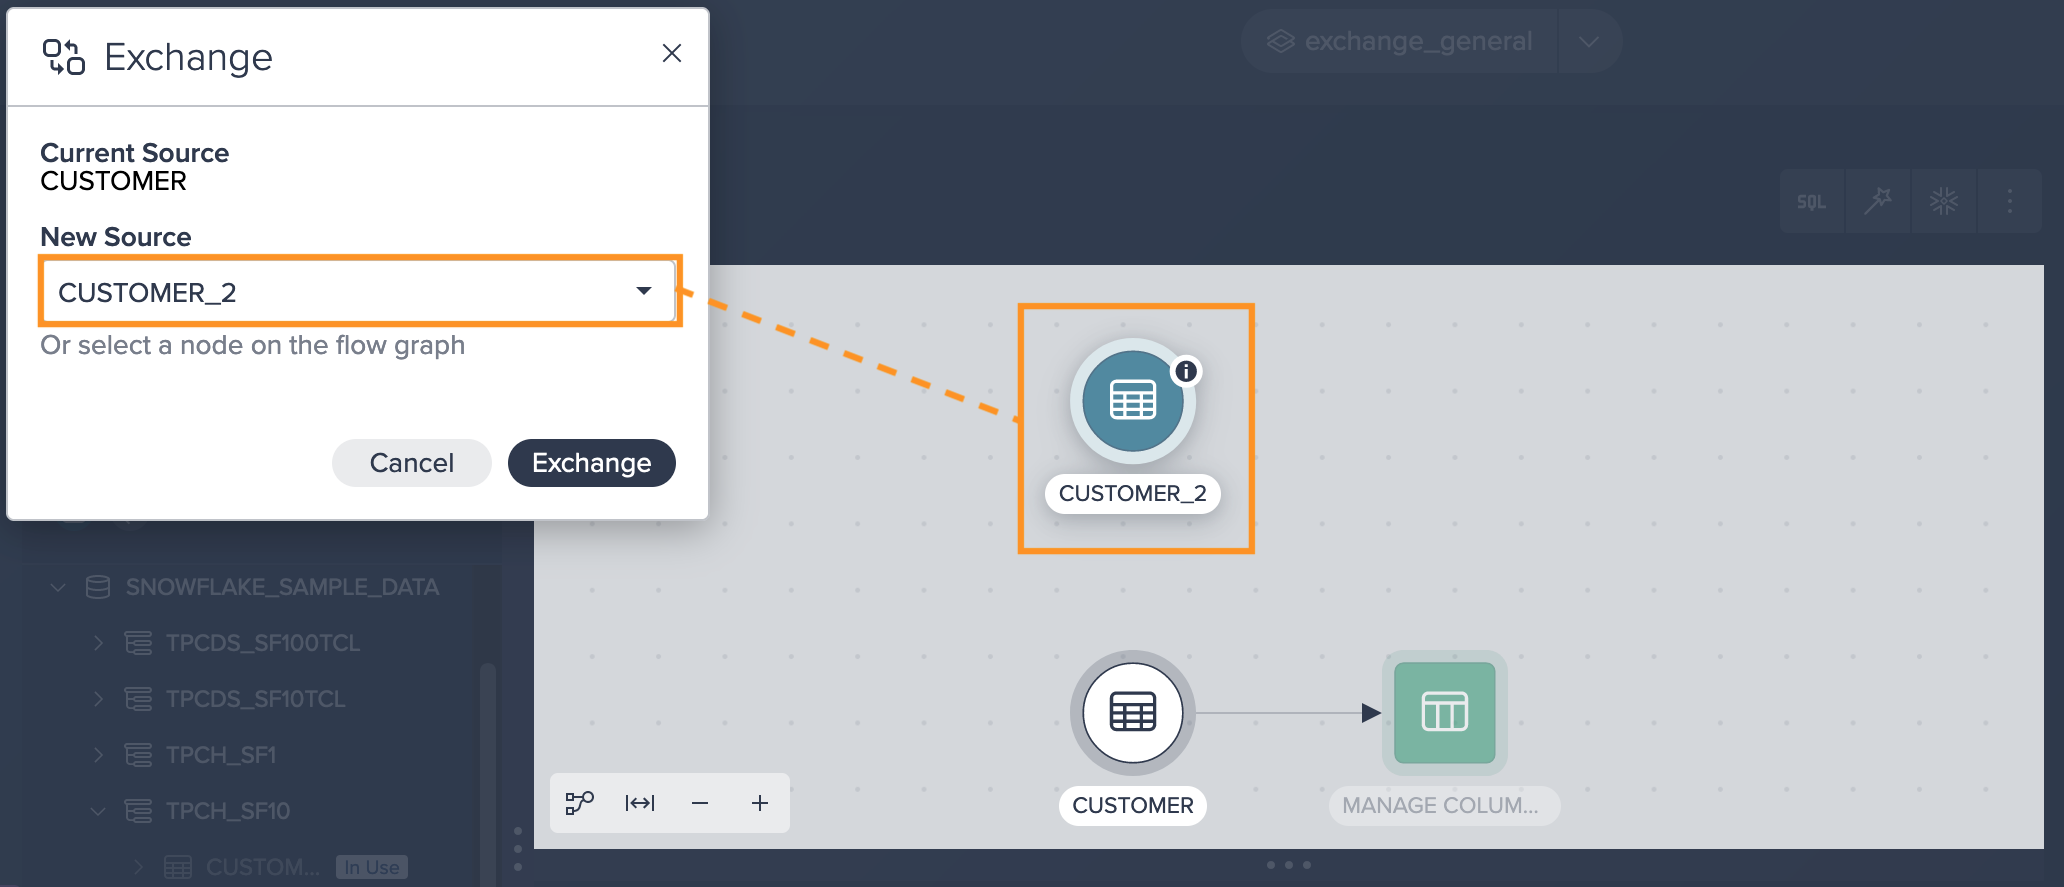
-
Confirm with "Exchange". The exchange proceeds. The Workbench opens and the new pipeline is shown. The former source is still displayed in the Flow Area.

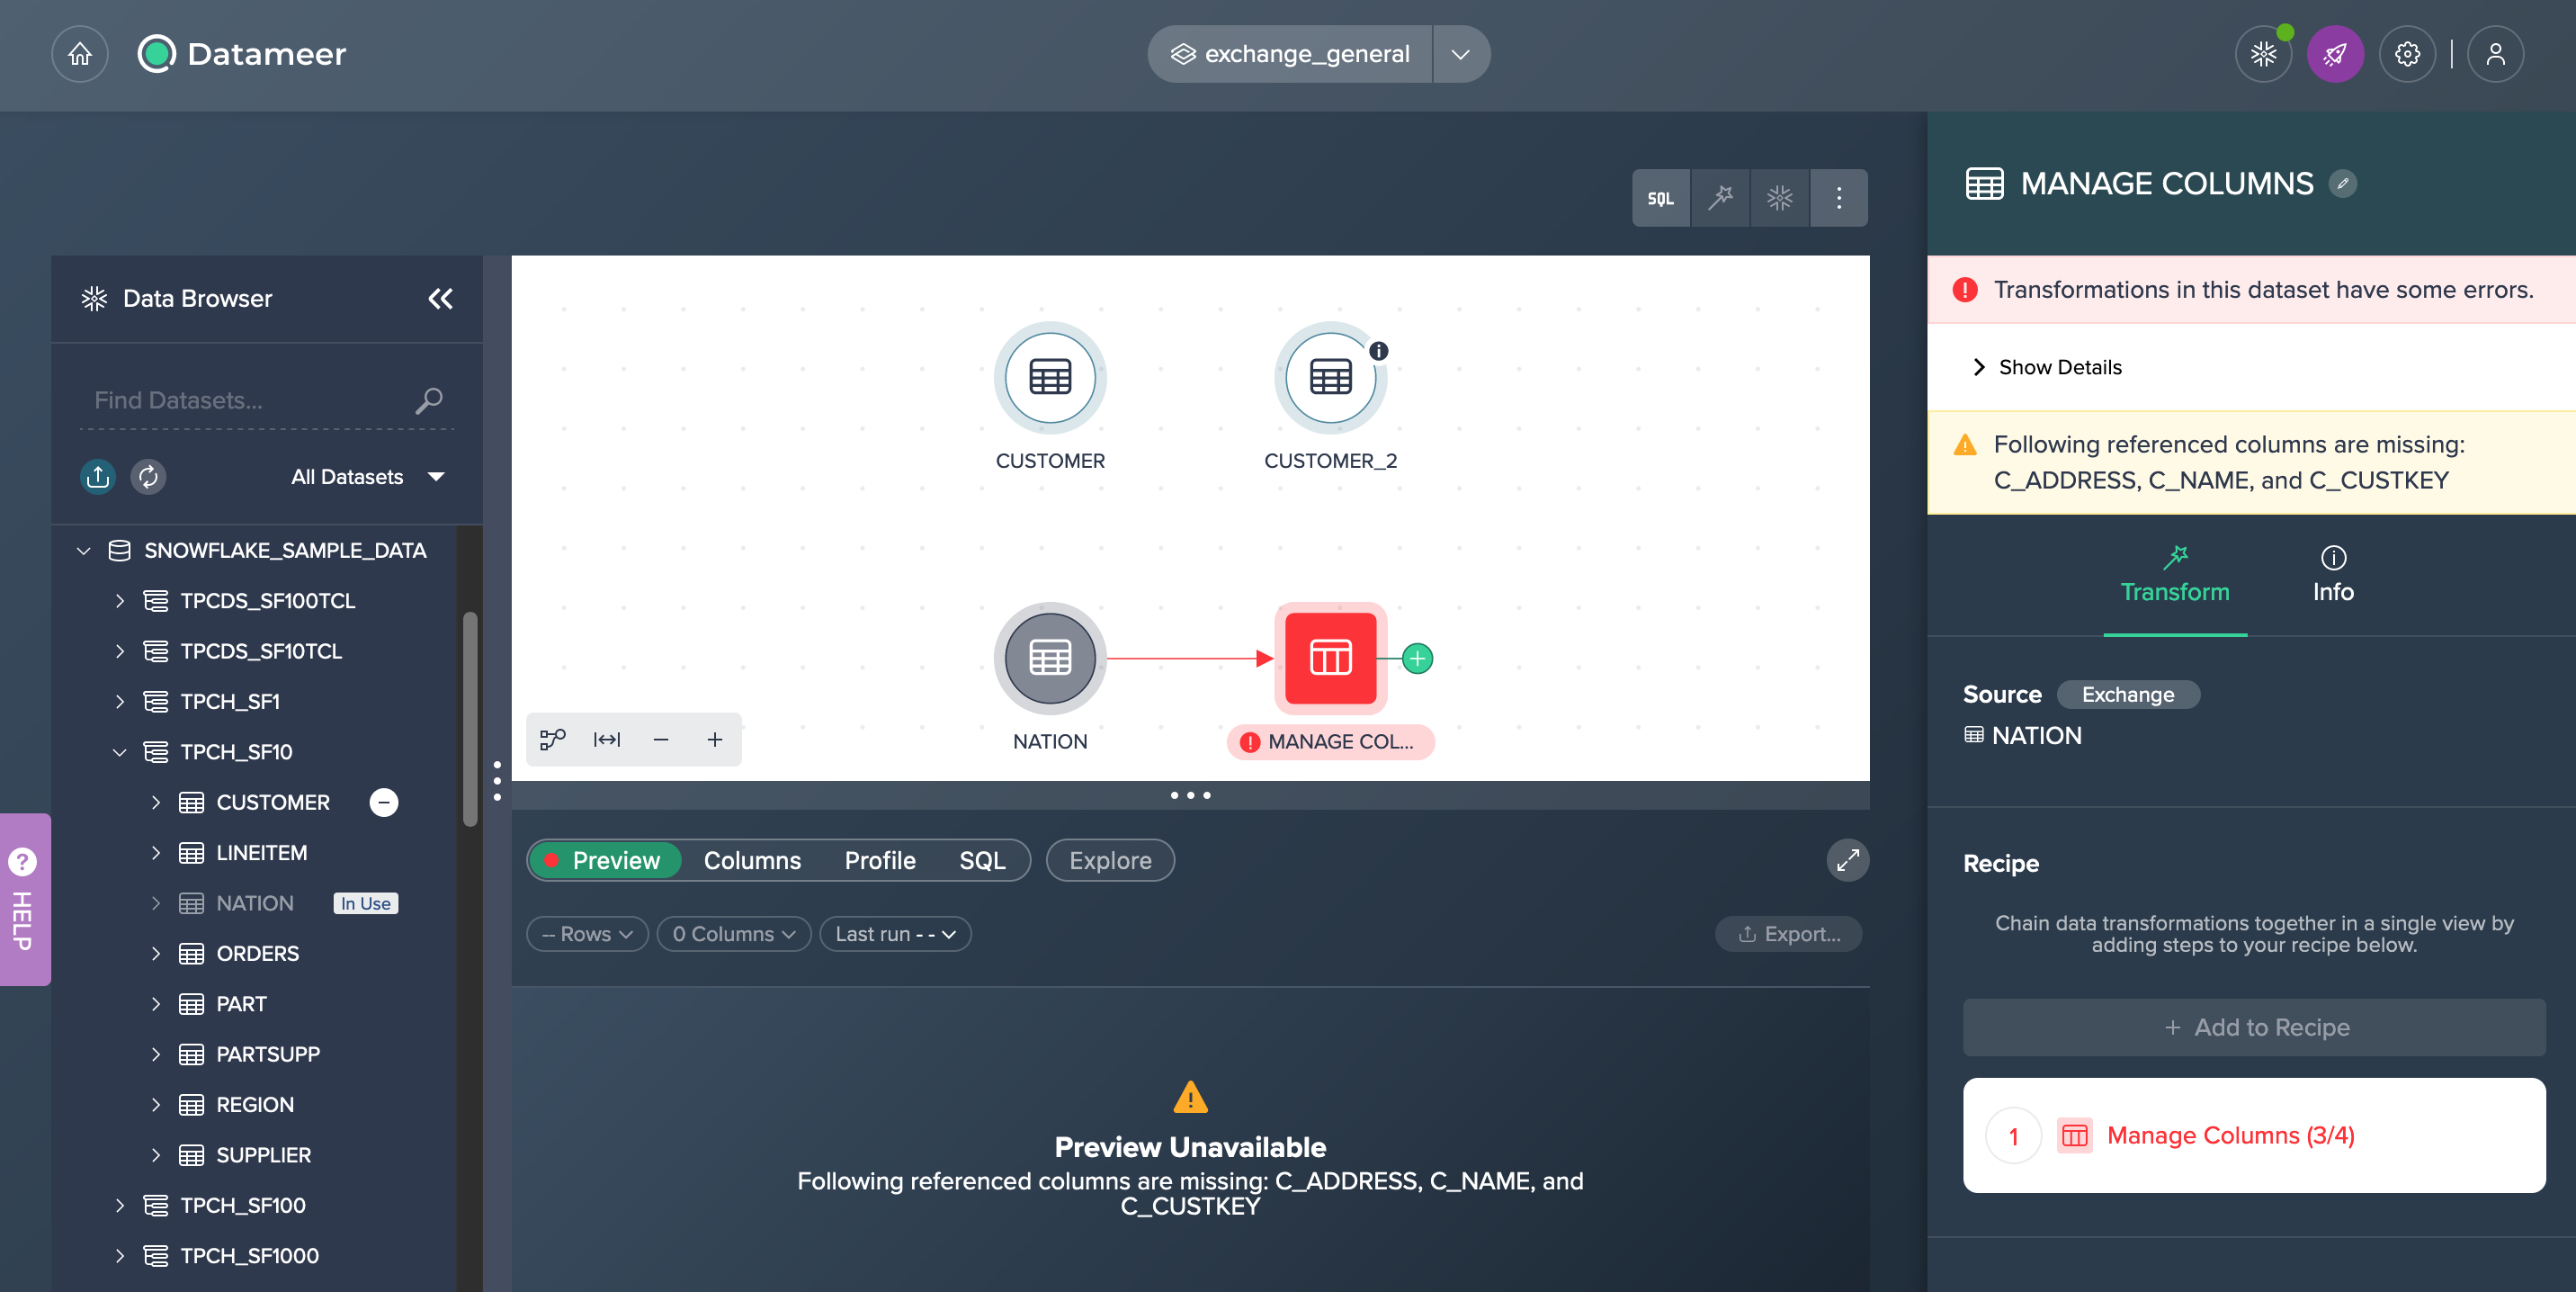
Error State#
Exchanging the input node leads to an error when the new source does not contain columns that are referenced in the transformed view. The following example shows an example case for this:
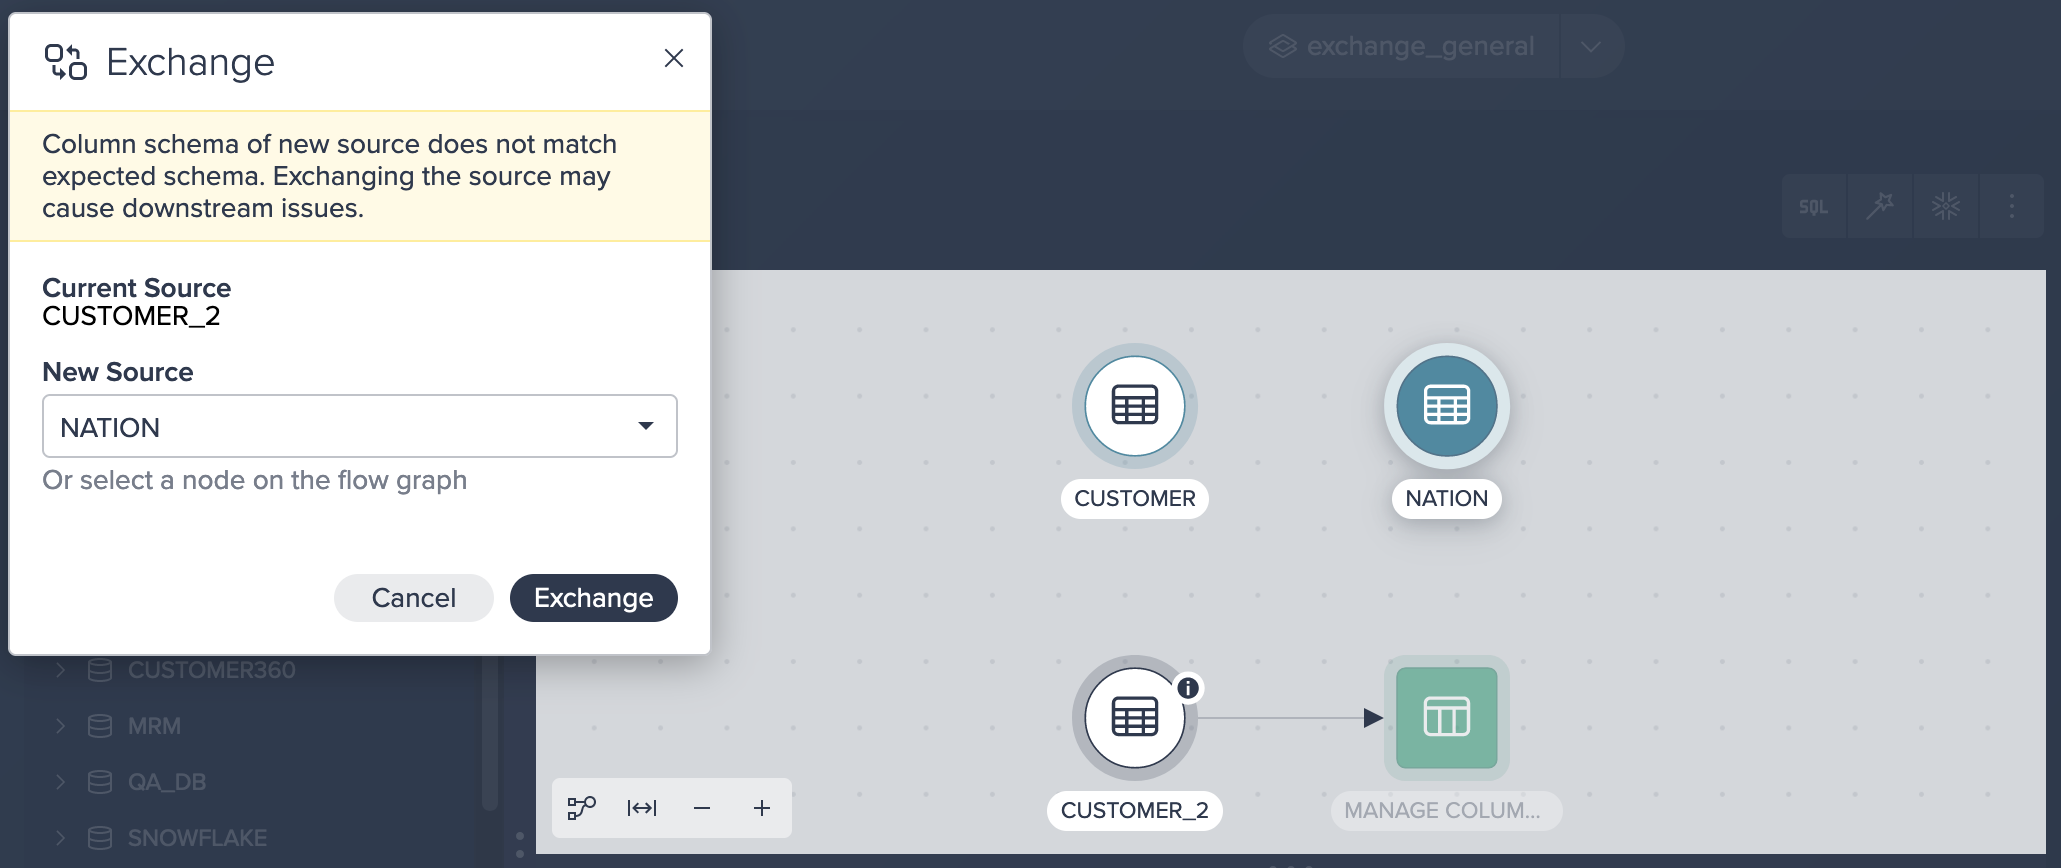
Nevertheless you can confirm the exchange and the error will be displayed in the Inspector, the node is displayed in the Flow Area and no Data Preview can be shown in the Data Grid.
Exchanging Use Cases#
These use cases might help you to understand the usage of the exchange feature. for more information read here.
Refactoring a Pipeline#
This scenario showcases the process of restructuring a pipeline to incorporate an additional transformation. Rather than reconstructing the entire pipeline from scratch, you can easily include the new transformation by adding it and then exchanging the source to seamlessly integrate the new node into the existing pipeline.
The following Datameer feature is performed in this use case:
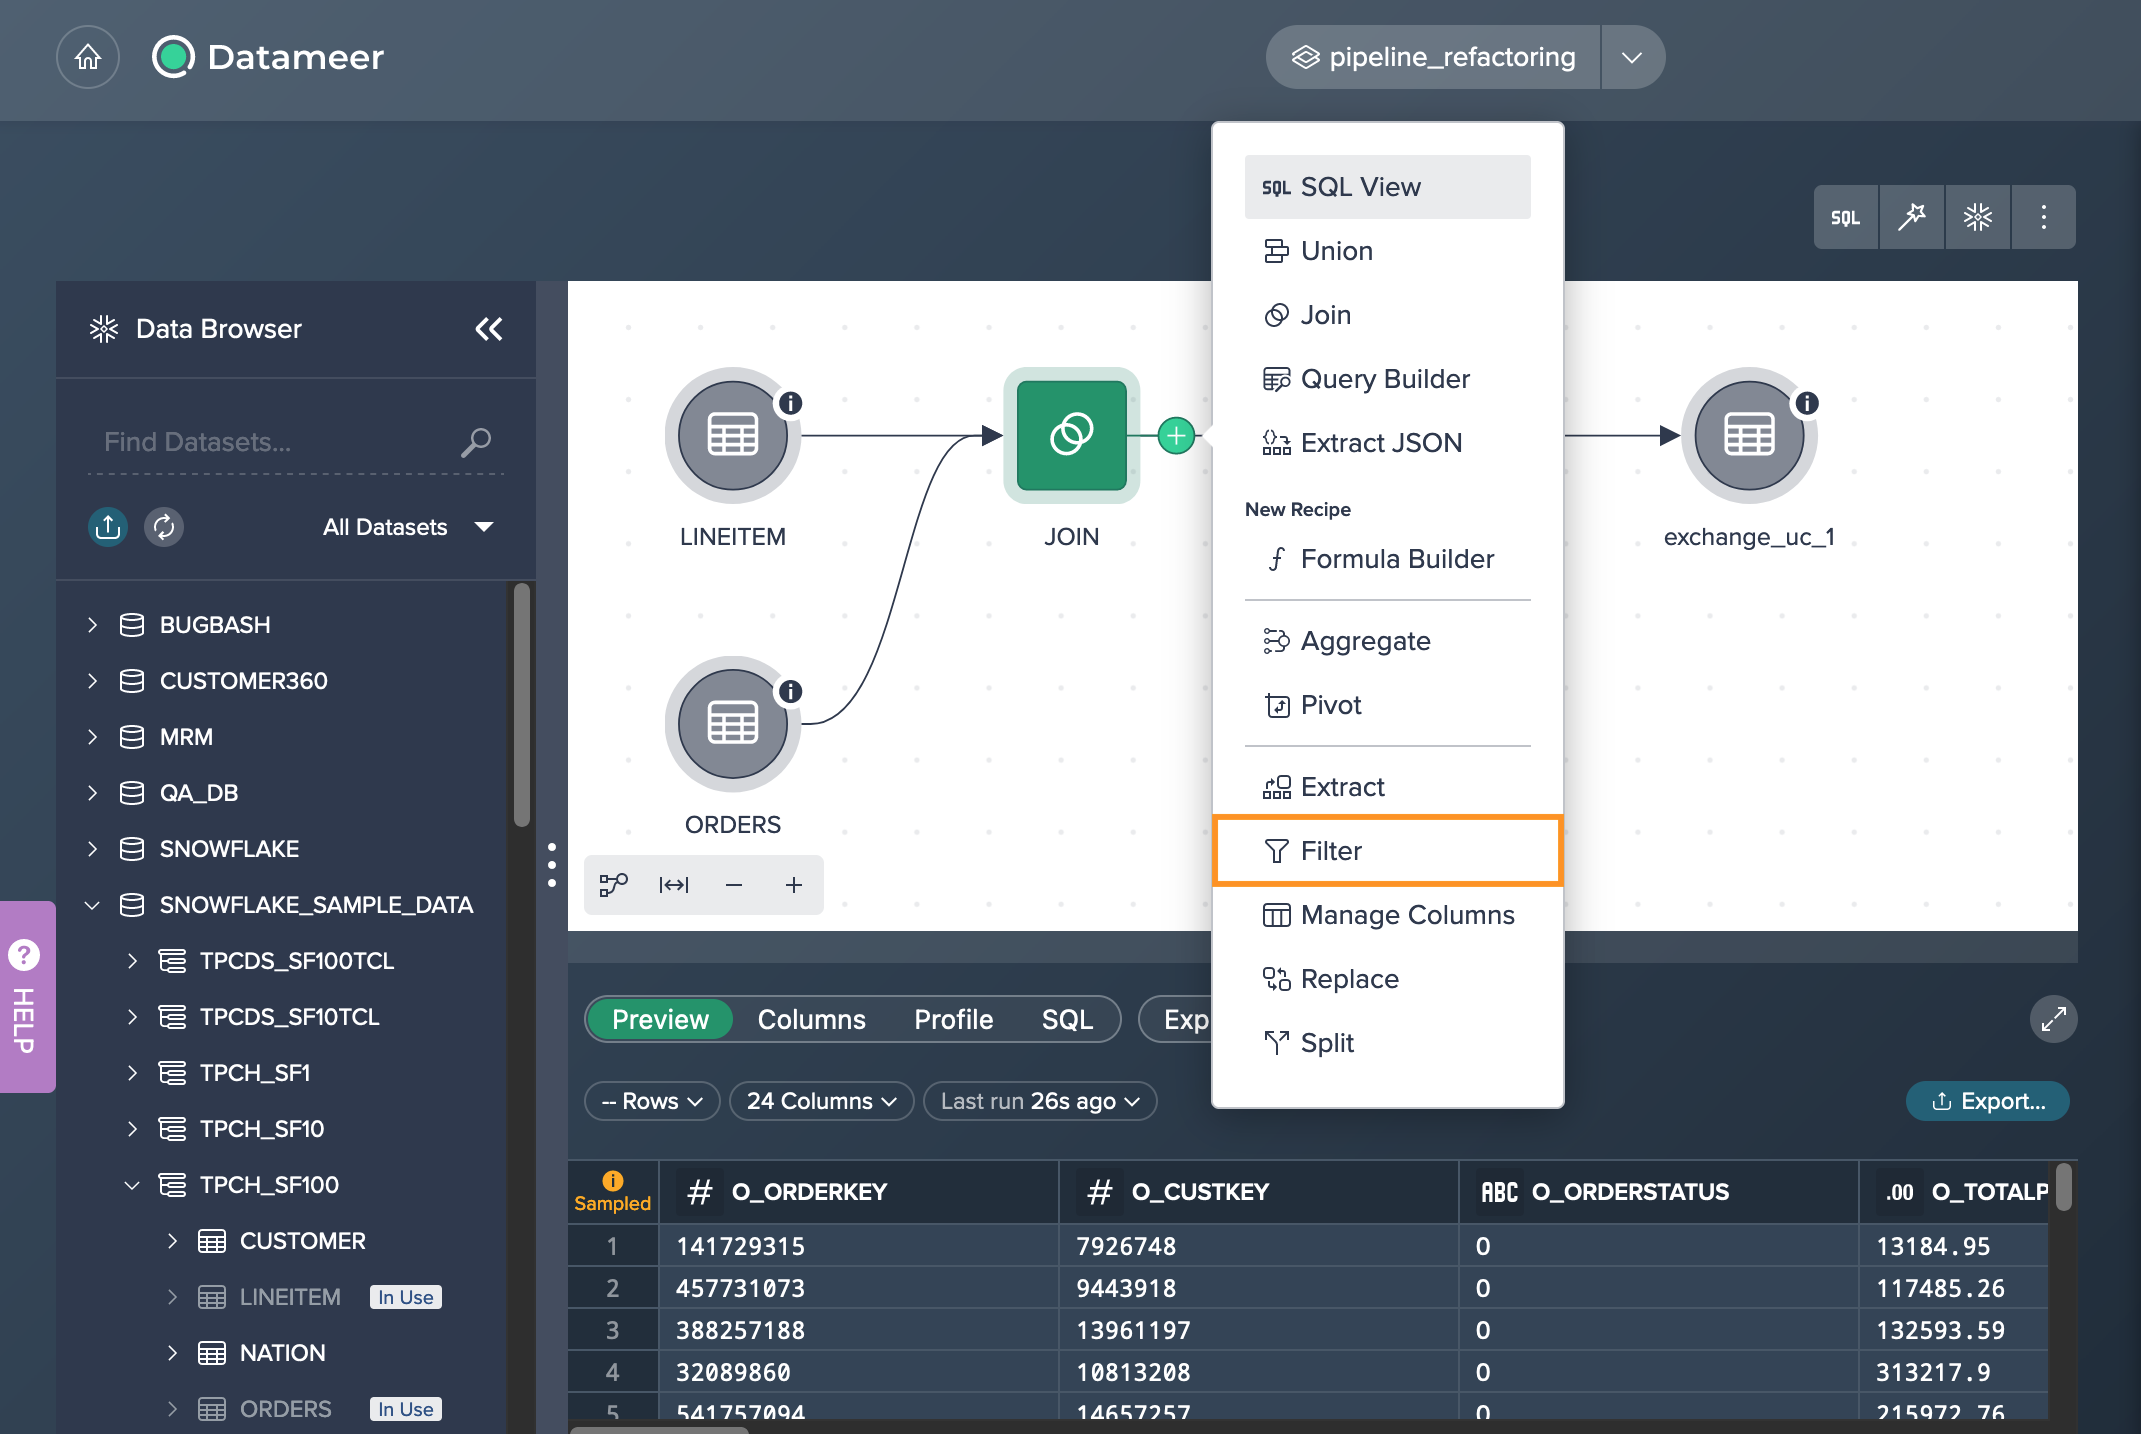
- transformation operation FILTER
- exchanging the data source
- re-deploying a data set to Snowflake
Scenario#
As an analyst, you have been assigned the responsibility of generating an overview for an online warehouse. This overview should include specific customer information along with delivery methods. To accomplish this, you are required to combine data from two existing datasets via the join transformation.
Let's say you have set up a new Project and imported two necessary data sets, namely 'ORDERS' and 'LINEITEM', from the Data Browser. After joining these source data sets, you applied an additional transformation using the 'MANAGE COLUMNS' operation to select only the required columns in the final data set. Subsequently, you deployed the data to Snowflake.
Now, your original task has been expanded, and you have been instructed to filter the data set for items with a value greater than $200,000. This requires you to modify your pipeline. However, instead of rebuilding the entire pipeline, you can simply add a transformation to the existing pipeline. The following section outlines the procedure for this.
Expanding the Pipeline by Exchanging the Source#
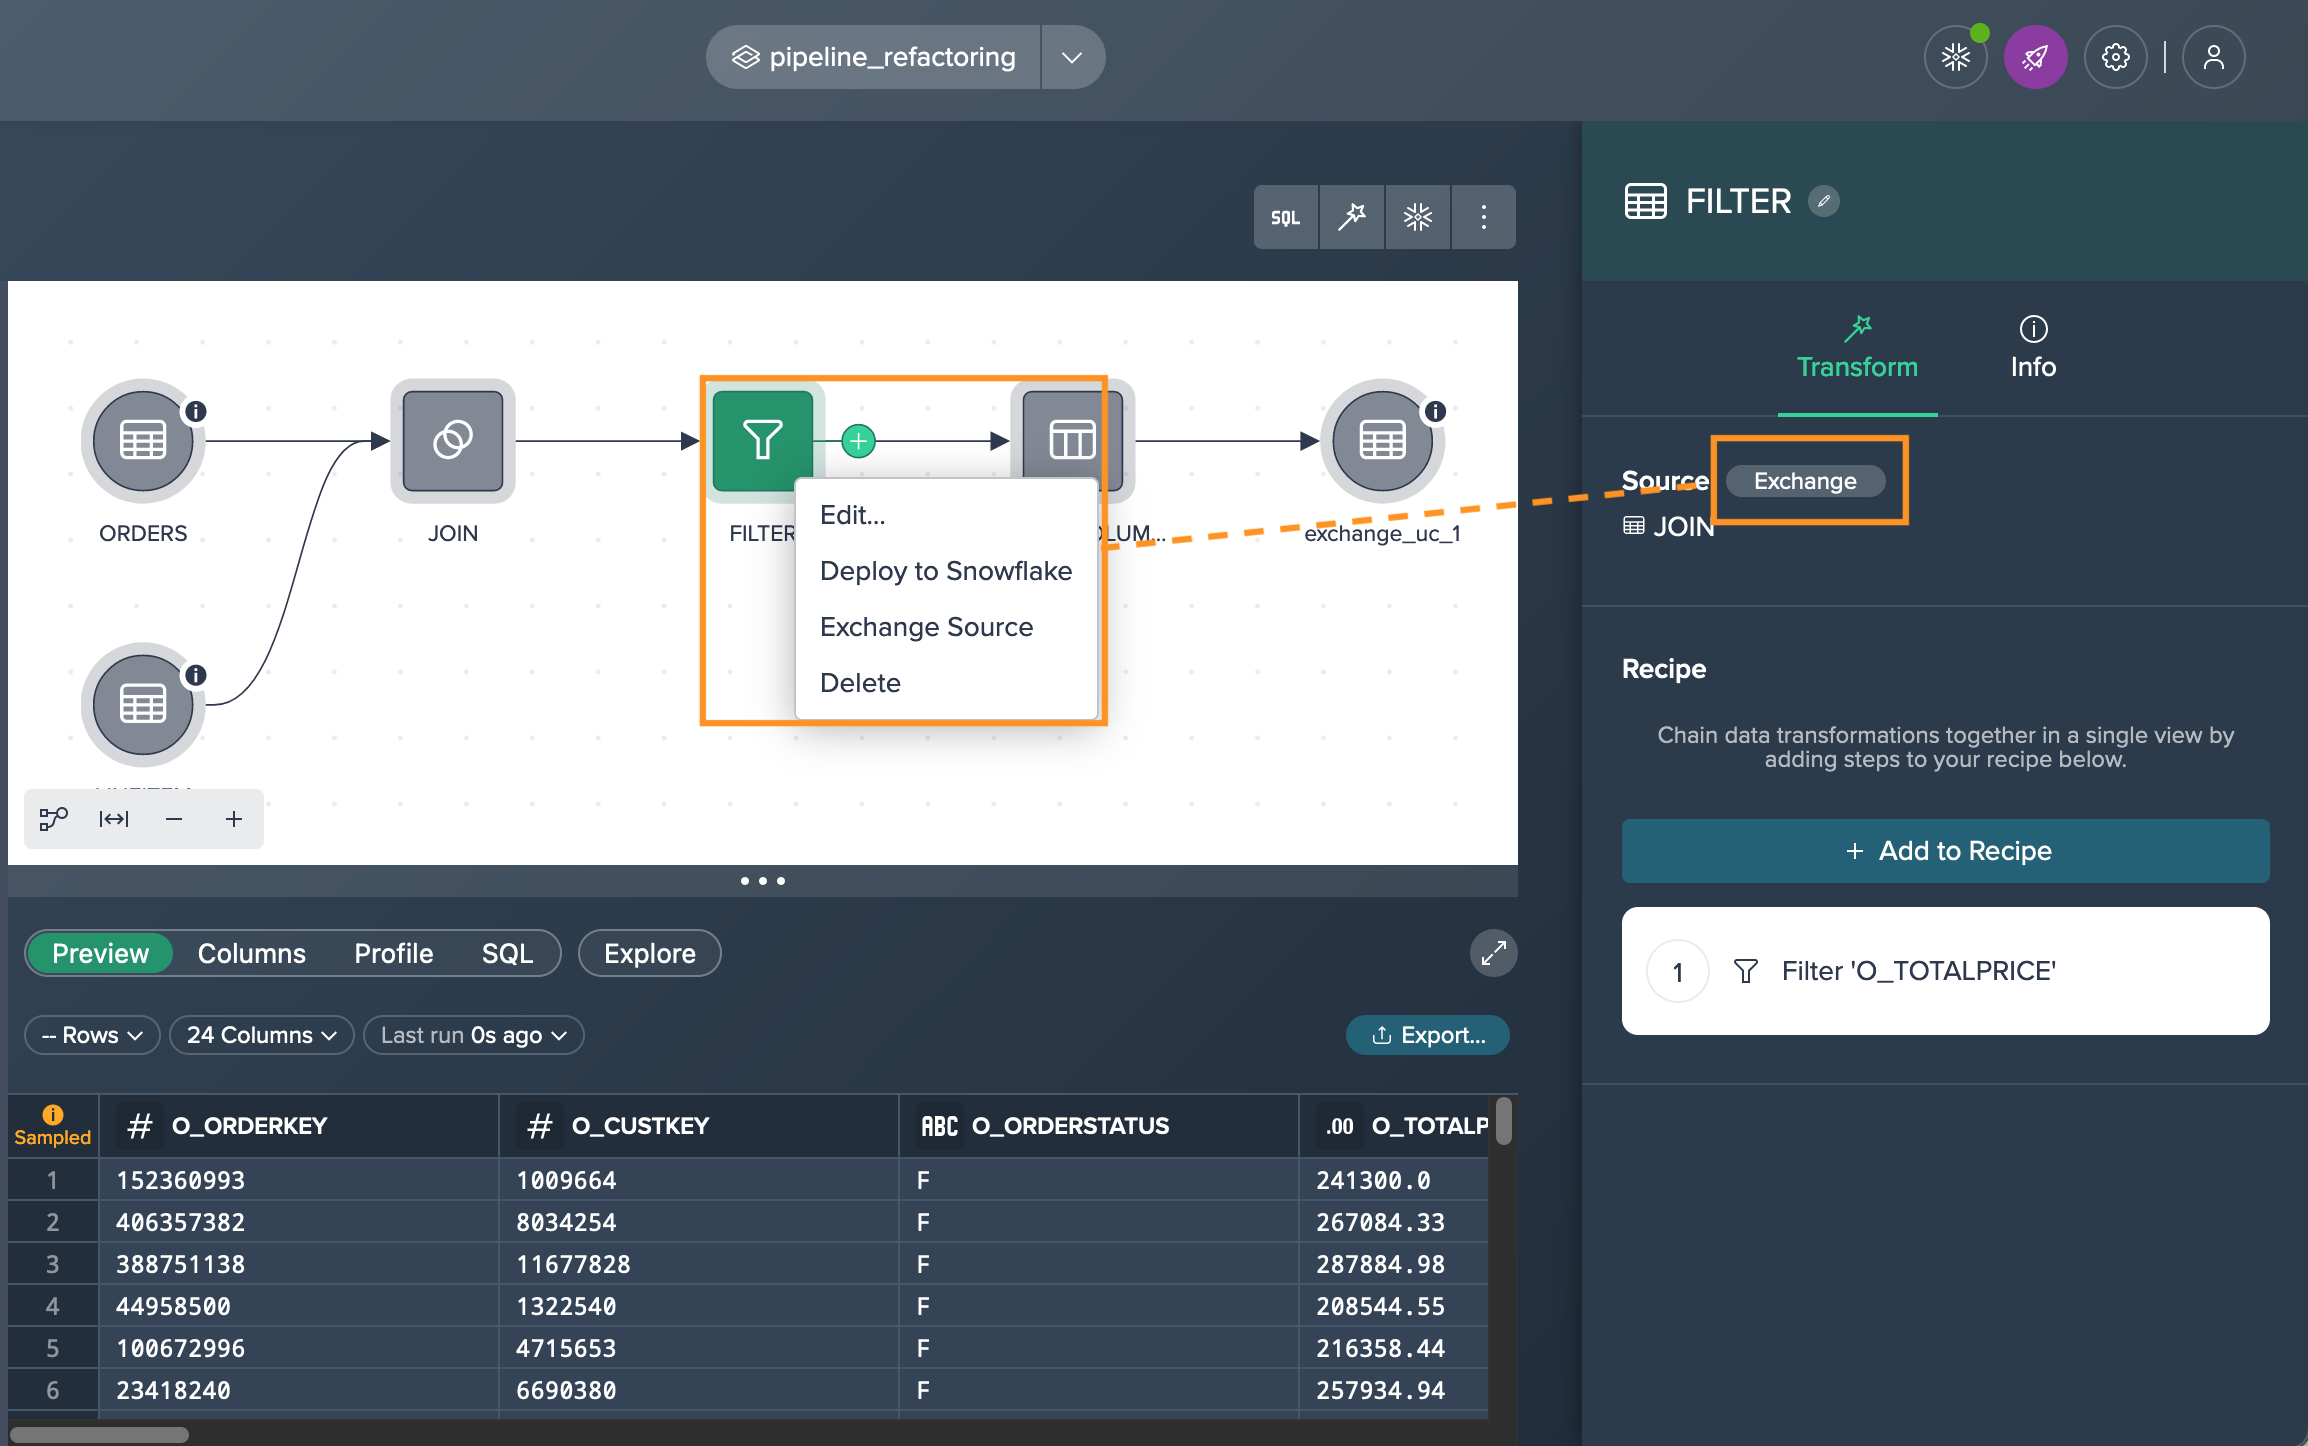
You select the 'JOIN' node and apply the 'Filter' operation to it. This creates a new 'FILTER' node that is connected to the JOIN node.
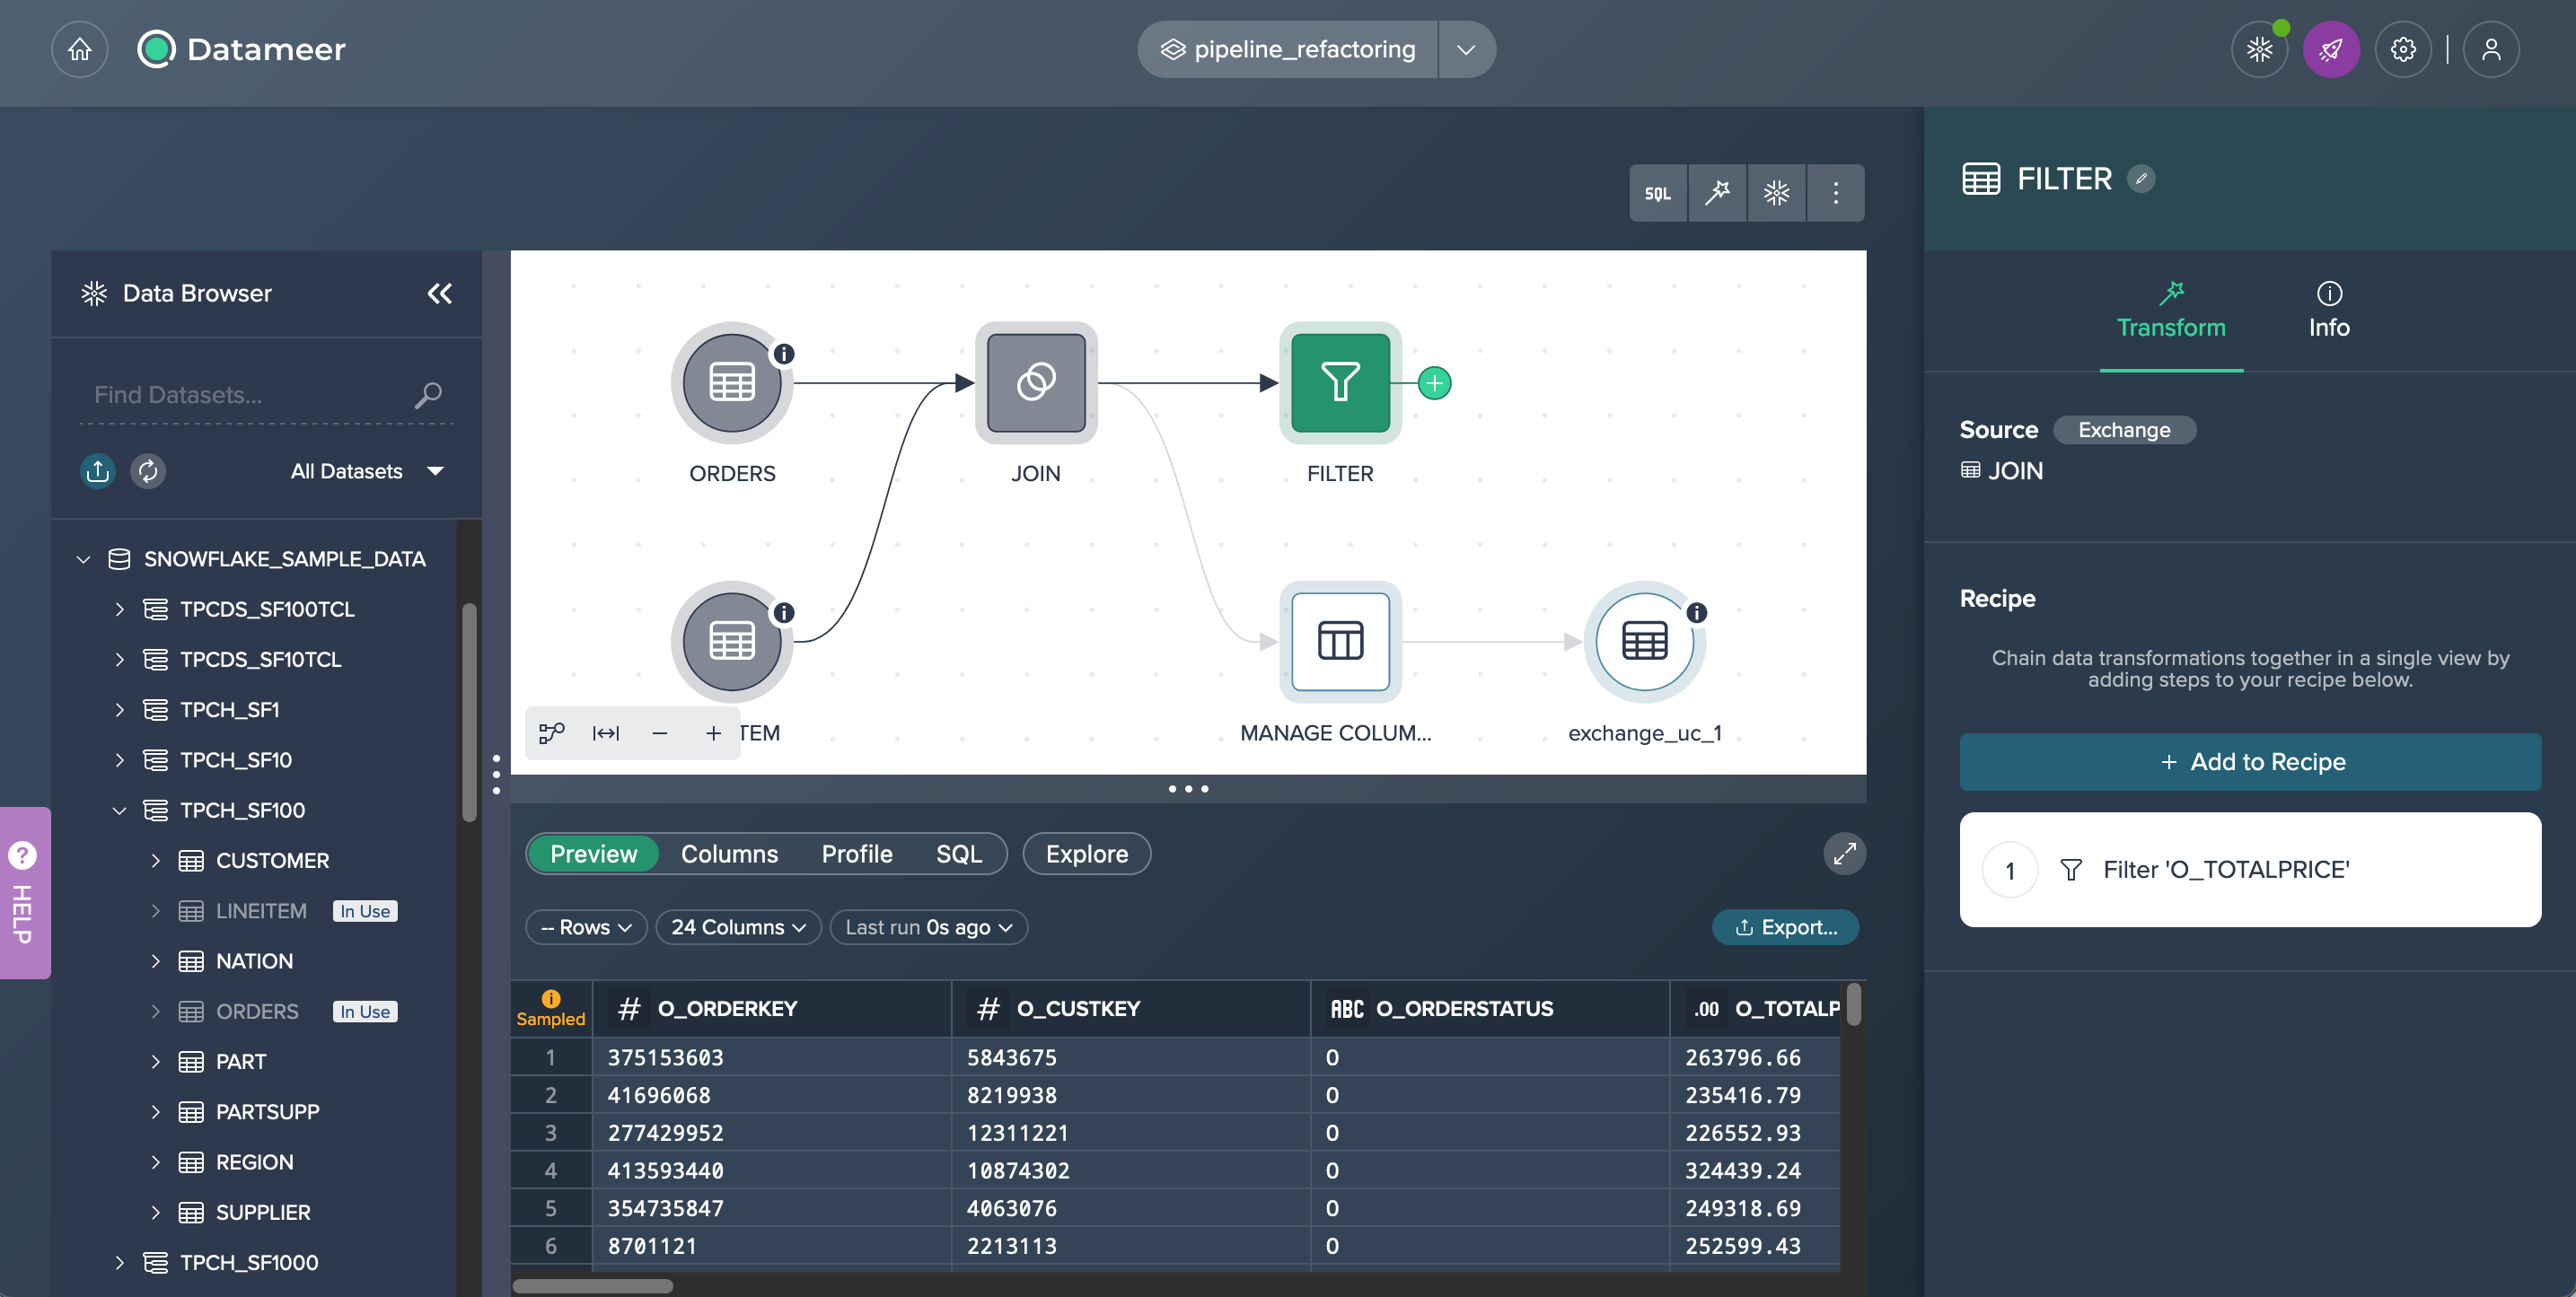
Next step is to bring the 'FILTER' node into the pipeline by clicking on it and selecting 'Exchange' in the 'Transform' tab of the Inspector. You choose 'FILTER' as the new source node and confirm the exchange.

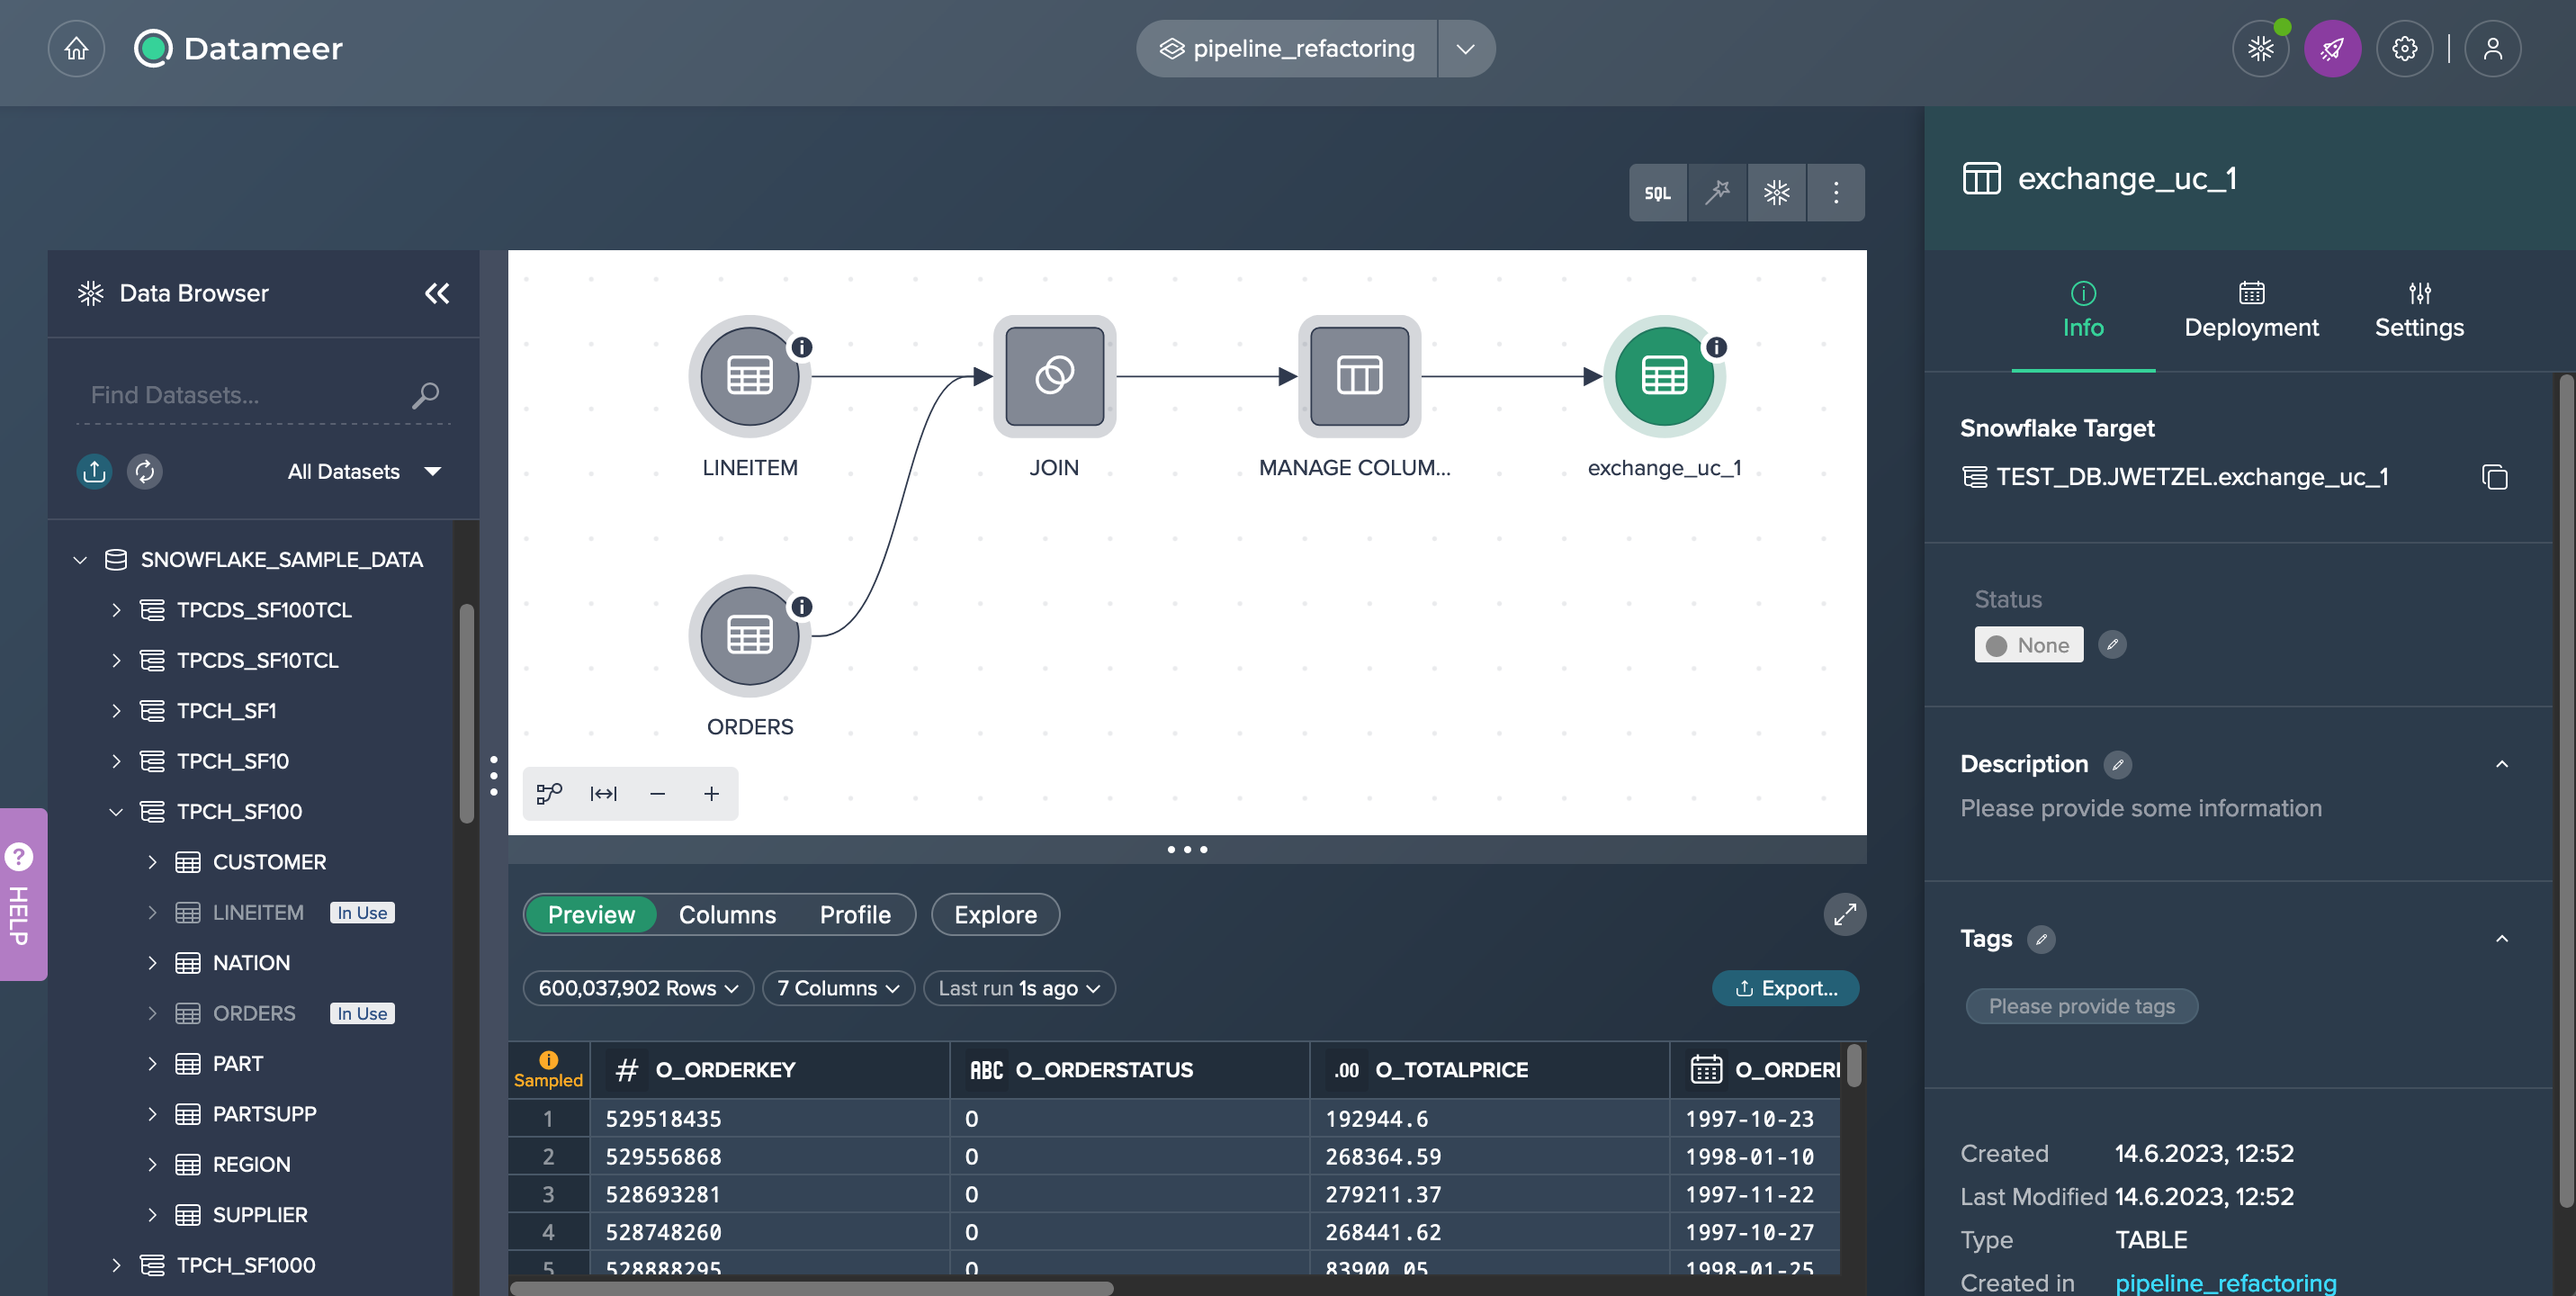
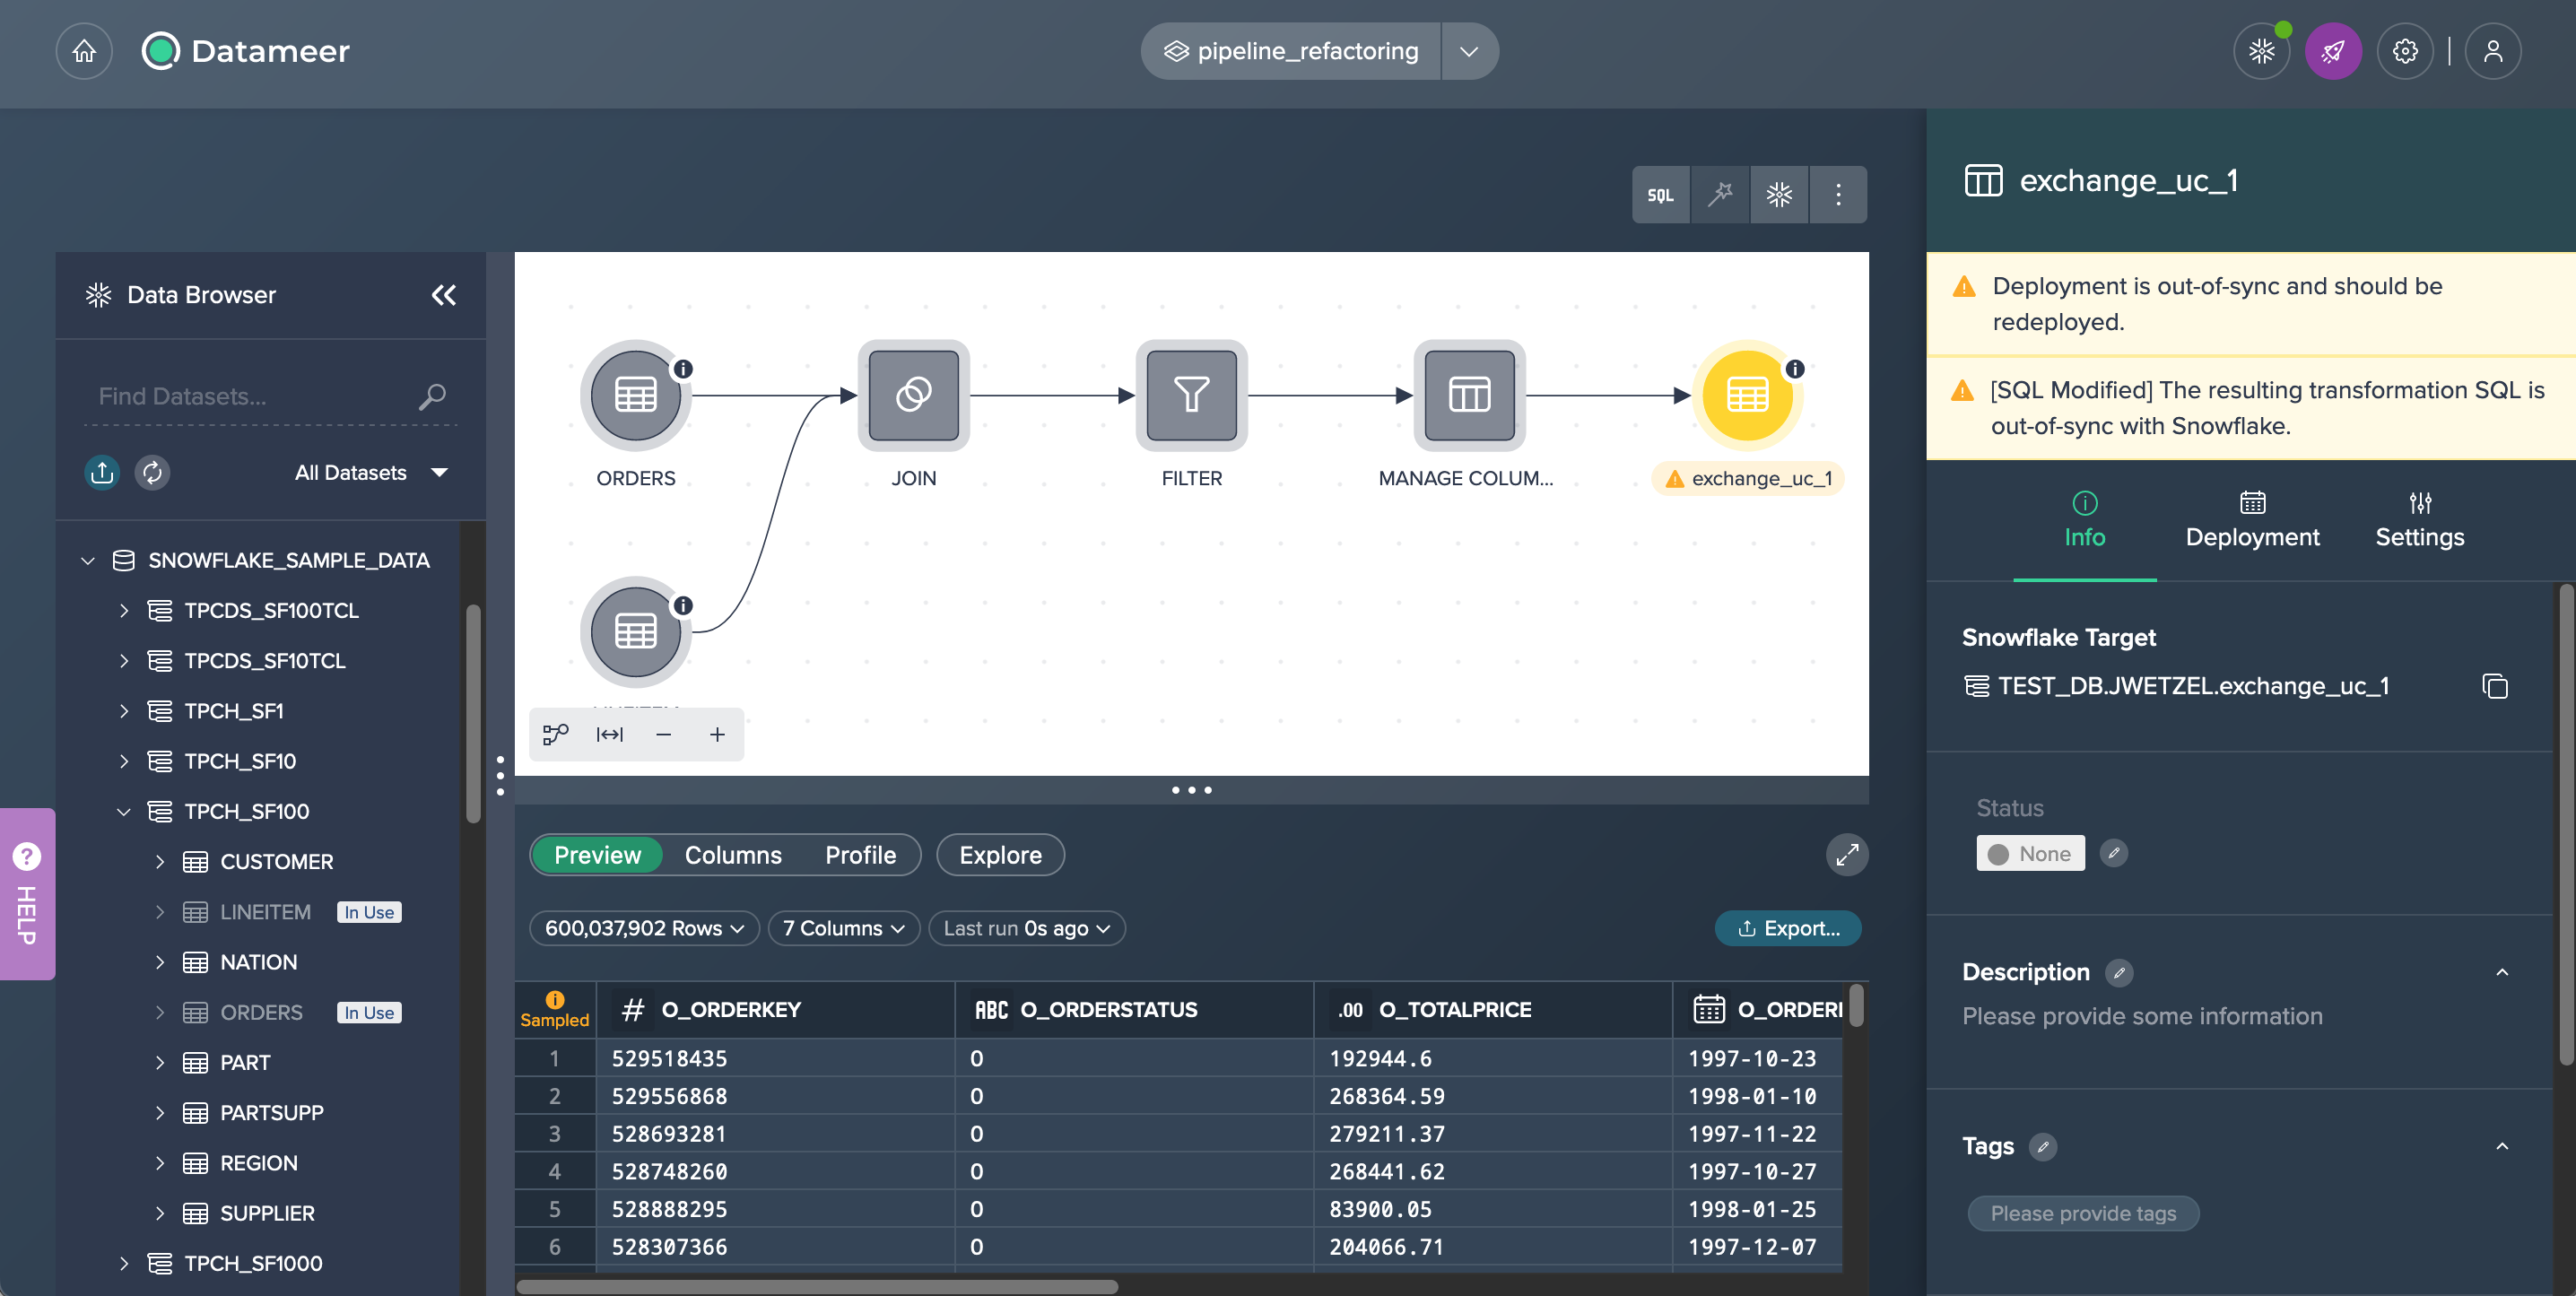
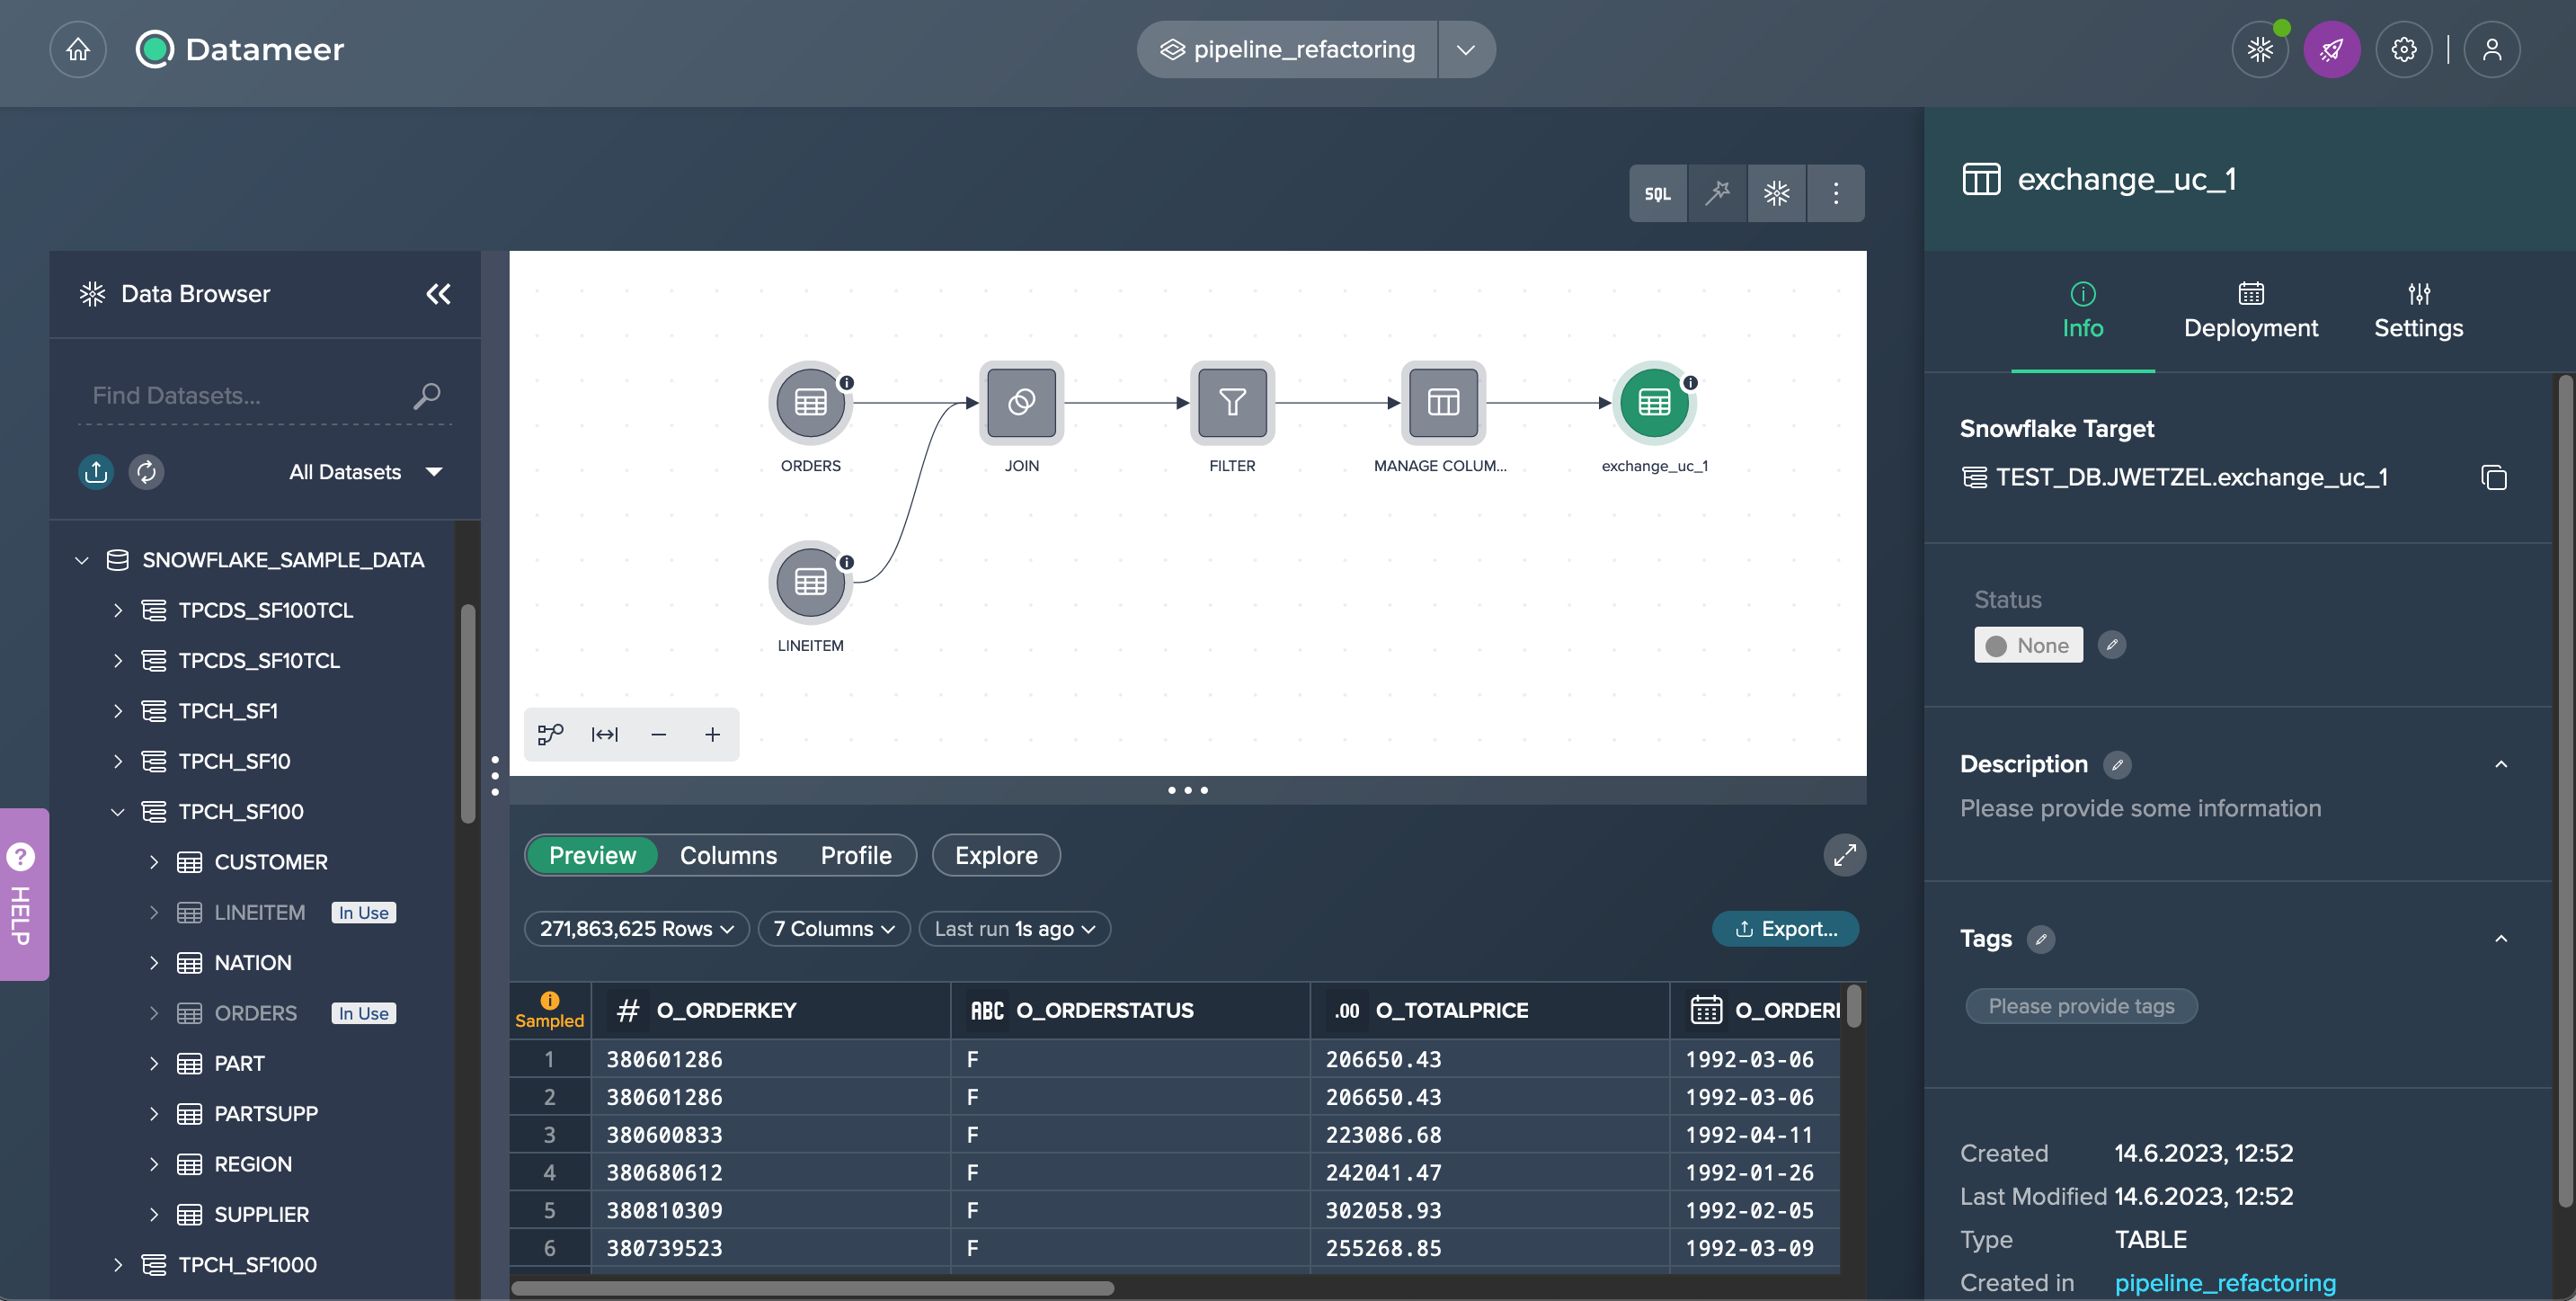
Now, observe the updated pipeline with the inclusion of the 'FILTER' node.
As a result of this modification, the deployment node 'exchange_uc_1' will turn yellow, indicating that the deployment is now out of sync. The corresponding error message will be displayed in the Inspector of that node.
Synchronizing the Deployment#
The final step is to synchronize the deployment with Snowflake. Click on the deployment node, select 'Re-deploy Snowflake', and provide the necessary deployment configuration.
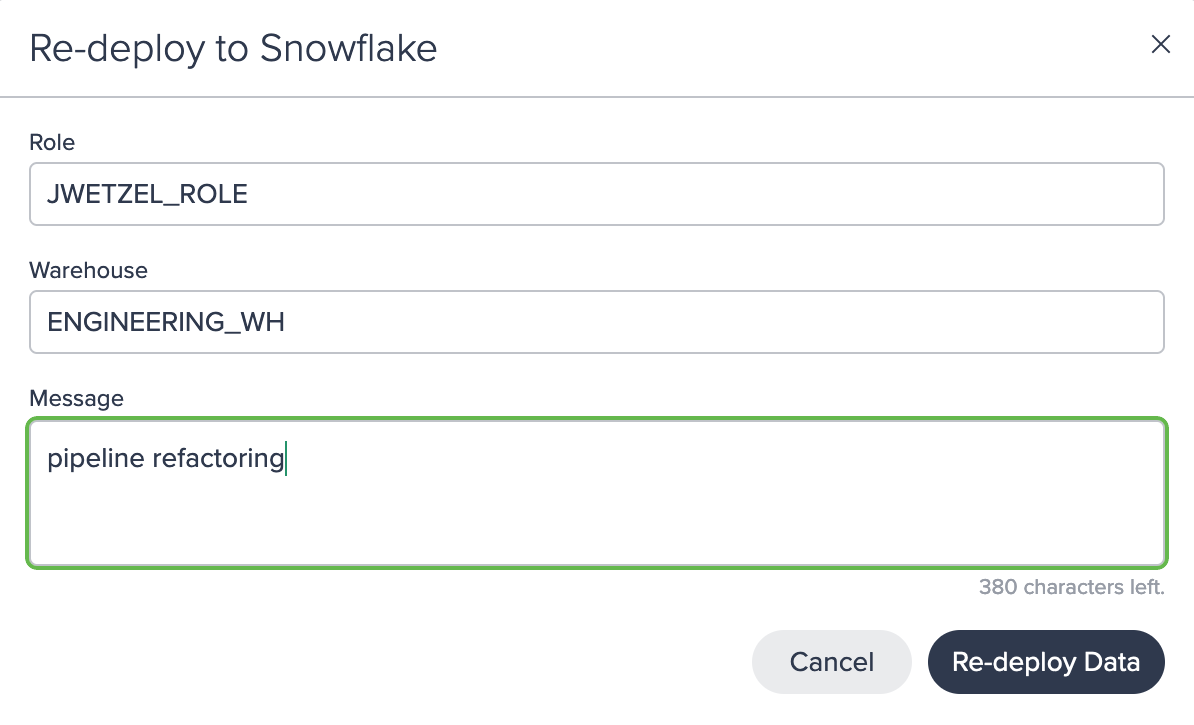
The re-deployment process will commence, and upon successful completion, you will notice the deployment node turning green again. This signifies that the pipeline has been successfully refactored and synchronized with Snowflake.
Exchange the source of a deployed node#
This scenario showcases the process of exchanging the source of an already deployed node by exchanging the pipeline that holds the source for the deployed node. By doing so you can easily deploy a node to a Snowflake table that was created during a former deployment.
The following Datameer feature is performed in this use case:
- deleting a deployment in Snowflake
- removing a node from a project
- deploying a data set to Snowflake
Scenario#
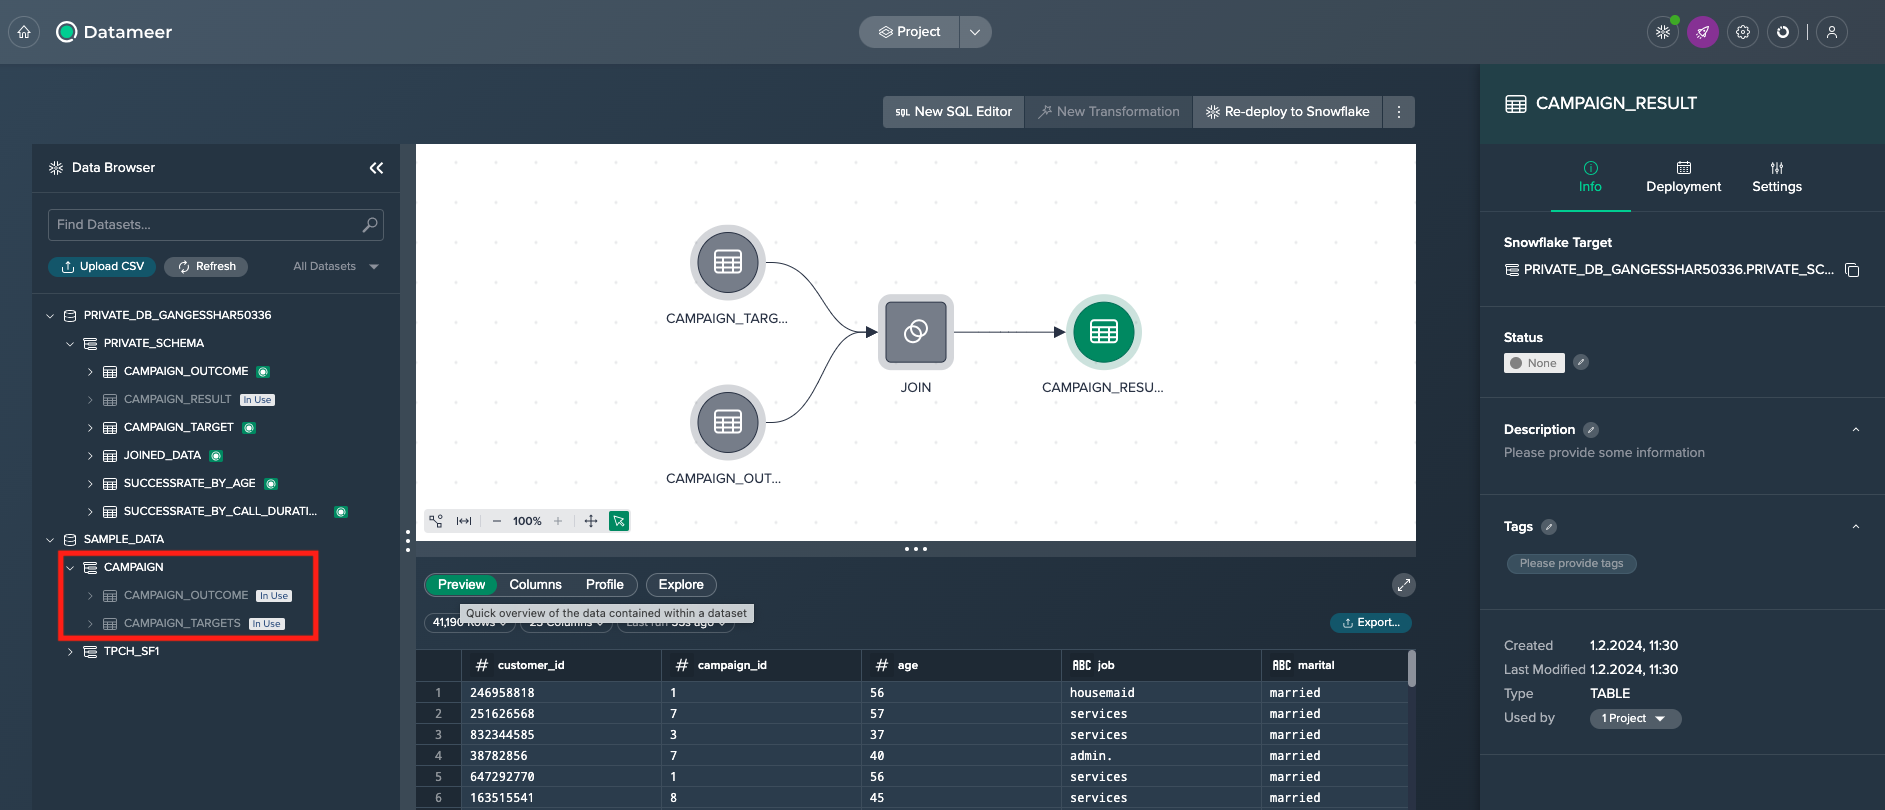
As an analyst, you have been assigned the responsibility of generating the results of certain campaigns. This overview includes the outcome itself and in addition the zip codes to plan further campaigns.
Let's say you have set up a new Project and imported two necessary data sets, namely 'CAMPAIGN_TARGETS' and 'CAMPAIGN_OUTCOME', from the Data Browser. After joining these source data sets, you deployed the data to Snowflake as a table named 'CAMPAIGN_RESULT'.
Now some new campaign results have been provided to you in another Snowflake schema and the result of your analysis should be the new source for the already existing table 'CAMPAIGN_RESULT' in Snowflake. The following section outlines the procedure for this.
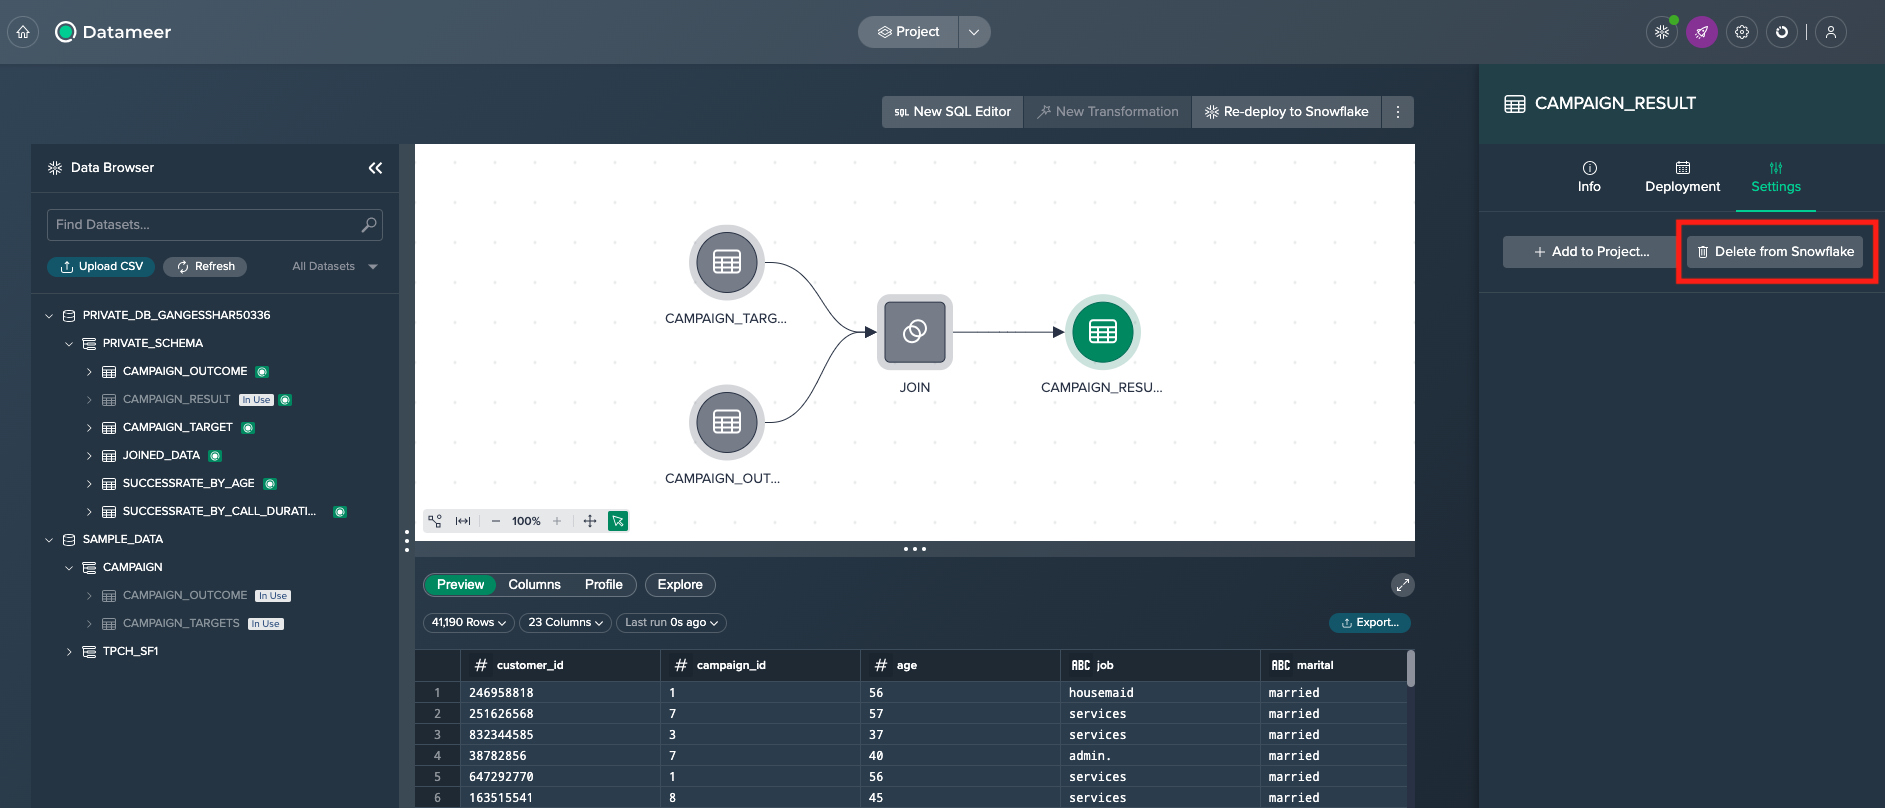
Remove the data from Snowflake#
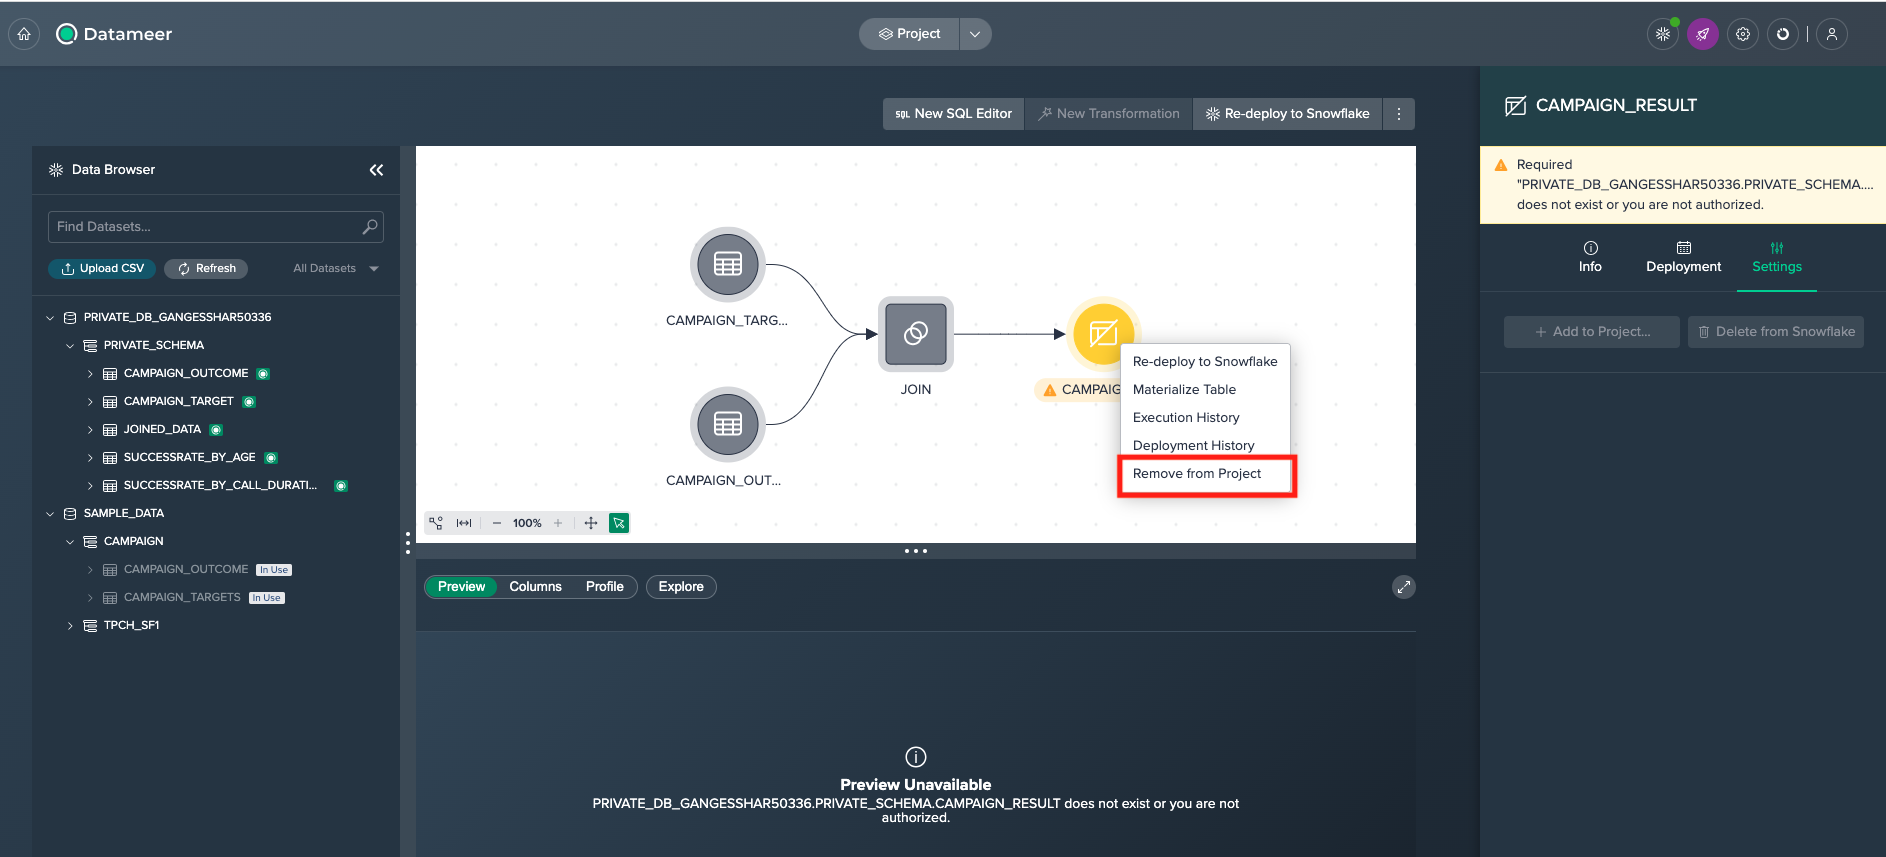
First step is to remove the deployment from Snowflake by clicking on the deployed node and selecting 'Delete from Snowflake' in the 'Settings' tab of the inspector.
Remove the node from the project#
Next step is to remove the node from the project by right clicking on it and selecting 'Remove from Project'.
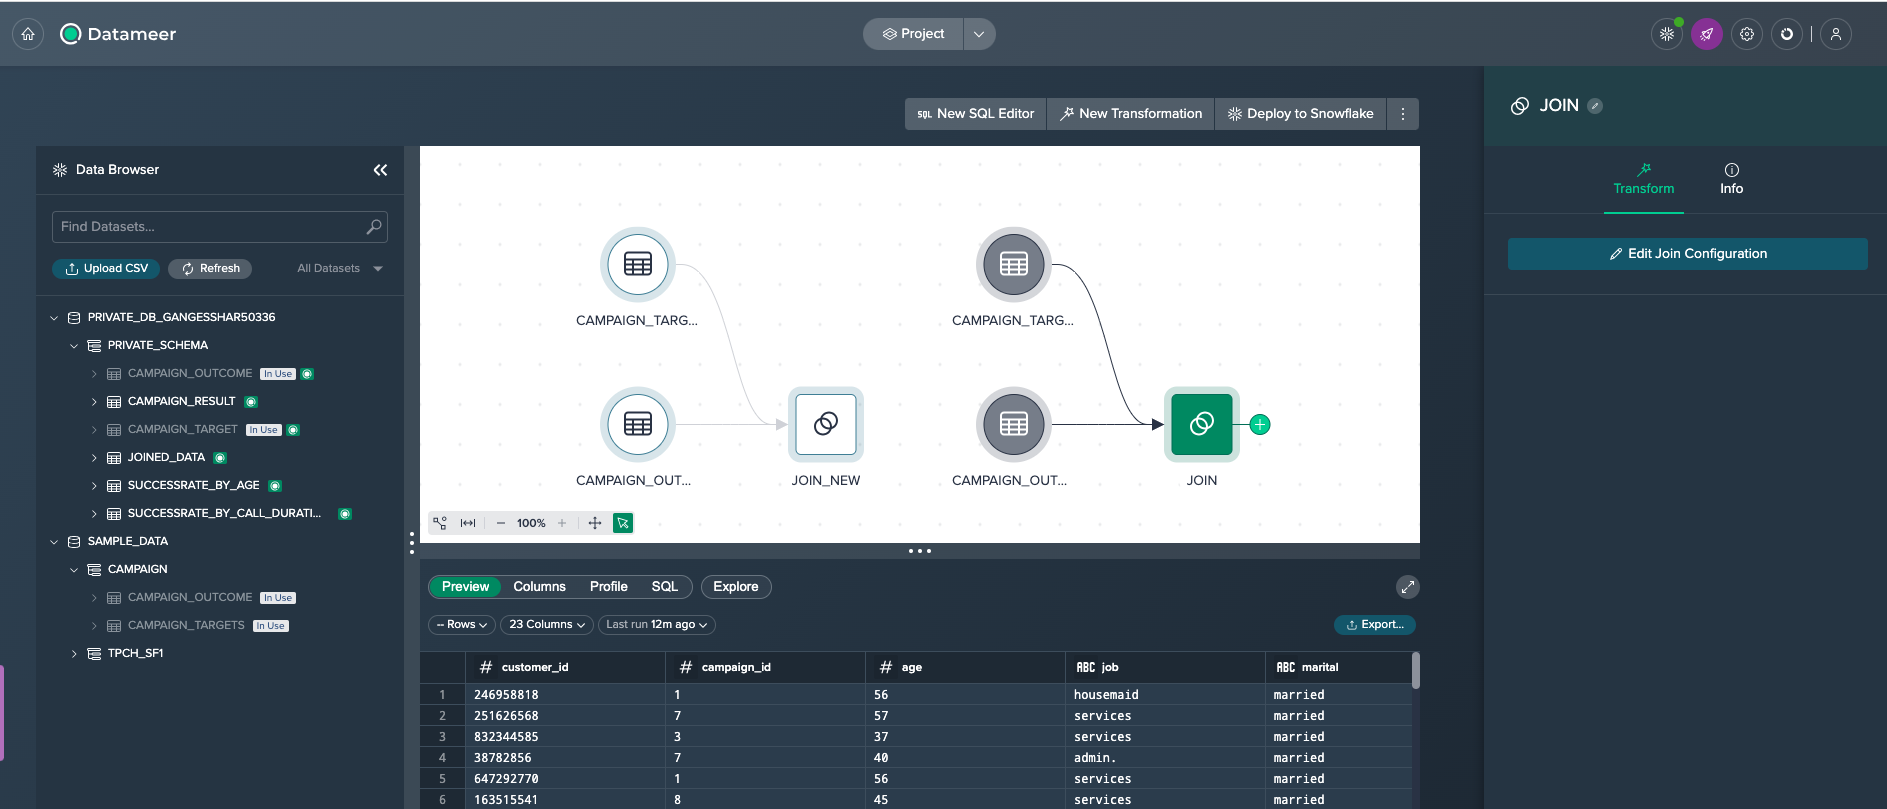
Build the new pipeline#
Now you can build the second pipeline based on the new data.
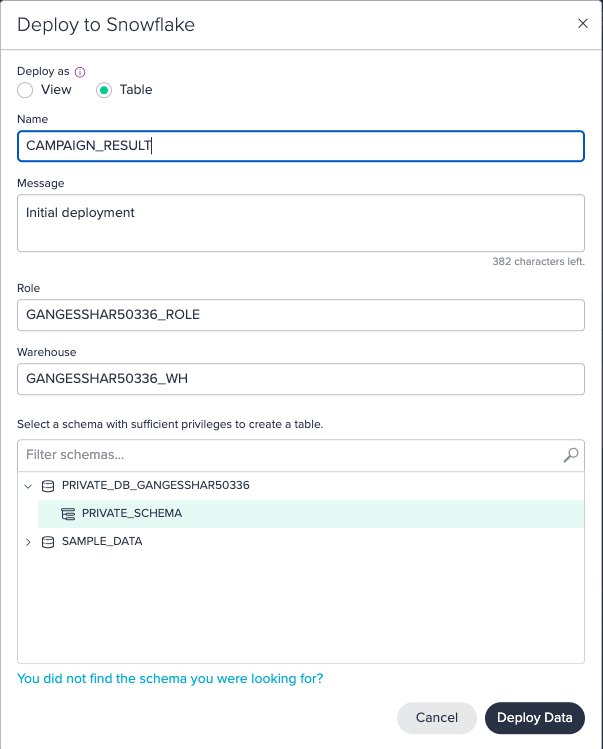
Deploy the new source to Snowflake#
Finally you deploy the second pipeline's transformation node to the Snowflake table 'CAMPAIGN_RESULT'.
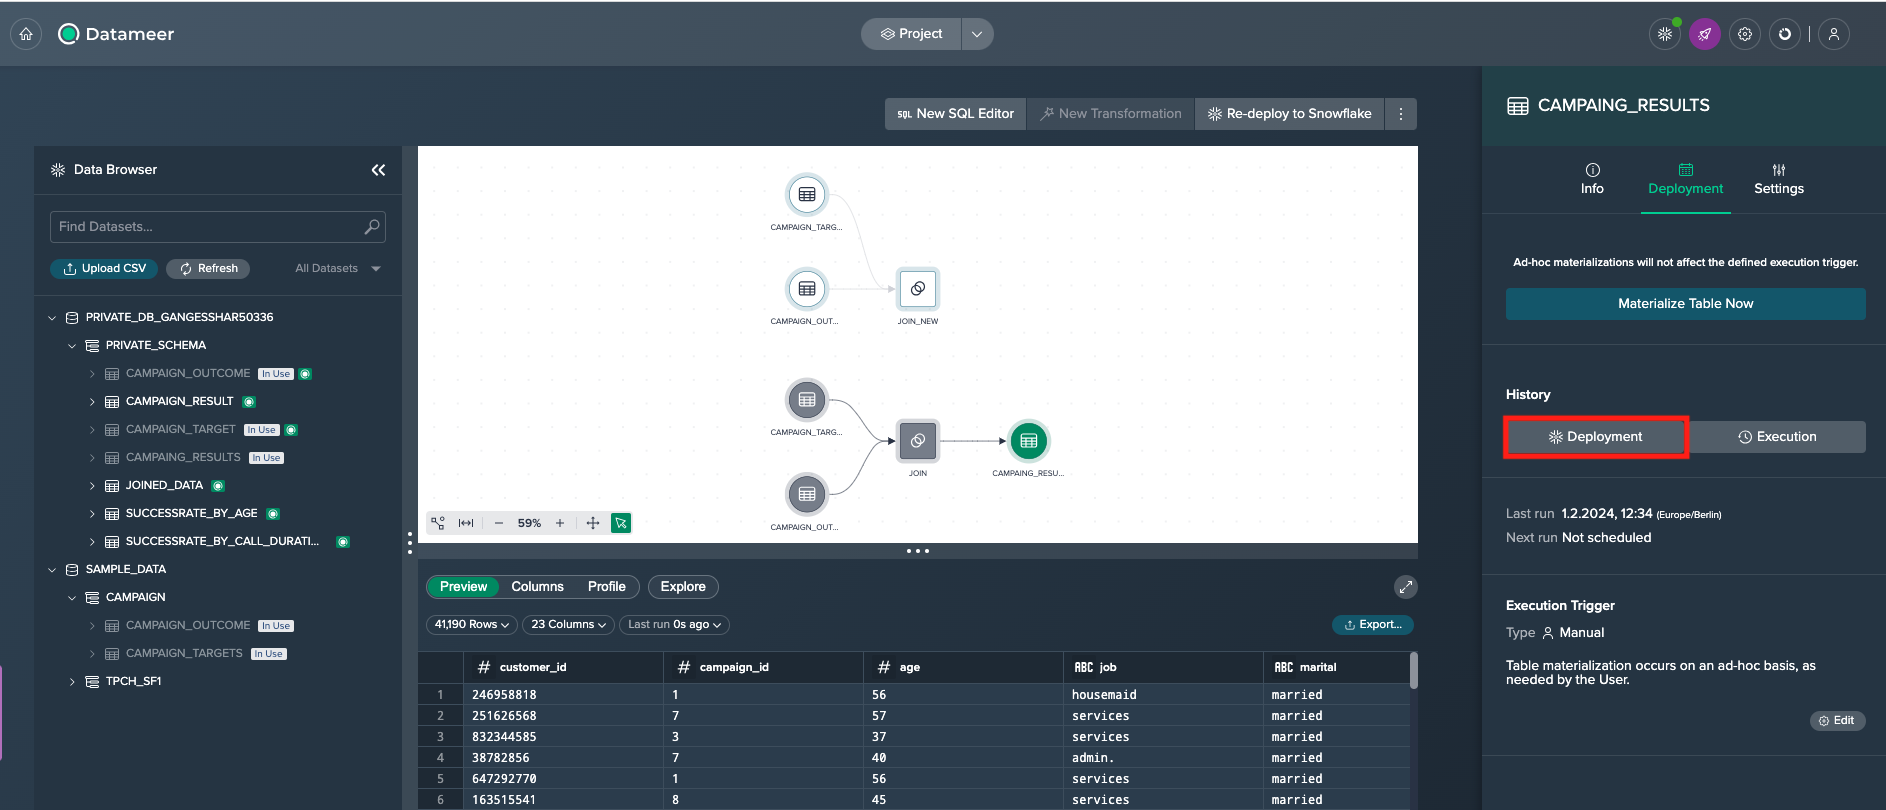
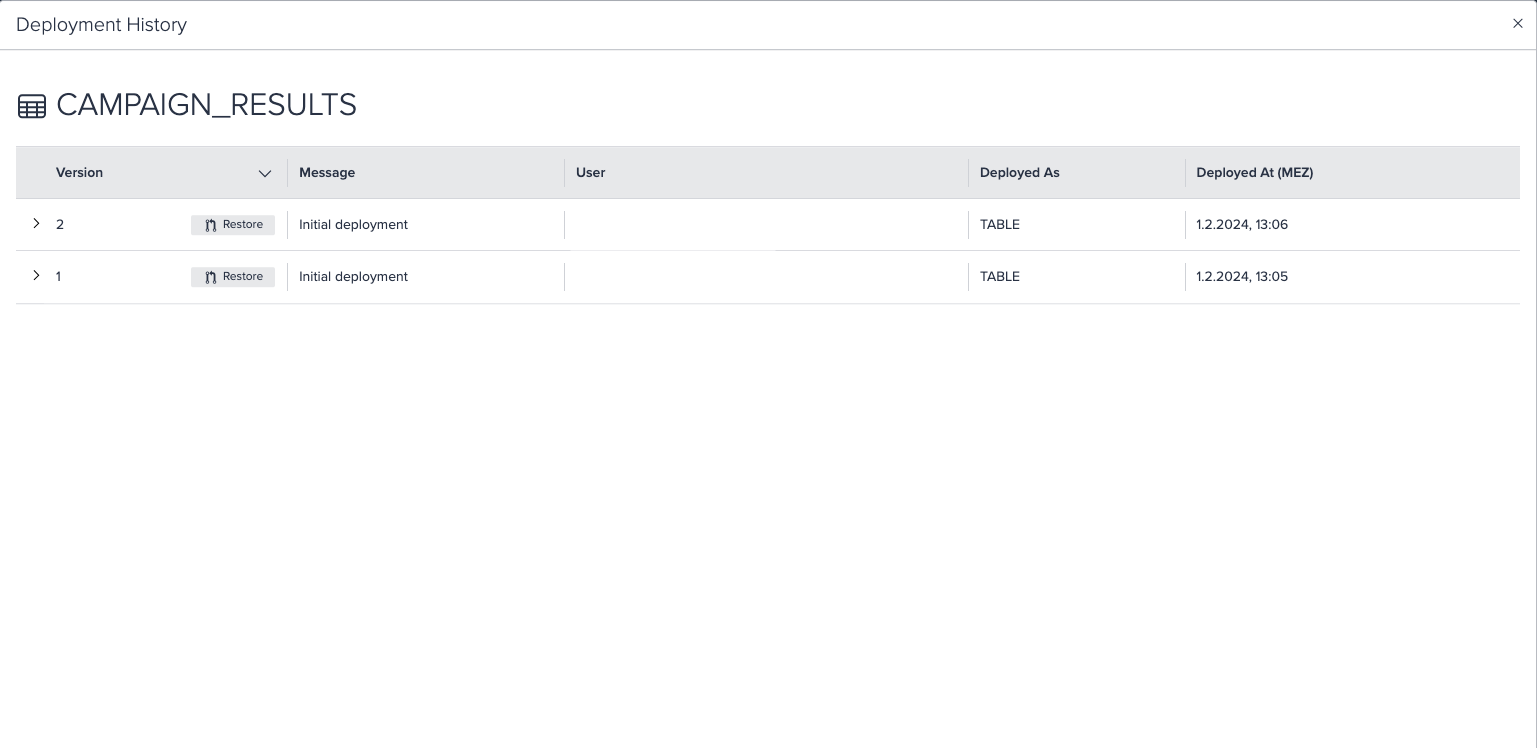
View the deployment history#
Open the deployment's history by clicking on the deployed node and selecting 'Deployment' in the 'Deployment' tab and view the latest entry.