How to Migrate from Development to Production Enviroment
Problem#
In many organizations, analytics development and change cycles are kept separate from production use cases to prevent any disruption. Typically, projects are initiated and developed in a sandbox or business-unit-owned environment. Once their value has been demonstrated, they are handed over to an IT team for operationalization.
The process of operationalization often involves the following steps:
- Using production datasets as data sources: The Project is configured to work with actual production data, ensuring the accuracy and relevance of the analytics results.
- Deployment in a dedicated production environment: The Project is moved to a separate environment specifically designated for production use, ensuring stability and reliability.
- Runtime performance optimizations: Measures are taken to optimize the performance of the analytics processes, ensuring efficient execution and minimal processing time.
- Implementation of SLAs (Service Level Agreements) and scheduling/orchestration: Service level agreements are established to define performance expectations, and scheduling/orchestration mechanisms are put in place to ensure timely execution of the analytics processes.
- Ownership change and access lockdown: Ownership of the project is transferred to the appropriate team, and access controls are tightened to restrict unauthorized modifications.
- Application of governance policies: Various governance policies are applied to the project, including metadata enrichment, documentation, version control, auditing, backup strategies, and monitoring. These measures ensure data governance, compliance, and accountability.
Datameer provides a range of features to support these operationalization activities. In this 'How To' guide, we will delve into these features and explain how they facilitate the smooth transition of projects from development to production, while ensuring data integrity, performance, and adherence to governance standards.
How to Migrate from Development to Production#
Cloning the Development Project#
To ensure a clear separation between the before and after stages of your Project and have the ability to revert back if needed, it is recommended to start with a backup of the Project.
Follow these steps to create a backup:
-
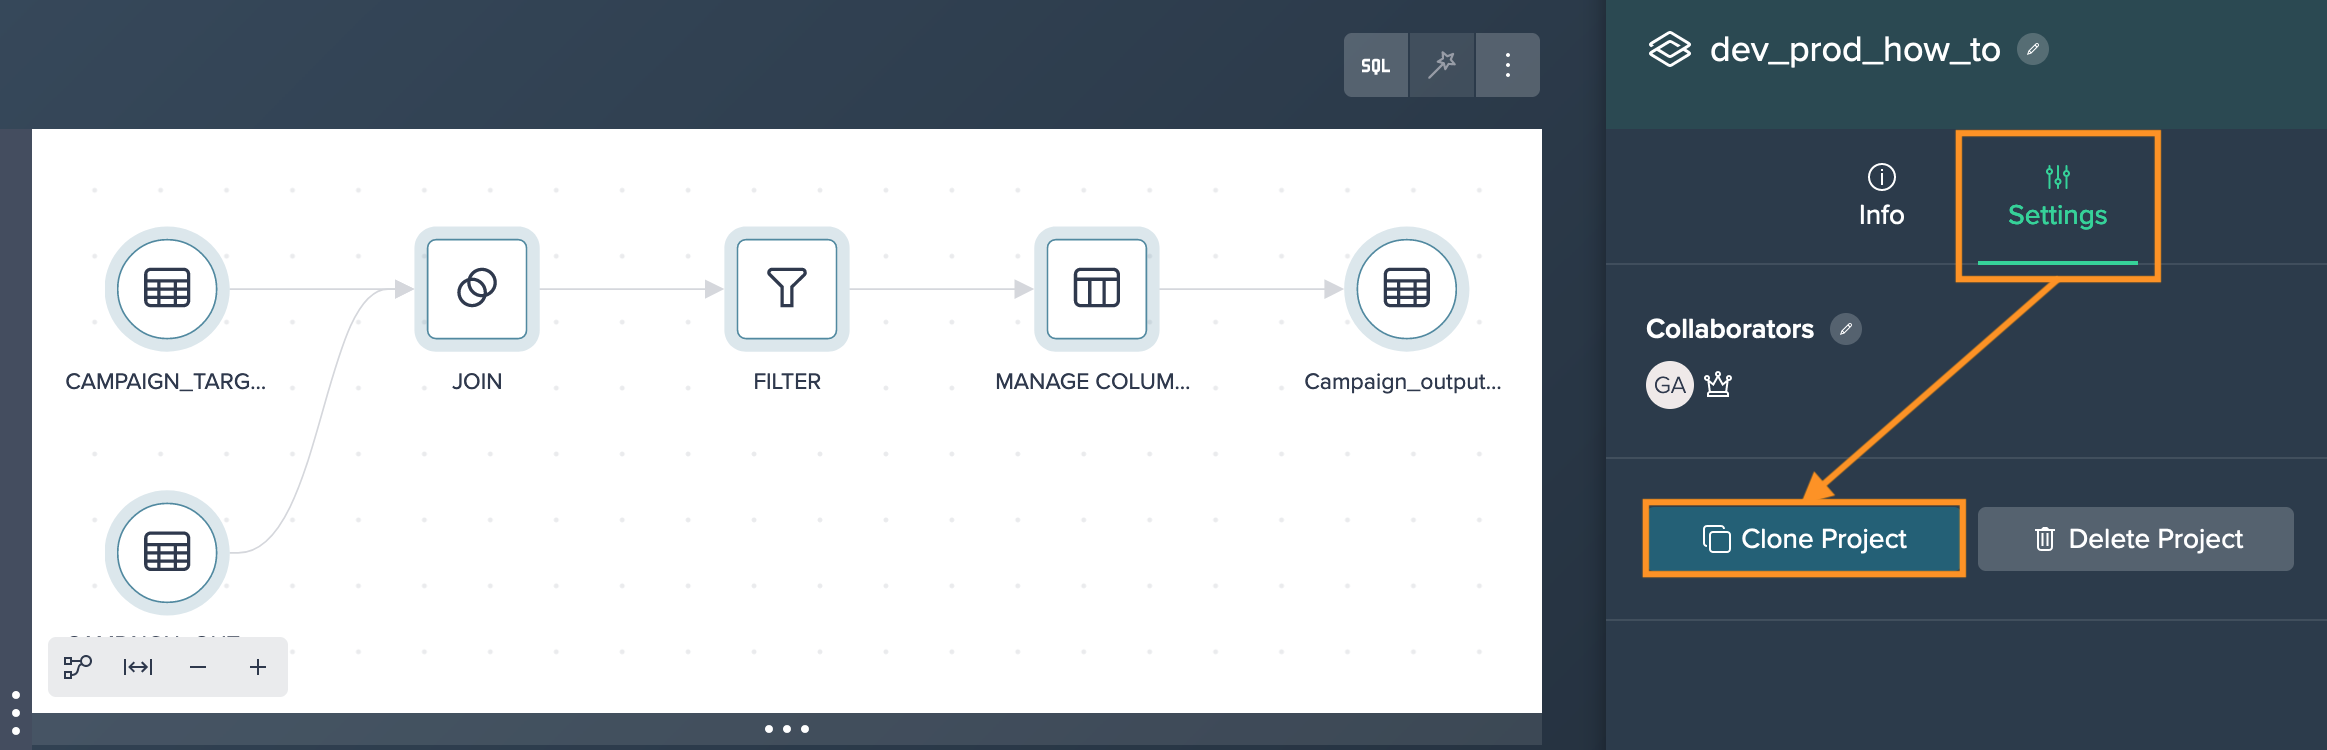
Select the Project by either clicking on its title at the top or by clicking into an empty area in the Flow Area and navigate to the "Settings" tab in the Inspector. Click on "Clone Project".
-
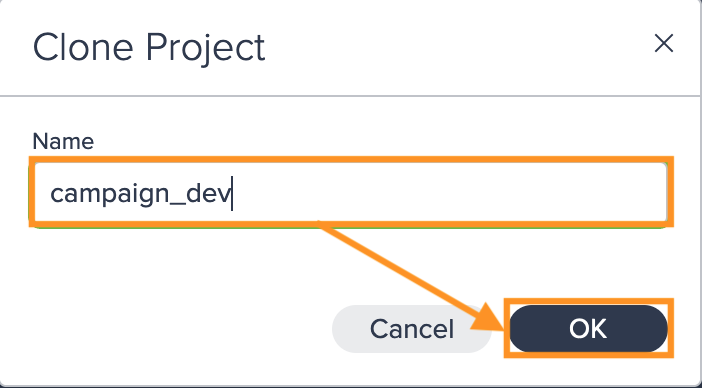
Provide a new name for the backup Project and confirm with "Apply" to initiate the cloning process. Datameer will automatically redirect you to the newly created clone of the Project.
It's important to note that the clone undergoes certain changes:
- deployments are removed from the clone to avoid conflicts with the original project, preventing one from overwriting the other
- Deployment and Execution Histories are pruned, clearing any past deployment and execution records
- the ownership of the Project clone is transferred to the current user, and collaborators are removed
- Project metadata such as descriptions, tags, and custom properties are not cloned from the original project
- Explorations that are attached to sources and transformation nodes, if any, are not cloned
Having a backup copy of your Project ensures that you have a safe point to return to if any issues or undesired changes occur during the subsequent stages of development or deployment.
Reviewing the Project#
Once the Project is created, the next important step is to have someone review it. The reviewer's role is to identify any bugs, suggest simplifications, and optimize the performance of the Project. They may also reorganize the pipeline by using node groups and add documentation to individual transformations or groups of transformations.
For more detailed information on specific topics, you can refer to the relevant chapters in this documentation. If changes to the transformation logic are required, the guides on "How To Refactor an existing pipeline" and "How To Validate Results" provide useful insights and instructions. These resources will assist in effectively modifying and improving the Project based on the reviewer's feedback.
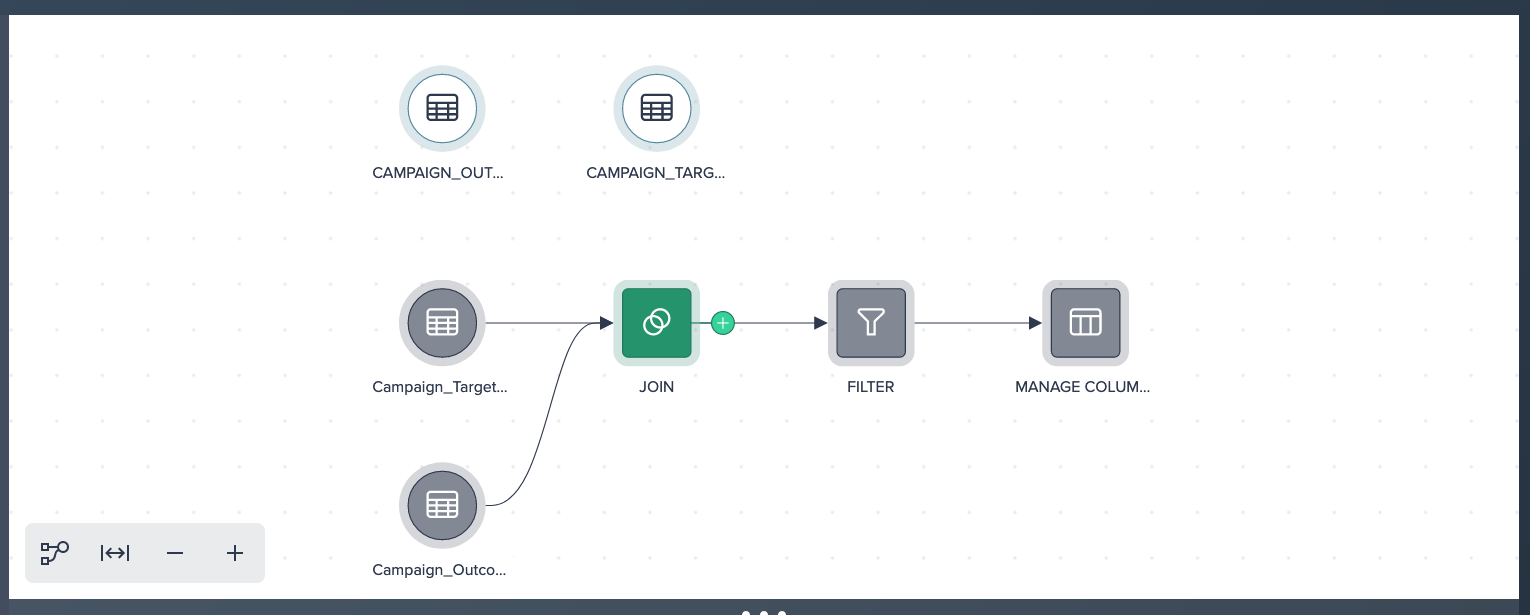
Swapping Data Sources Against Production Data Sets#
By following these steps, you can easily update the data sources in your production pipeline, ensuring that it runs with the desired production datasets:
-
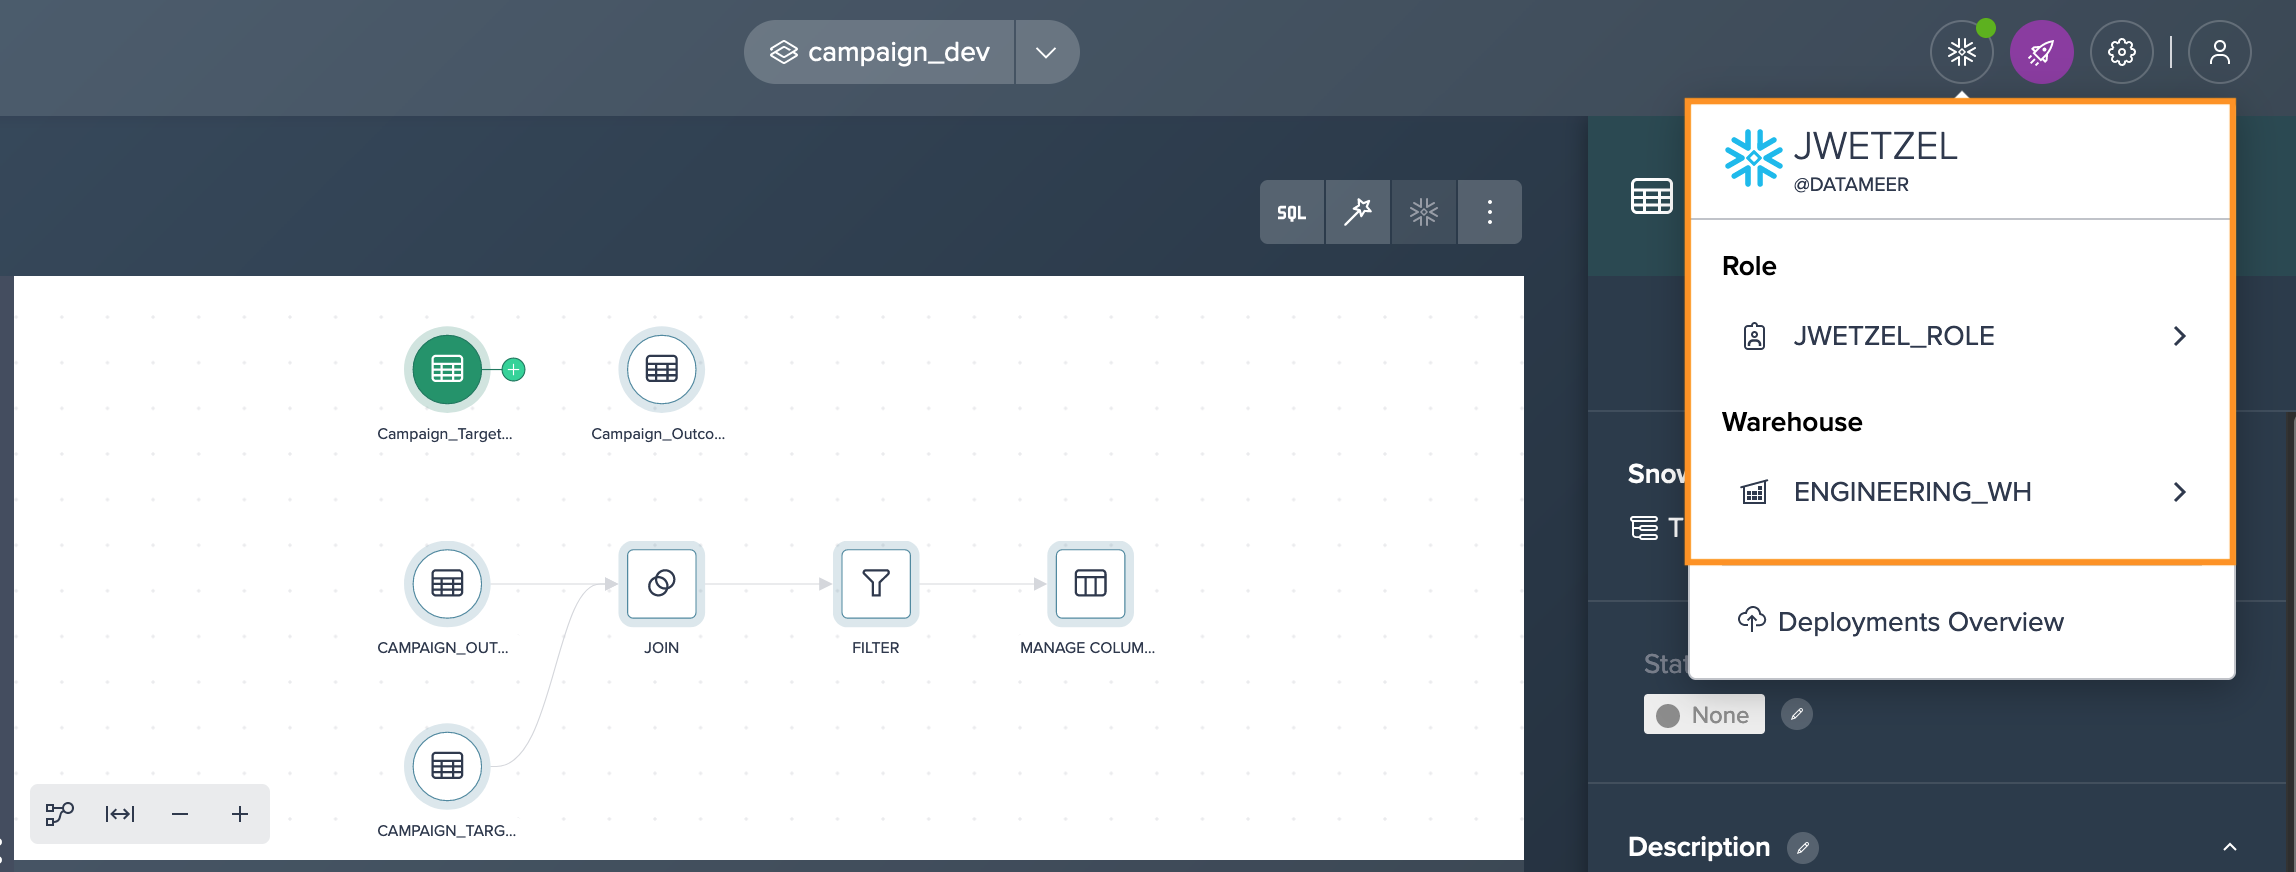
Authenticate against Snowflake using a role that has access to the production datasets.
-
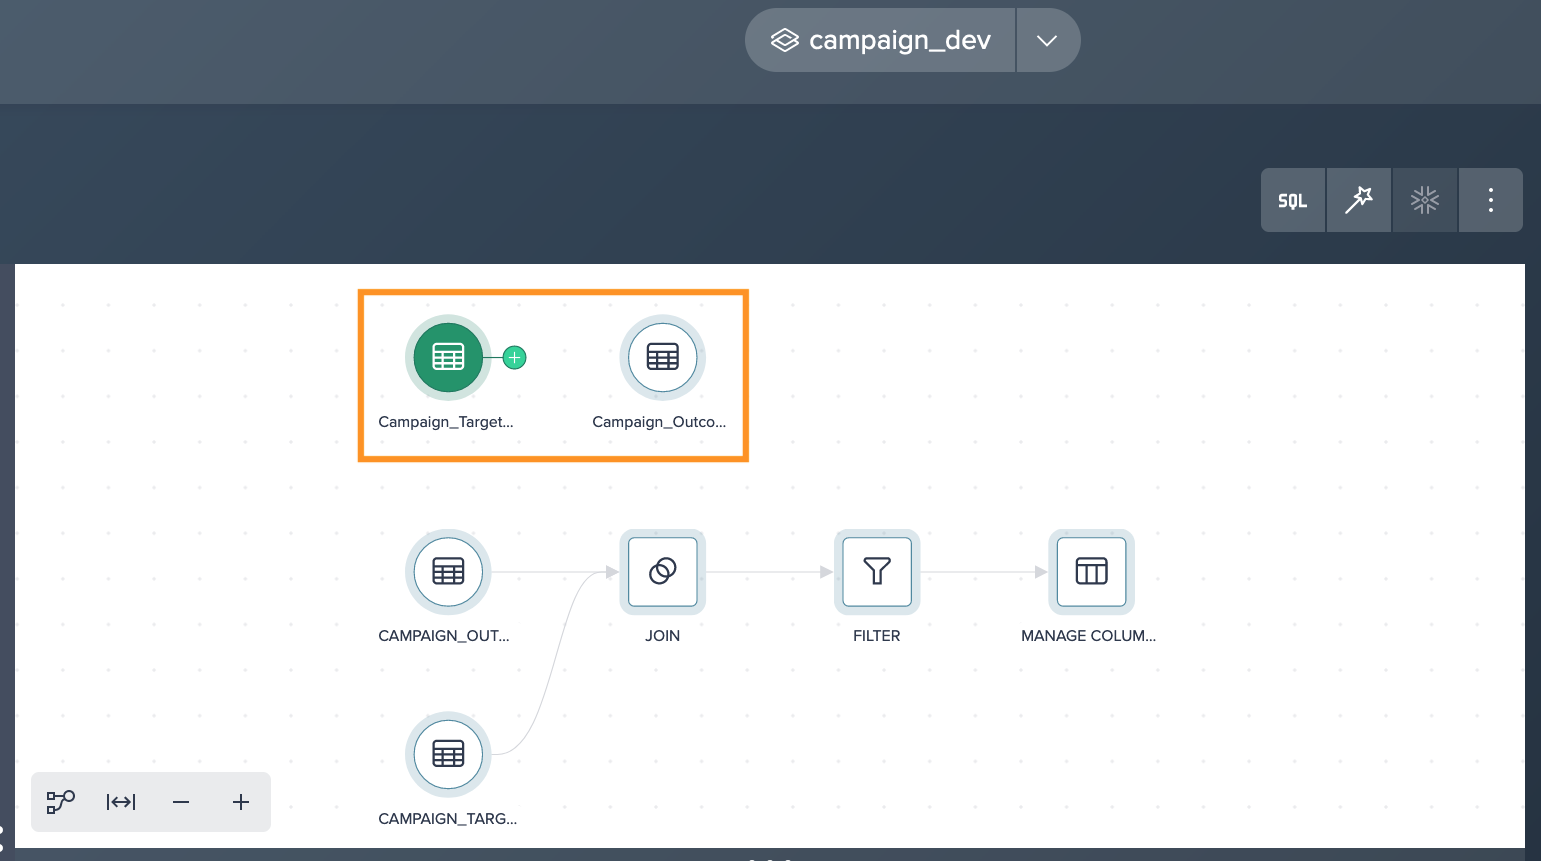
Locate the production datasets in the Data Browser within Datameer: Add the production datasets to the Project by either dragging them onto the Flow Area canvas or clicking the "+" icon next to them.
-
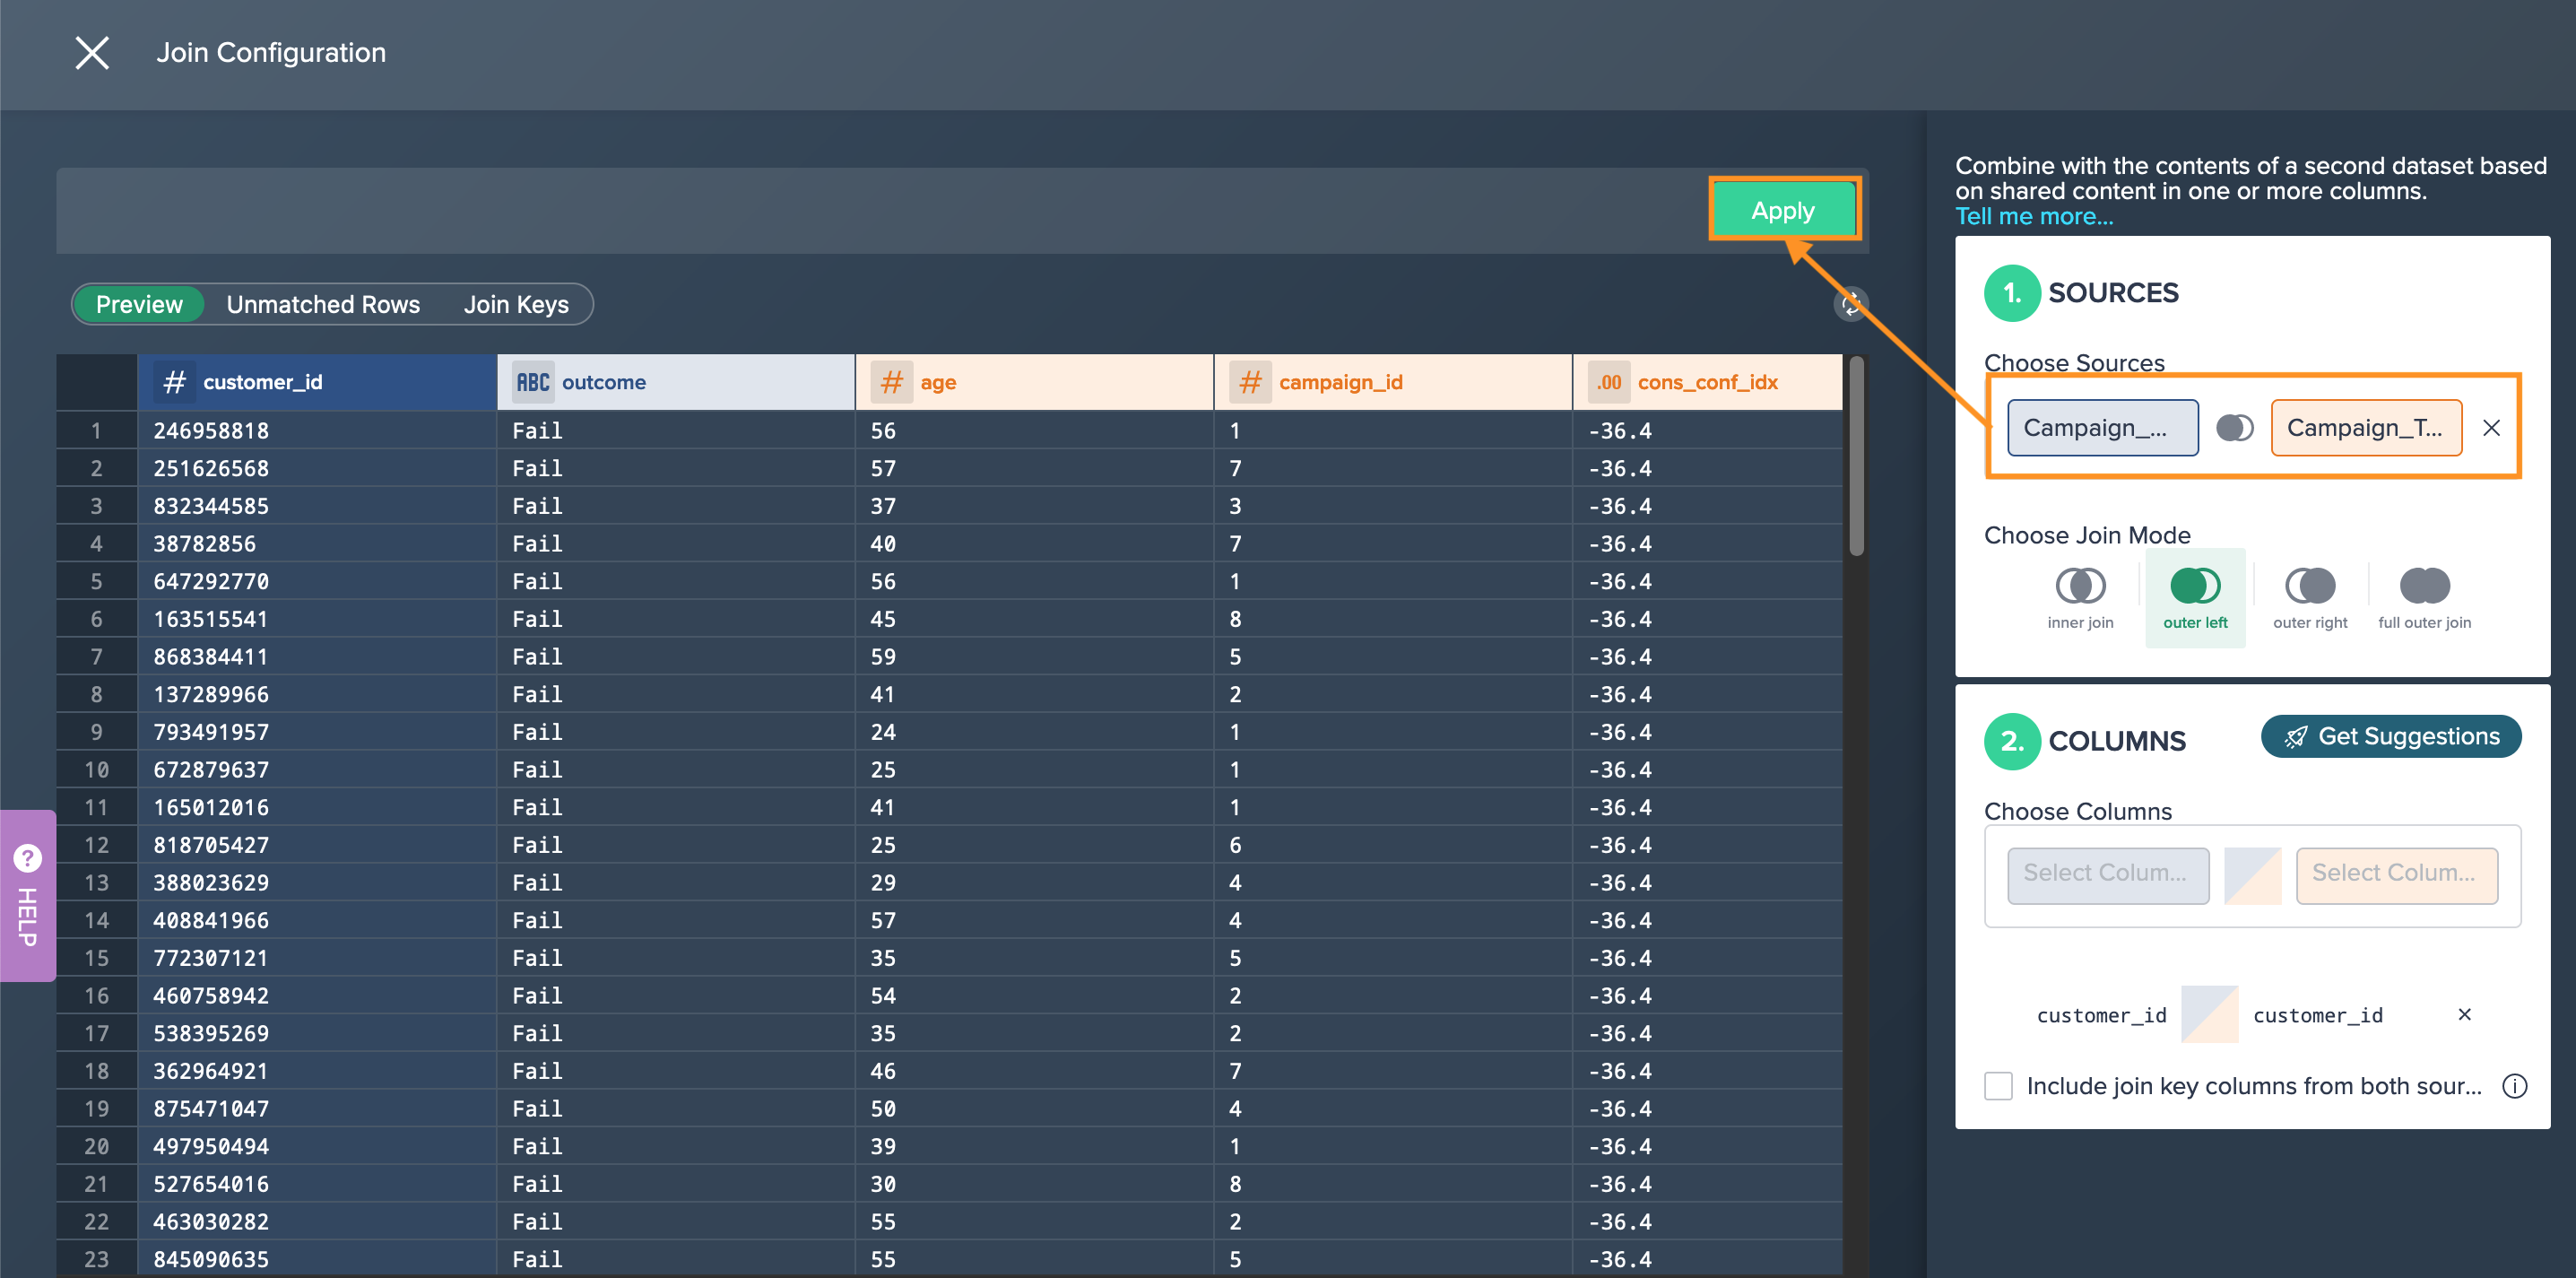
Utilize the 'Exchange Source' feature in Datameer to swap the current data sources with the new production datasets. Note that some functions need to have the sources changed in the editor (e.g. JOIN).
-
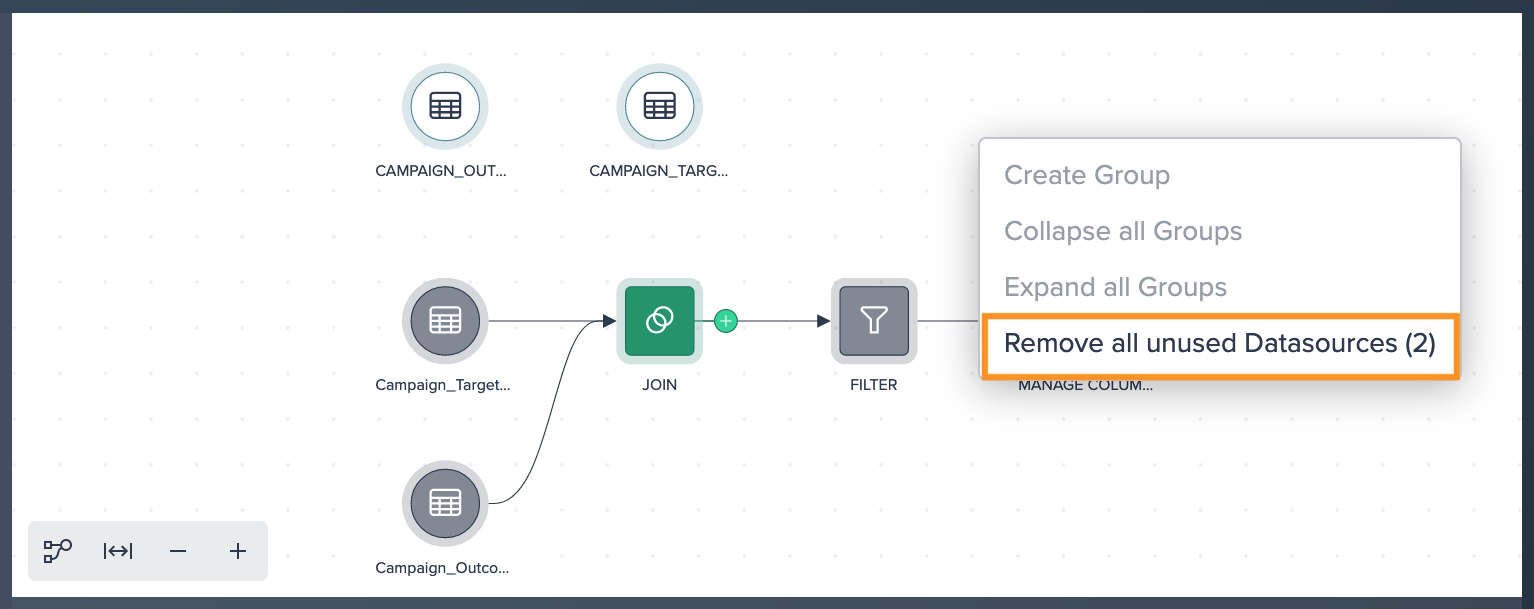
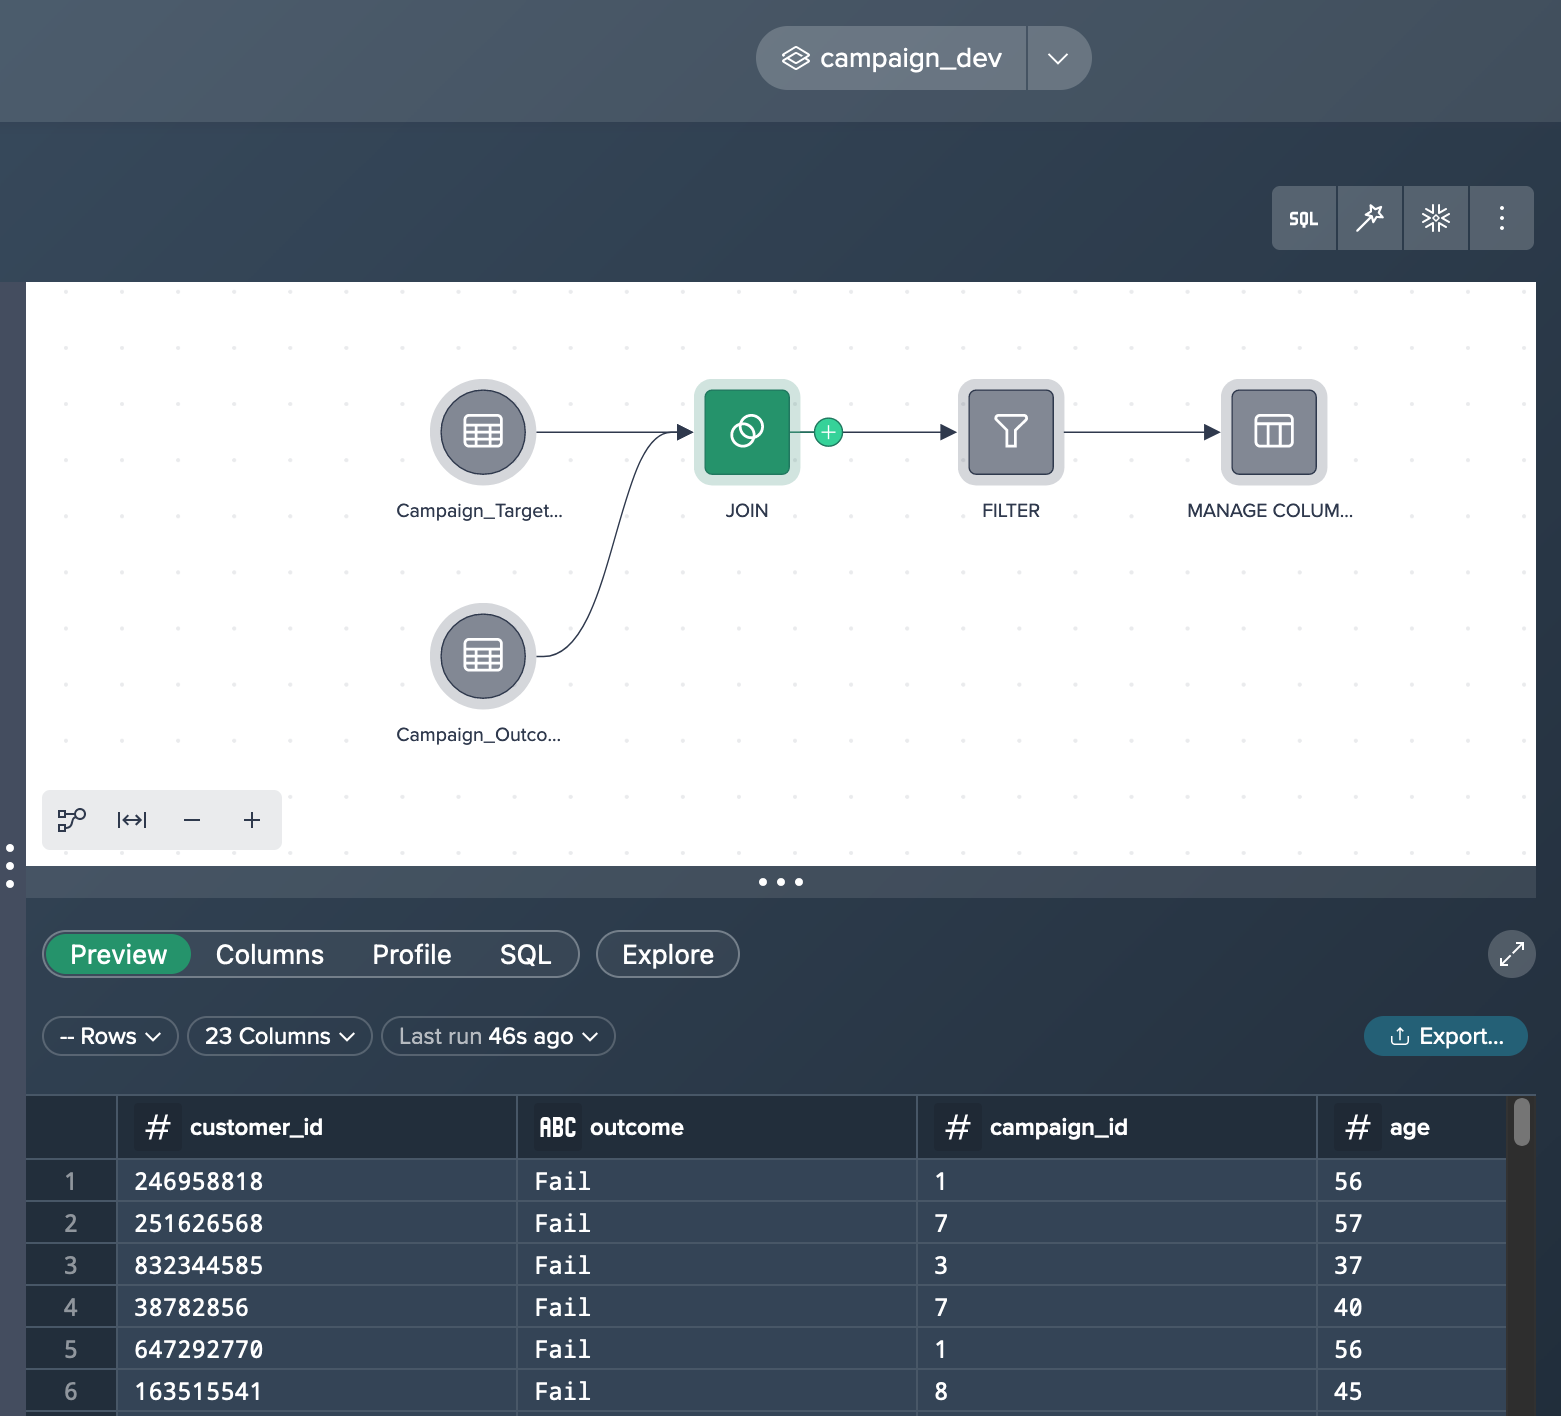
To maintain a clean and organized Project, remove the former sources by selecting "Remove All Unused Datasources" from the context menu. This option can be accessed by clicking into an empty area of the Flow Area.
Re-Creating Deployments#
After cloning the Project to the new target environment, the Project outputs need to be re-created.
Follow these steps:
-
Authenticate against Snowflake using a role that has write access to the production environment.
-
Deploy the desired transformations to Snowflake by selecting the required node and clicking on "Deploy to Snowflake".

-
Define the type (View or Table), the destination schema, and provide a name for the deployment node. Make sure to select the appropriate Snowflake Role and Warehouse for the deployment and confirm with "Apply". These settings will be used when running the deployment as a recurring scheduled process.
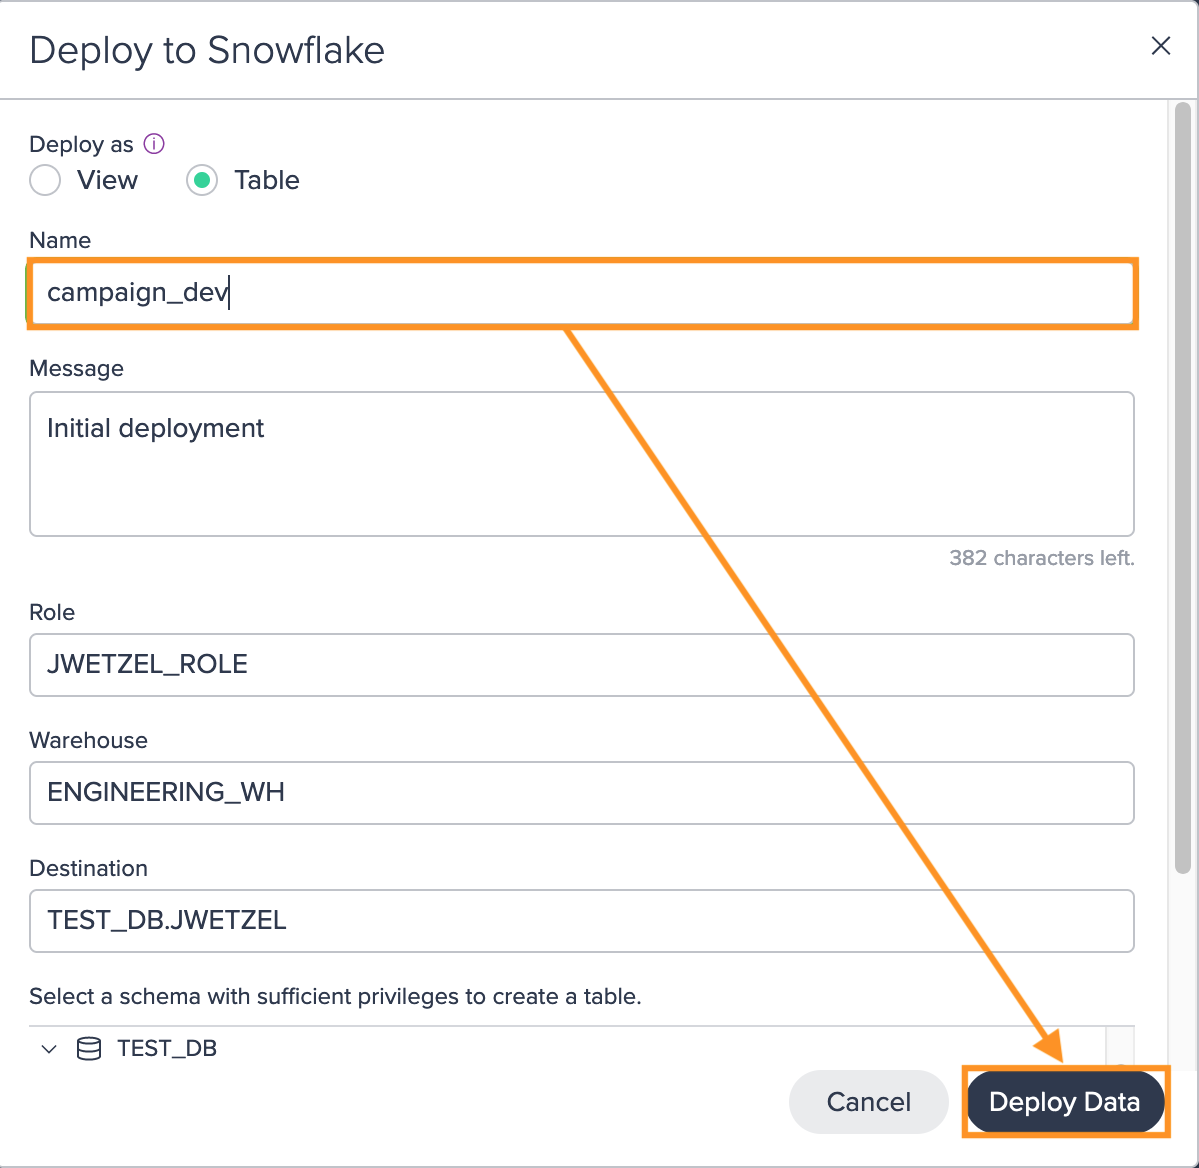
It's important to note that each deployment creates a new version in the Deployment History. This allows you to restore a previous version if needed, providing additional flexibility and safety for your Project outputs.
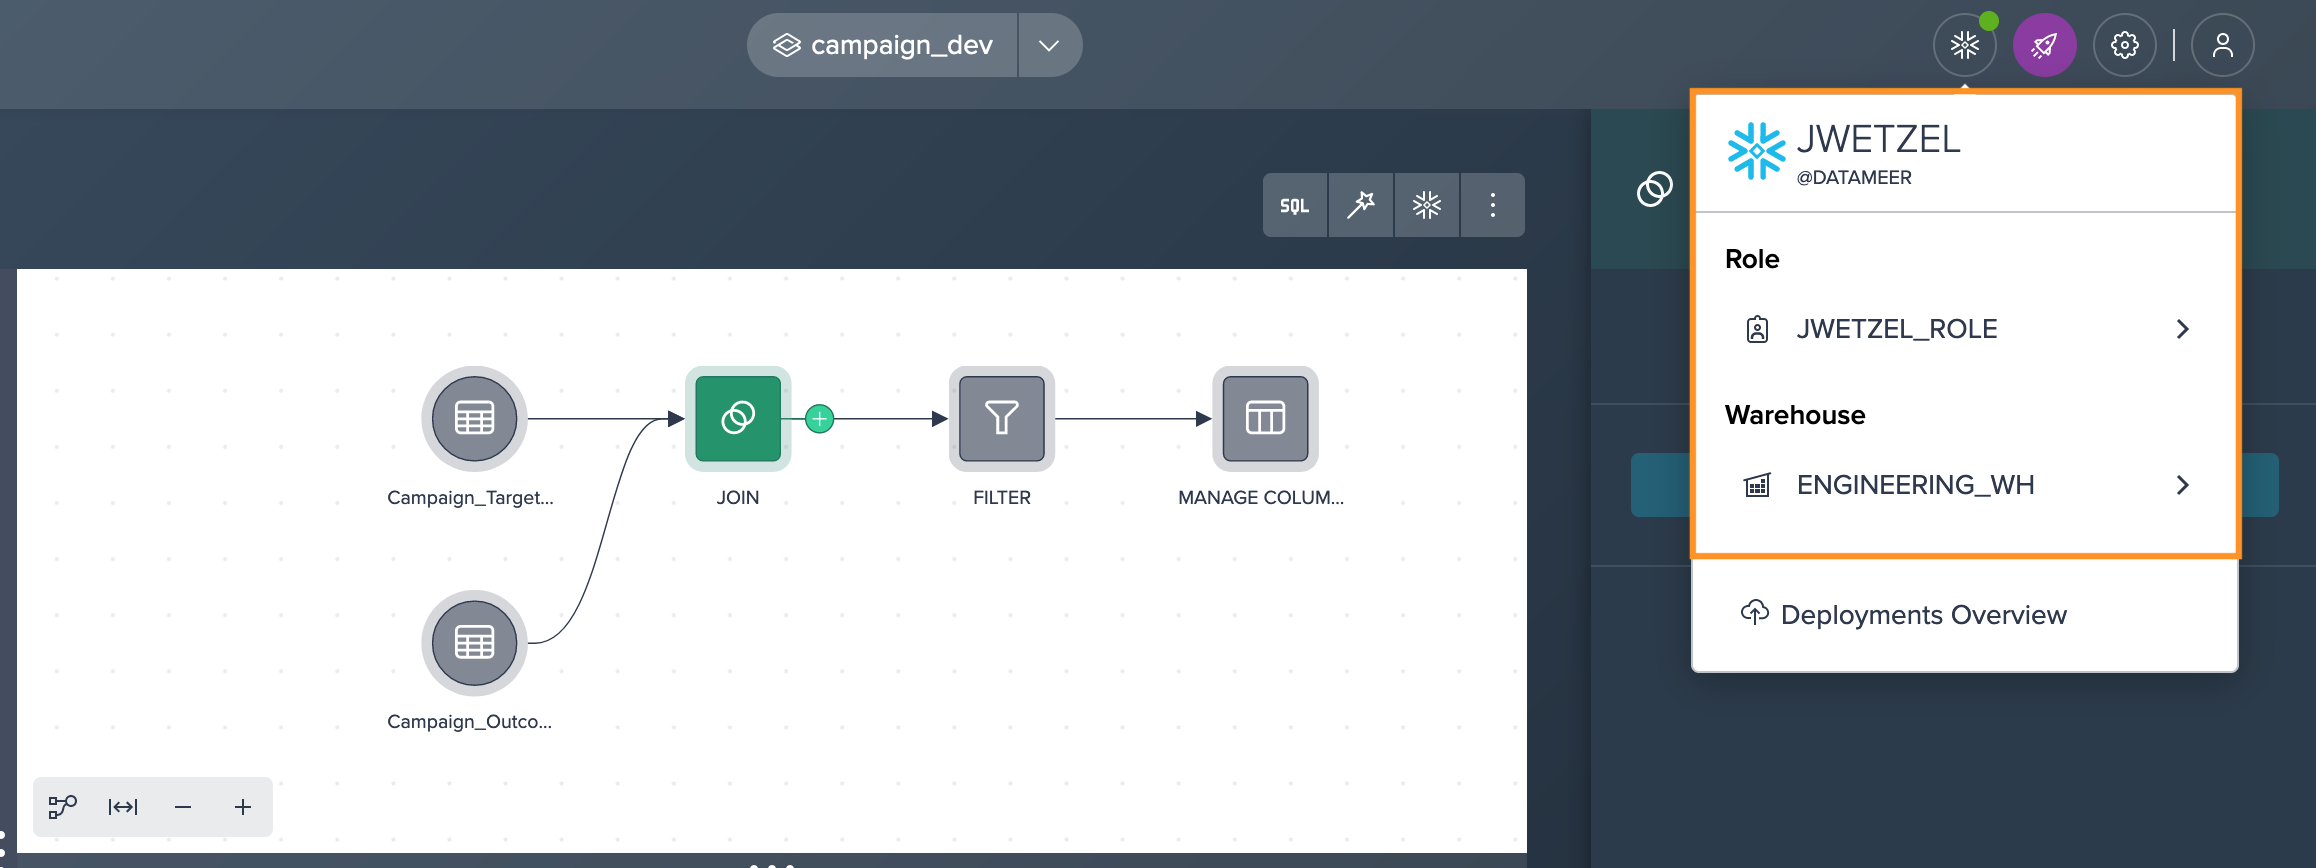
Enabling Scheduling#
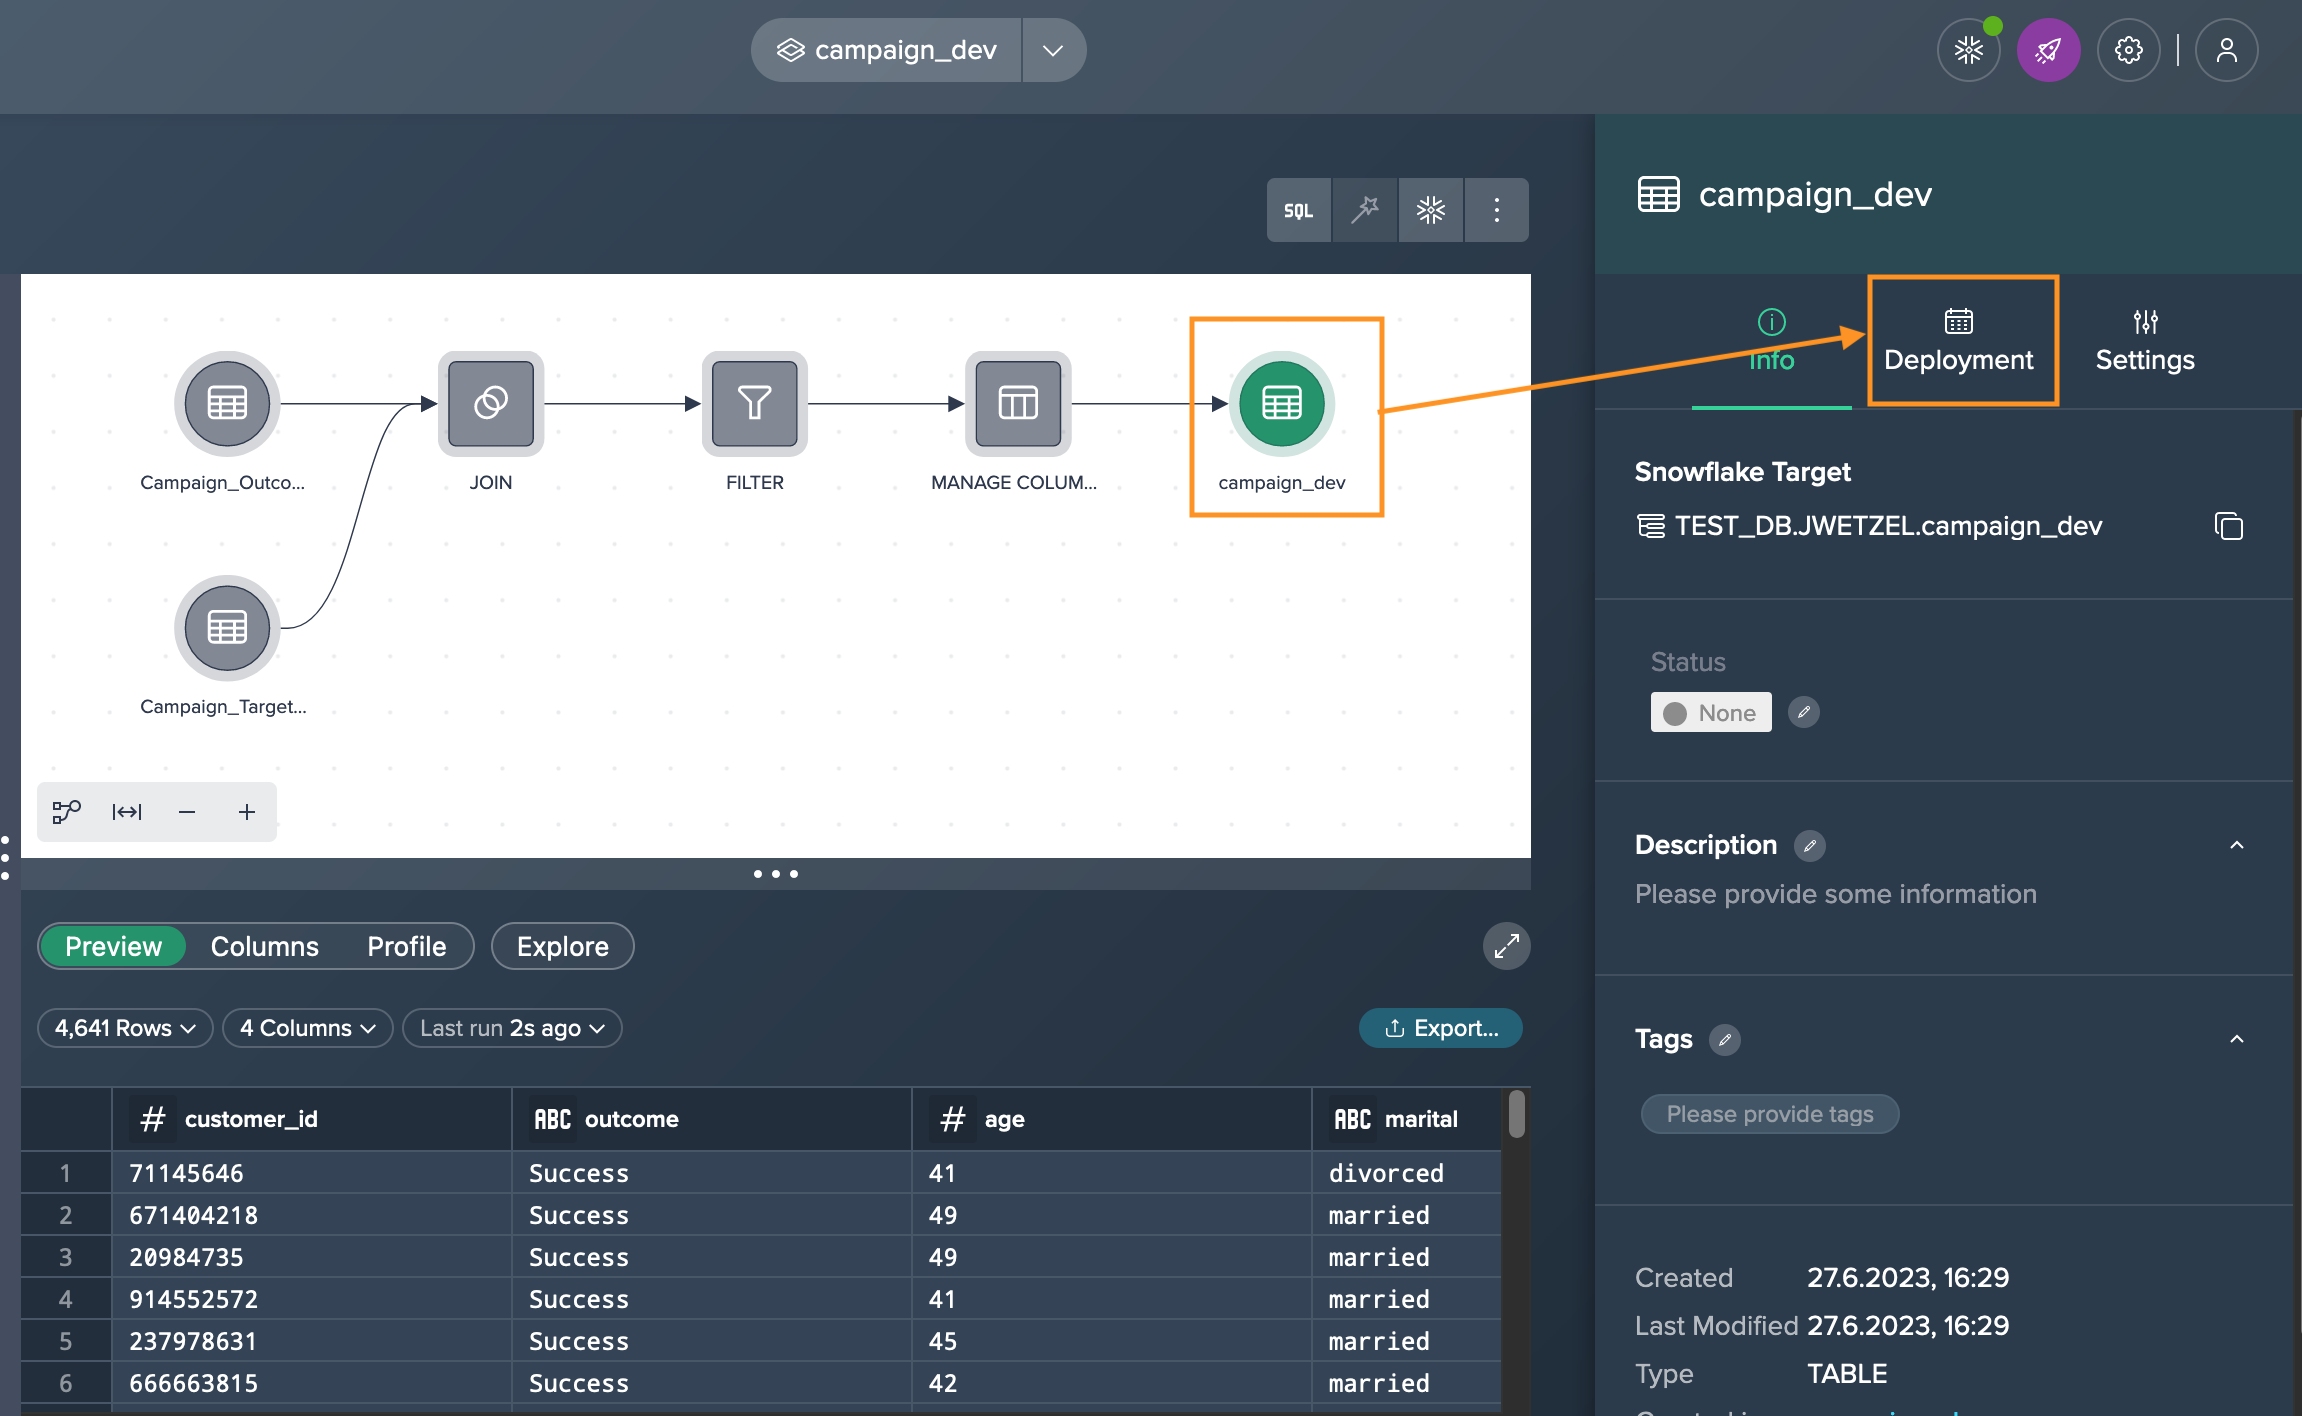
Scheduling the materialization from a Project allows you to keep your target Snowflake table up to date. If you have chosen the deployment type as a 'Table', you can enable and set up its scheduling in the 'Deployment' tab in the Inspector for each deployment node.
-
Click on the deployment node in the Flow Area and navigate to the 'Deployment' tab in the Inspector.
-
Enable the scheduling option by toggling the switch and set the desired schedule for the deployment by specifying the frequency, start time, and other relevant parameters. Confirm with "Apply".
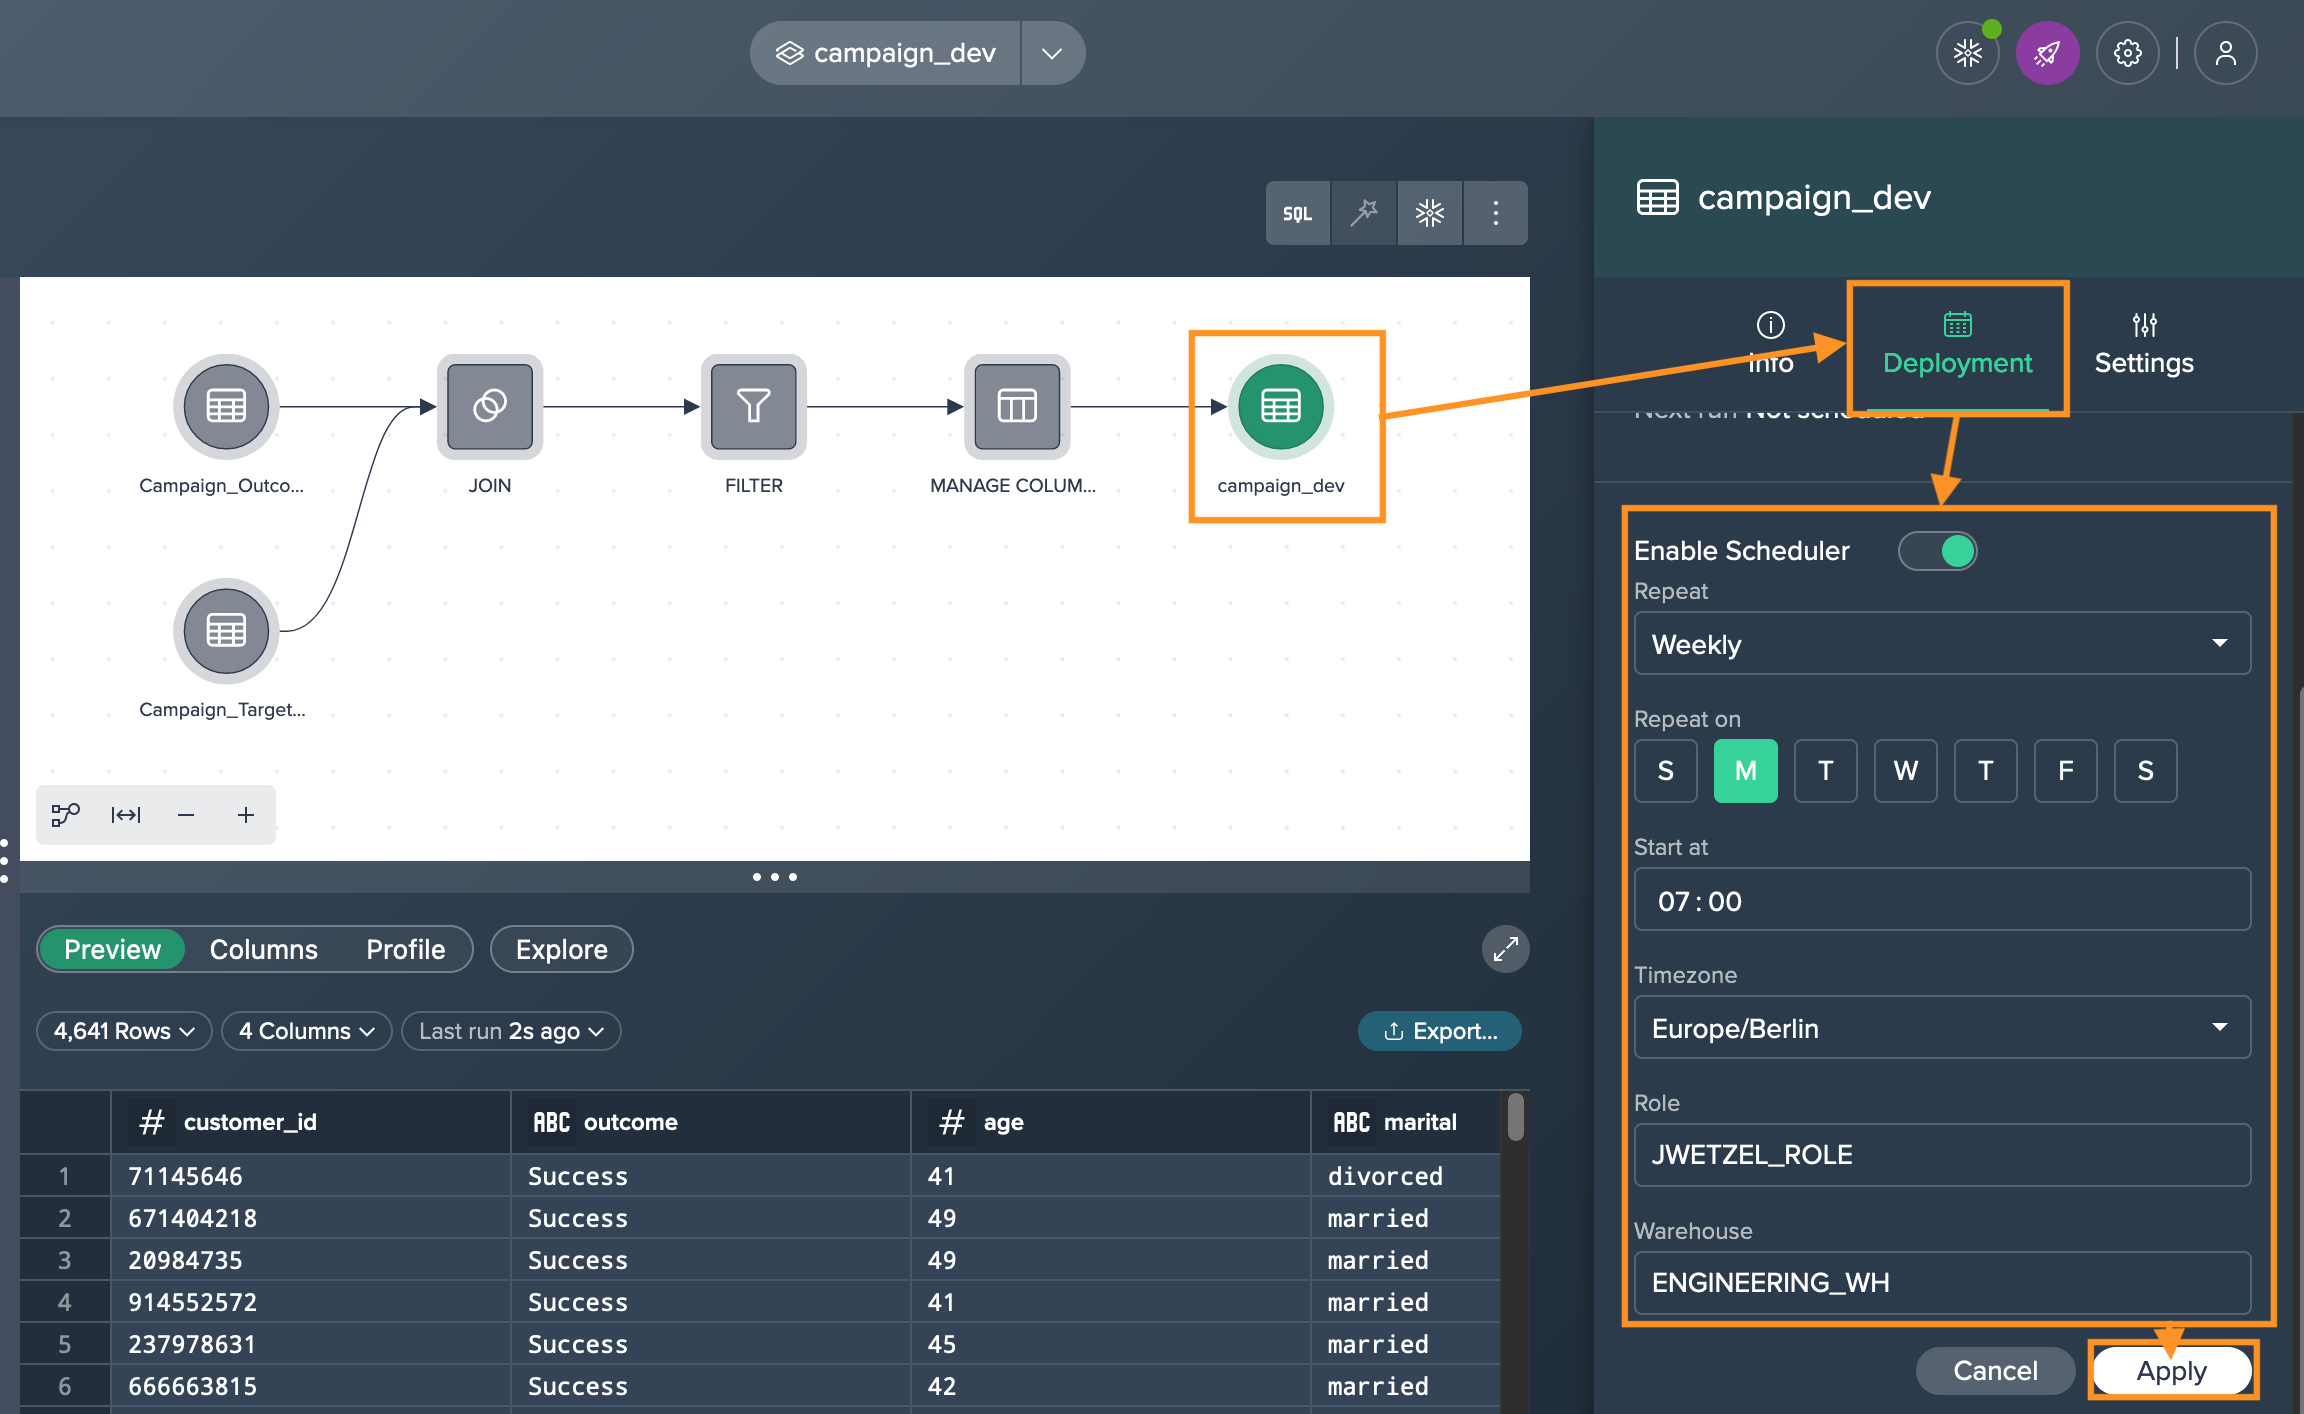
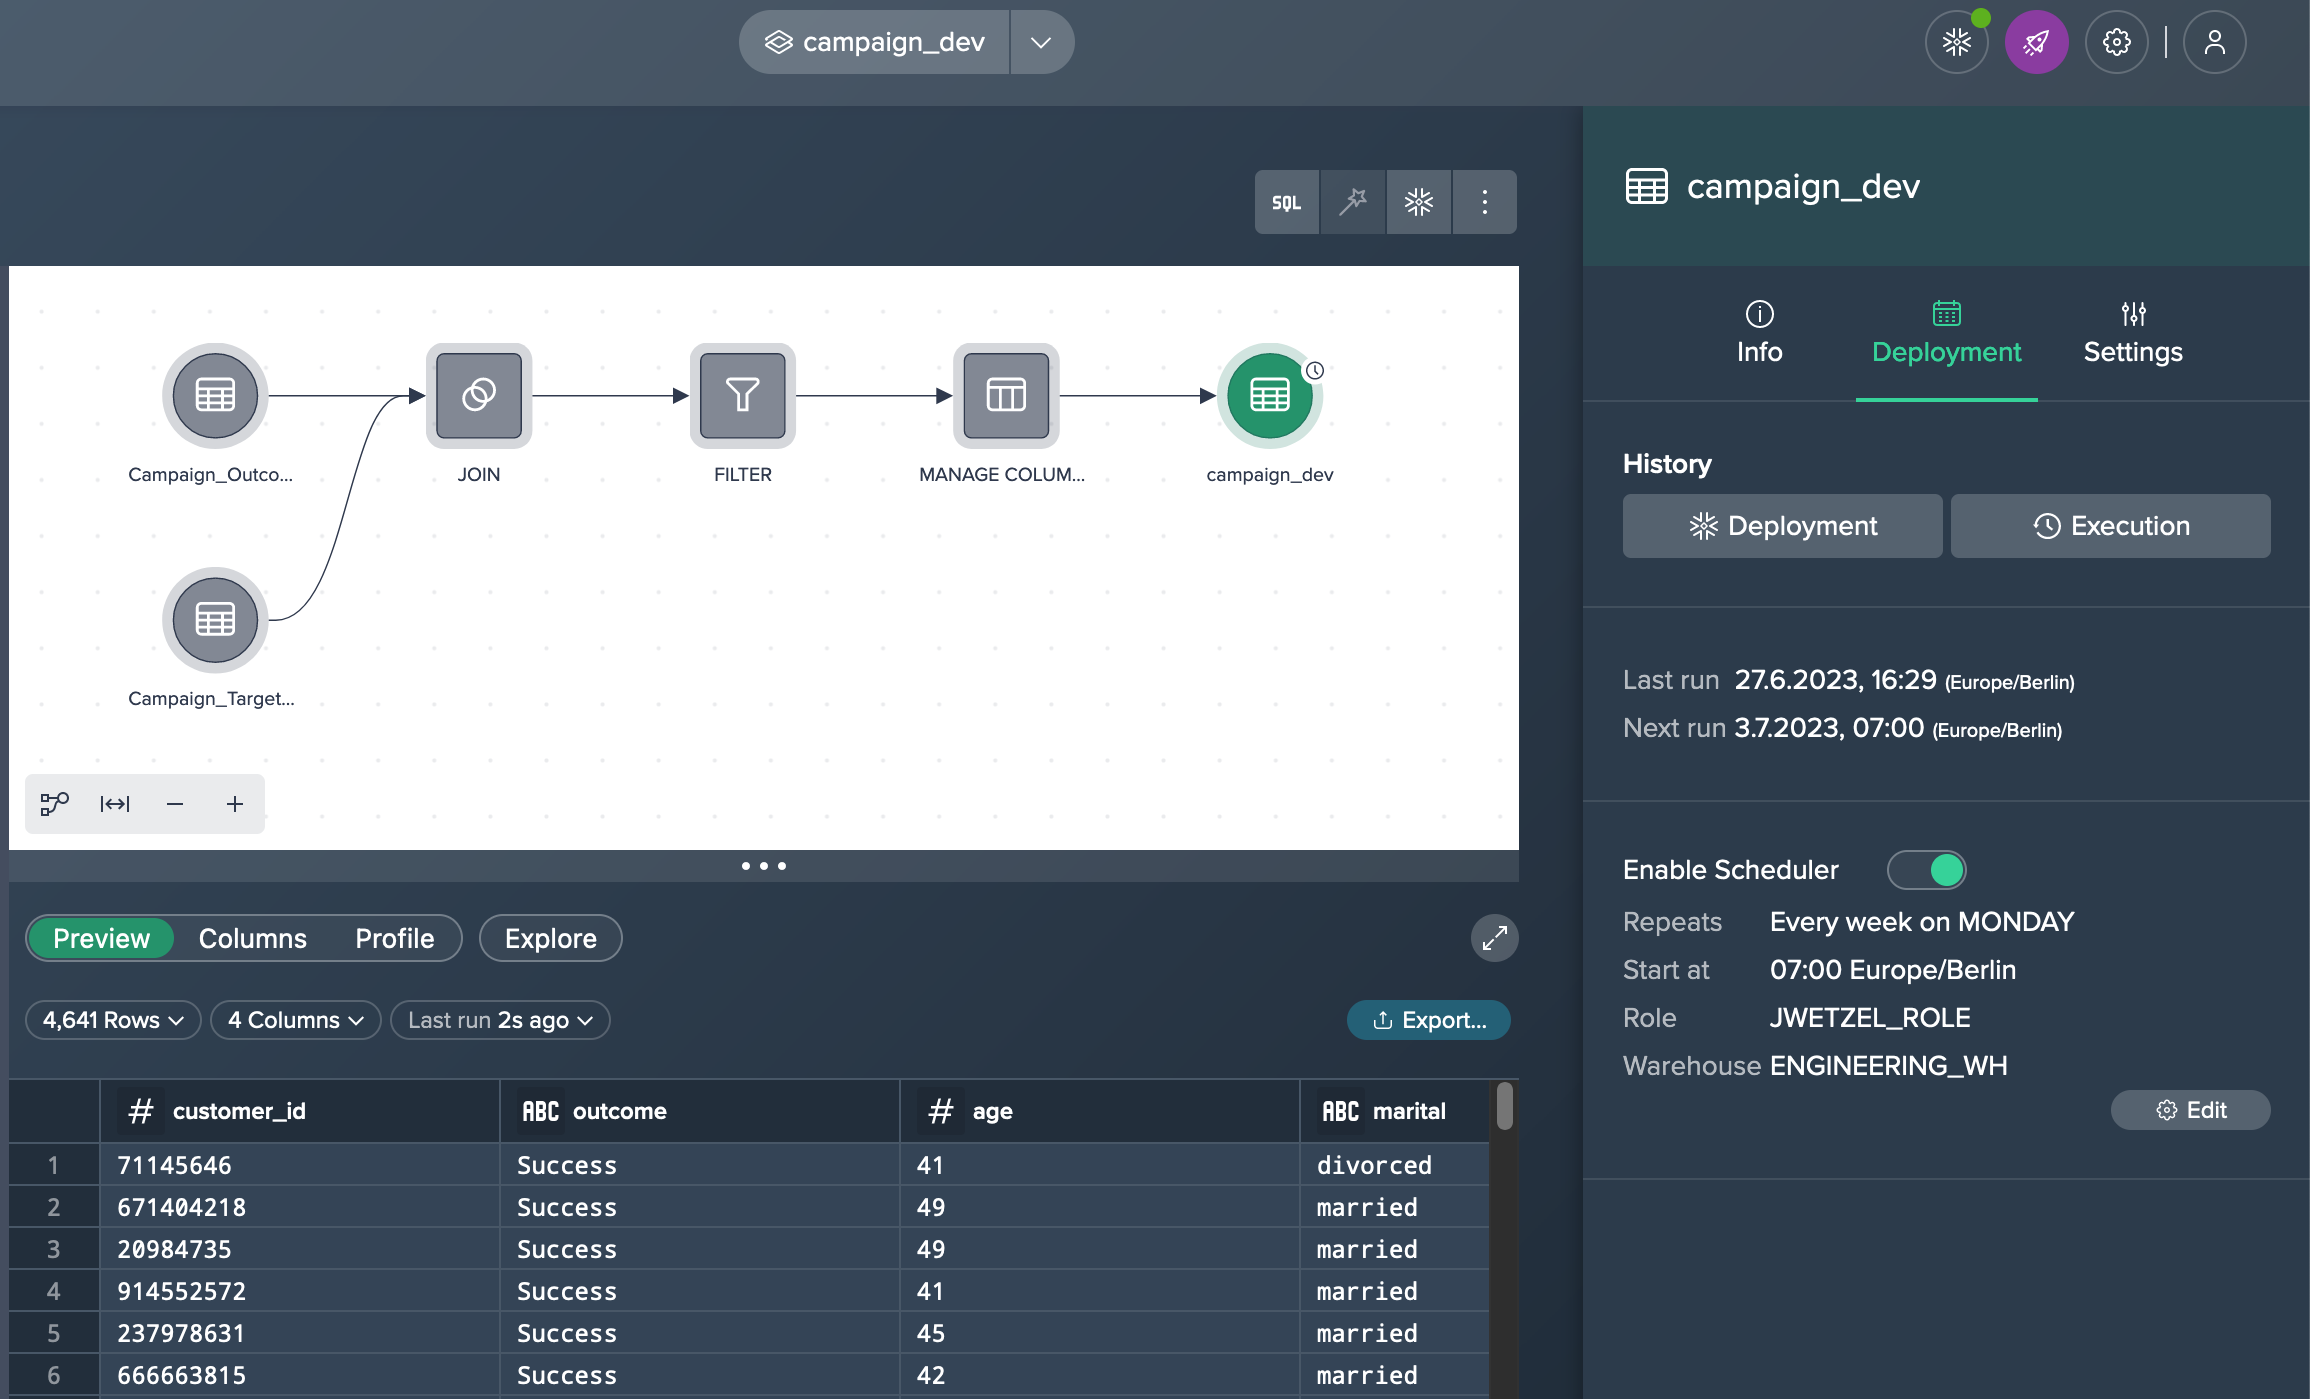
Once the scheduling is enabled and configured, the deployment will automatically run at the specified intervals according to the defined schedule.
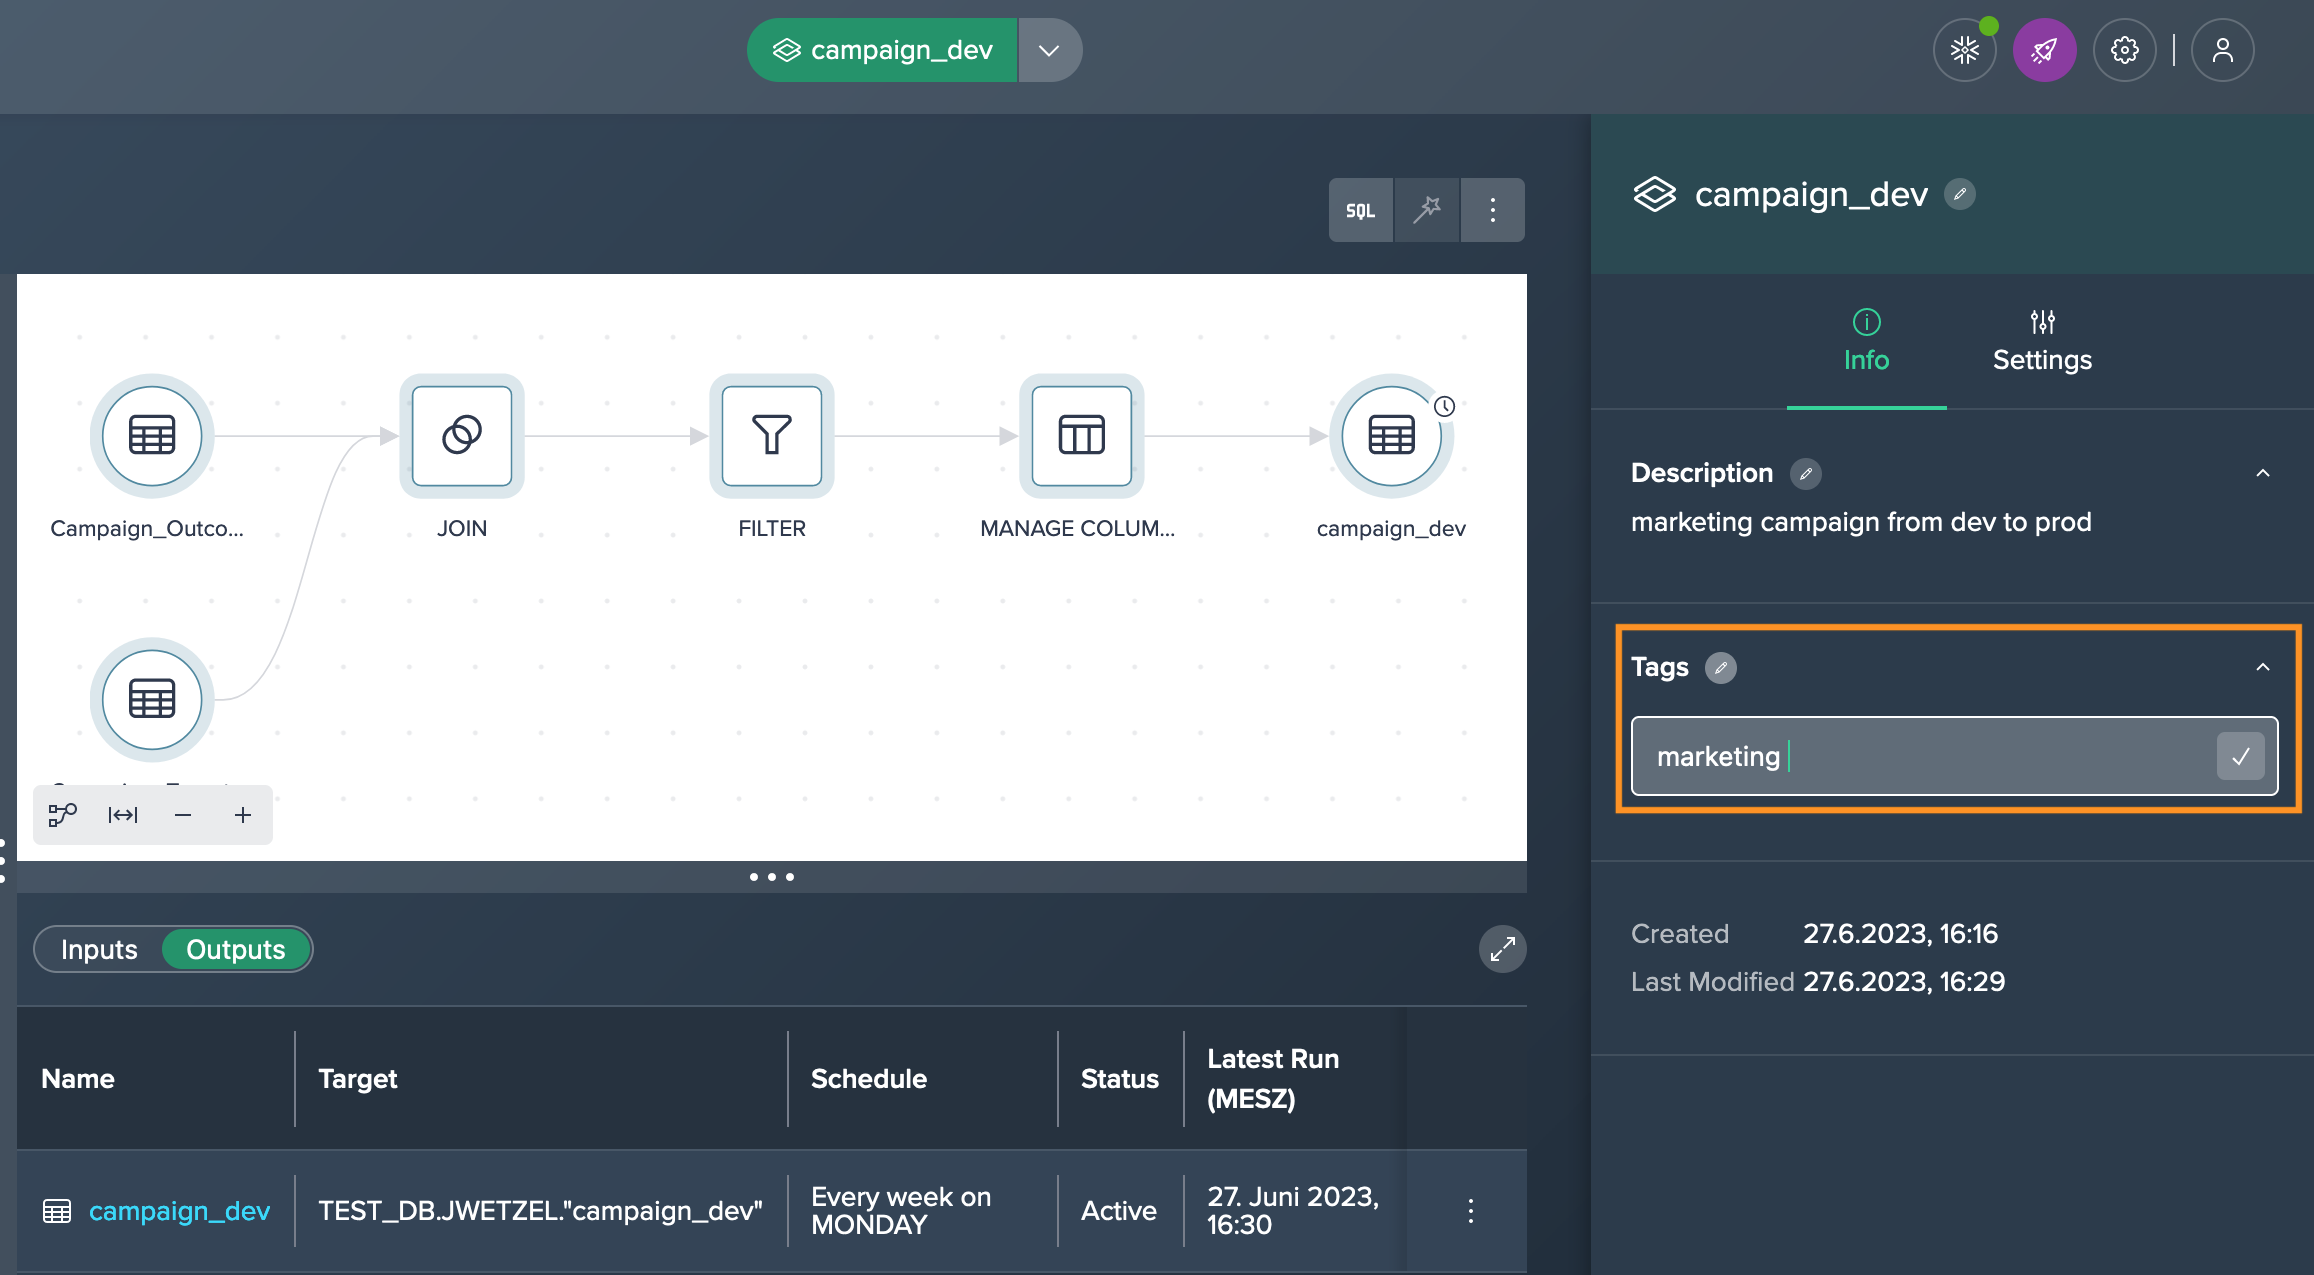
Changing the Project Ownership#
To transfer ownership of a Project to another user, follow these steps:
-
Select the Project either by clicking on its title in the title bar or by clicking on an empty area in the Flow Area, go to the 'Settings' tab in the Inspector panel and under the 'Collaborators' section, click on the "Edit" button.
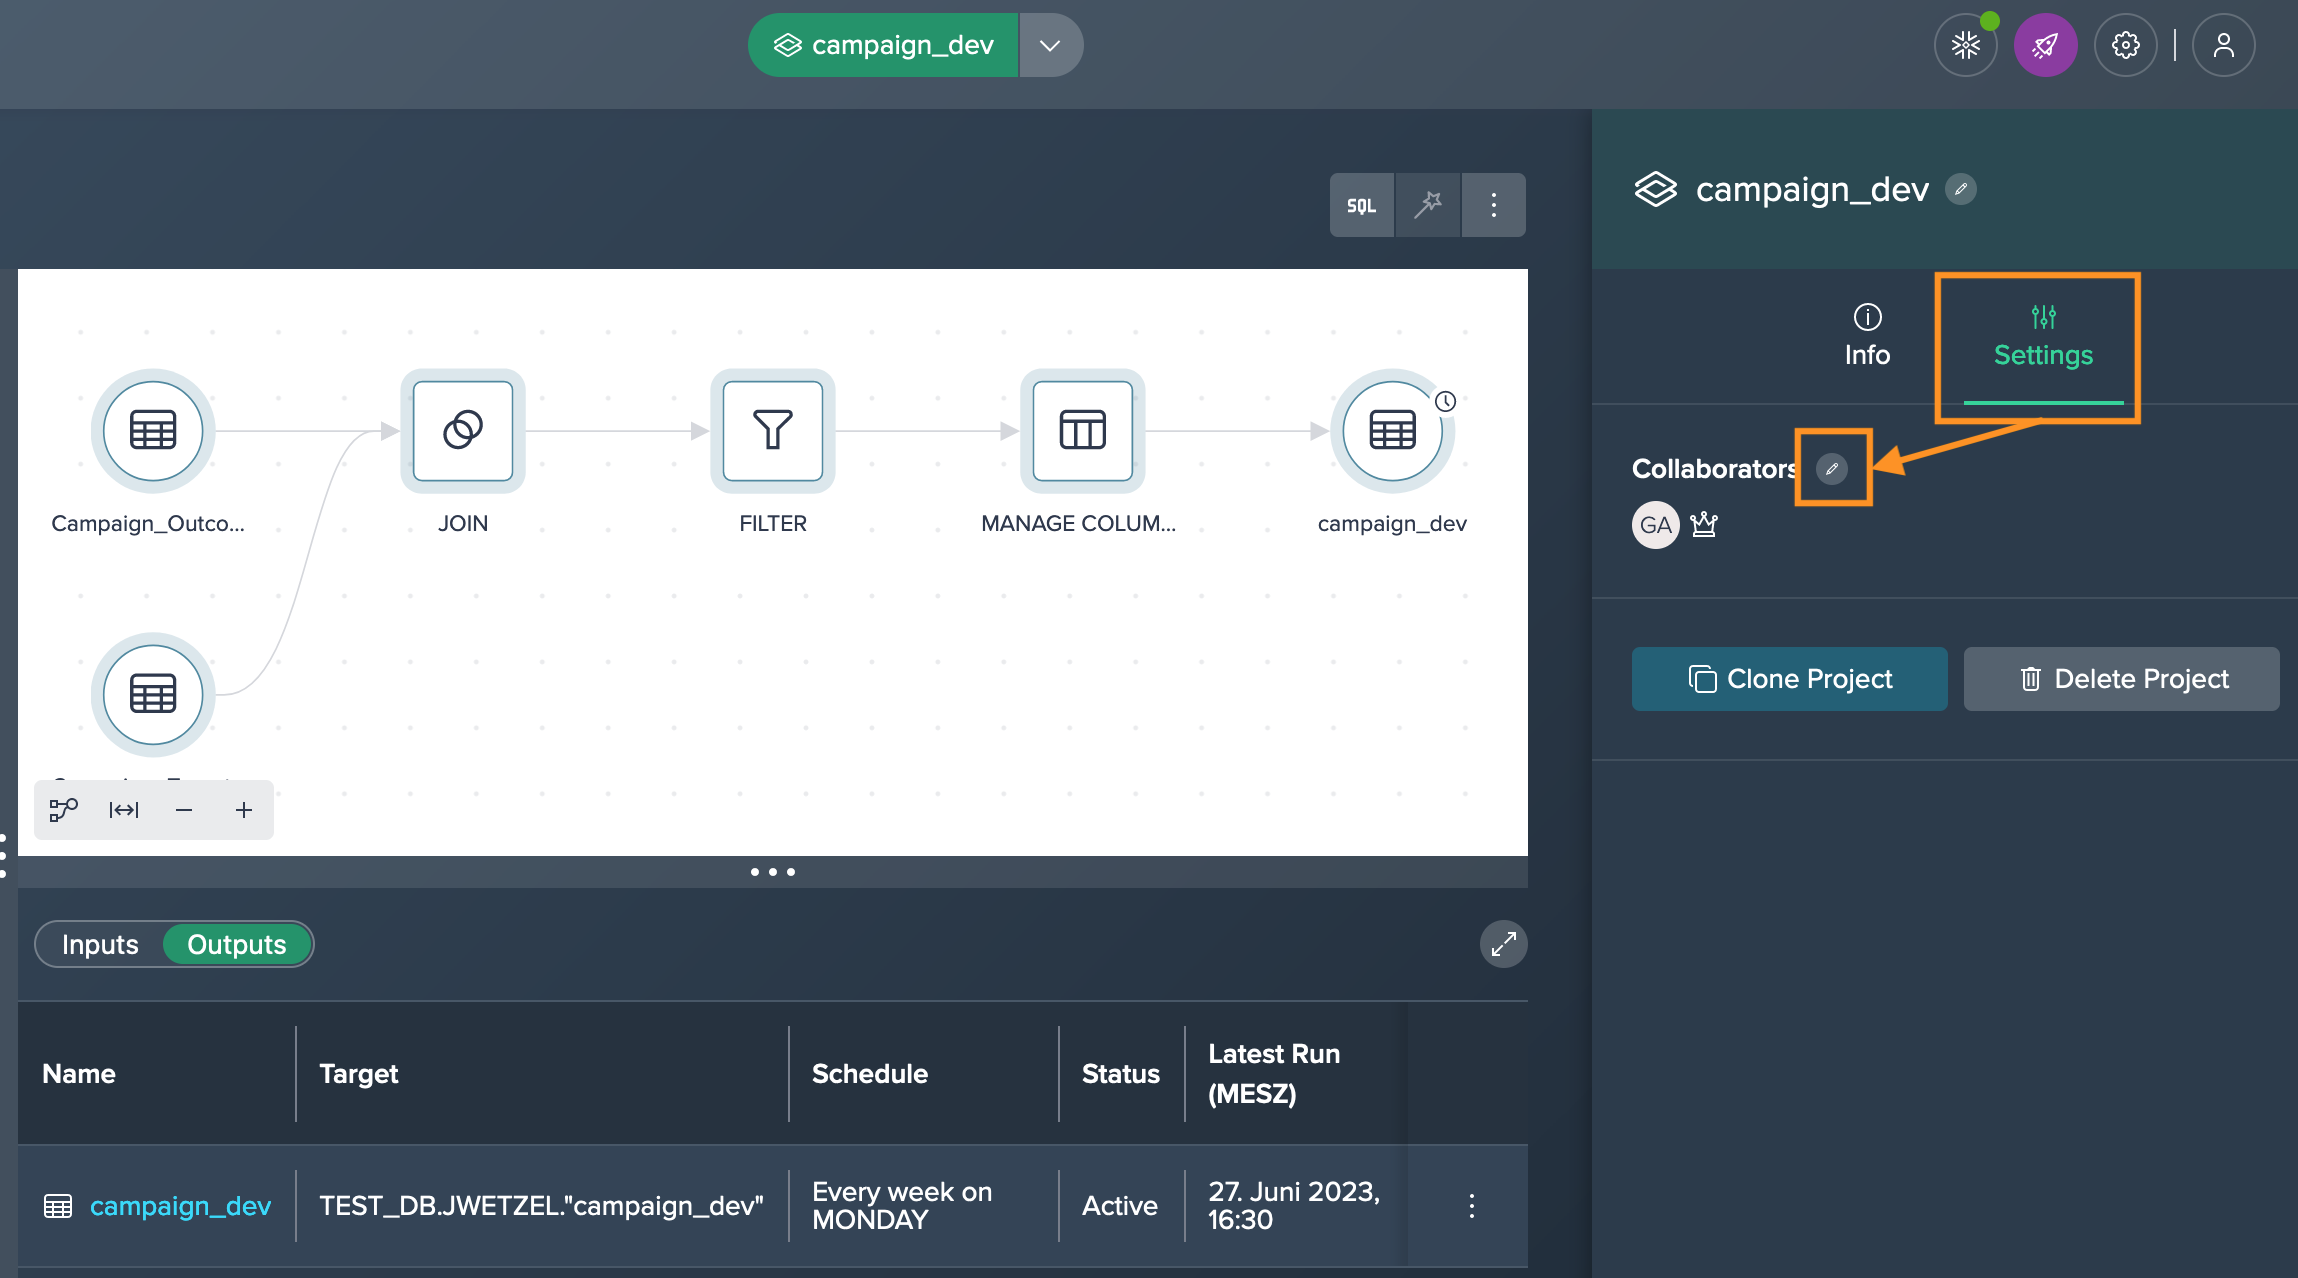
-
Add the new owner as a collaborator by entering their username or email and selecting the appropriate role and confirm with "Apply" to save the changes. Note that if the required user is not available, you need to add the user first.

-
Reopen the "Edit Collaborators" dialog and locate the user you want to promote to owner and click on the crown icon next to their name. This will convert them from a collaborator to an owner.
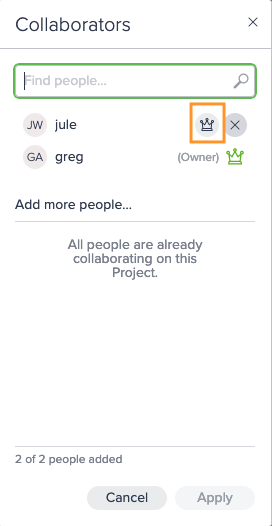
-
Make any additional changes to the list of collaborators as needed, such as adding or removing collaborators and finally save the changes.
Adding Documentation#
Along with the review process, it can be beneficial to add annotations to deployments to provide additional context and information. Annotations can include descriptions, tags, and custom properties. Here's how you can add them:
-
Select the deployment node that you want to annotate. Switch to the Inspector and navigate to the corresponding chapter for adding descriptions, tags, and custom properties and add the description.
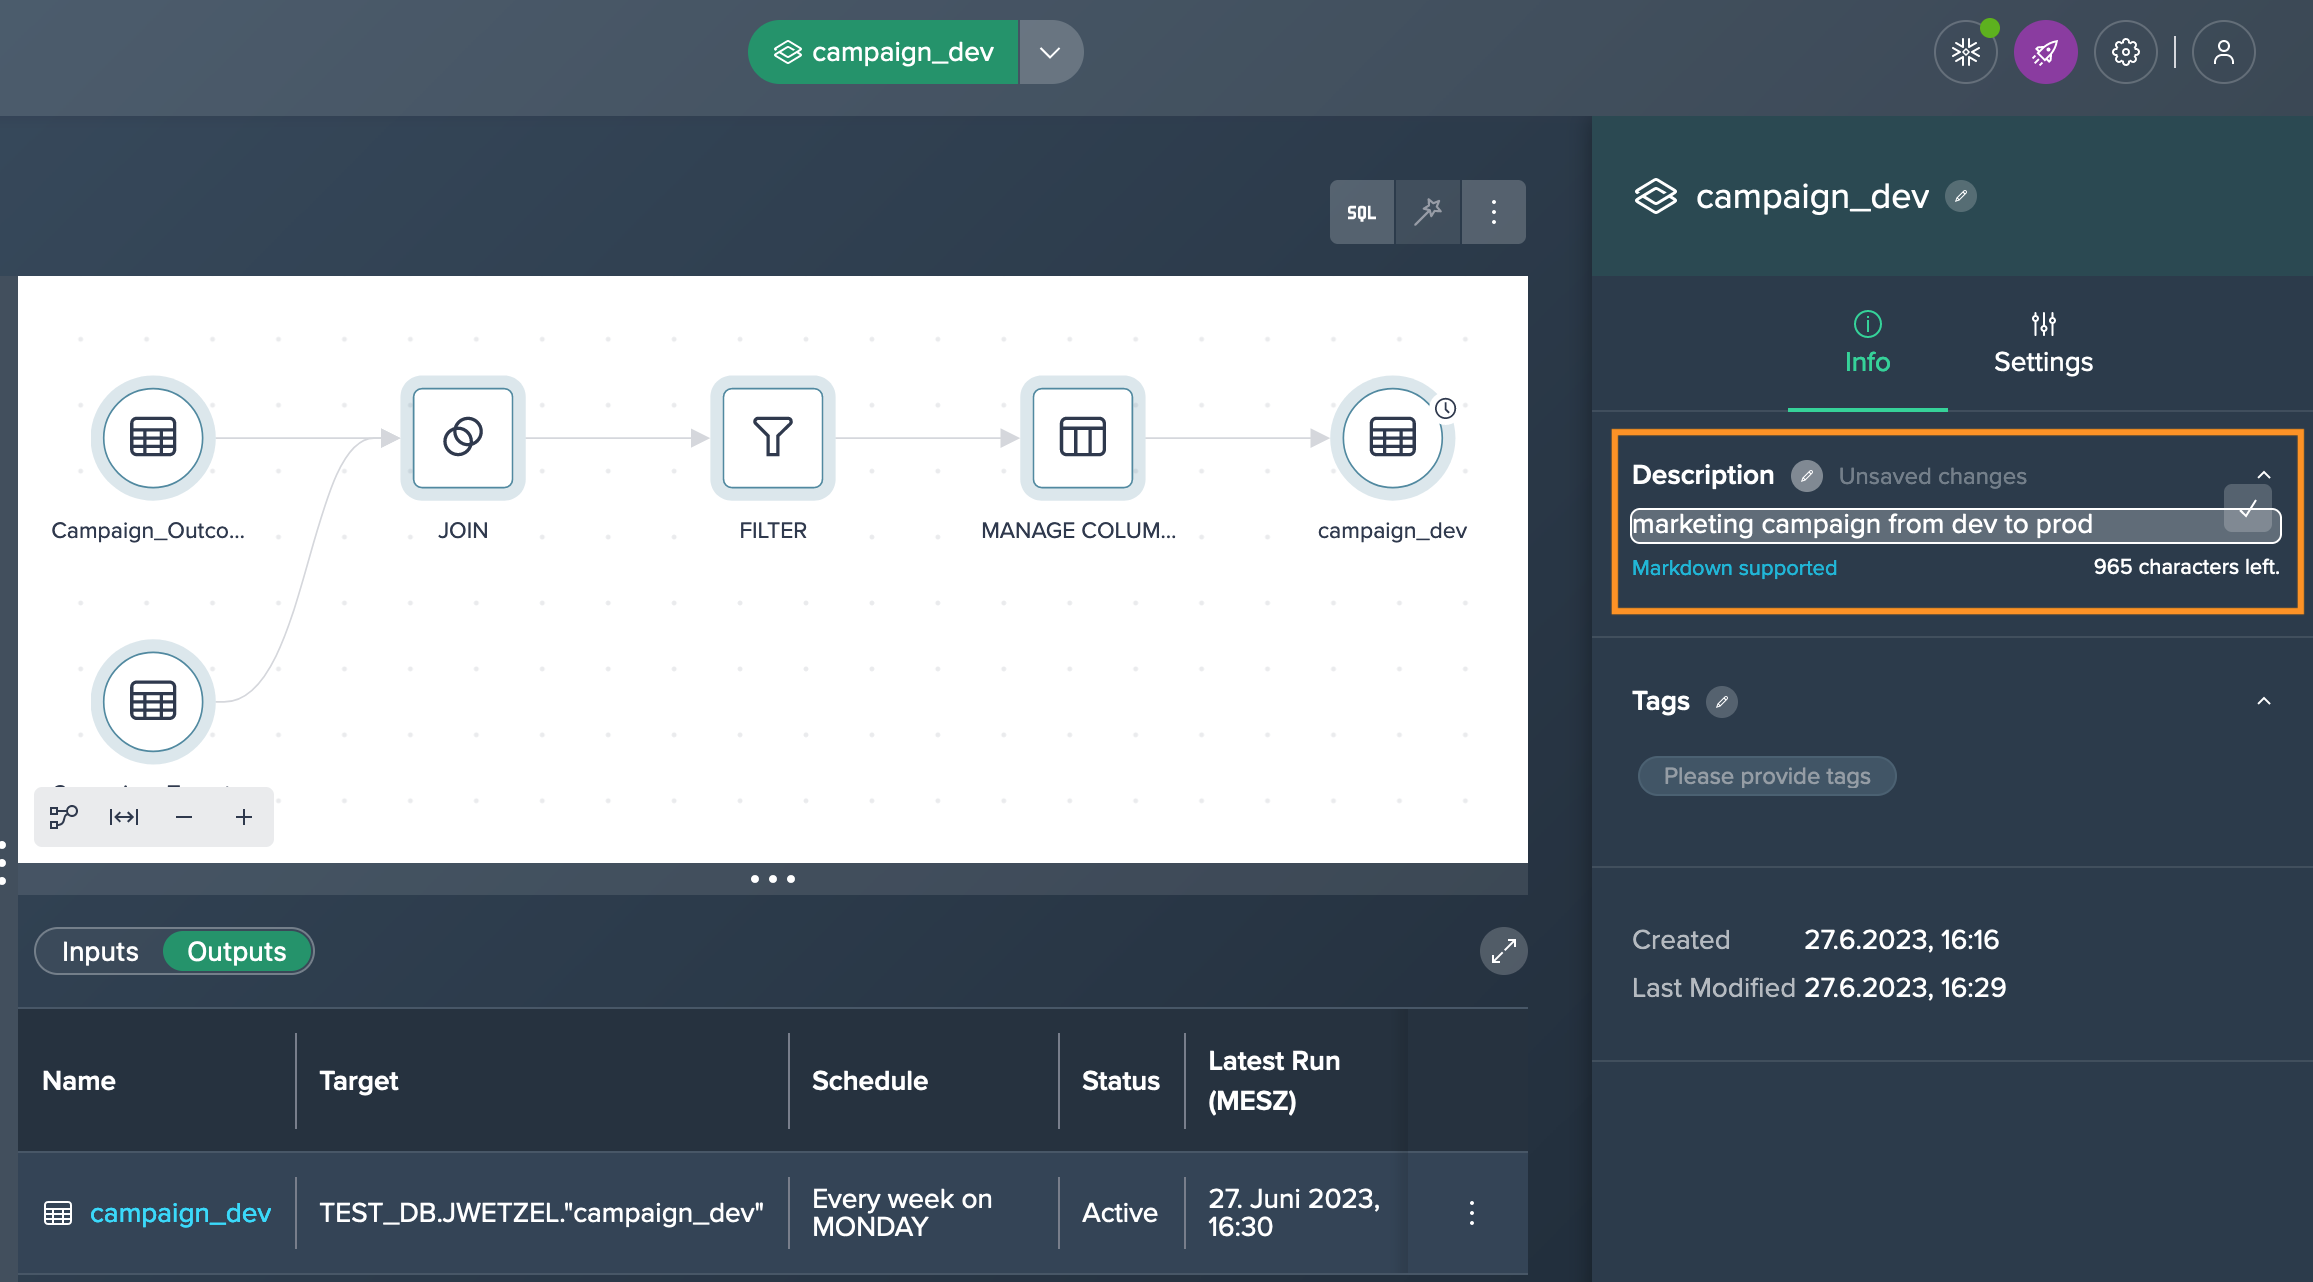
-
Assign tags, or define custom properties to the deployment and save the changes.
Monitoring#
To stay updated about the status of your scheduled deployments and be notified in case of any failures, it is recommended to set up monitoring for your Project. One way to achieve this is by configuring Slack integration and configuring your Project to send notifications to a specific Slack channel to stay informed about the status of your Project and promptly address any issues or failures that may occur during scheduled deployments.
Alternatives#
Handover the Pipelines Result SQL to the IT Team#
By accessing the raw SQL code of the development Project, your IT team can analyze and work with the SQL queries generated by the pipeline, allowing for external productionalization processes or further customization if needed.
To access the raw SQL generated by a pipeline and executed against Snowflake at runtime, follow these steps:
-
Add a member of your IT team as a collaborator to the Project. This will grant them access to the necessary permissions.

-
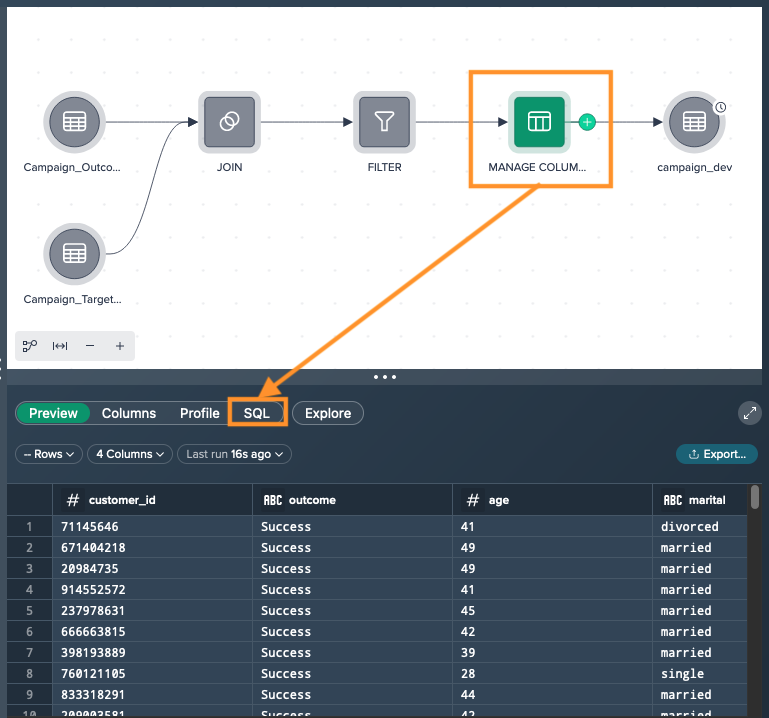
Within your Project, select the parent node of a deployment node in the Flow Area. This node represents the starting point of the pipeline. Click on the "SQL" tab in the 'Data Grid'.
-
Use the "Copy to Clipboard" function, which is typically represented by an icon or button, to copy the full CTE (Common Table Expression) of the current node and all nodes upstream.
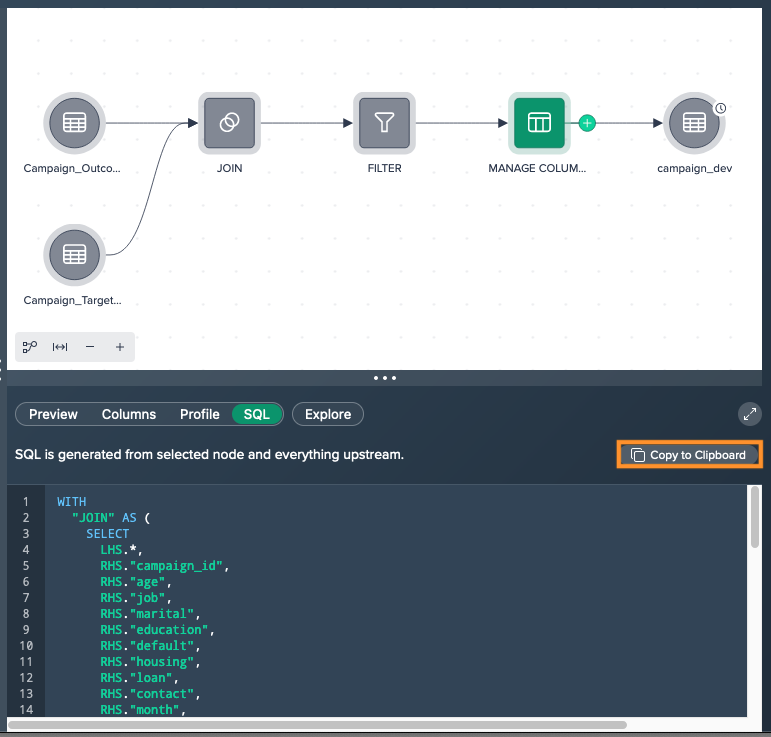
-
Once the SQL code is copied, it can be shared with the IT team or used for external purposes, such as executing the SQL directly against the Snowflake database.