Sharing Data
All dataset files that are used within a Project can be provided, exported and shared easily for further usage, e.g. download easily CSV files from your Datameer instance.
Downloading the CSV File#
To download your data as a CSV file:
-
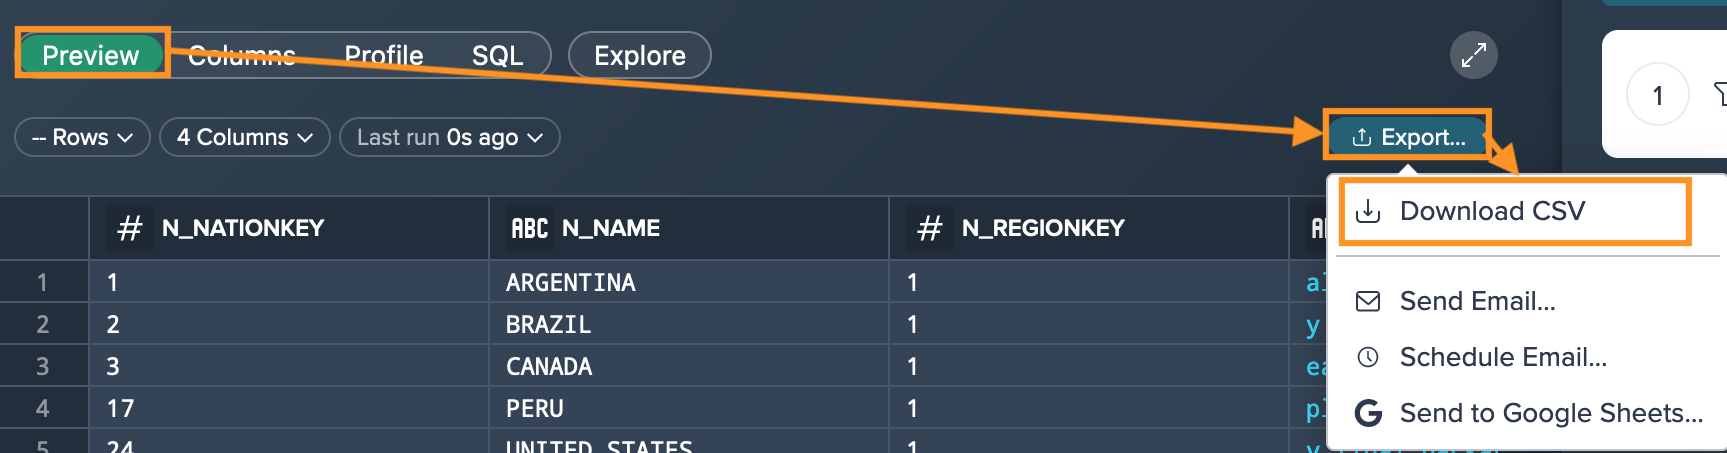
In the Data Grid, select the "Preview" tab and click on "Export..." -> "Download CSV". The download is being prepared and the snackbar informs you when the download is ready.
-
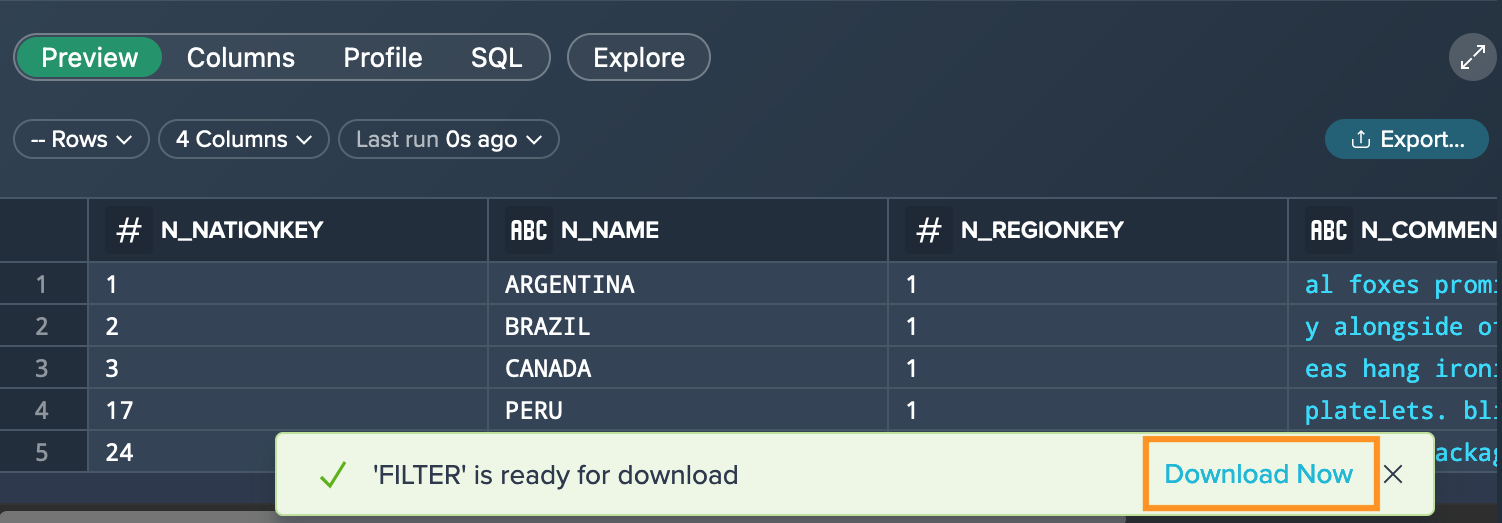
Click on "Download Now" to download the CSV file. The file is now available according to your download configuration, e.g. in the download folder.
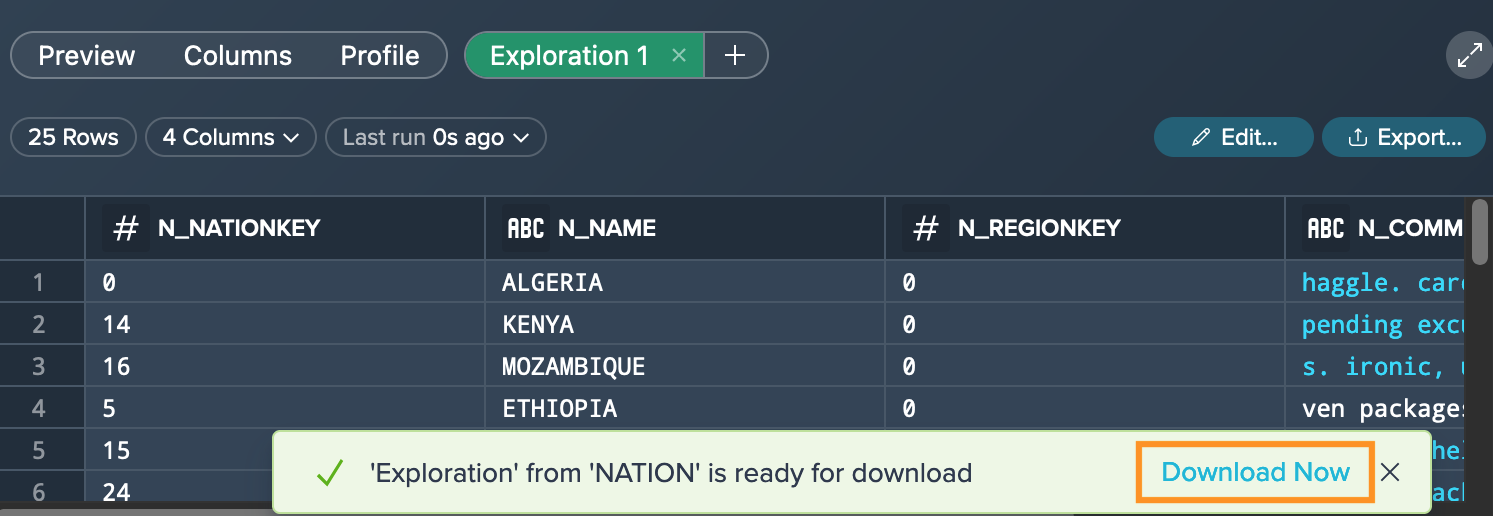
Downloading the Exploration CSV File#
To download the exploration CSV file:
-
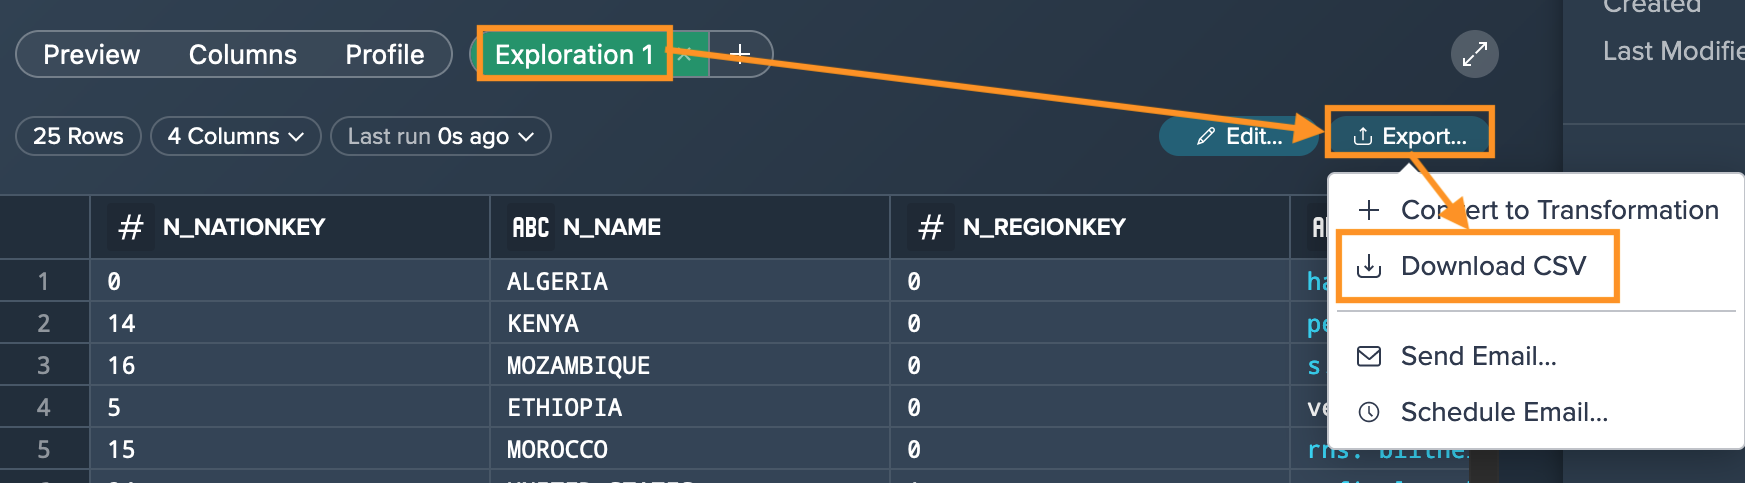
In the Data Grid, select the required "Exploration" tab and click on "Export" -> "Download CSV". The download is being prepared and the snackbar informs you when the download is ready.
-
Click on "Download Now" to download the Exploration CSV file. The file is now available according to your download configuration, e.g. in the download folder.
Download Limitations#
Note that the maximum download size is limited to 1 GB per default. This limit can be changed on the 'Snowflake Settings' page by an Admin. Due to Snowflake file size limitations, this limit should not be set over 5 GB.
Sending CSV Emails#
To provide data for others, you can send the dataset via email:
- via an ad-hoc email
- via a scheduled email
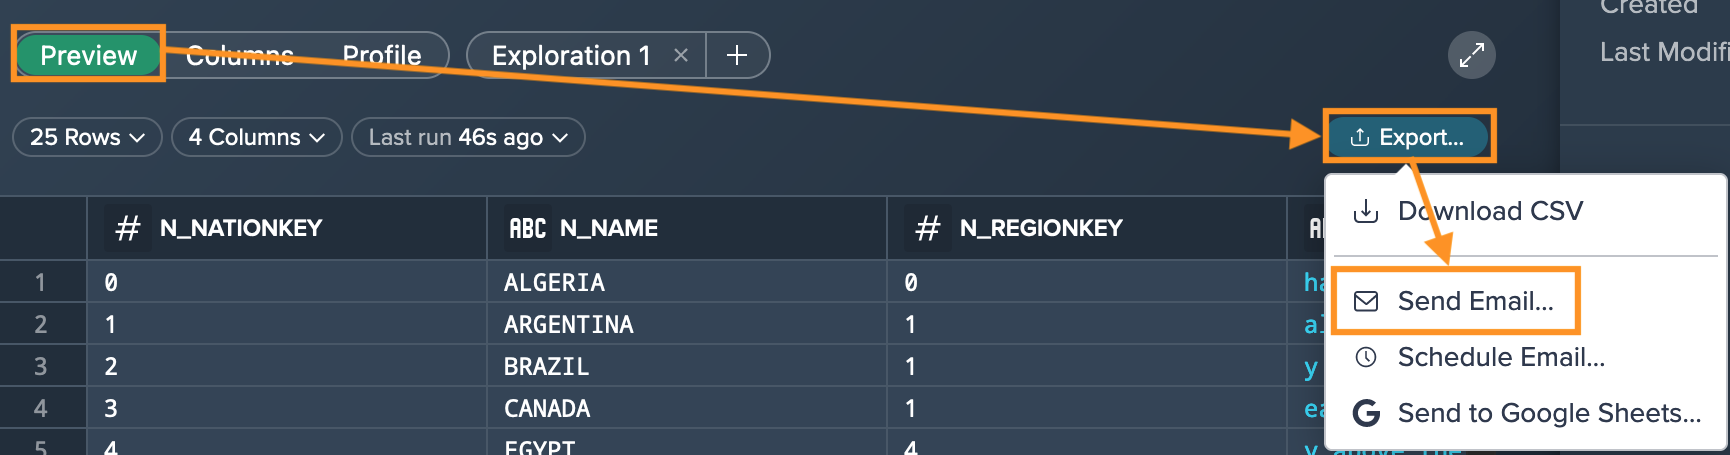
Sending a Single CSV Email#
You can also export your transformation results via email out of the Data Grid:
-
In the Data Grid, click on the "Preview" tab, click on the "Export" button and select "Send Email". The dialog 'Send CSV via Email' opens.
-
Enter the email recipient(s), optionally a subject and an additional message and confirm with "Send". The email is sent to all recipients.
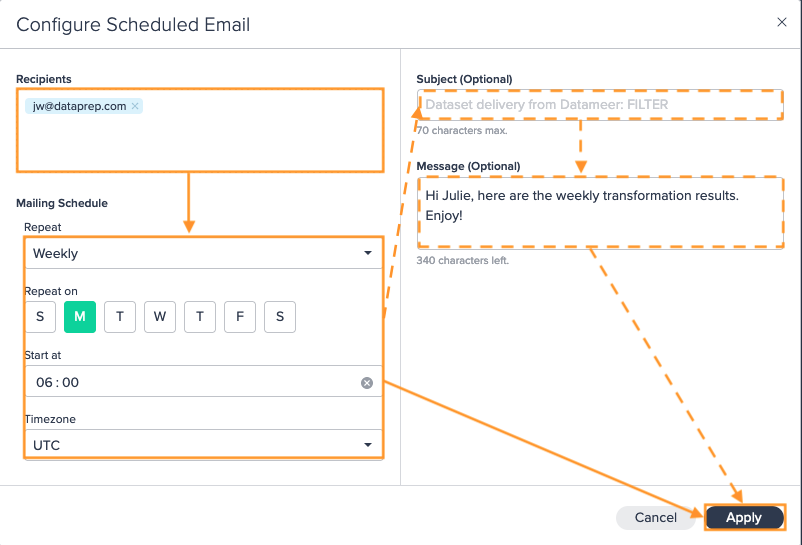
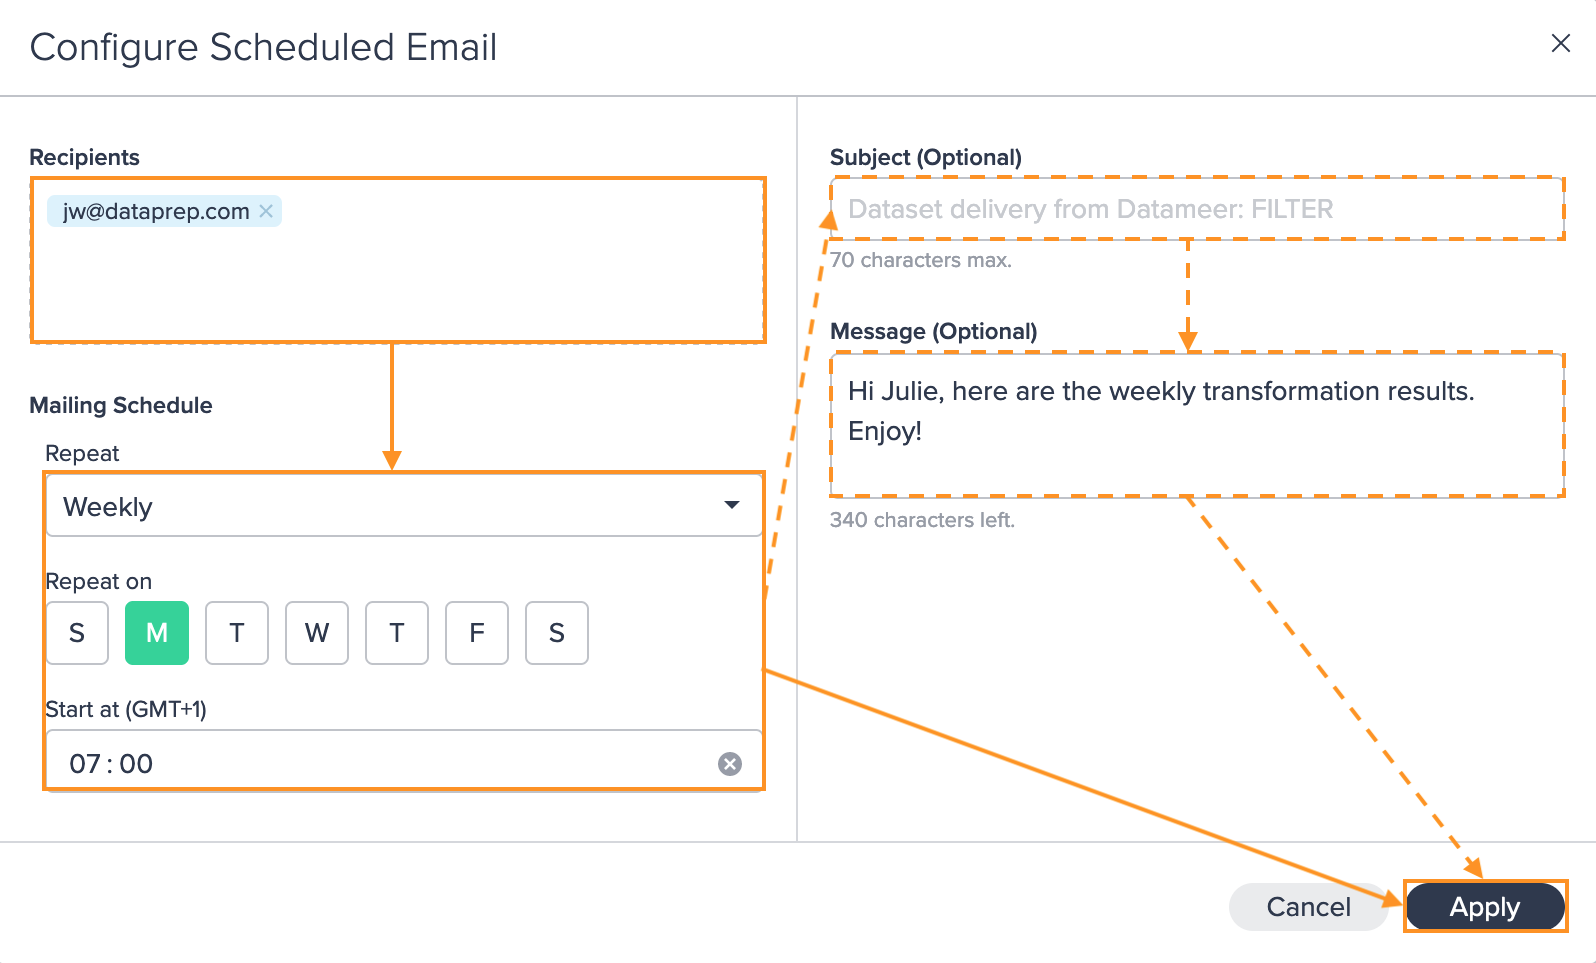
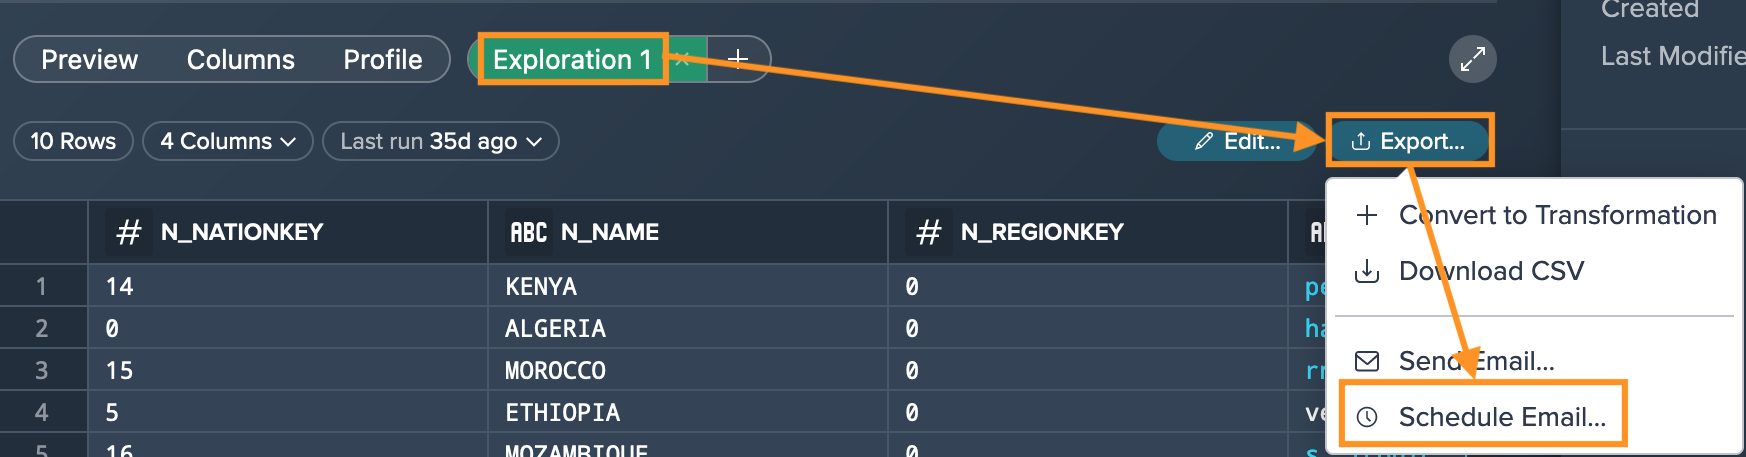
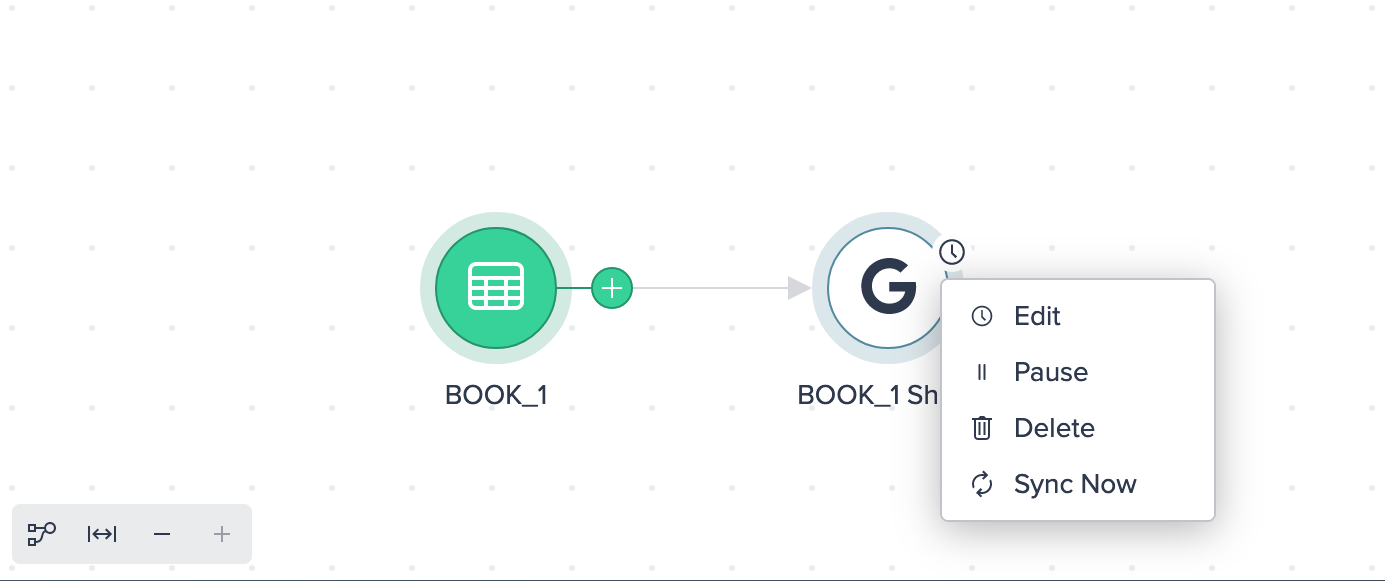
Scheduling a CSV Email#
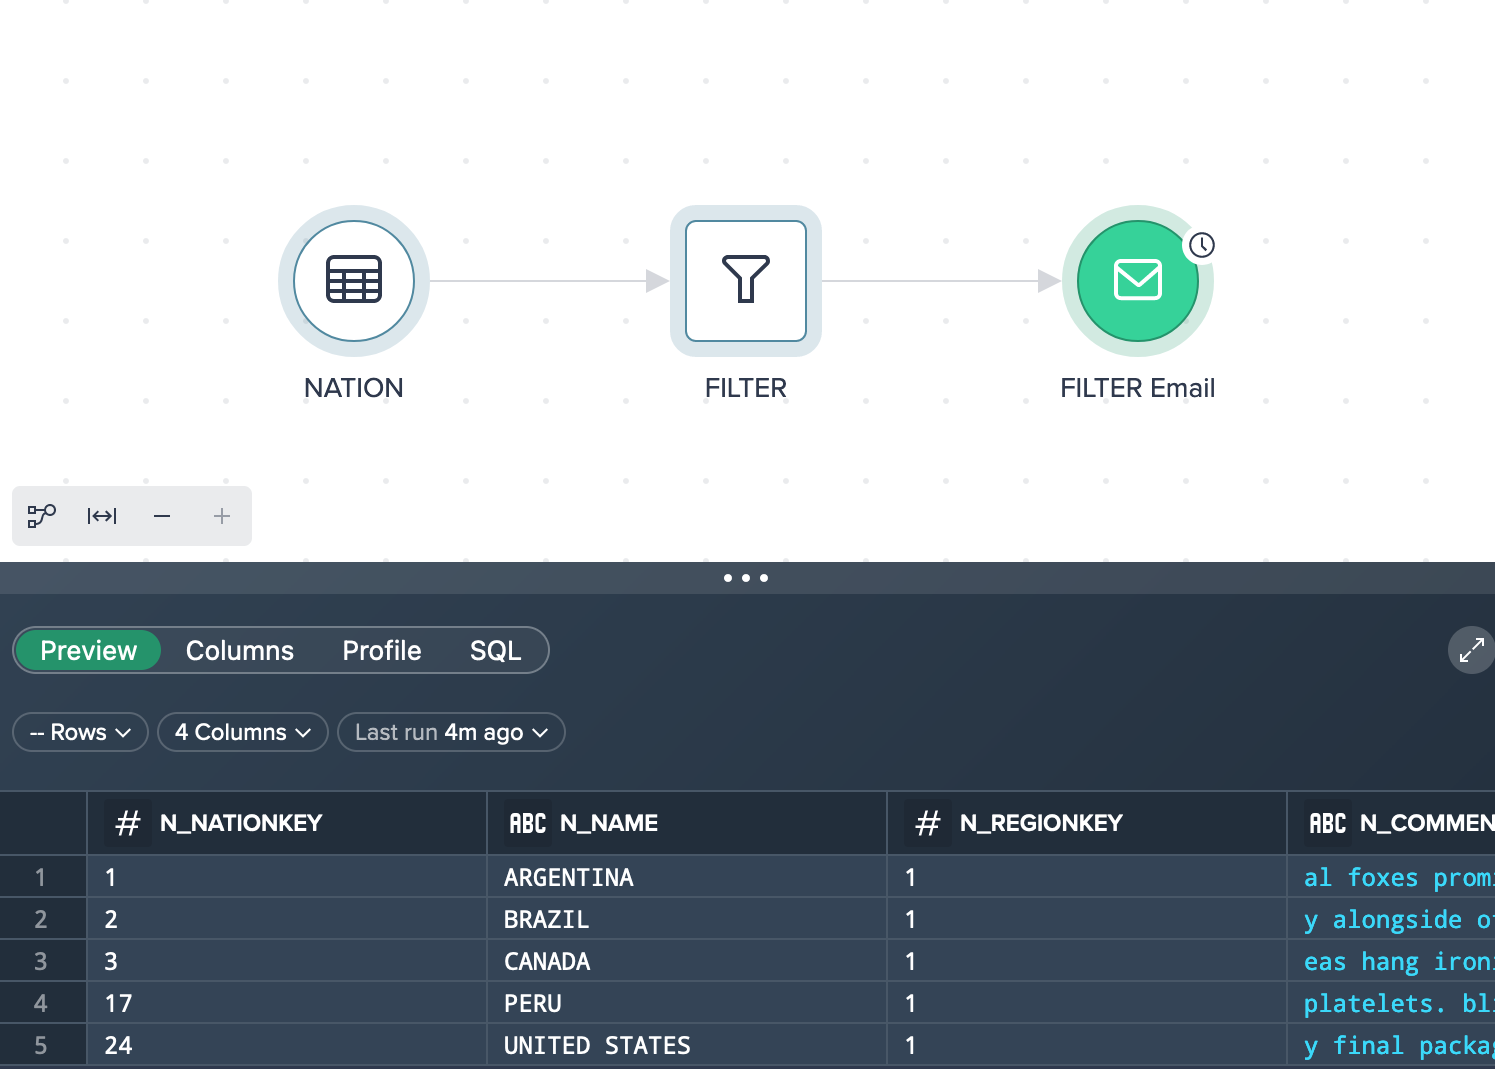
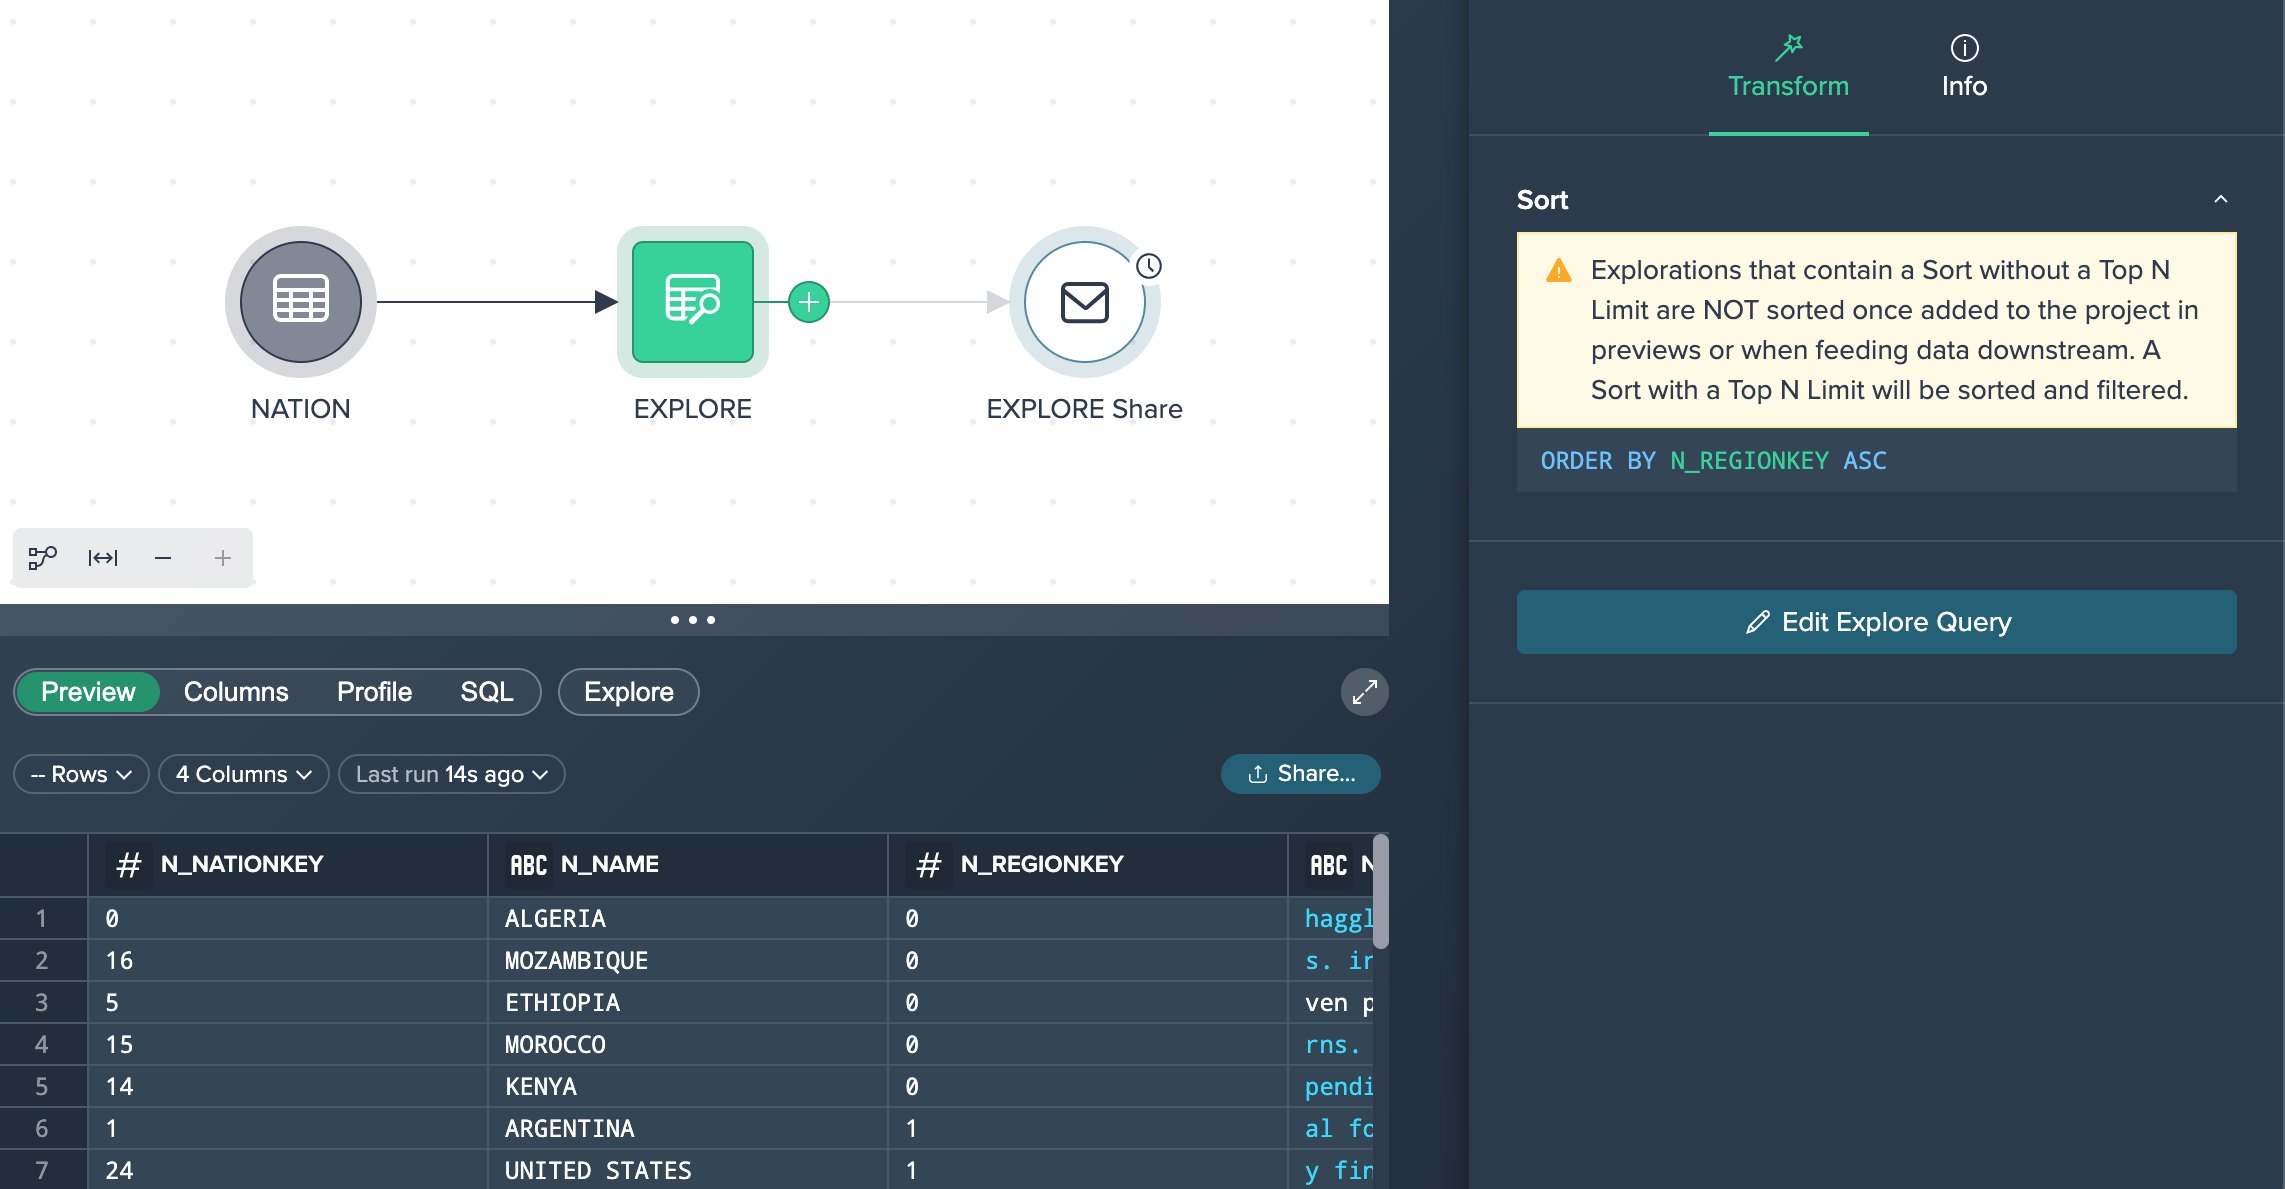
You can also schedule sending an email with CSV data sets. This can be useful e.g. when planning to send the transformation results once a week. Scheduled emails are displayed as an email node in the Flow Area:

To schedule an email:
-
In the Data Grid, click on the "Preview" tab, click on the "Export" button and select "Schedule Email".. The dialog 'Configure Scheduled Email' opens.
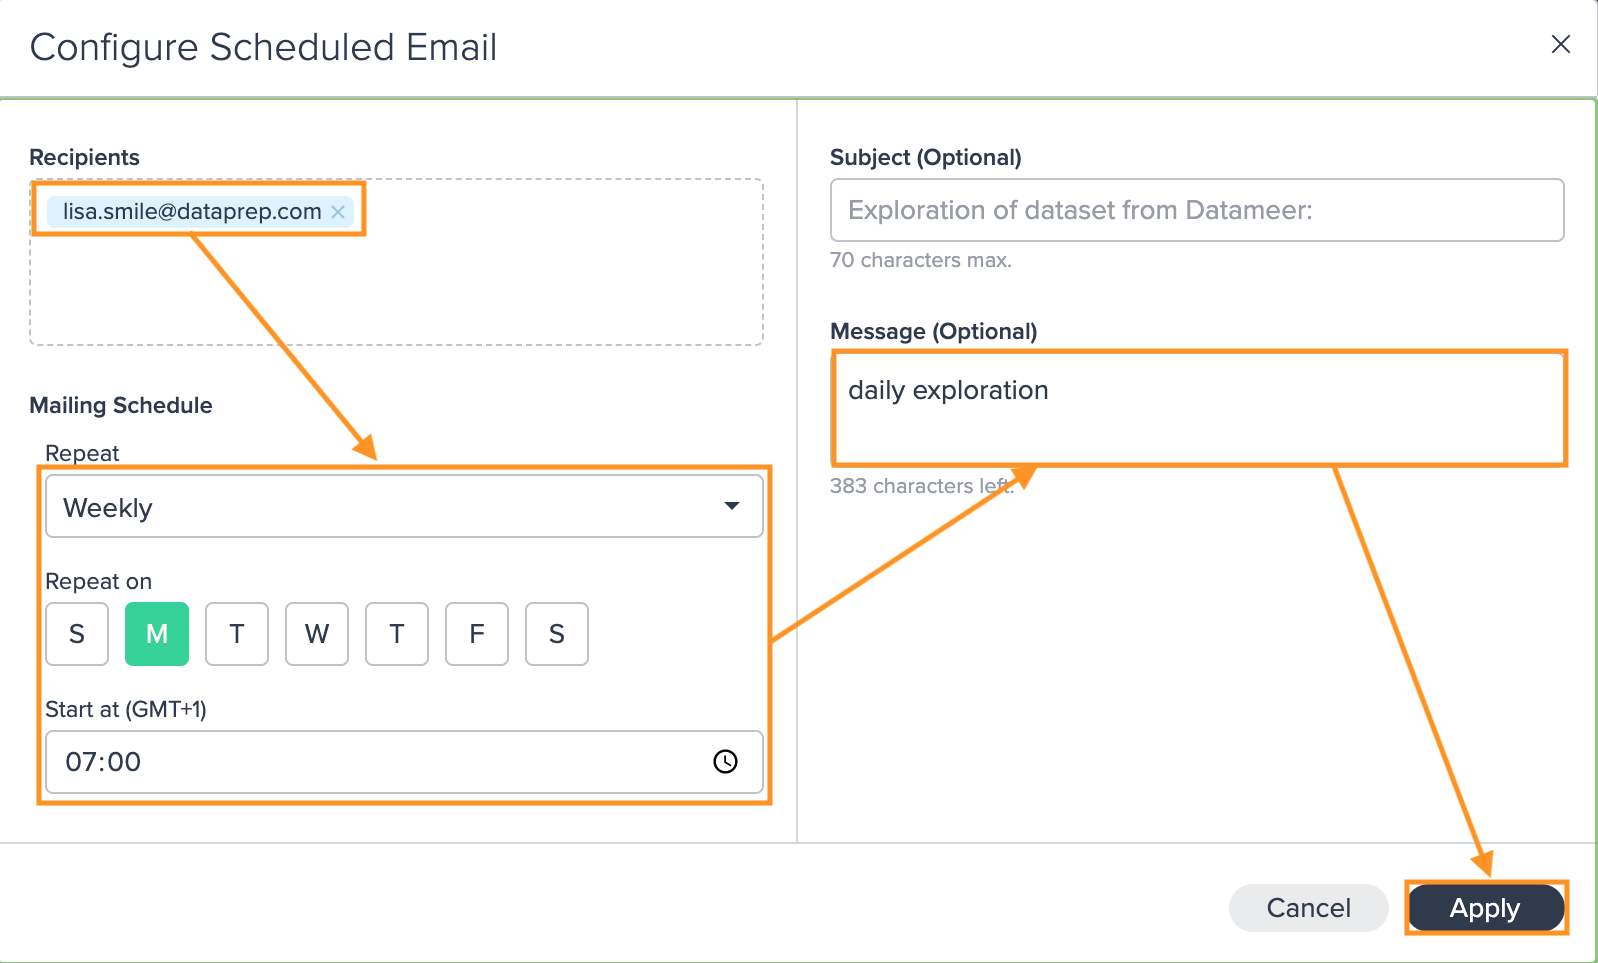
-
Enter the email recipient(s), select the mailing schedule, enter an optional subject and message and click on "Apply". Your configuration has been saved and the email will be send according to your scheduling. The snack bar displays the email scheduling confirmation. An email node appears in the Flow Area.
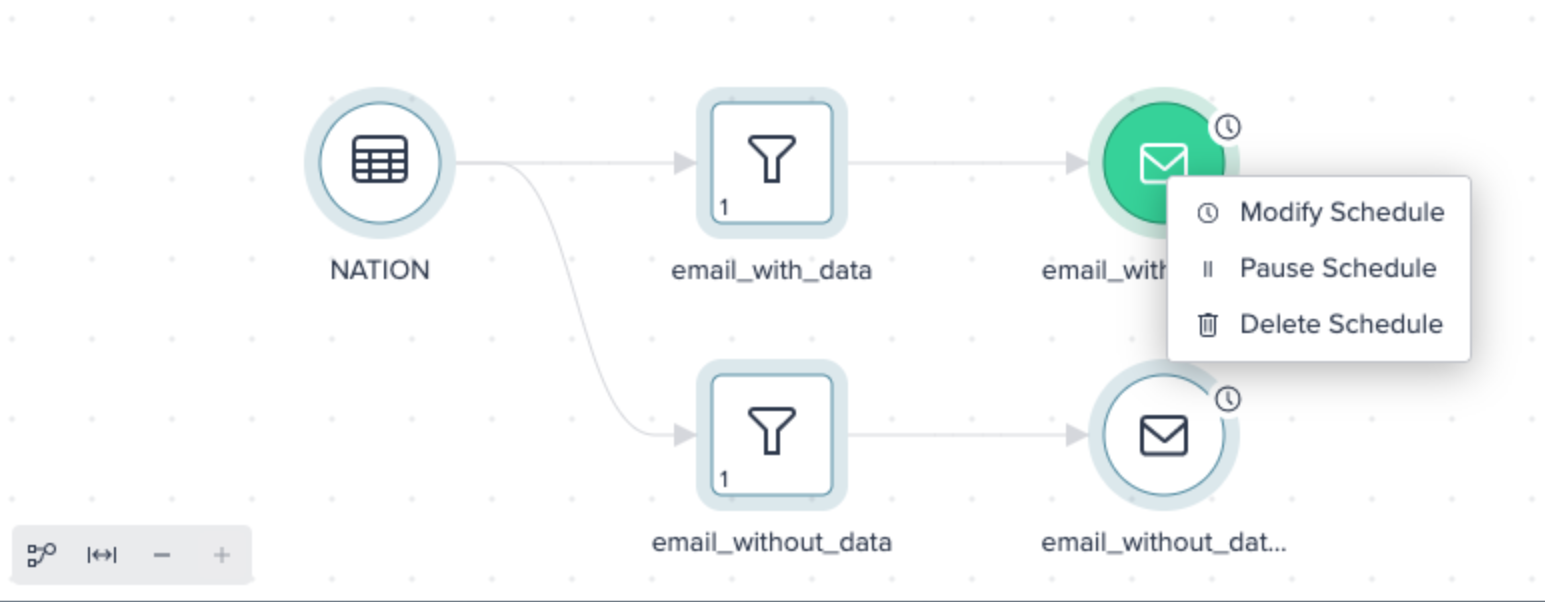
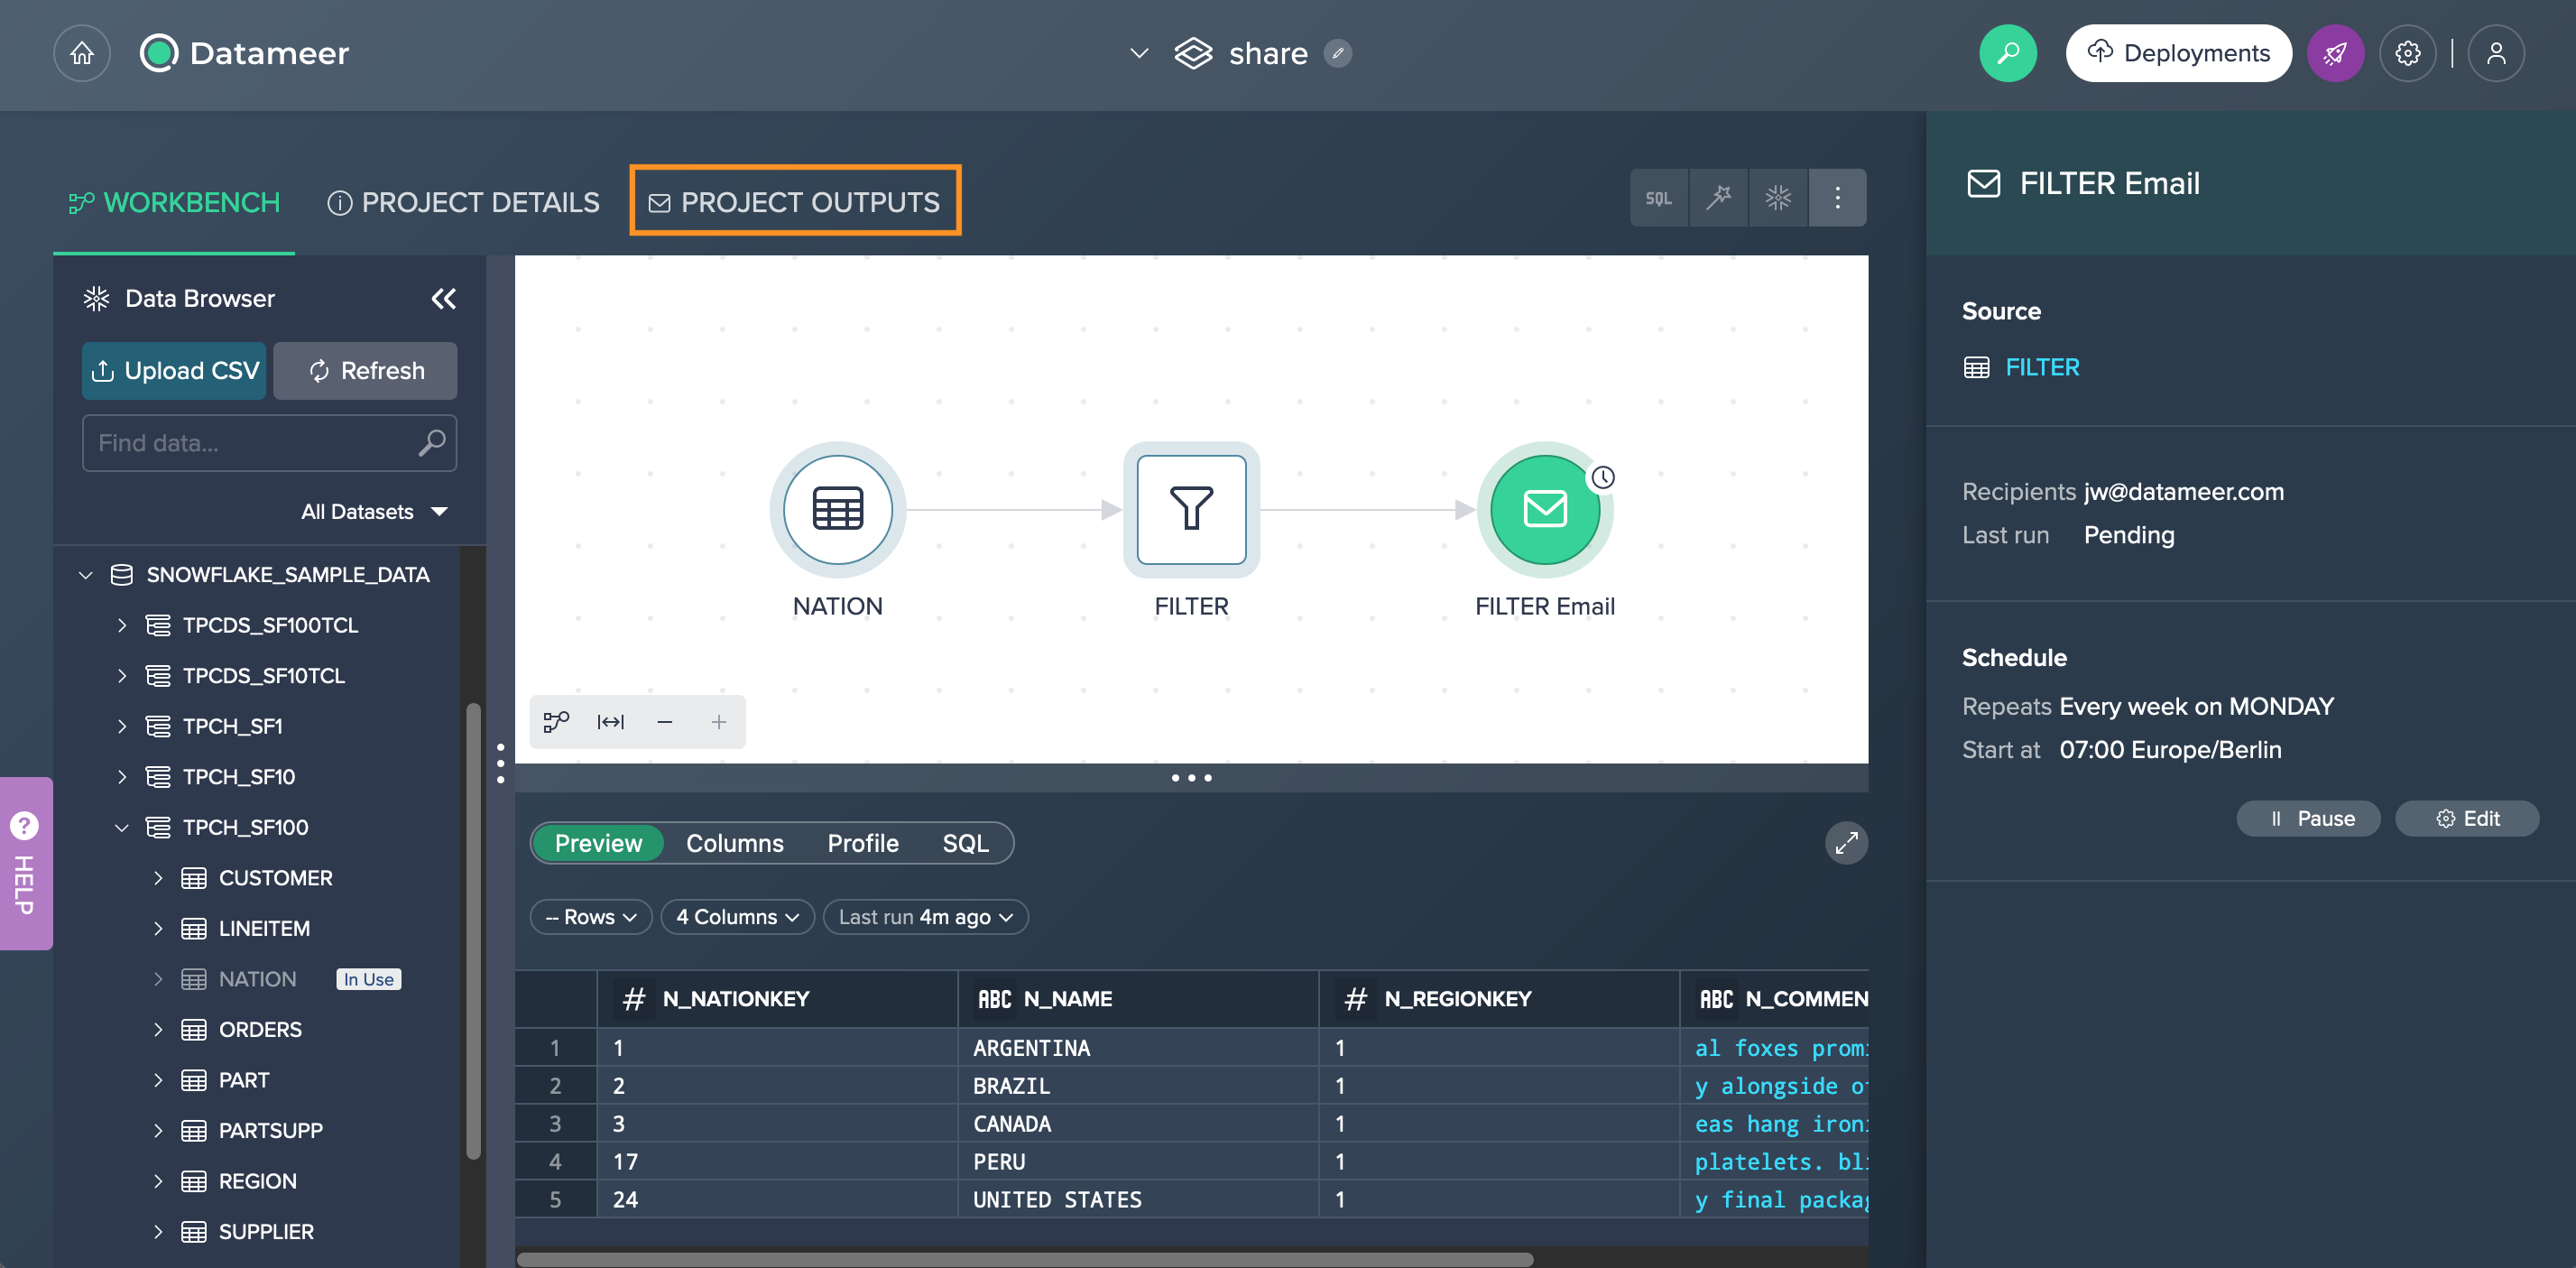
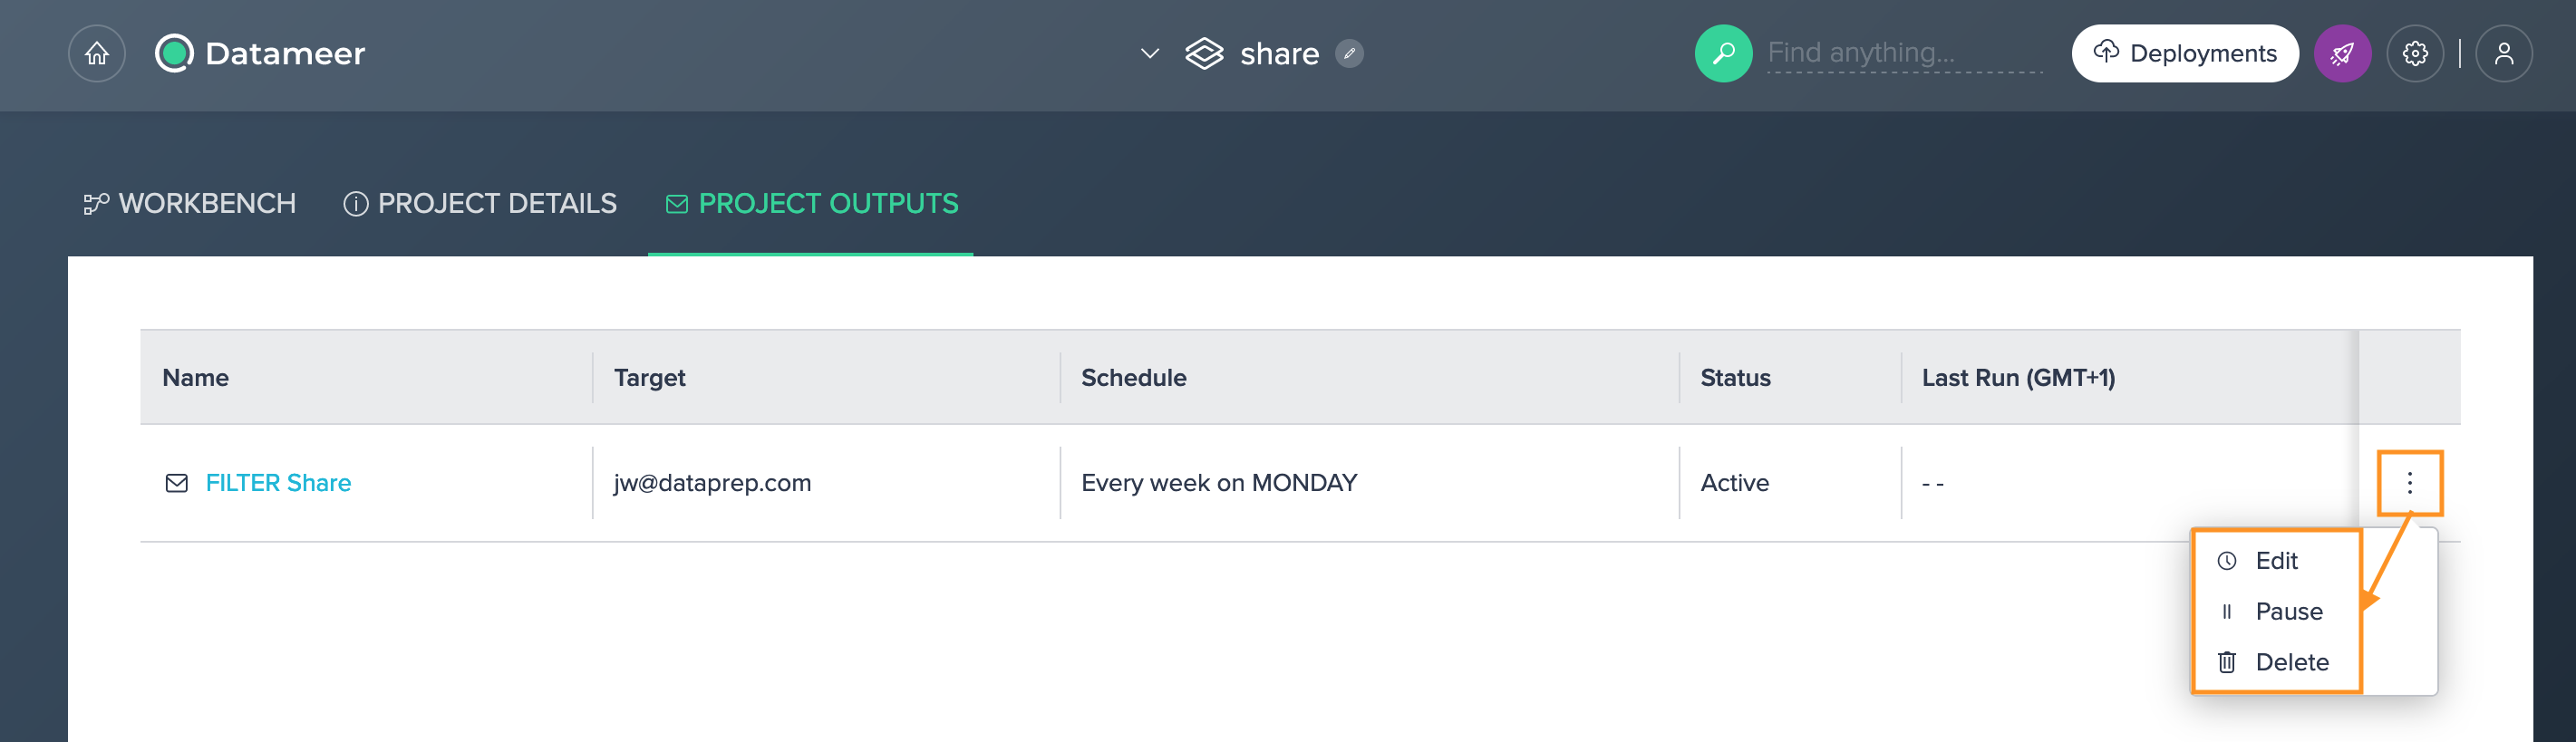
Scheduling Options#
Once an email is scheduled, you can modify, pause or delete the schedule:
-
via a schedule node's context menu
-
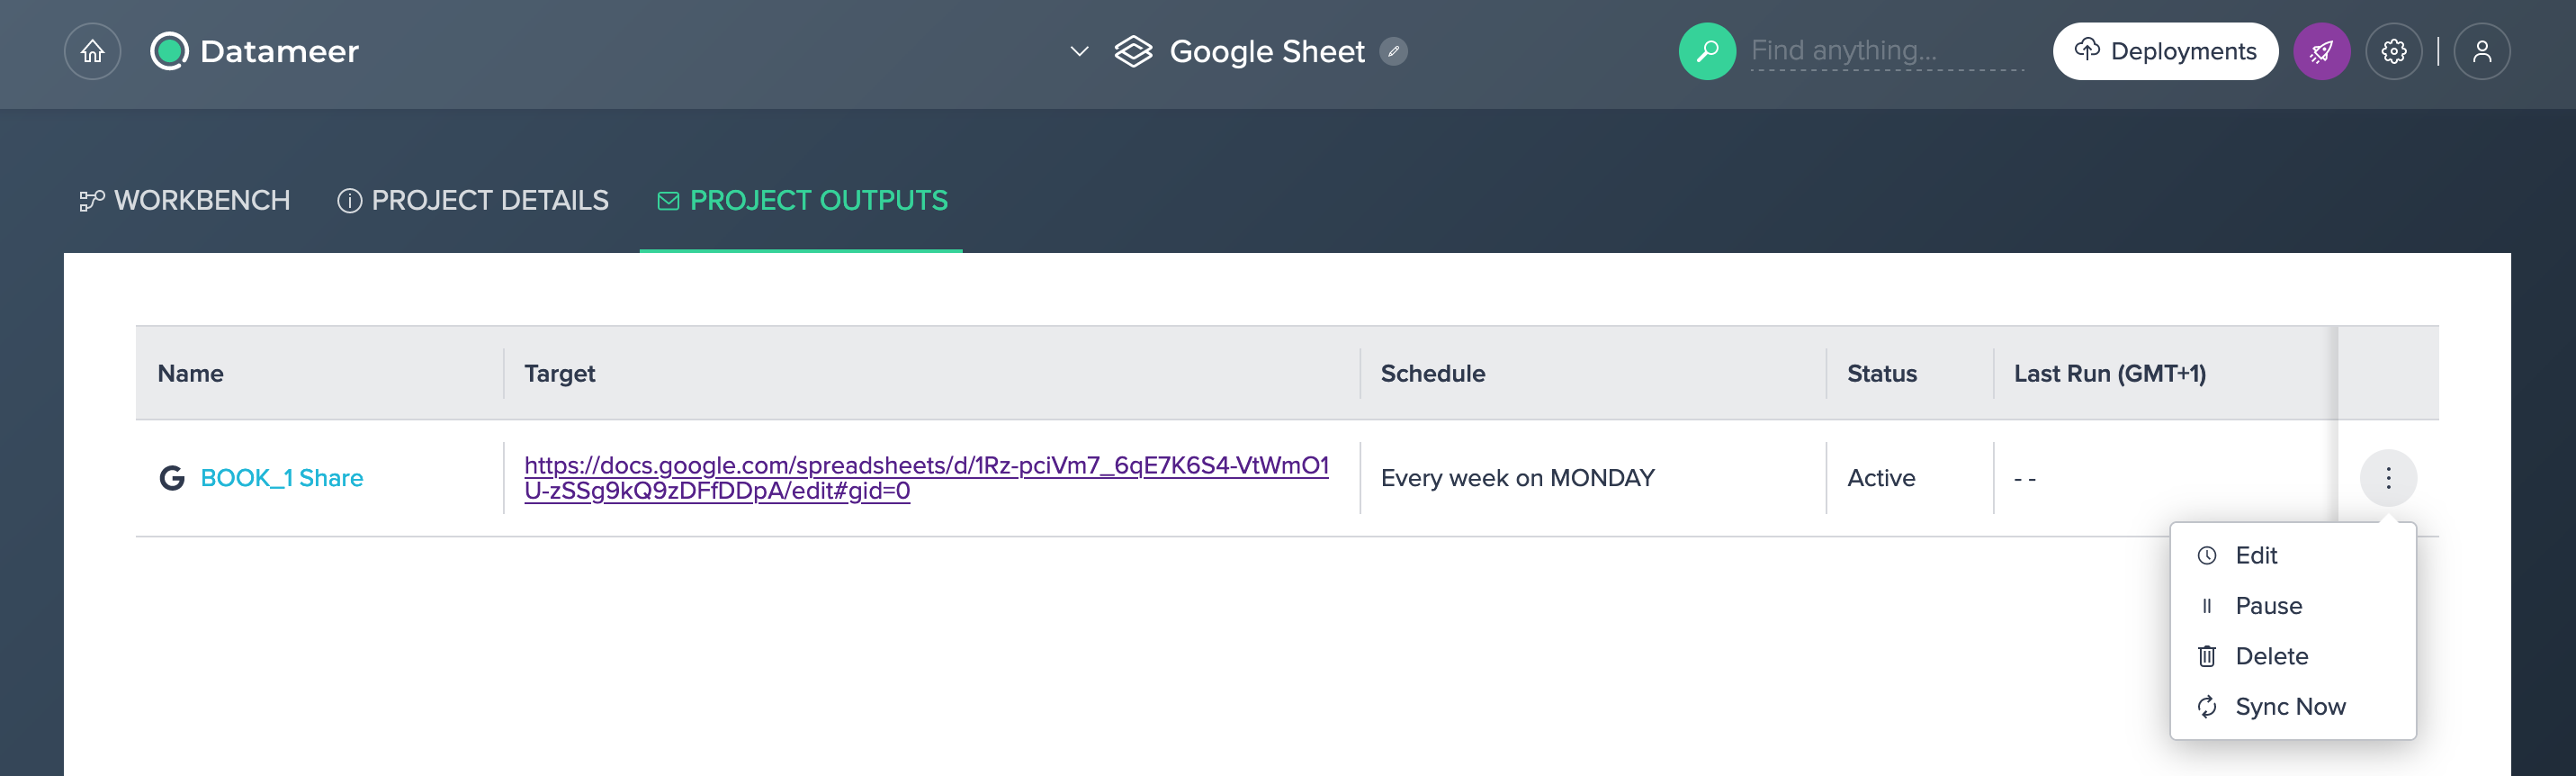
from the 'PROJECT OUTPUTS' tab
Sending Email Limitations#
-
Note that the maximum file size for sending an email is limited to 25 MB per default. This limit can be changed on the 'Snowflake Settings' page by an Admin but should not beyond 25 MB and would lead to errors in this case.
-
When a dataset has zero data and you want to send the empty dataset via email once oder scheduled, you get an error message displayed that the query returned no data for the named dataset name and Project. The recipient receives an email that the dataset contains zero results.
Sending an Exploration CSV#
To provide explorations for others, you can send the exploration via email:
- via an ad-hoc email
- via a scheduled email
Sending a Single Exploration CSV#
You can also export your exploration results via email out of the Data Grid:
-
In the Data Grid, click on the "Exploration" tab, click on the "Export" button and select "Send Email". The dialog 'Send CSV via Email' opens.
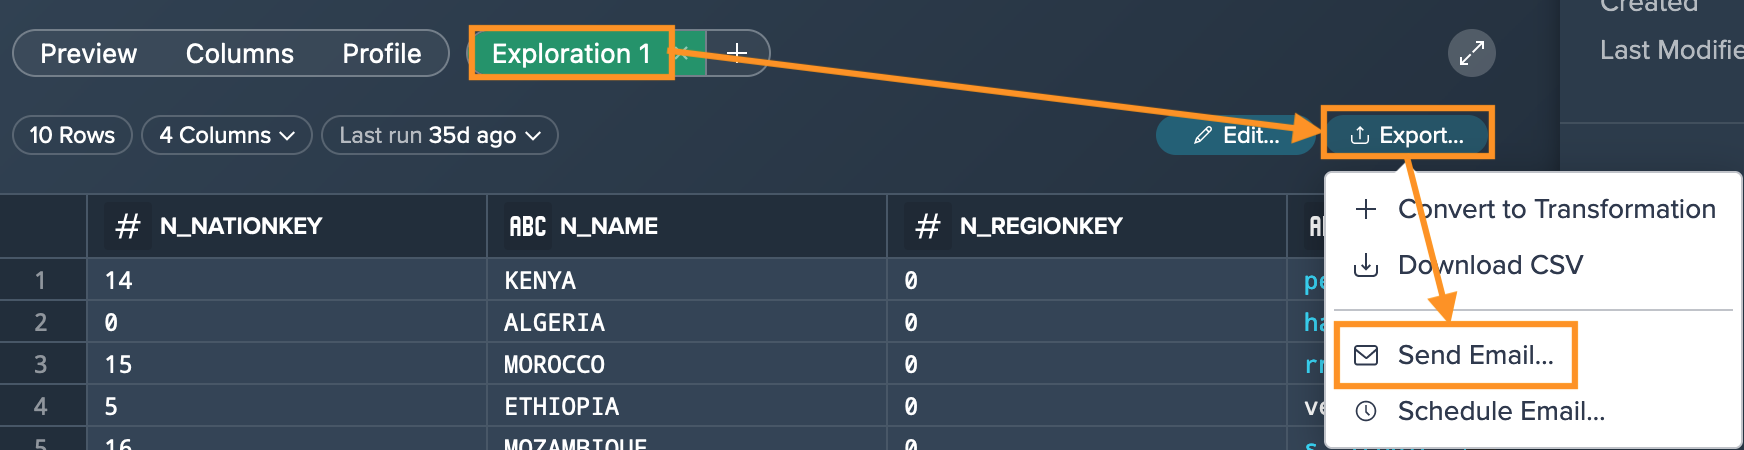
-
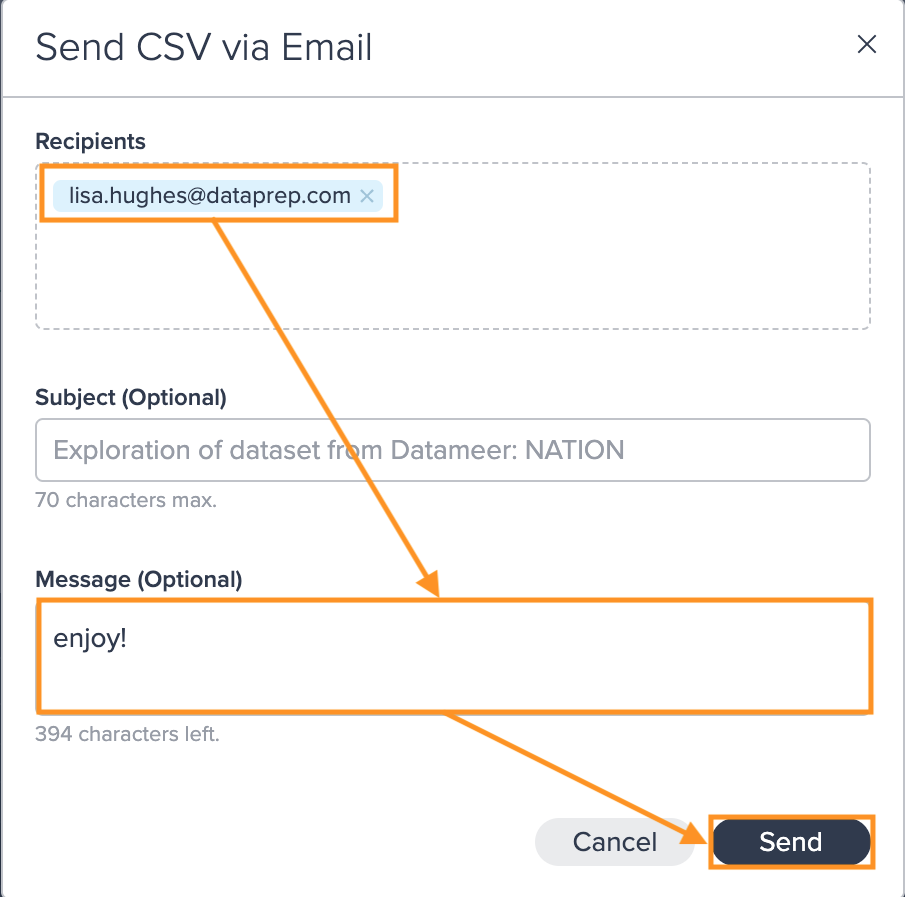
Enter the email recipient(s), optionally a subject and an additional message and confirm with "Send". The email is sent to all recipients.
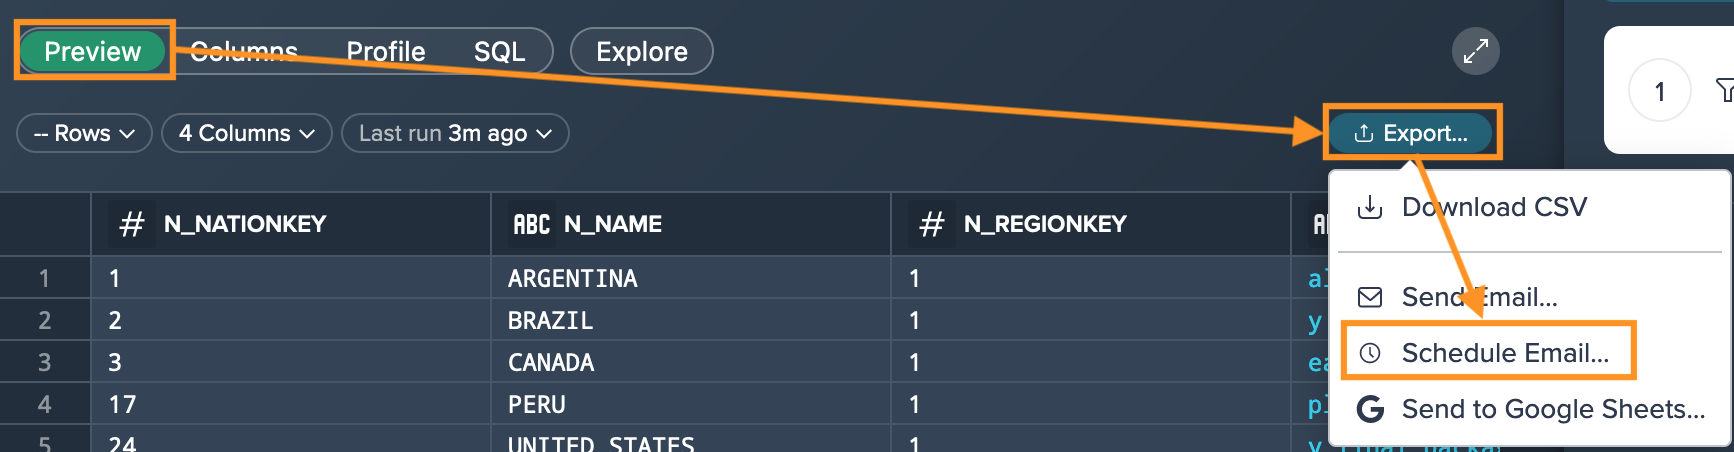
Scheduling an Exploration CSV#
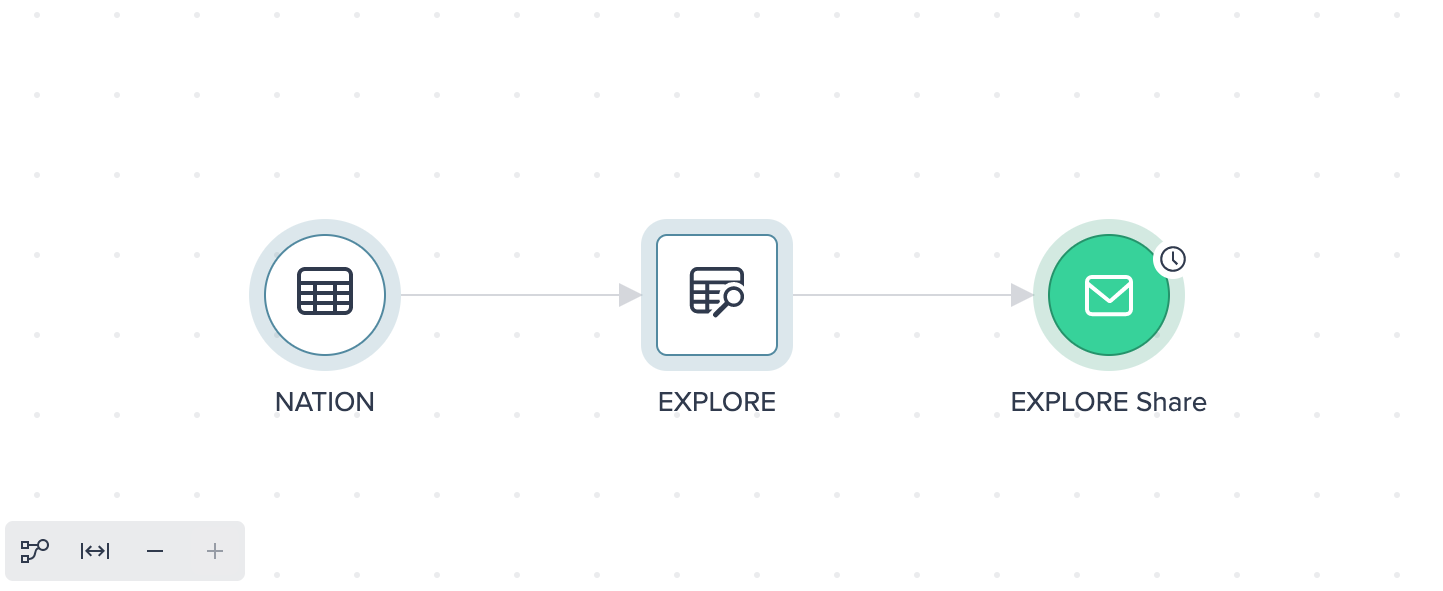
You can also schedule sending an email with exploration CSV data sets. This can be useful e.g. when planning to send the exploration results once a week. Scheduled Exploration emails are displayed as an exploration node plus the according scheduling mail node in the Flow Area:
To schedule an email:
-
In the Data Grid, click on the "Exploration" tab, click on the "Export" button and select "Schedule Email".. The dialog 'Configure Scheduled Email' opens.
-
Enter the email recipient(s), select the mailing schedule, enter an optional subject and message and click on "Apply". Your configuration has been saved and the email will be send according to your scheduling. The snack bar displays the email scheduling confirmation. Both the Exploration node and the Scheduled Email node appear in the Flow Area.
Exporting to Google Sheets#
You can export and update your Google Sheets with your colleagues and refresh the dataset periodically to keep it updated. Schedules can be set to automate the updating process. Sharing the dataset can be performed via the 'Export' button in the Data Grid.
Prerequisites#
To export a Google Sheet, the following prerequisites must be fulfilled:
- required privileges on the 'Admin' page
- prepared Google Sheet & Google account
Google account preparation
Your Google account must be configured to provide a service account in order to generate a private JSON key. You will need this key later on in Datameer. Find help on how to create a service account here.
Datameer 'Admin' configuration
Datameer must be configured to connect a Google Sheet Service Account. For that:
-
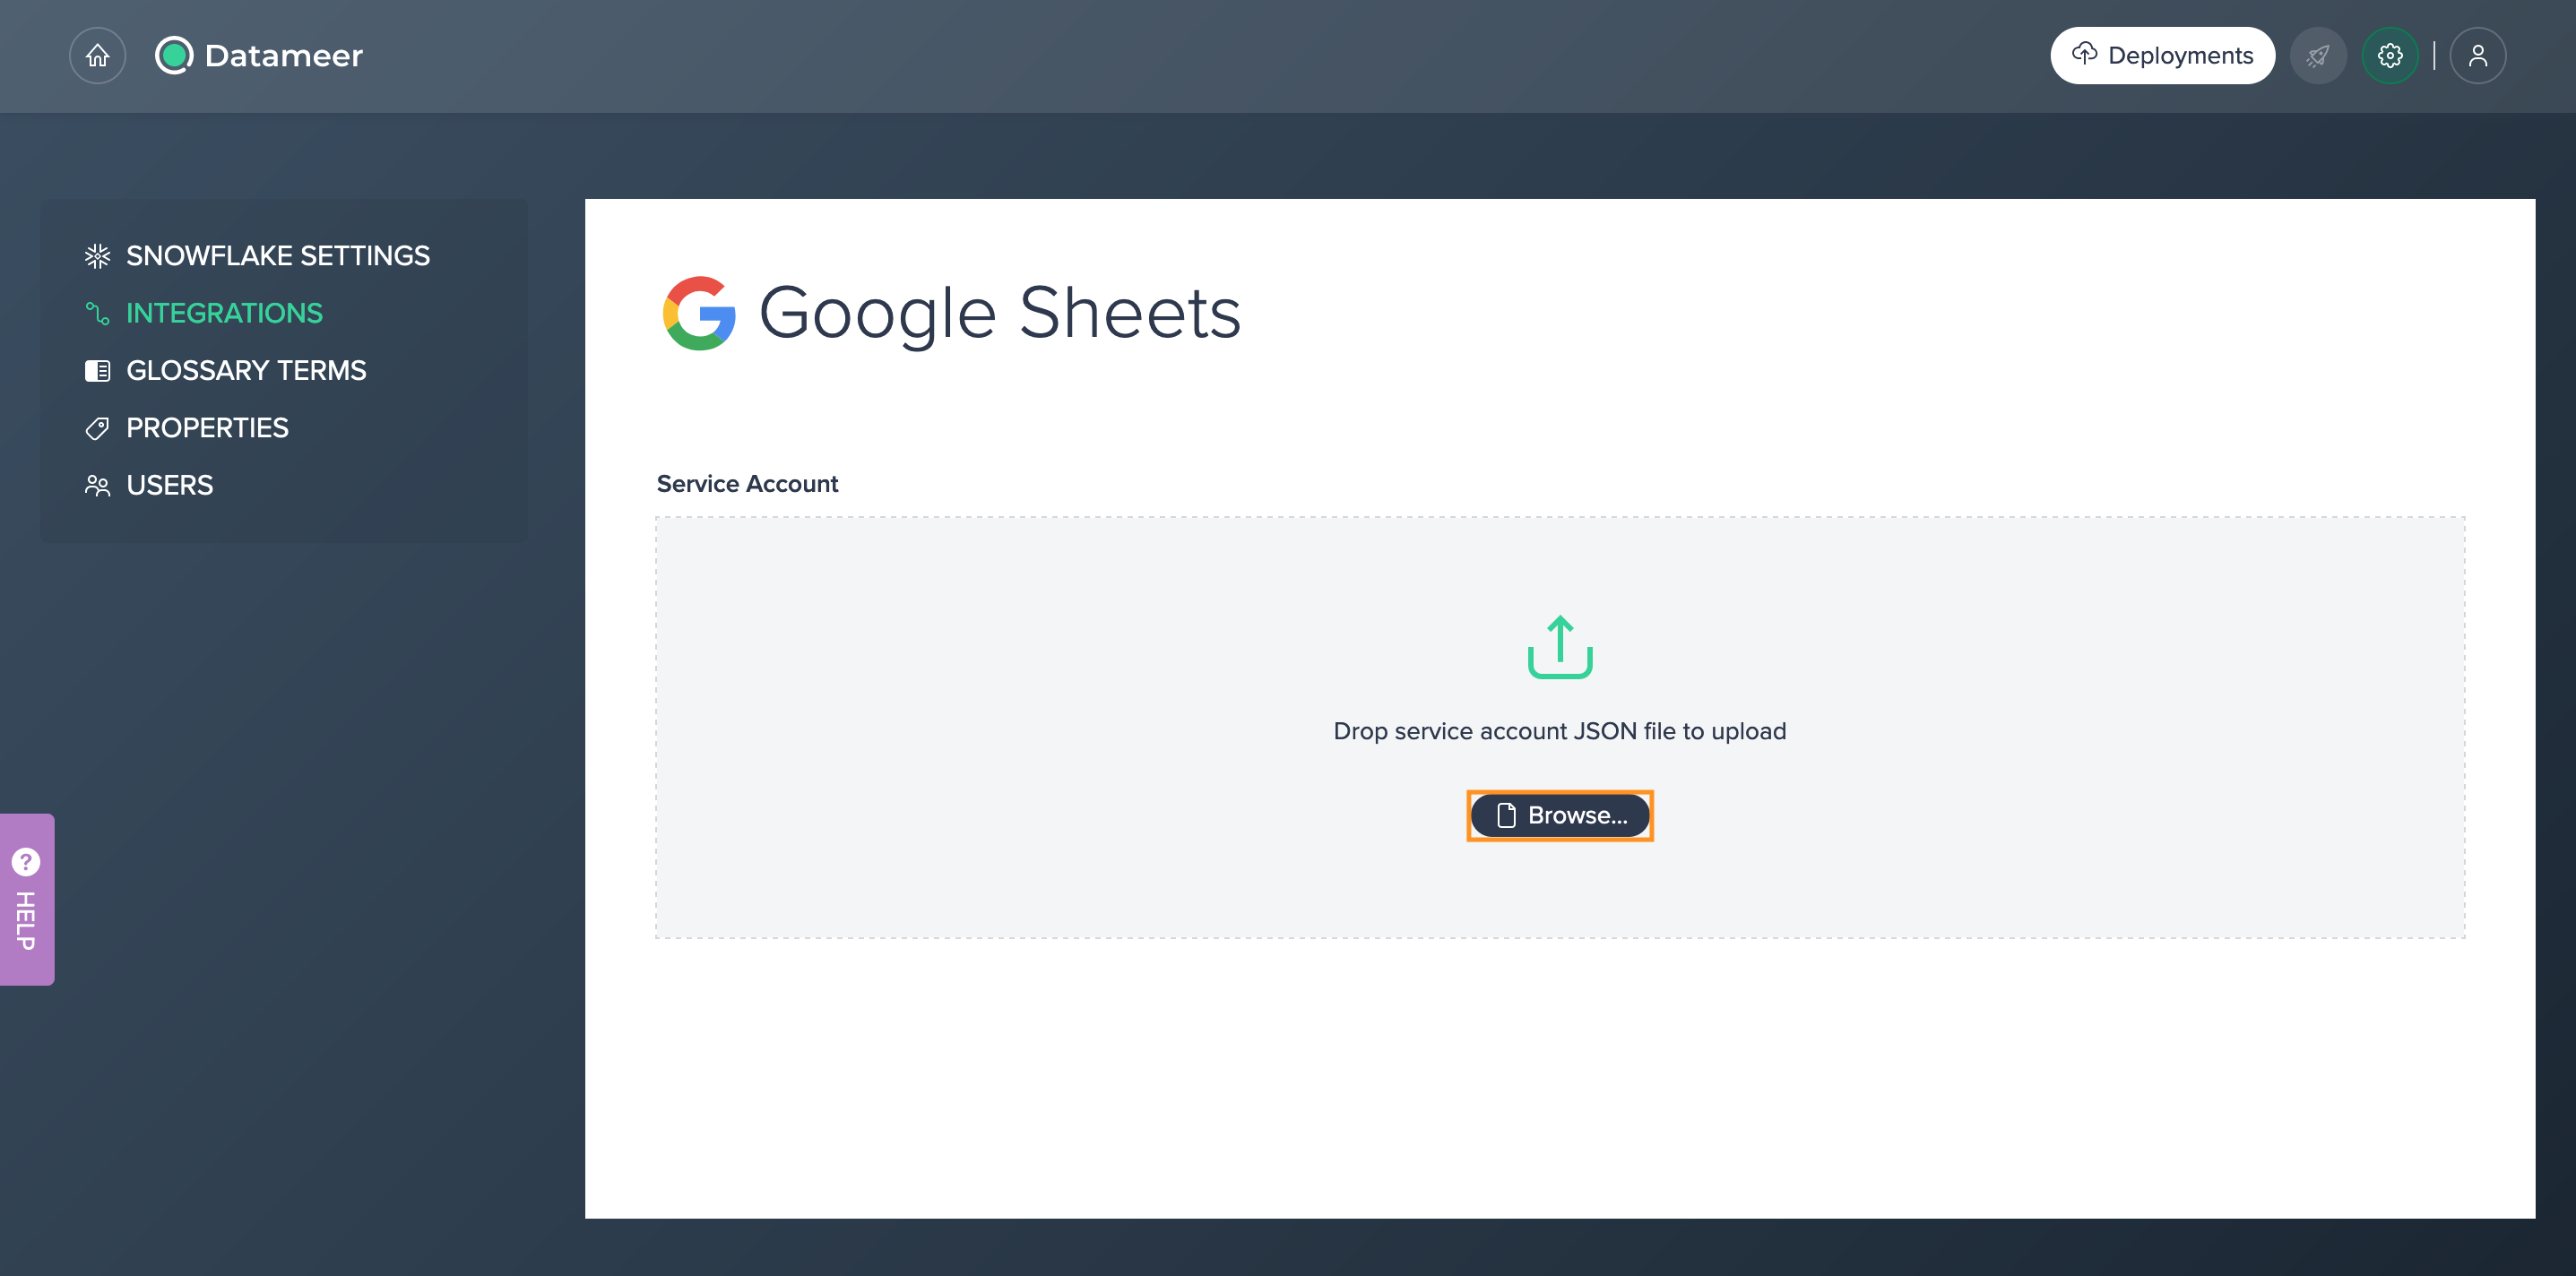
Jump to the "Admin" page and select "Integrations". The 'Service Account' section opens.
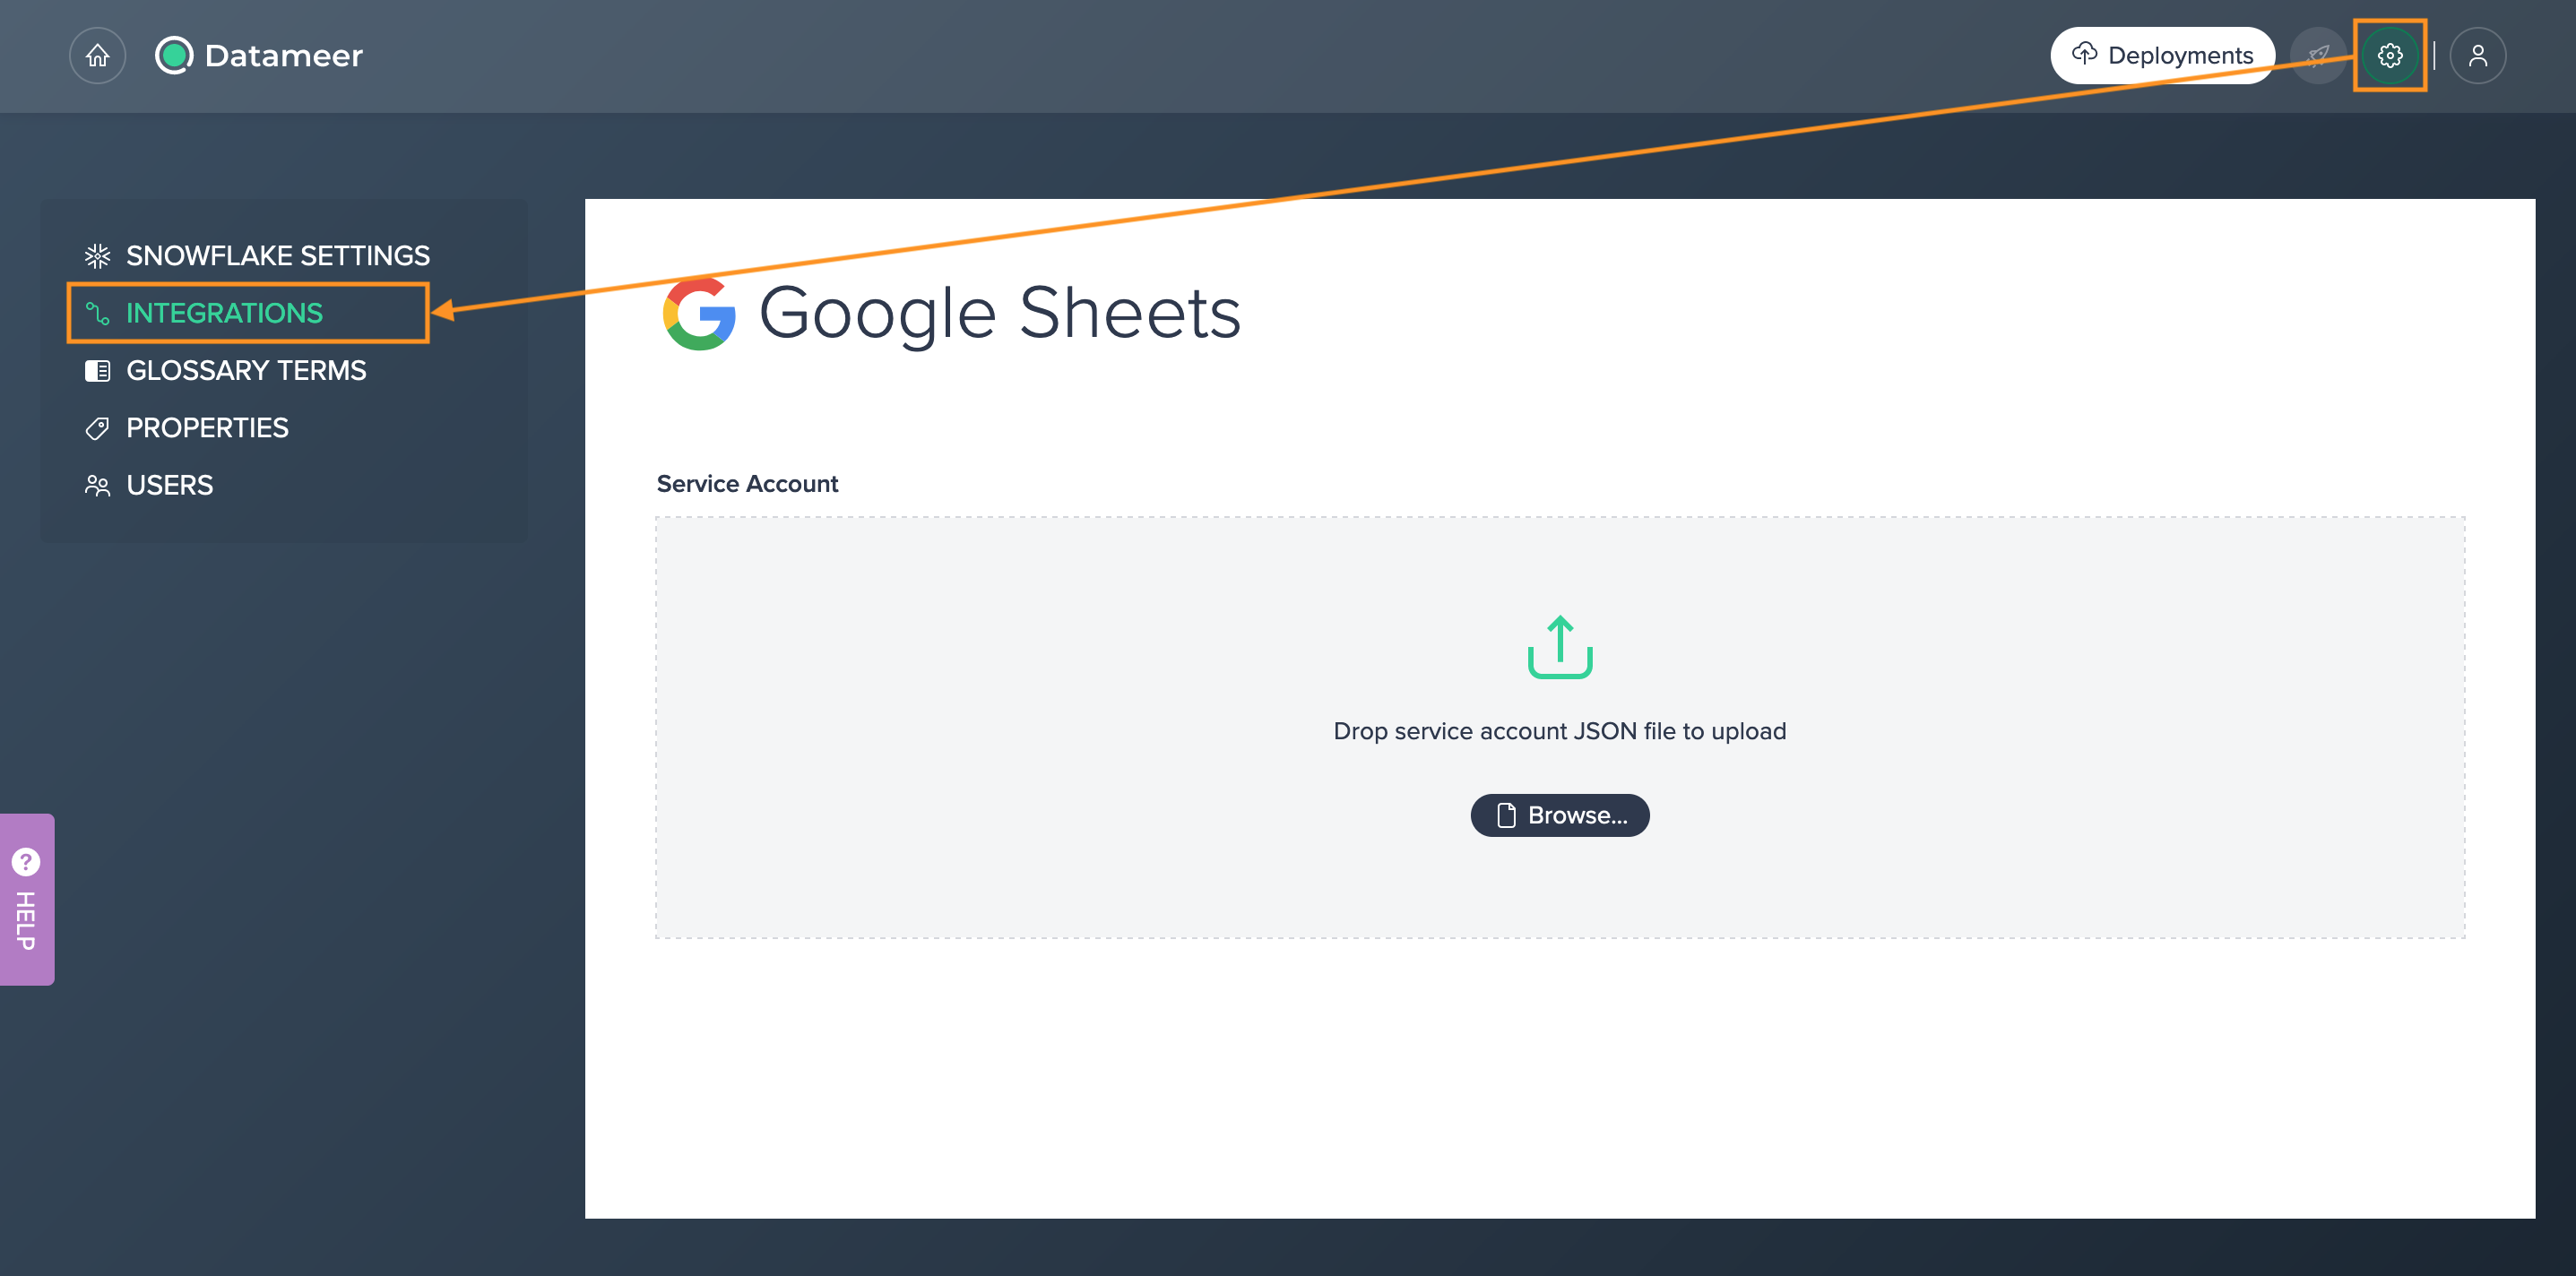
-
Upload the JSON file from your Google Sheet Service Account. The service account is no configured.
Google Sheet preparation
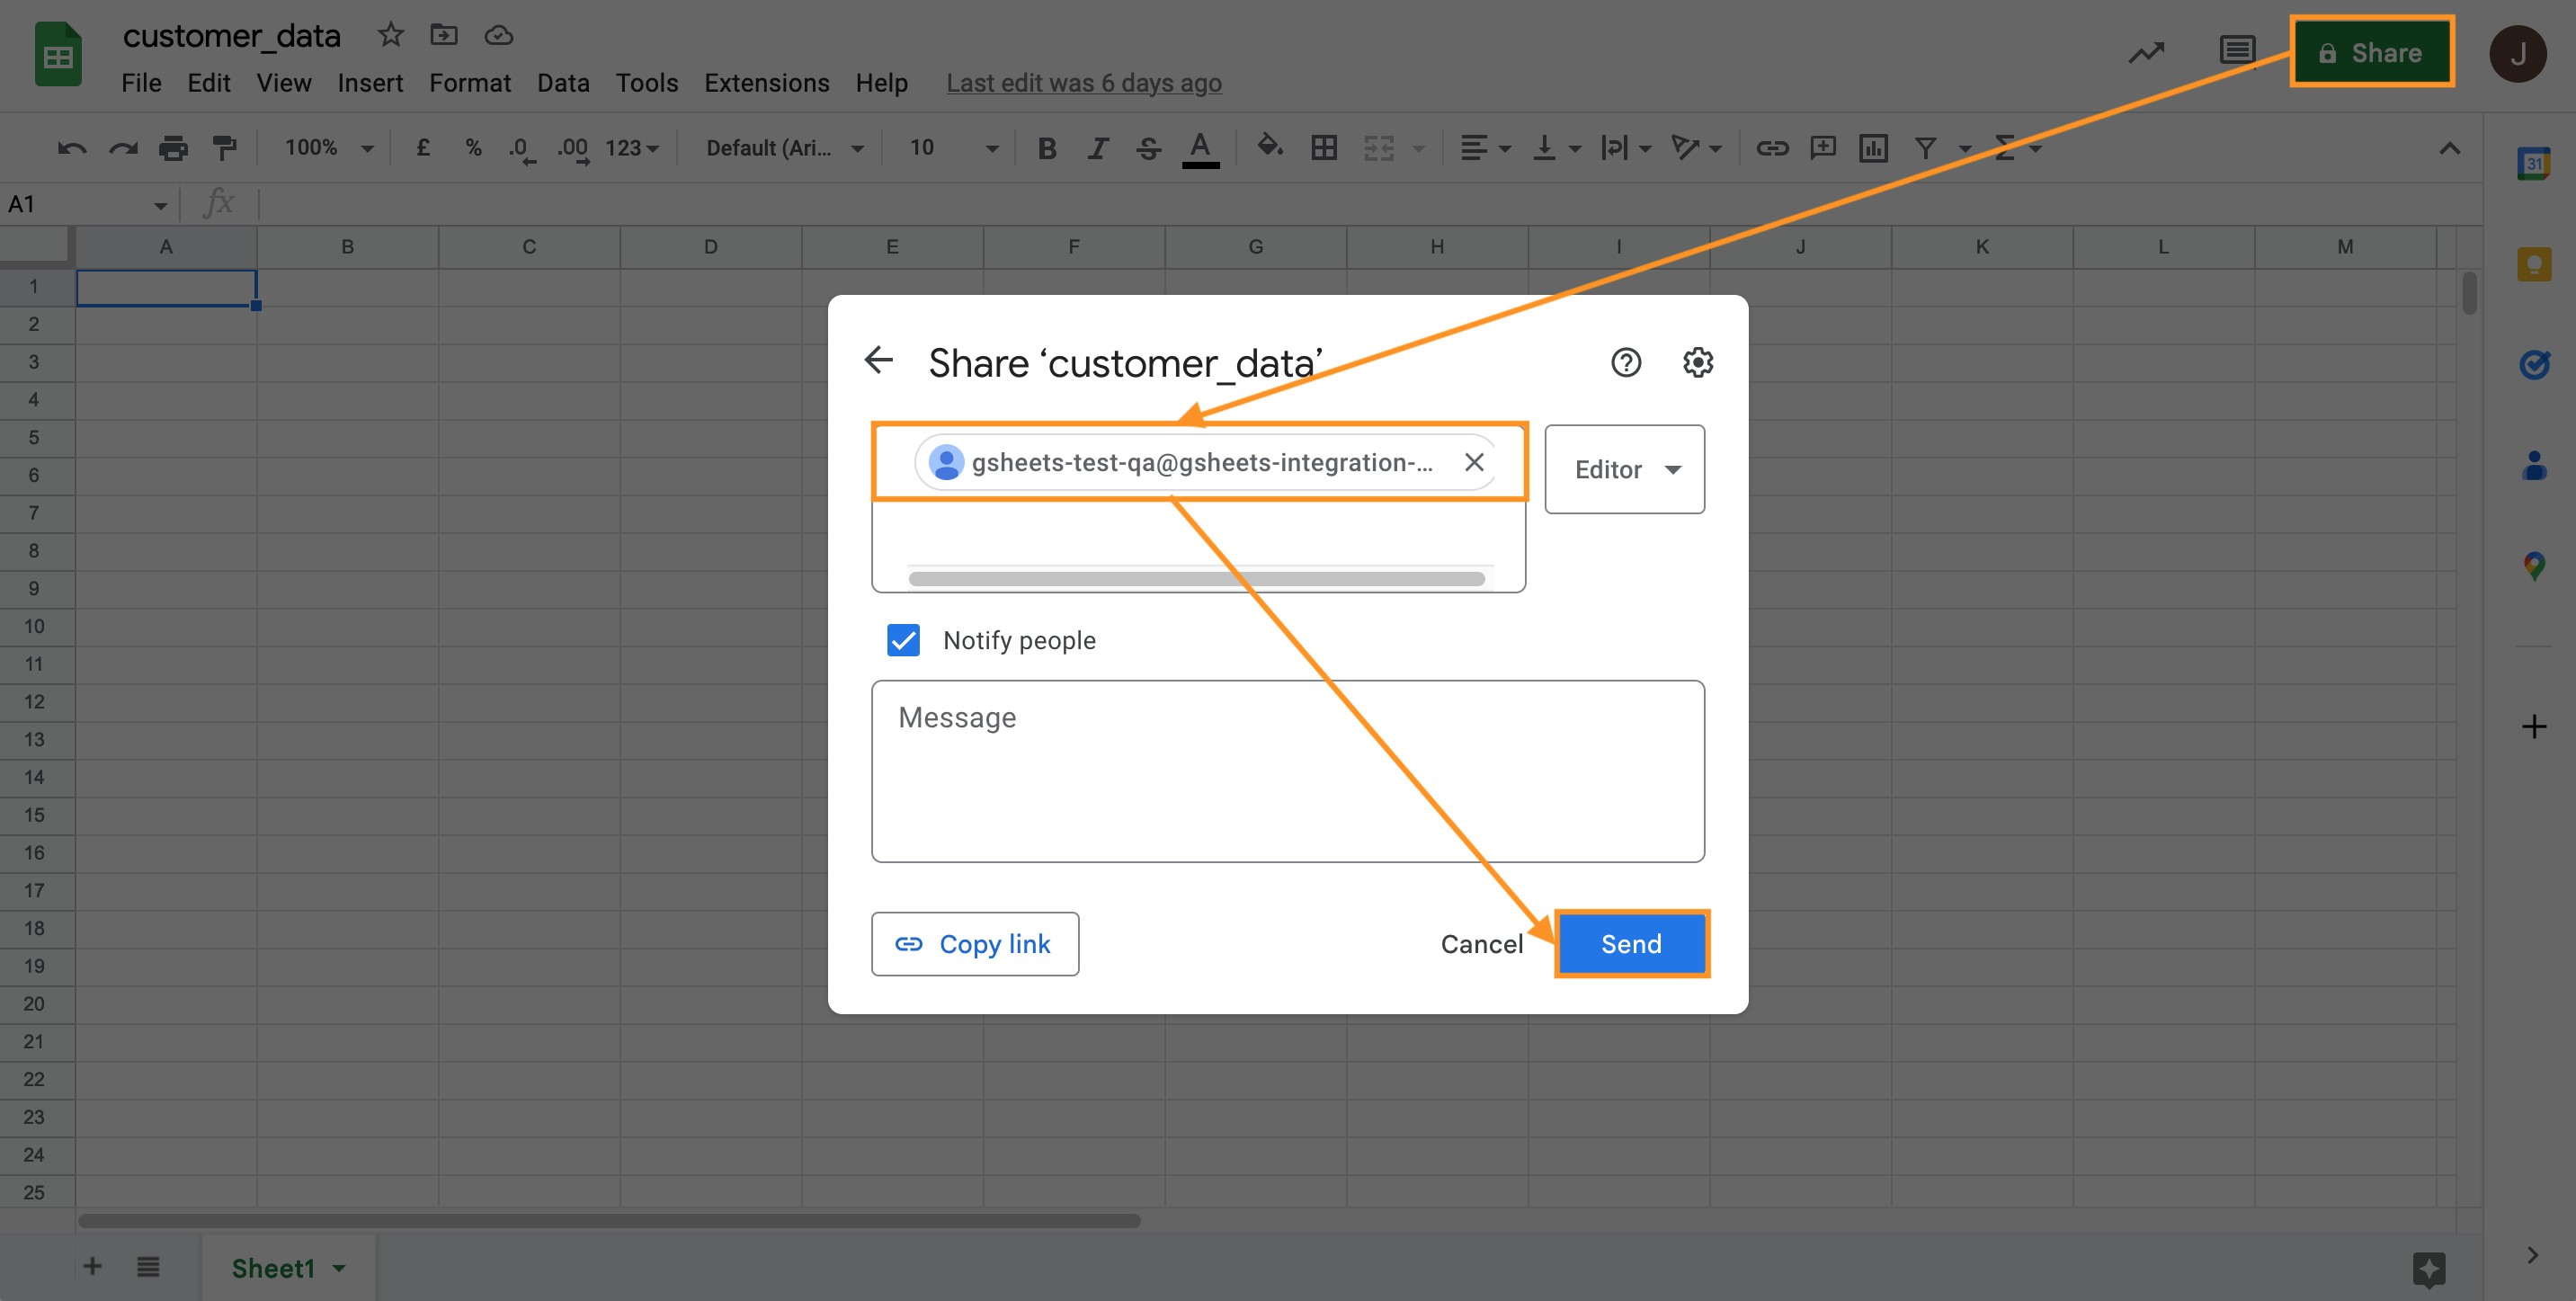
Create a blank Google Spreadsheet and copy the URL. Share the URL with your Google Service account.
Sending to Google Sheets#
To update your Google Sheet:
-
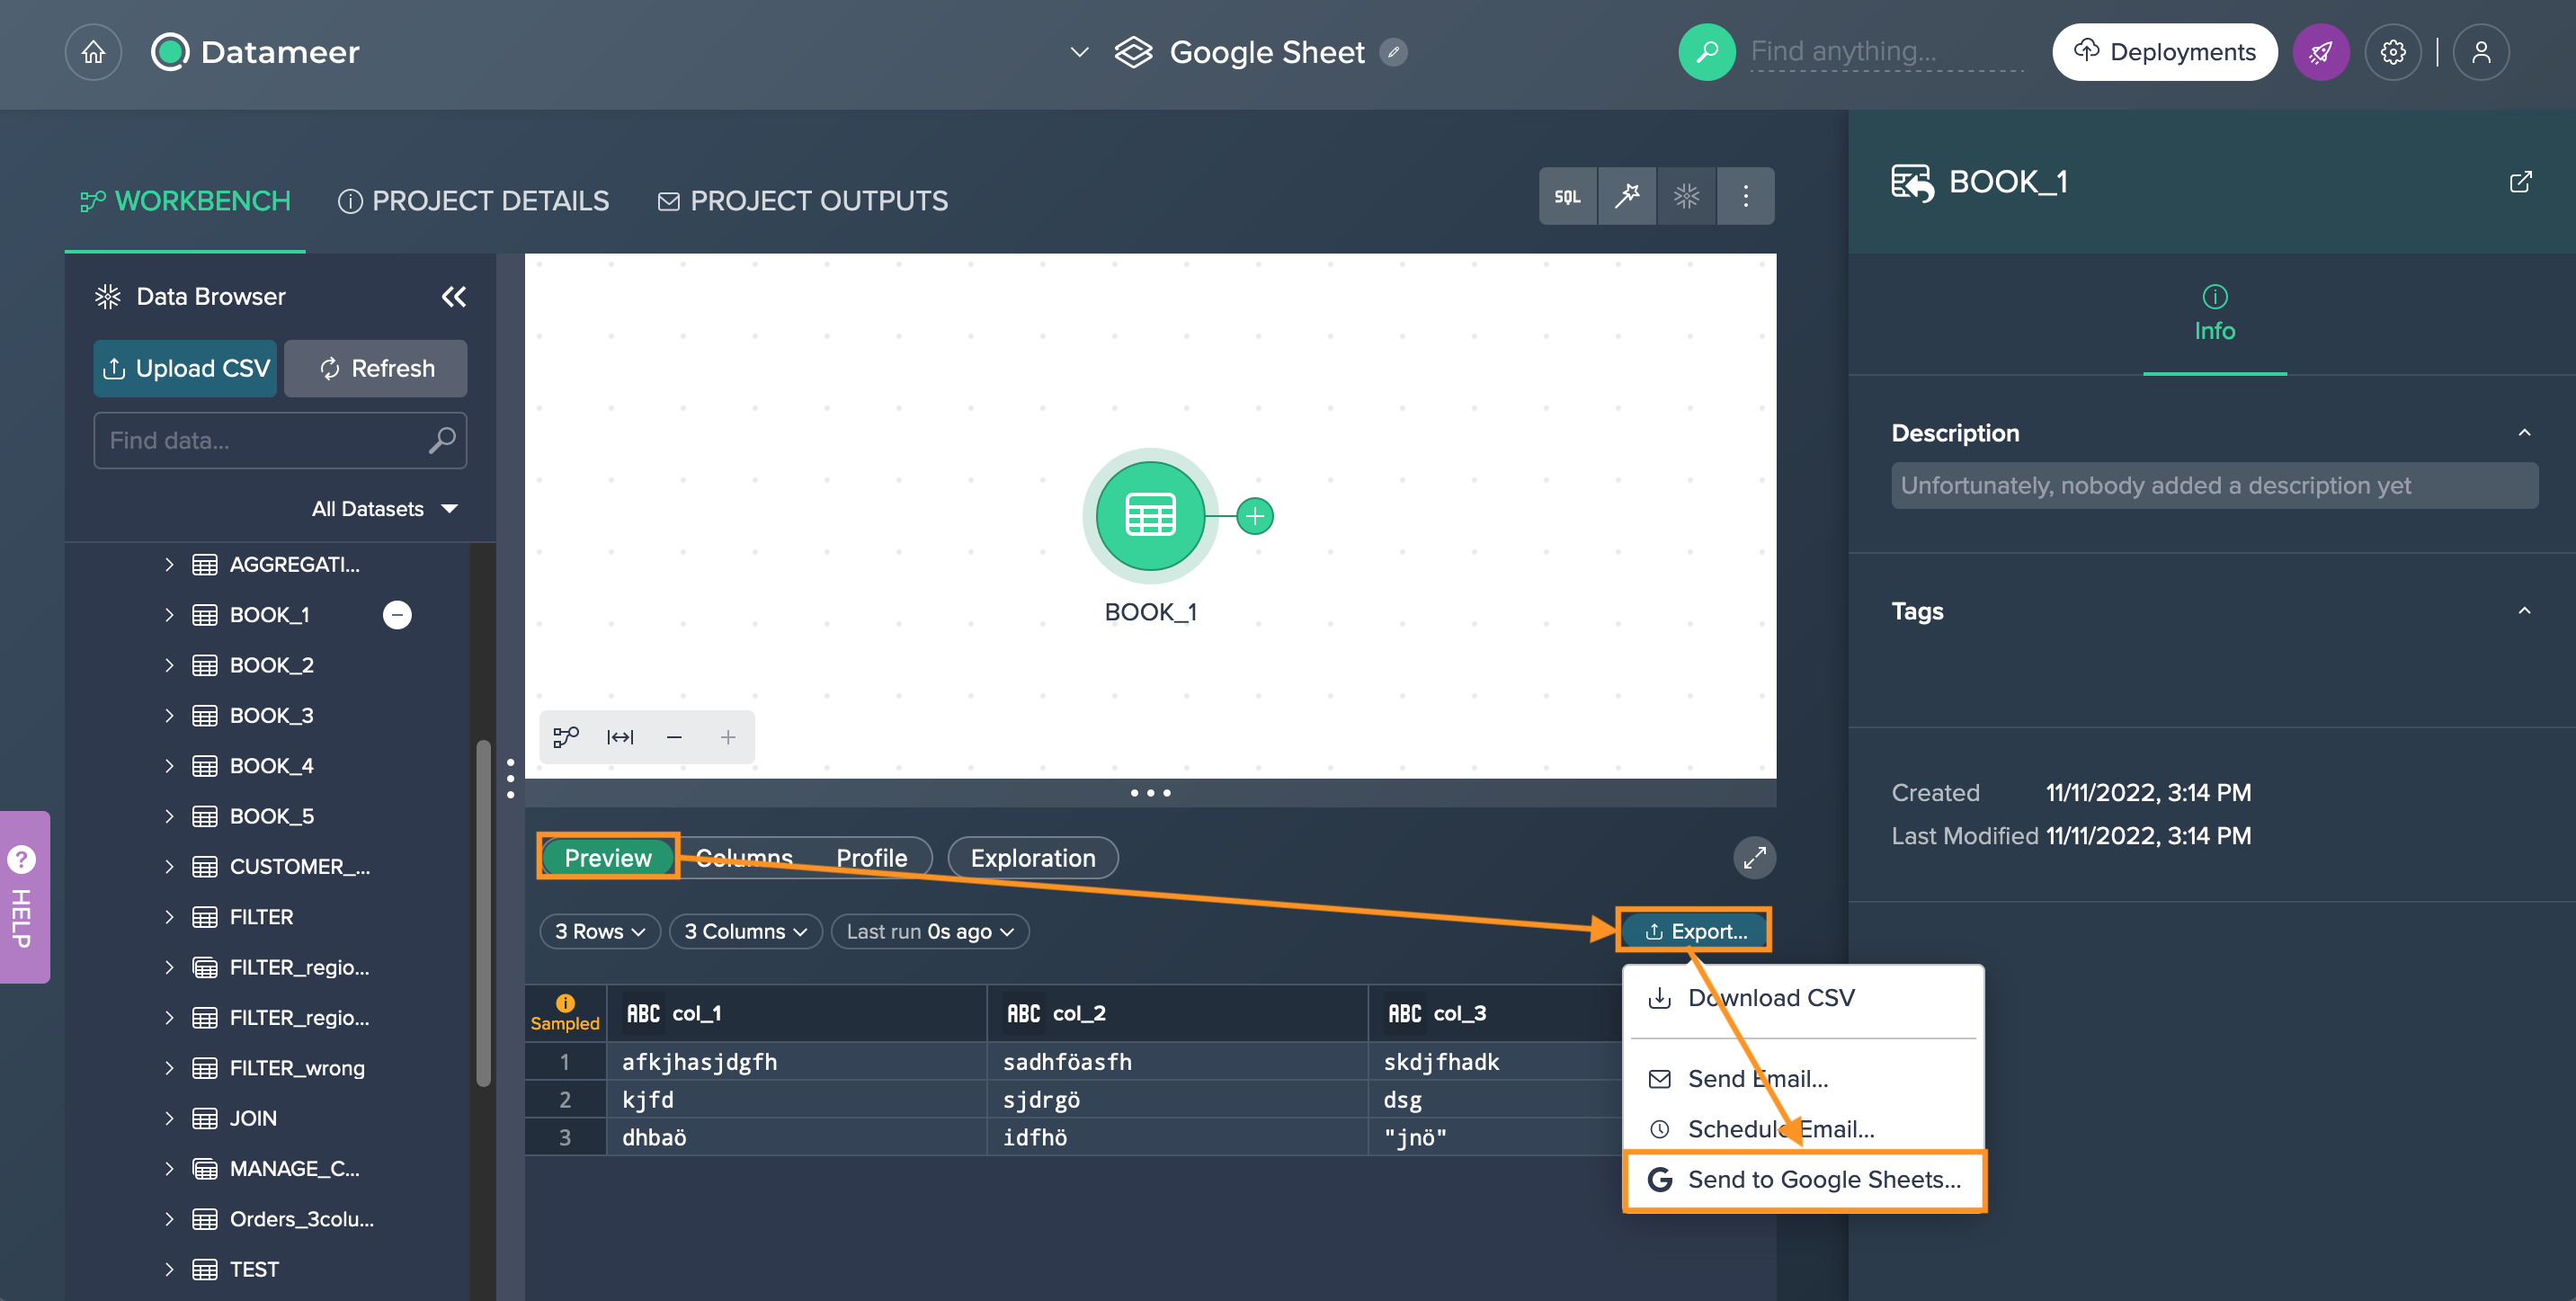
In the Data Grid, click on the "Preview" tab and then on "Export" -> "Send to Google Sheets...". The configuration opens.
-
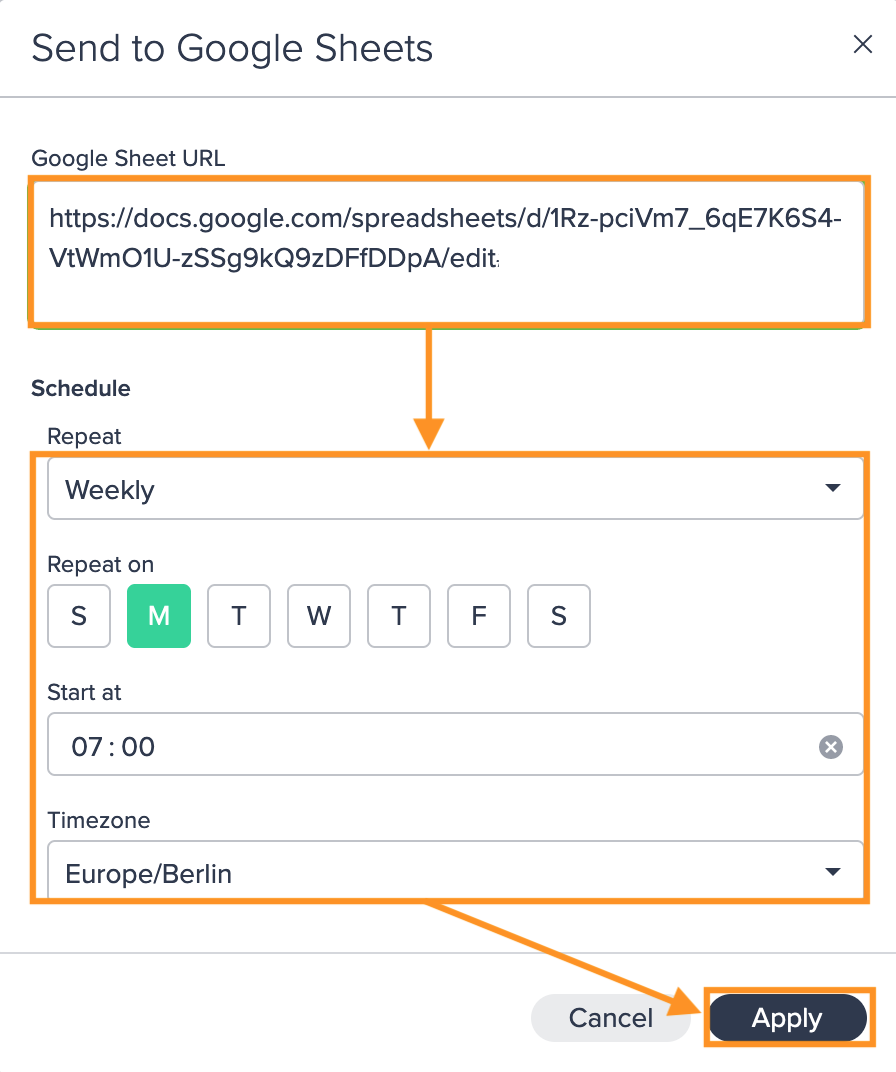
Enter the copied Google Sheet URL, configure the schedule to your needs and confirm with "Apply". The configuration applies and the Google Sheet node is displayed in the Flow Area.
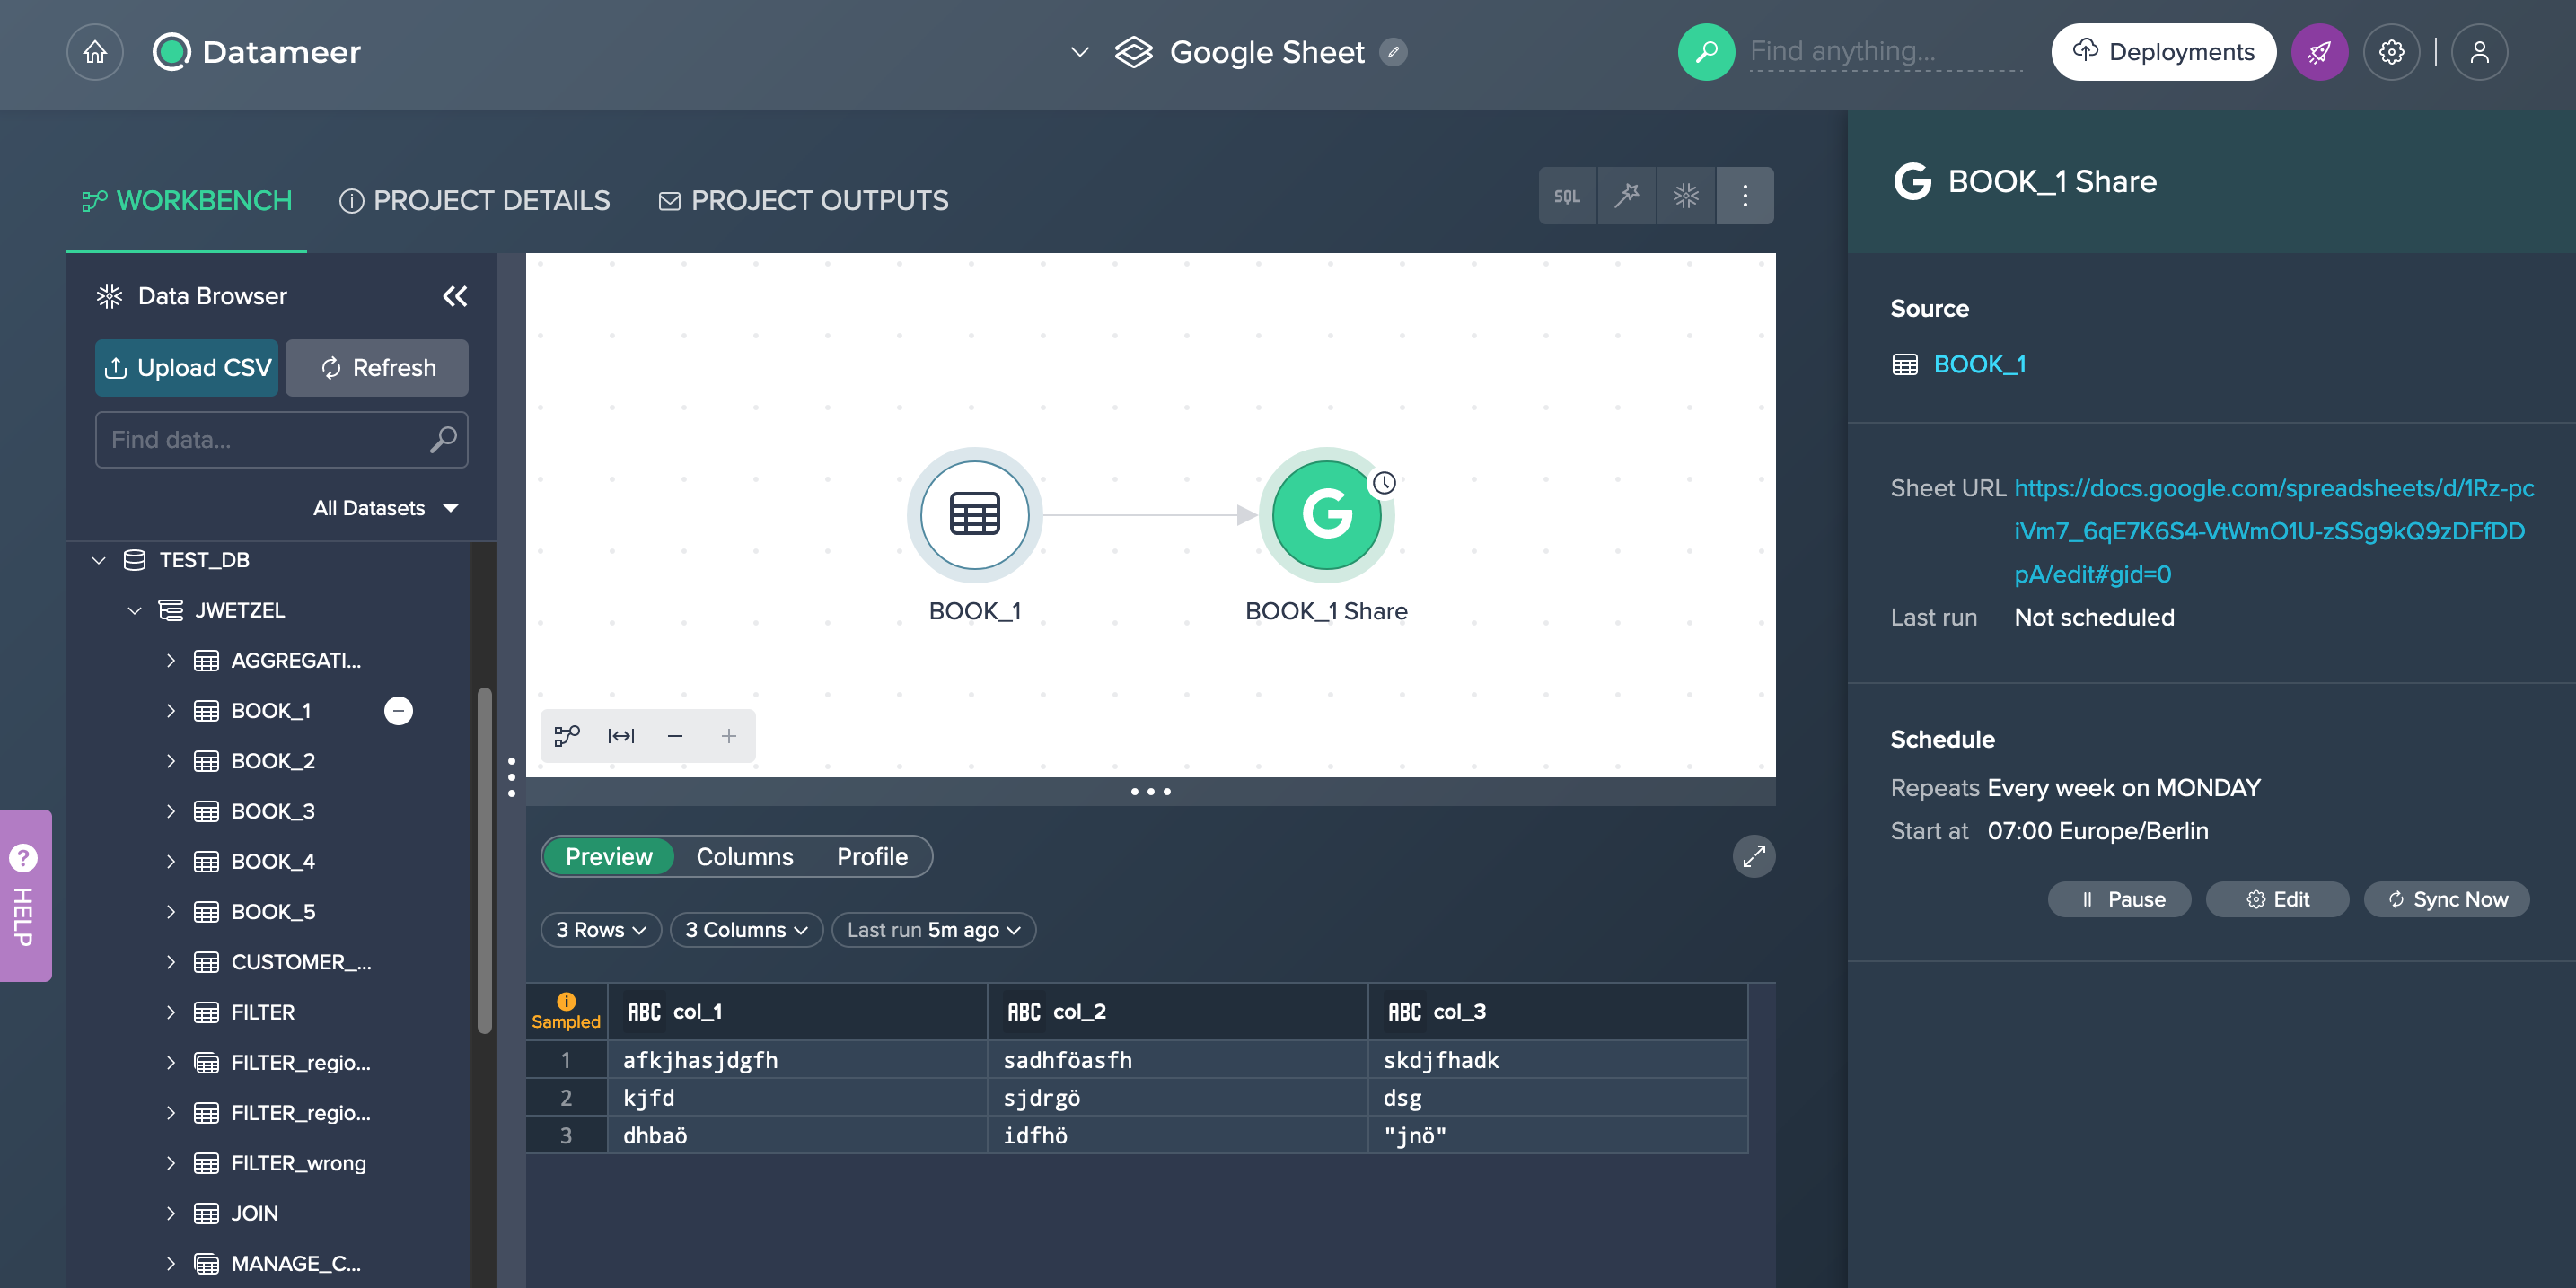
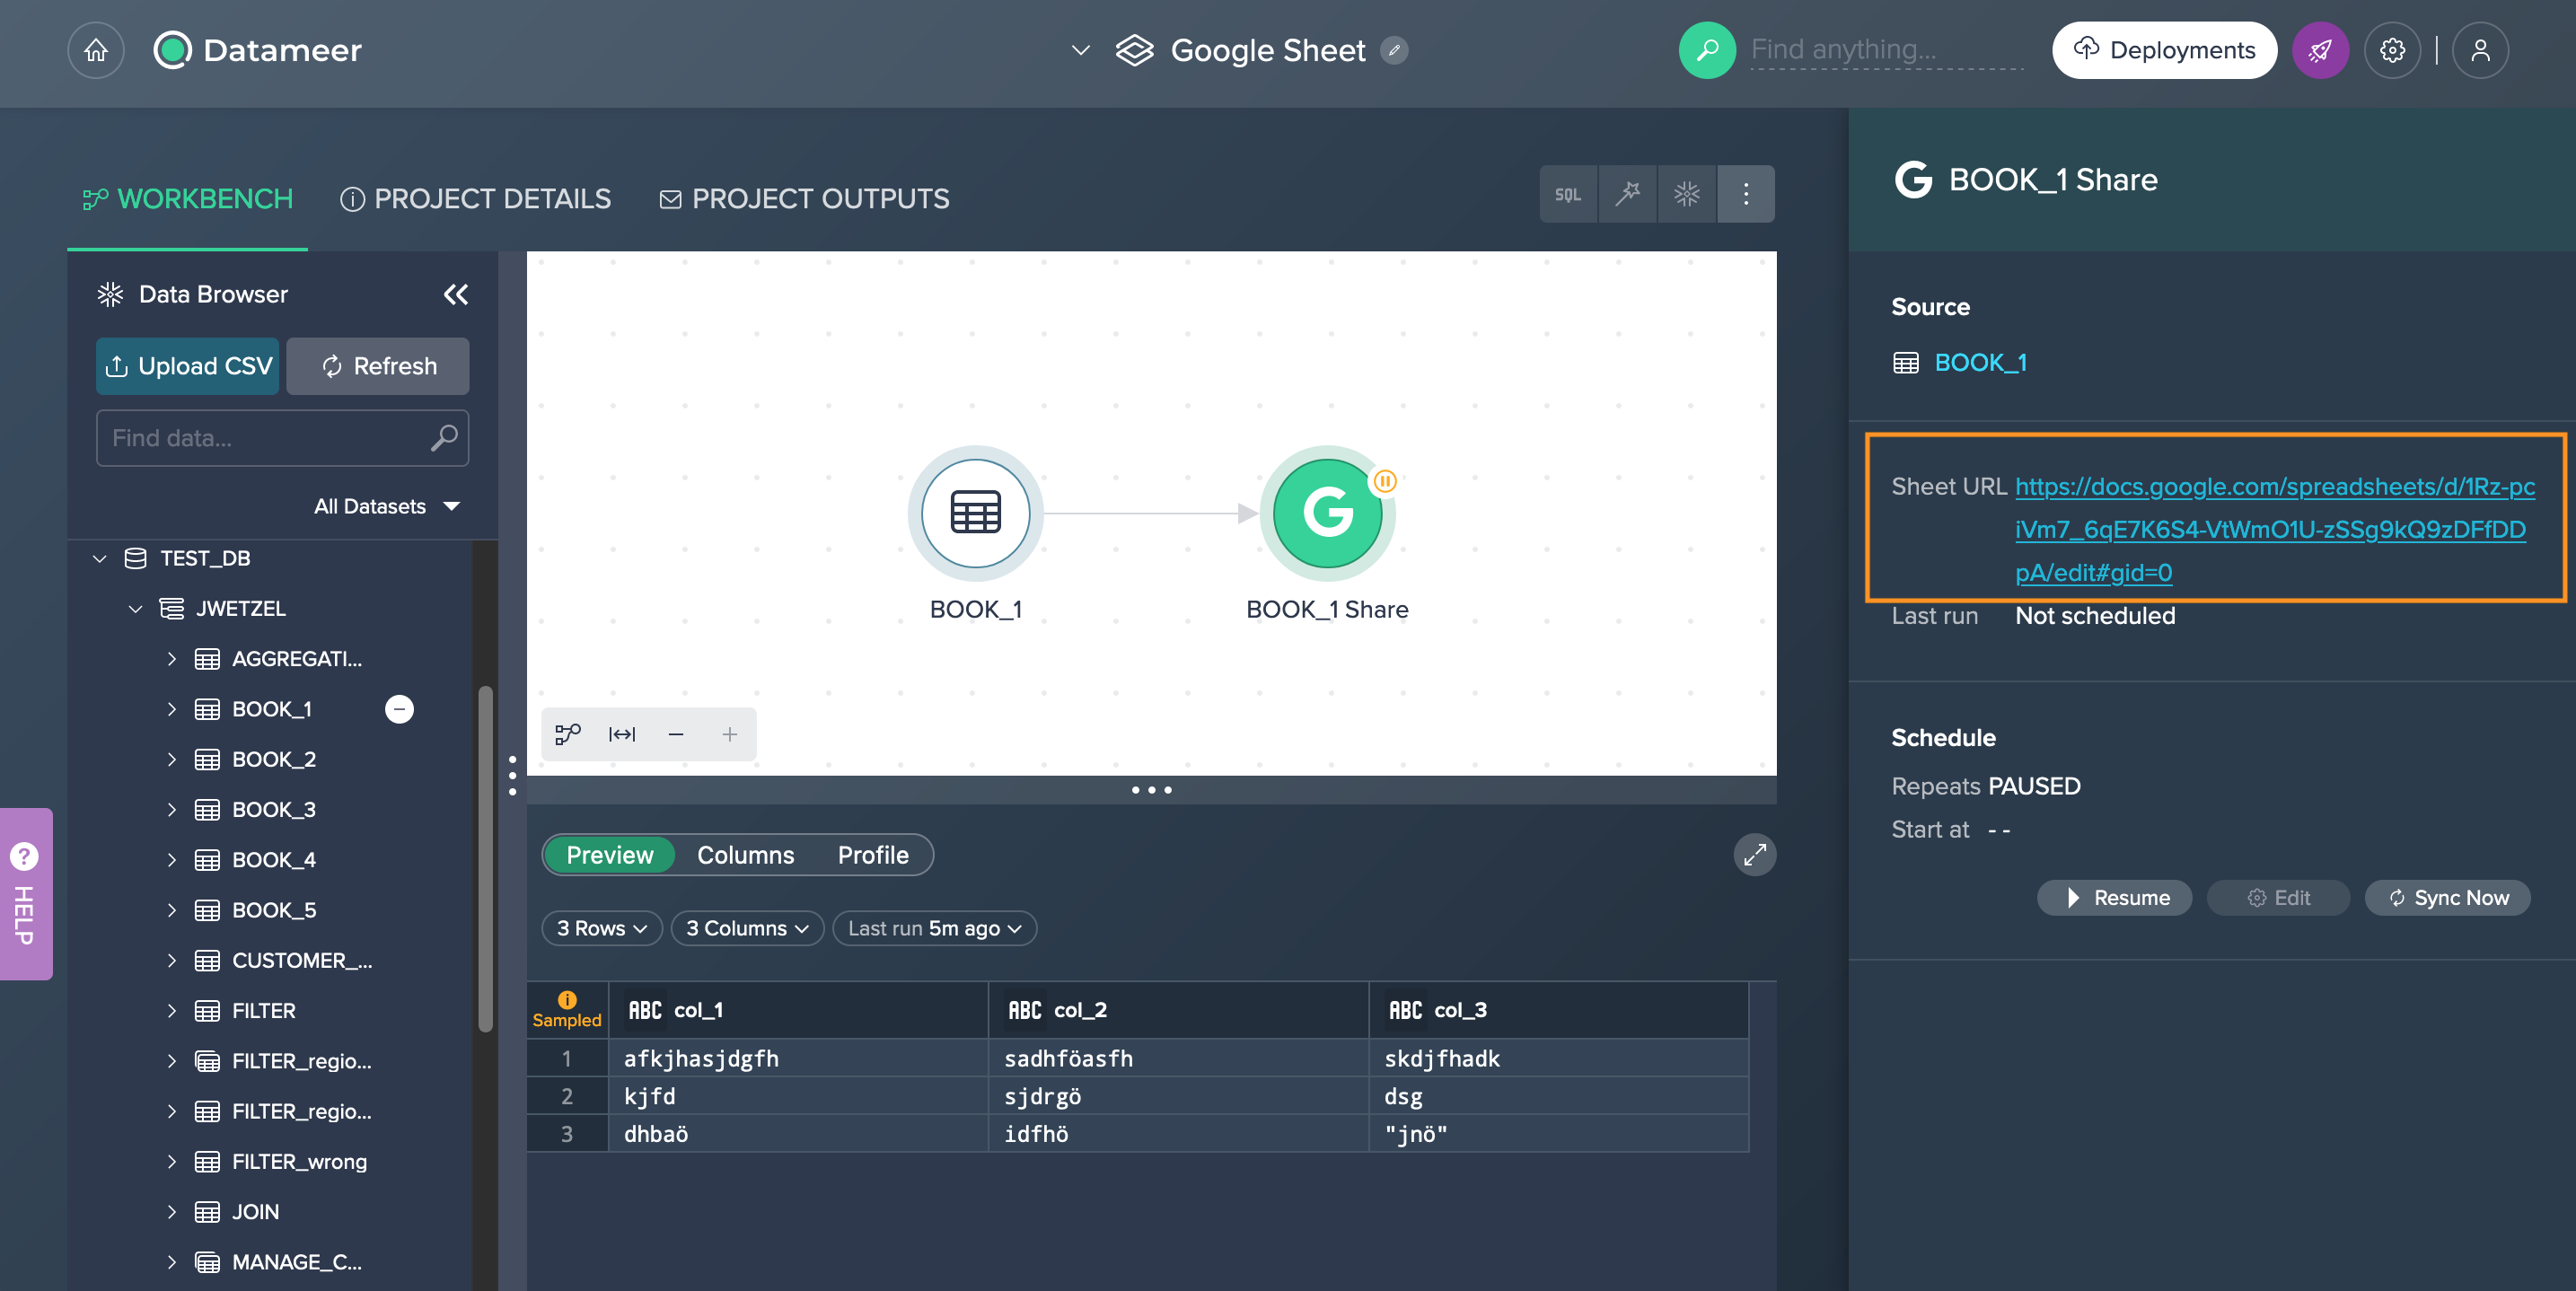
Google Sheet Configuration Options#
Once you scheduled and exported to a Google Sheet, you have the following options for the configuration:
-
edit, pause/ resume and delete the schedule/ node and sync the dataset ad hoc
-
open your Google Sheet out of the Datameer Inspector
-
view and configure your schedule via the 'Project Outputs' tab