Projects#
Projects are Datameer's collaborative workspace areas. Add references and data to datasets that you need for your project. Use the attached Workbench to combine, filter, and otherwise transform your referenced data into new datasets. These new datasets can be used elsewhere in Datameer for further analysis.
Use the SQL editor to create and perform individual SQL queries to manage and transform data from the Snowflake source.
Discover a project on the Project's Detail page to get all the important metadata information you need.
Document with comments, tags, and the description field so that your work is more discoverable and you can easily distinguish between related projects.
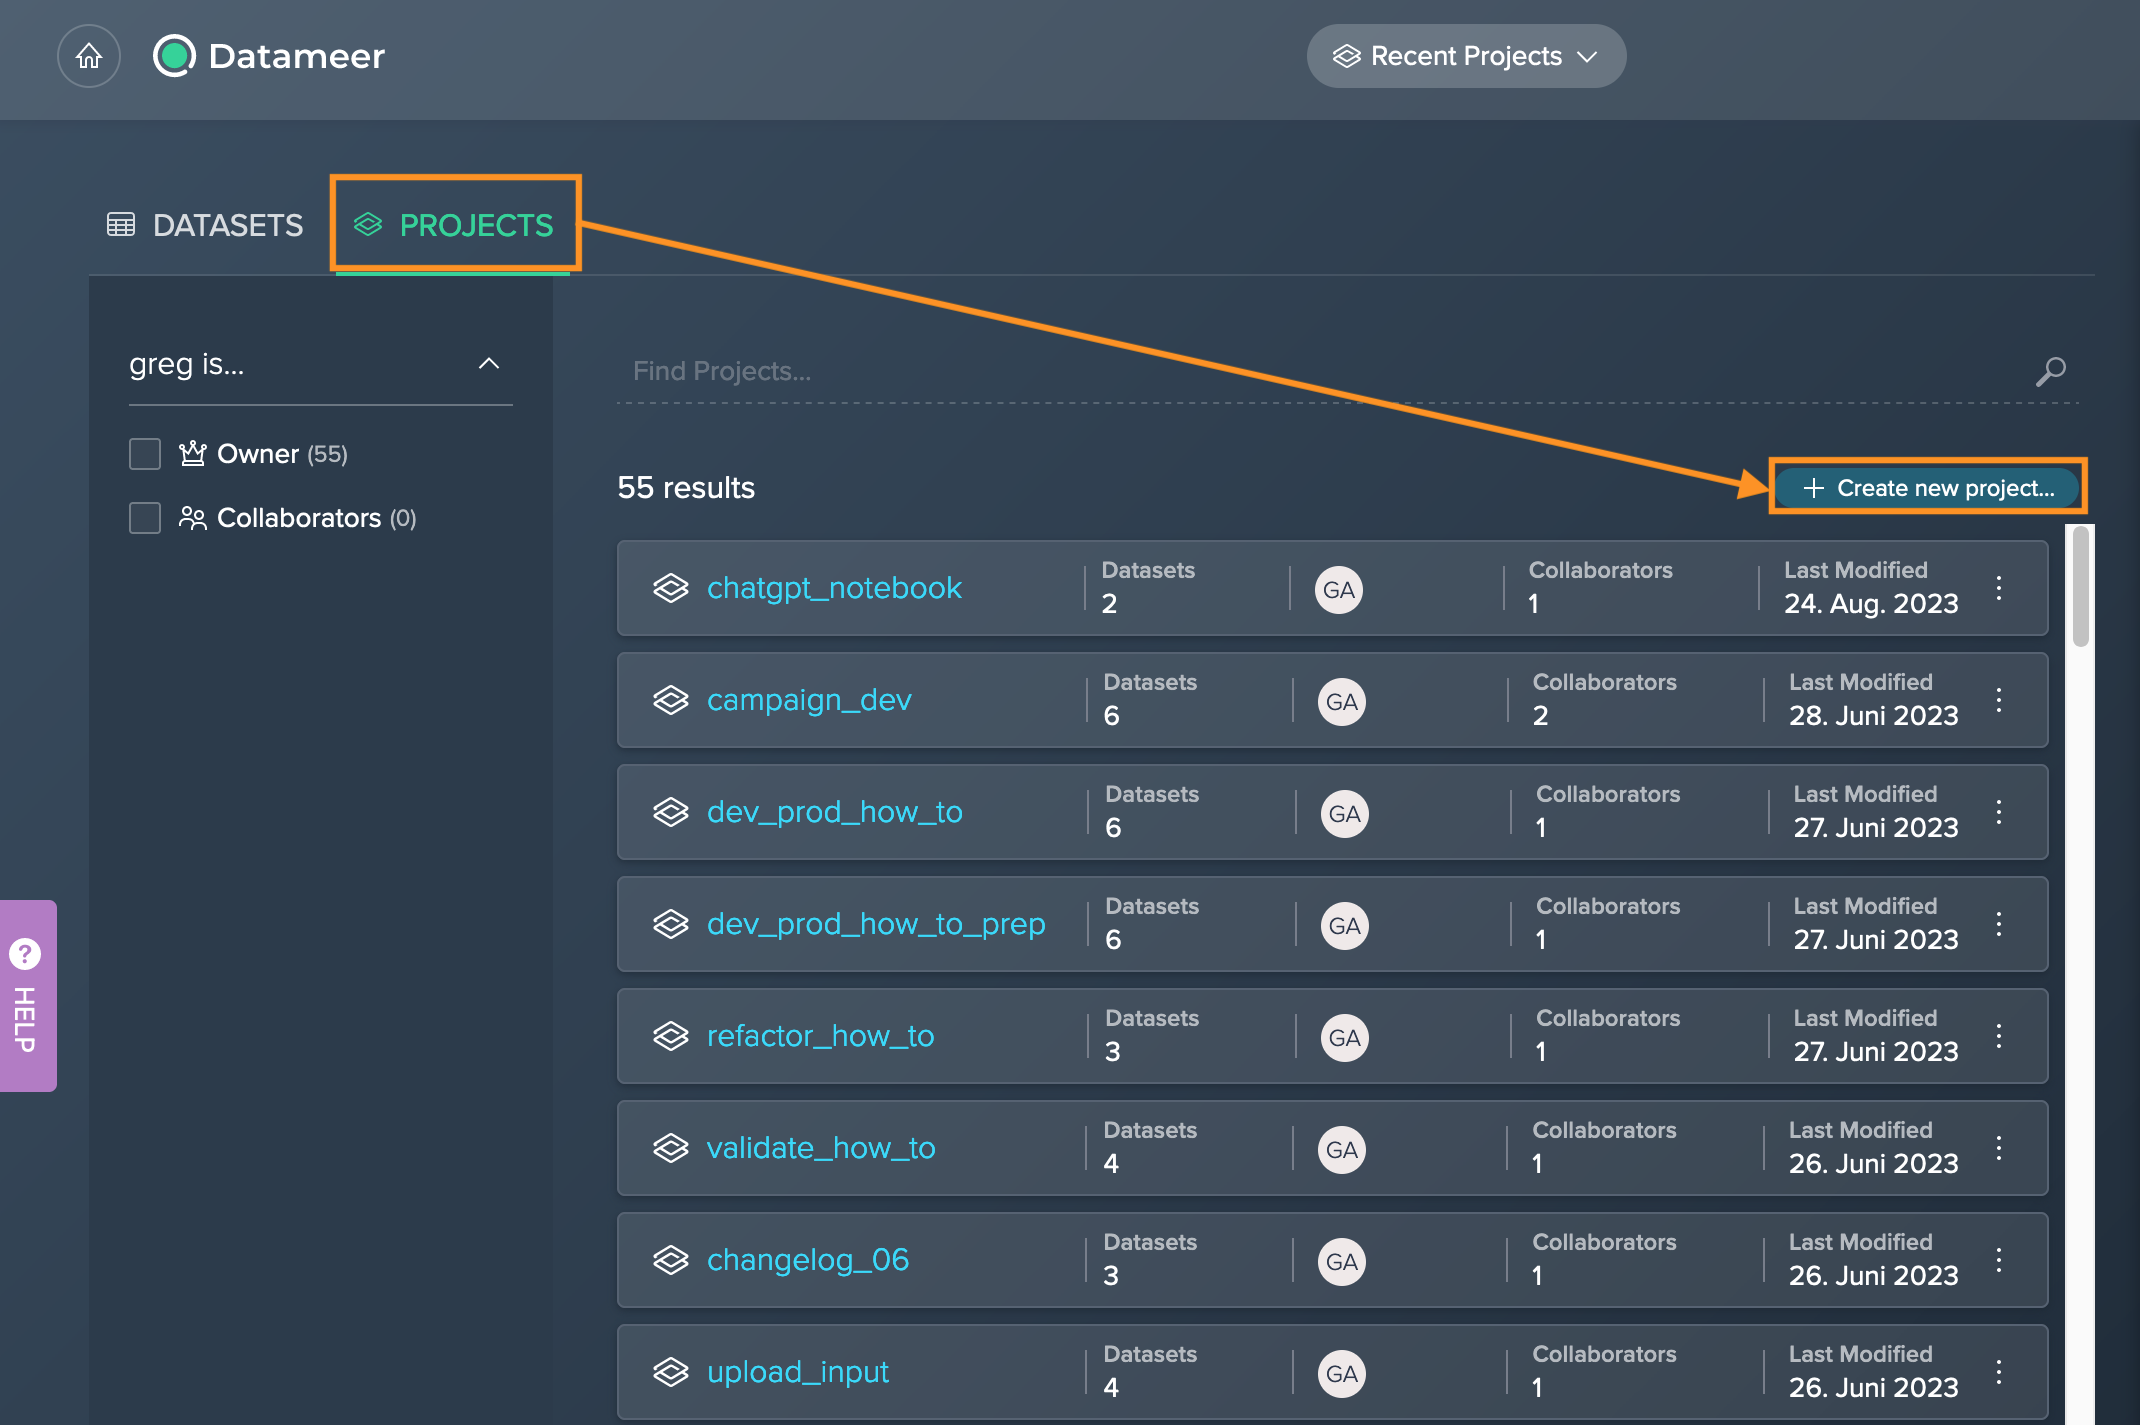
Creating a Project#
A new Project can be easily created from the Datameer Home page:
-
Select the "PROJECTS" tab and click on "+ Create new Project".
-
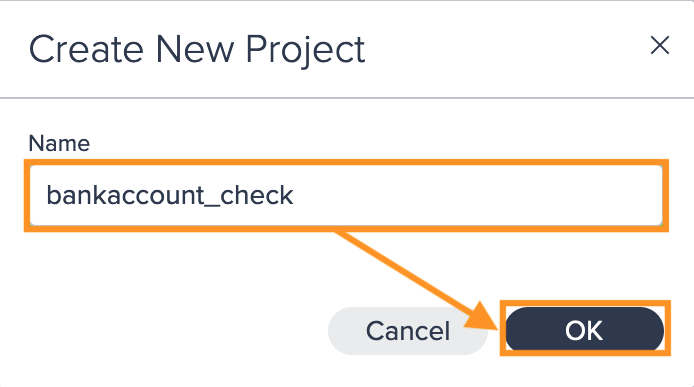
Enter the Project name and confirm with "OK". The new Project is created and the Workbench opens.
Renaming a Project#
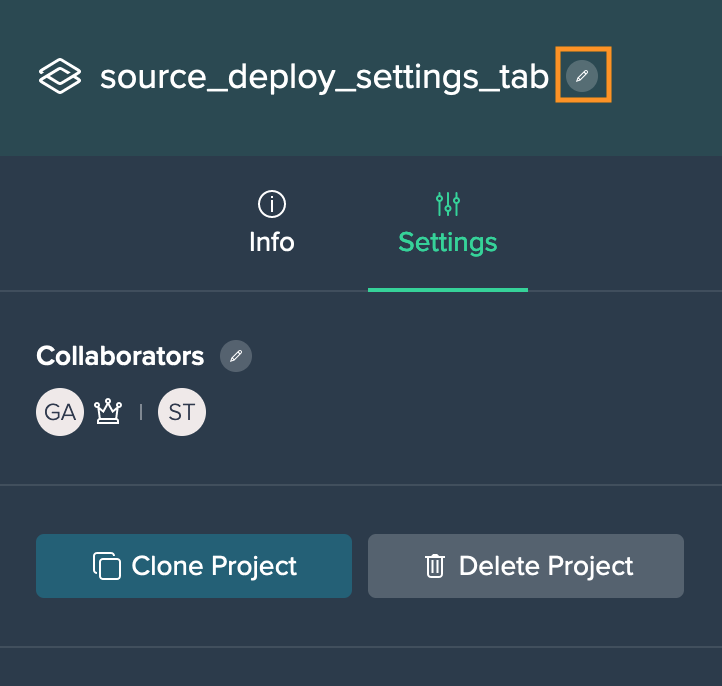
To rename a Project, click on the pencil icon next to the Project name, enter the new Project name and confirm. The Project is renamed.
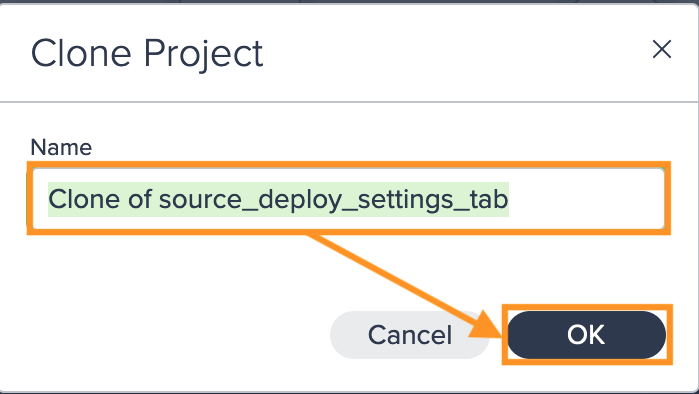
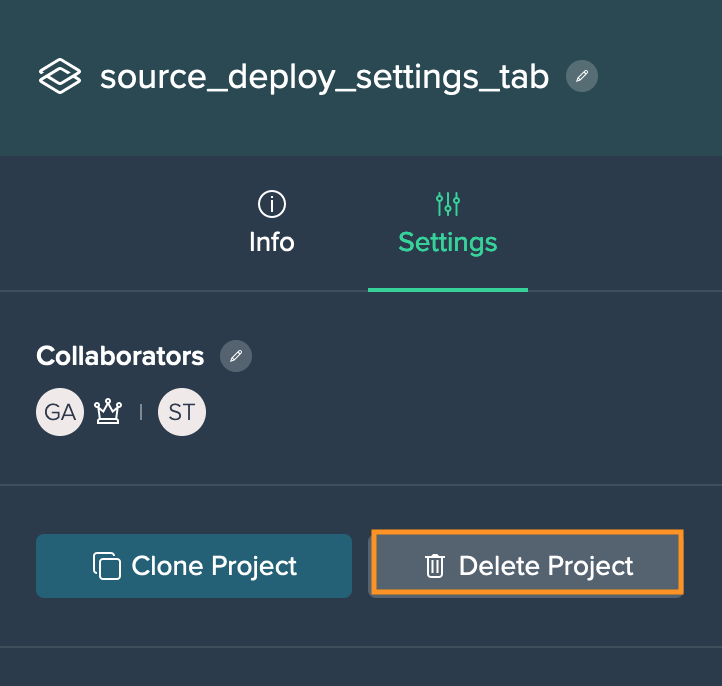
Cloning a Project#
The following applies:
- Only data sources, groups that contain nodes, and transformation nodes can be cloned. Deployed nodes, scheduling, create and modify date, owner of the old Project, collaborators and Project descriptions and tags from the source Project are not cloned!
- Groups that contain deployment nodes don't copy over the deployment nodes - if a group only contains deployment nodes, the whole group would not be copied
-
Only collaborators and administrators can clone a Project
-
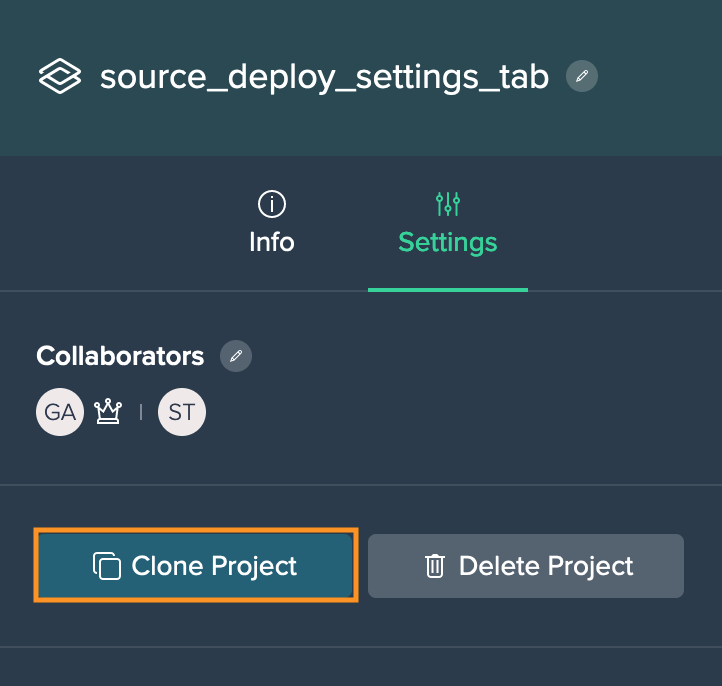
To clone a Project, switch to the 'Settings' tab in the Project Inspector and click on "Clone Project". The dialog 'Clone Project' opens.
-
Enter the new Project name and confirm with "OK". The Project is cloned and the Workbench opens.
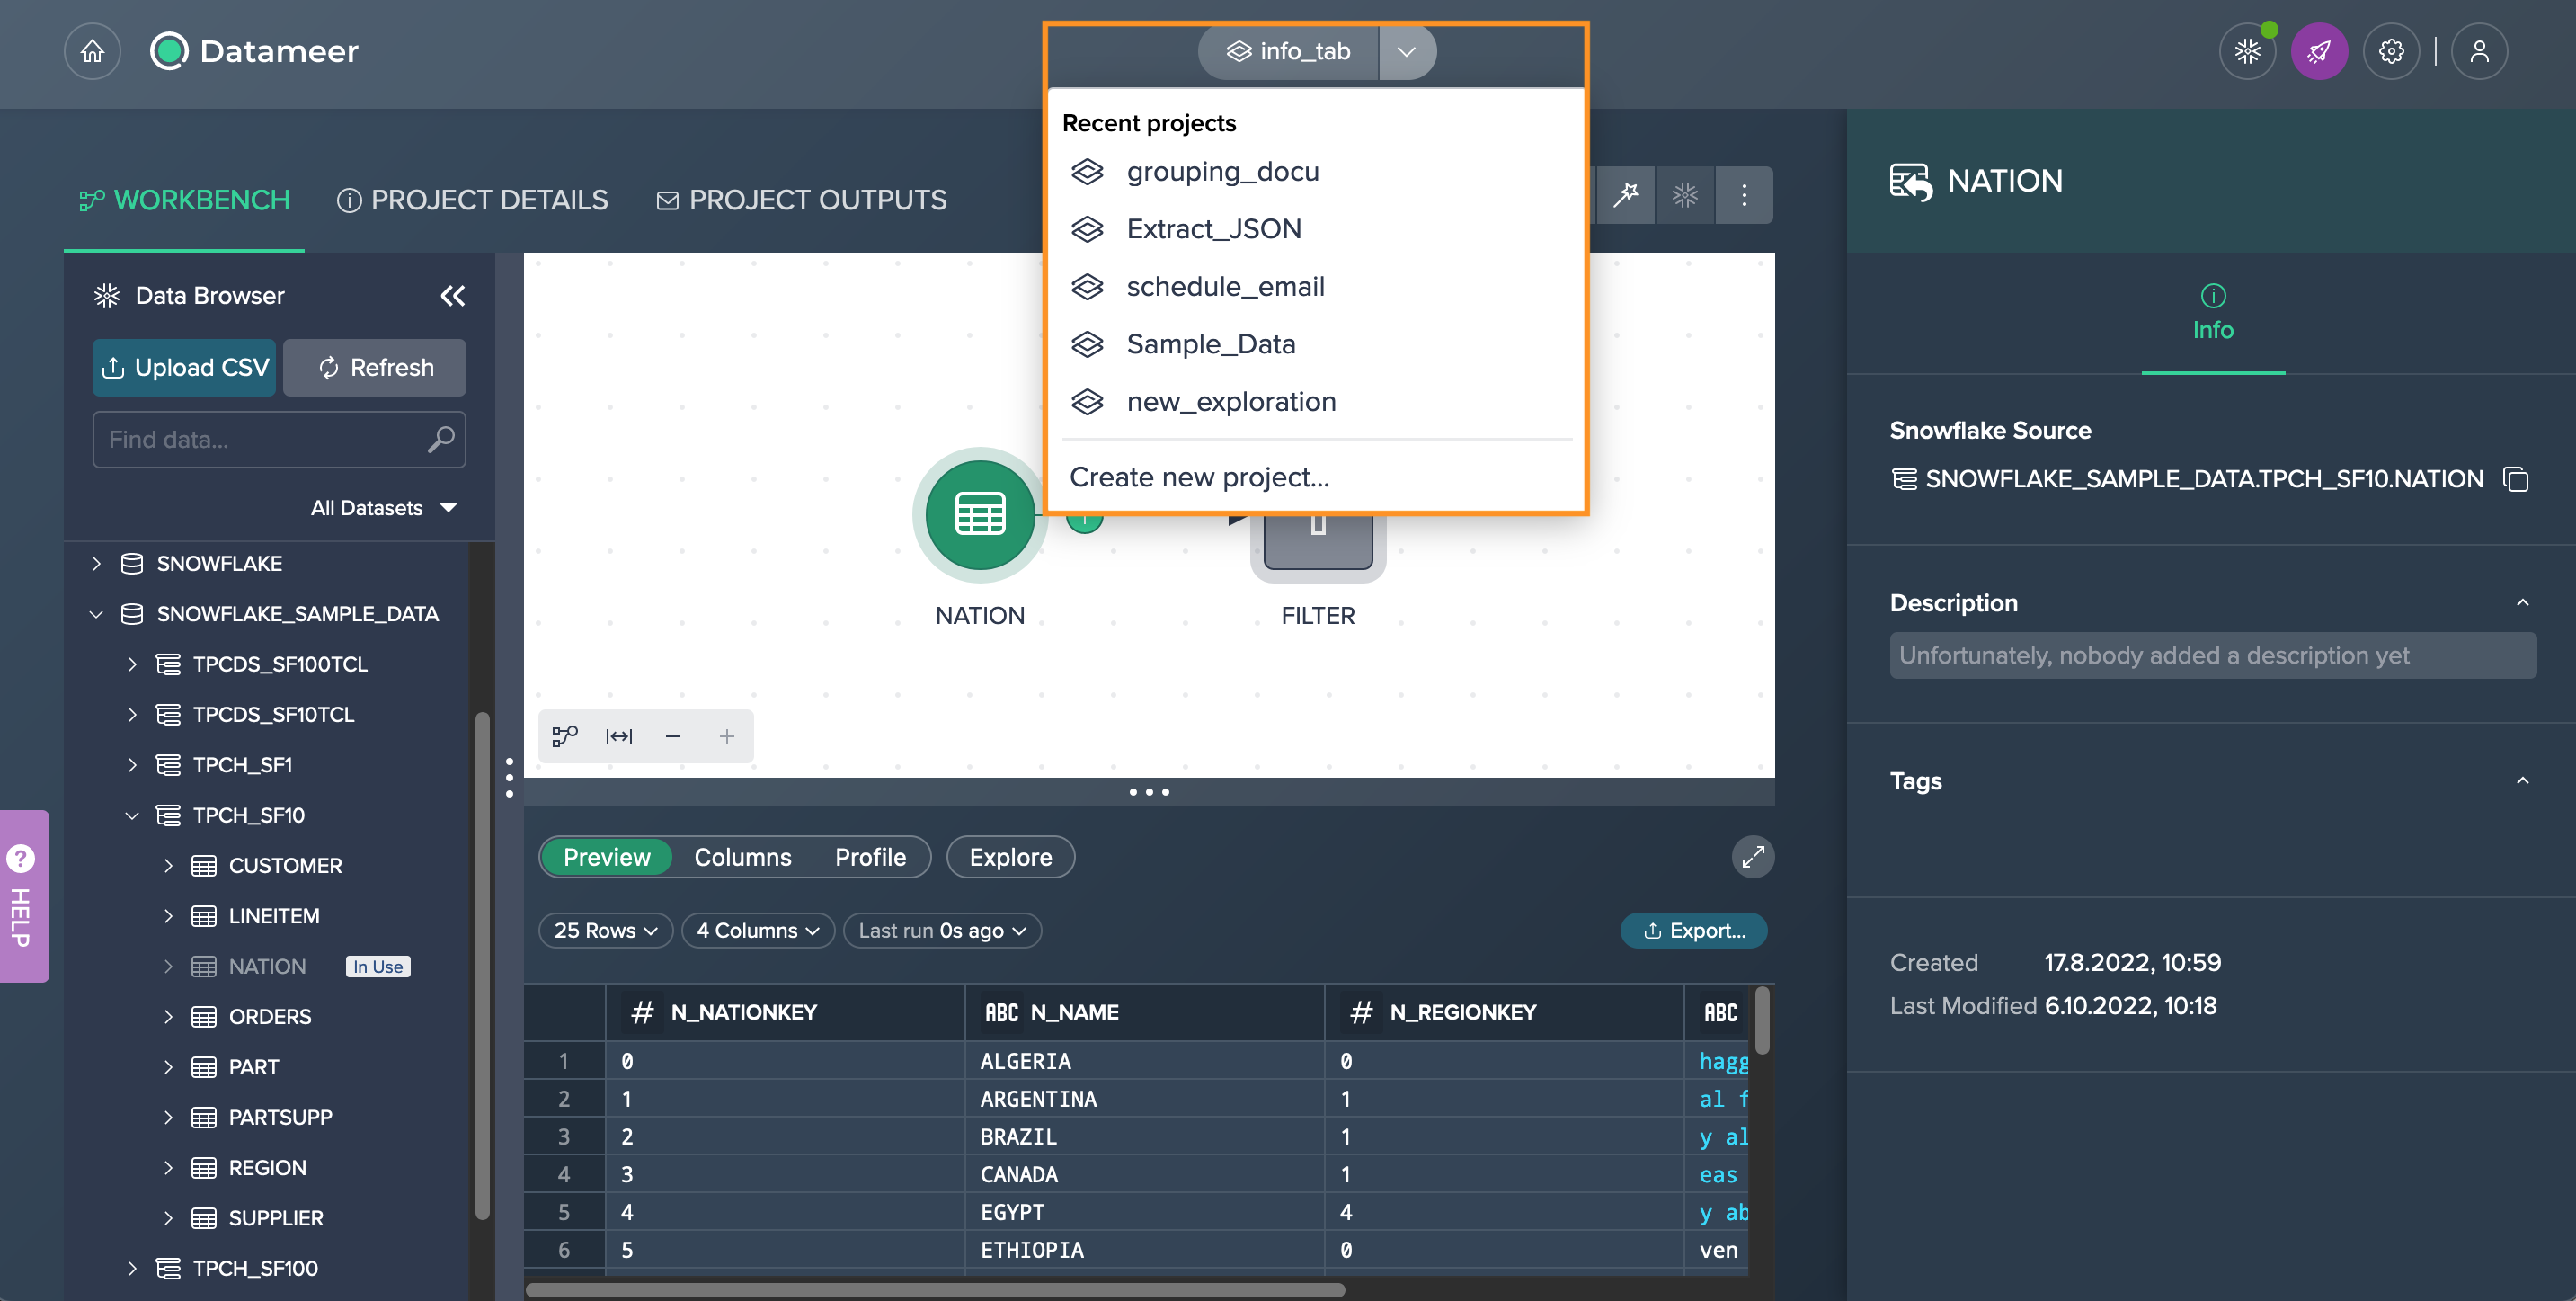
Switching Between Projects#
You can switch between the last five Projects in the Workbench via the Project dropdown. Furthermore you can also create a new Project from here.
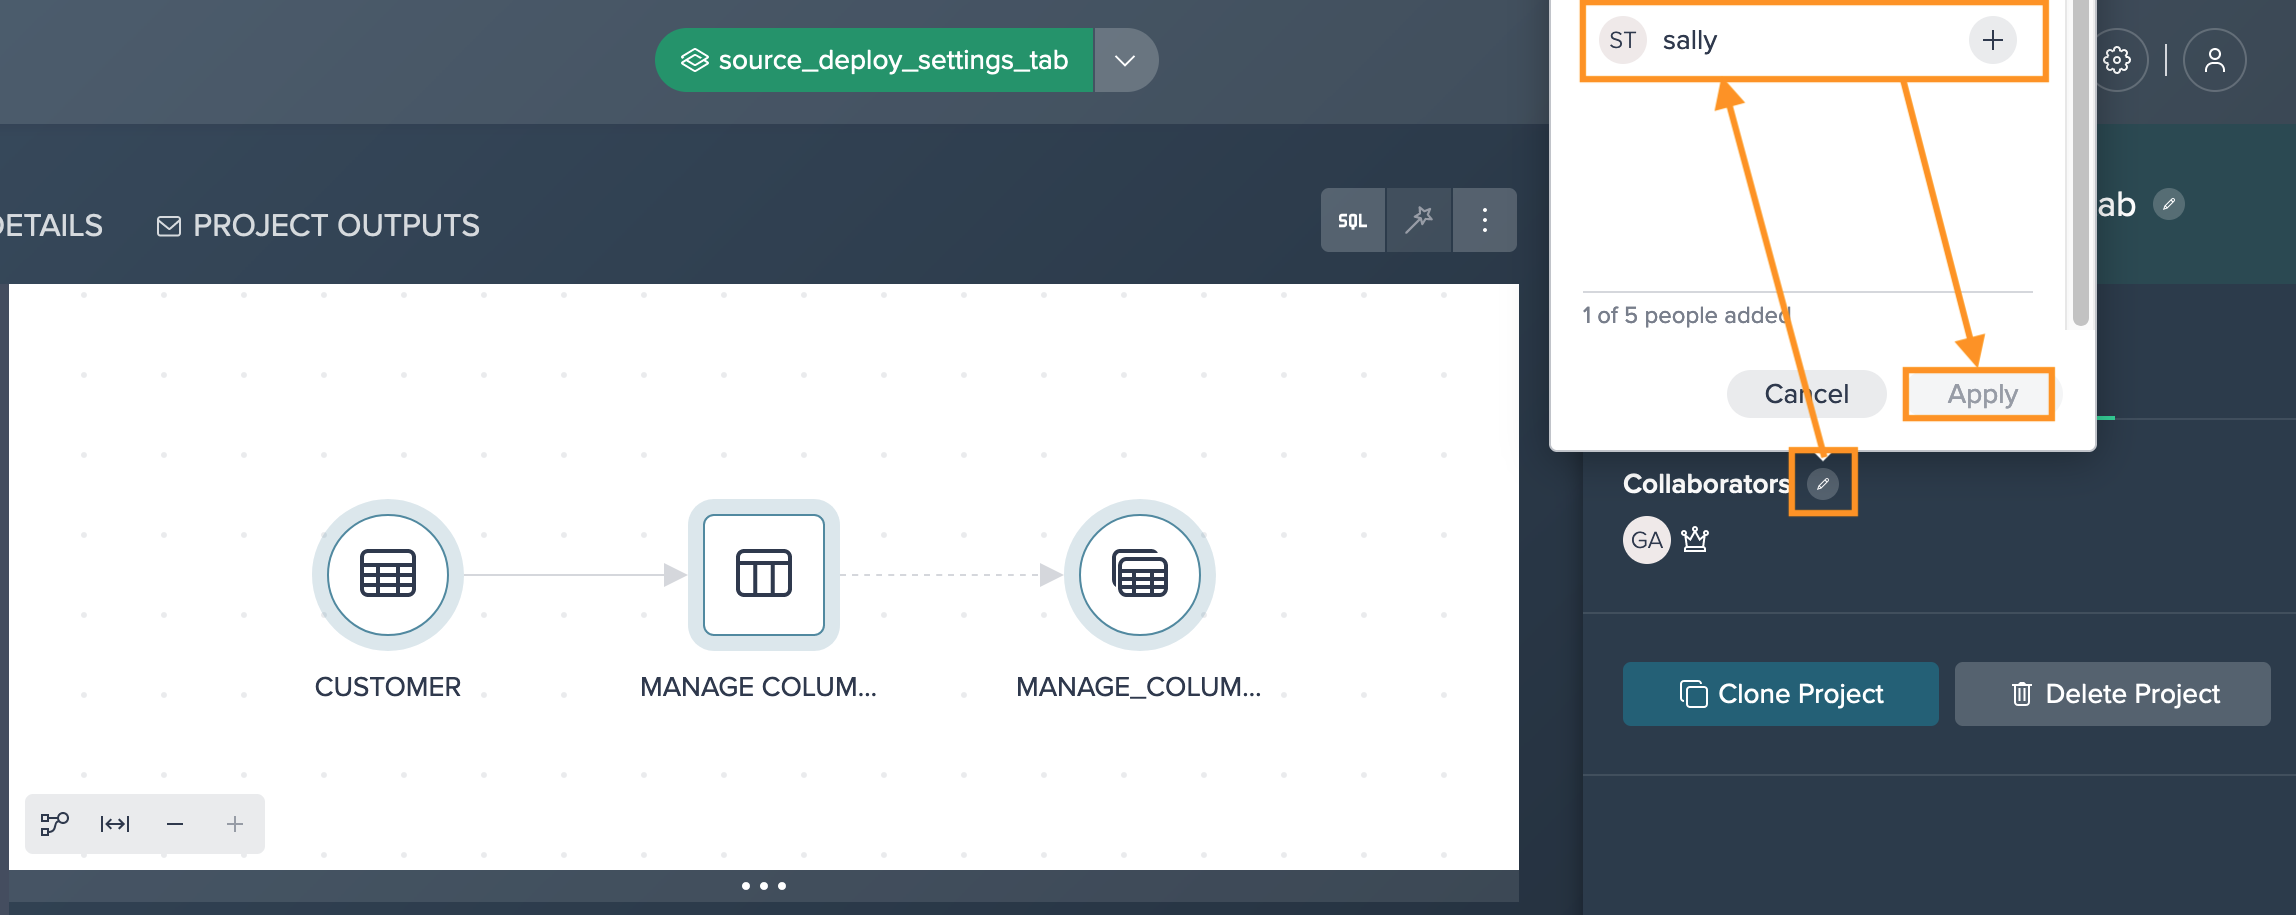
Adding a Collaborator#
To add a collaborator, switch to the 'Settings' tab in the Project Inspector and click on the pencil icon next to "Collaborators", click on the name and confirm with "Apply". The added collaborator appears in the list.
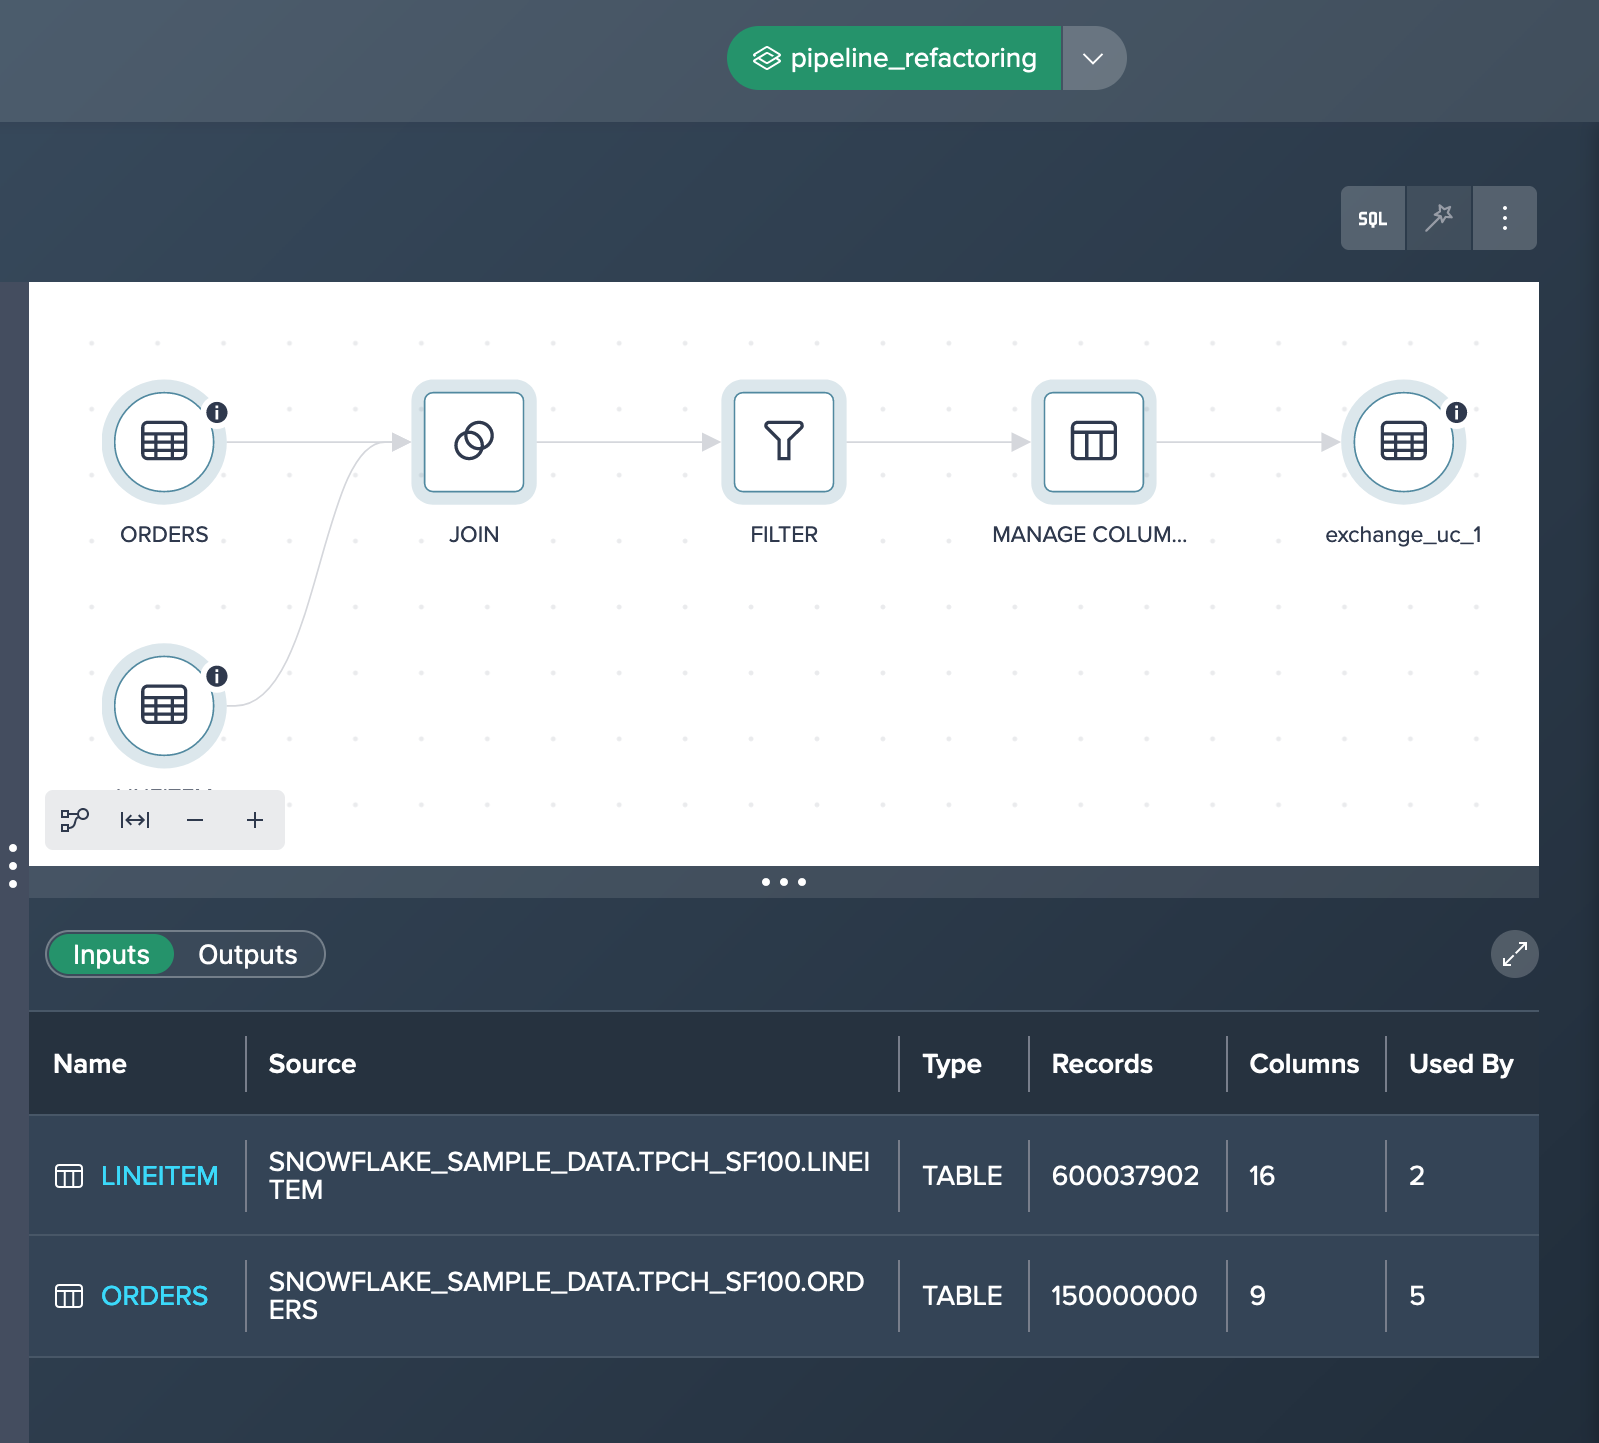
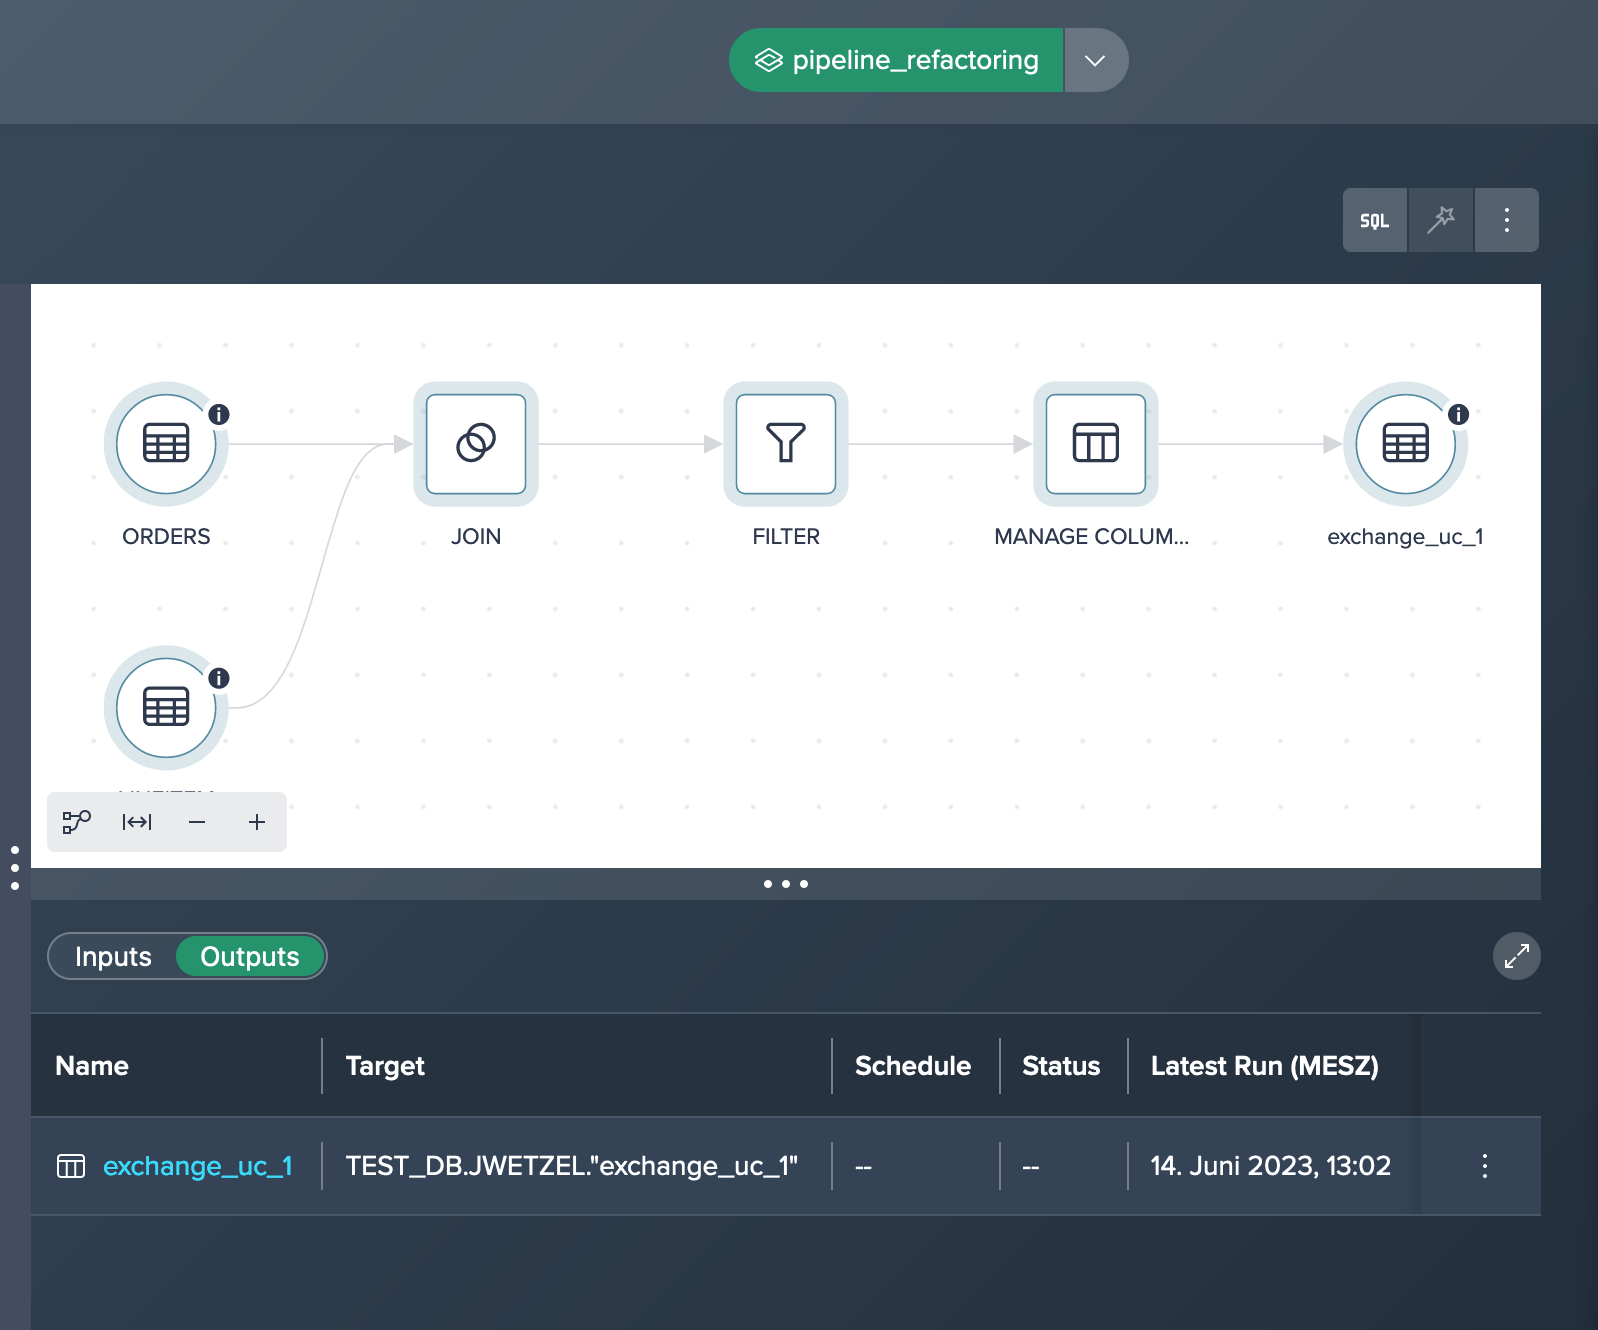
Viewing Project Inputs and Outputs#
When working on a Datameer Project, several data set inputs and outputs can be viewed. For that, simply click on the current Project name from the Project selection or click in an empty place in the Flow Area. You can switch between the input and output view.
The Data Grid presents for input nodes that are added from the Data Browser to the Flow Area:
- Name: clicking the name focusses the node and the node's preview gets displayed in the Data Grid
- Source: shows the fully qualified Snowflake name with database, schema, and table
- Type: shows table or view type
- Records: shows the record amount of the node
- Columns: shows the column amount of the node
- Used by: shows the count downstream usage
For output nodes the following information is shown:
- Name: clicking the name focusses the node and the node's preview gets displayed in the Data Grid
- Target: shows the target Snowflake schema and table/view name
- Schedule: shows the scheduling information if scheduling is enabled
- Status: shows the deployment status or warning
- Latest Run (MESZ): shows the date and timestamp of the latest run
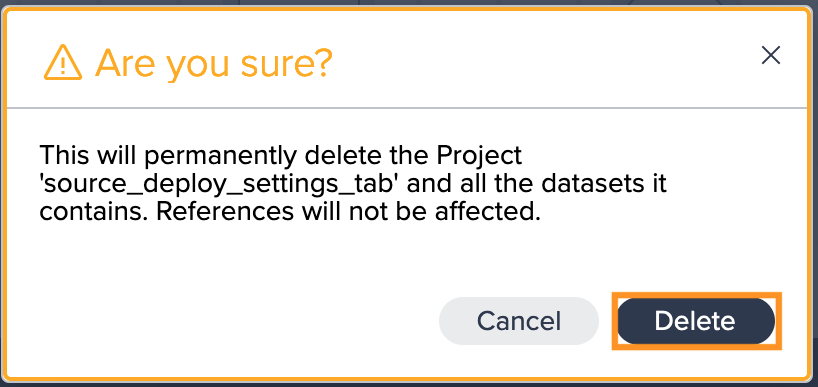
Deleting a Project#
When you delete a Project, any nodes in it will be deleted as well. Datasets from elsewhere in Datameer that have been referenced here will be unchanged. A Project cannot be deleted if it contains datasets that are referenced in other Datameer Projects. Only the owner or an Administrator has the permission to delete a Project.
To delete a Project:
-
Switch to the 'Settings' tab in the Project Inspector and click "Delete Project". A confirmation dialog opens.
-
Confirm with "Delete". The project is deleted.
Project Details Page#
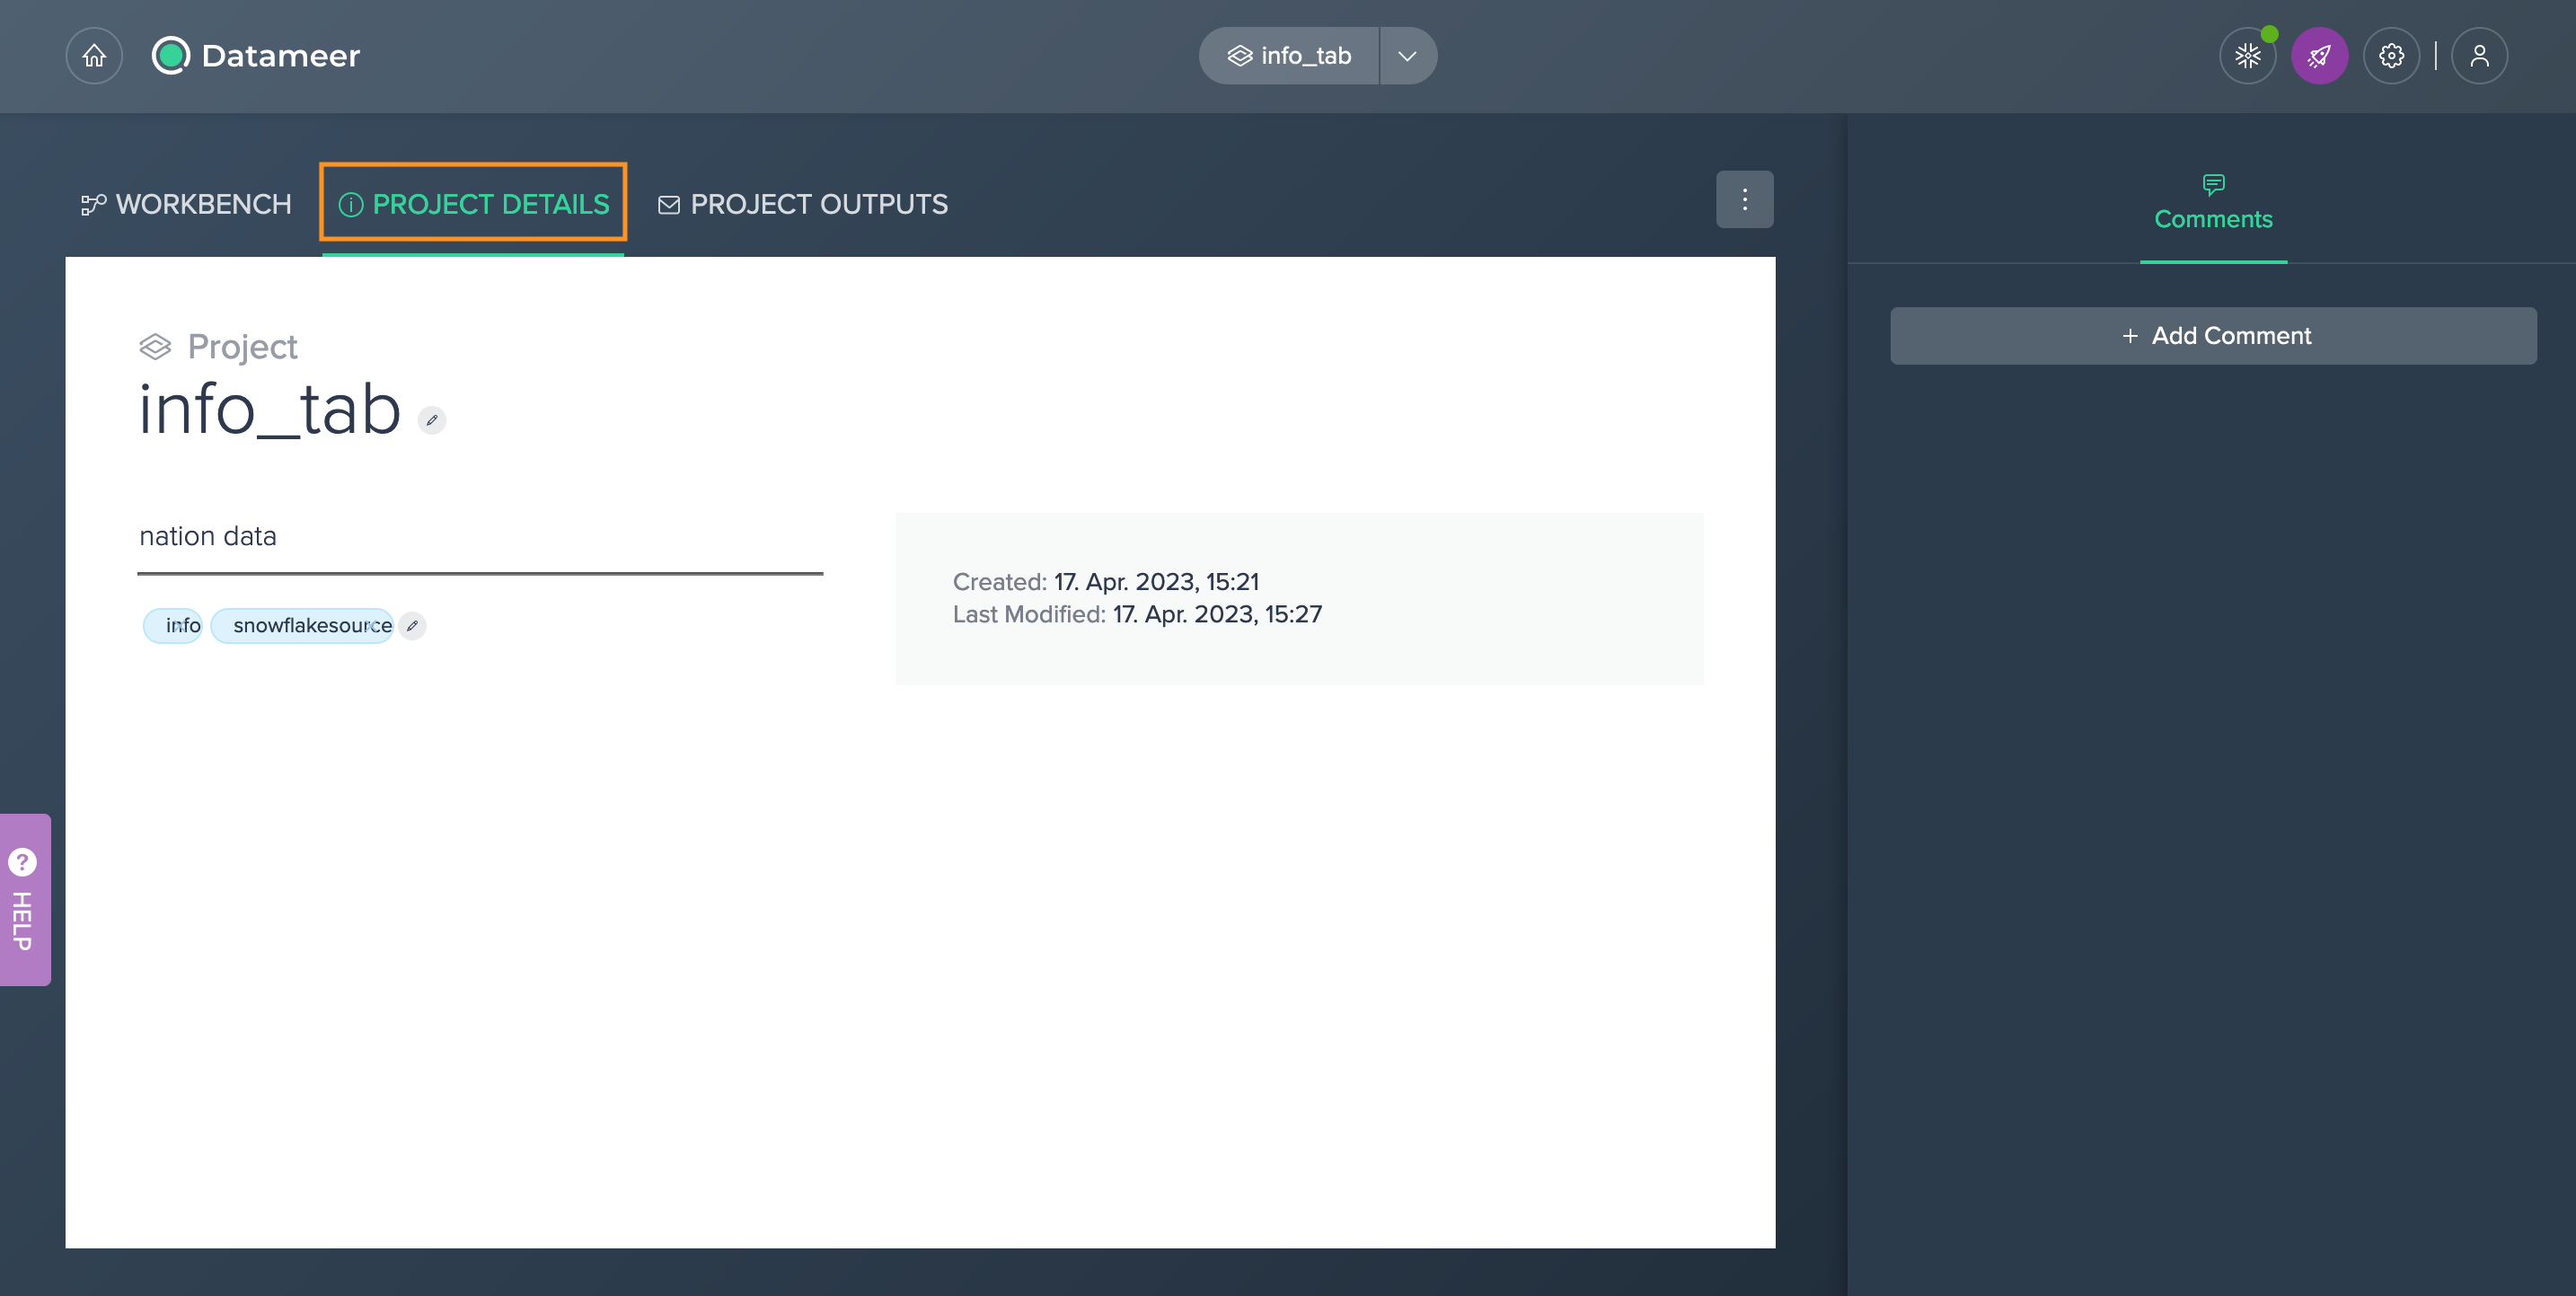
The Project details page can be reached when clicking the "PROJECT DETAILS" tab in the Workbench.
You can do the following:
- rename the Project: Project names can be up to 100 characters, cannot start with an (_) character or a space, and cannot contain a (`) character.
- enter a Project description: The description can be up to 1,000 characters long. Use this to outline project goals, summarize important assumptions, or otherwise make it easier to understand the work you are doing. The more a Project is documented, the more useful it becomes for collaboration.
- enter Project tags: Tags help quickly identify, search for, and categorize assets in Datameer. Add some here to make this Project easier to find and easier to tell apart from the rest of your related Projects. A tag can be up to 80 characters (spaces are not allowed). Clicking on a tag launches a search for all assets with that tag in Datameer.
- view the date and time when the Project has been created and modified: Displays the dates on which the Project was created and last modified. A Project is considered to have been modified whenever a dataset or collaborator is added or removed, and whenever the title or description is edited. The last modified date is used to sort some search results.
- add a comment