User Management#
User Management Overview#
Datameer Administrators can use the User Management page to view all users in their Datameer instance, add new ones, edit user information, and deactivate or reactivate users.
To open the 'User Management' page, click on your user icon in the top right of any page in Datameer and select User Management.

Viewing Users#
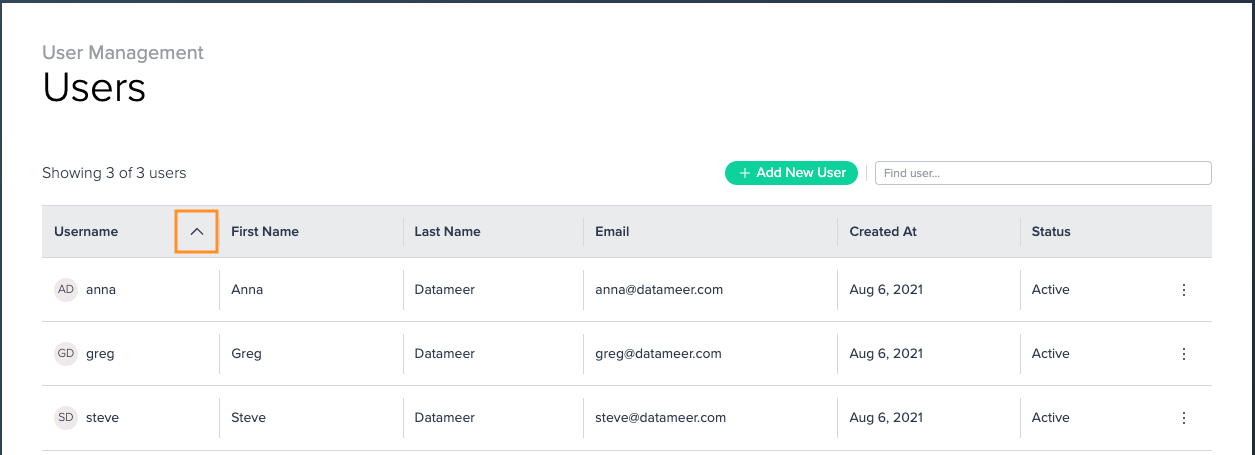
The list of Datameer users includes all active accounts and all deactivated users.
-
To sort the user list by a column, click any of the columns in the user list. Click the same column again to reverse the sort order.
-
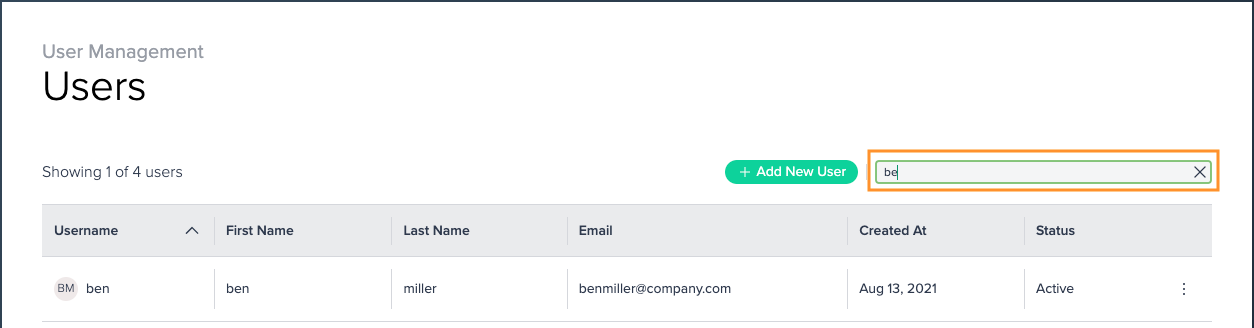
To find a user, type in the name in the search bar. Only the users containing the search entry value are displayed.
Adding a User#
To add a new user:
-
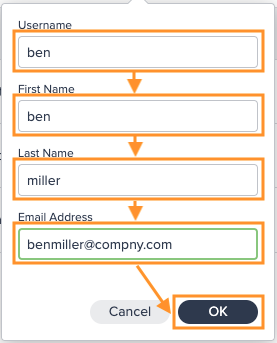
Click on "+ Add New User". The dialog for entering the user data opens.

-
Fill in the text boxes for "Username", "First Name", "Last Name", and "Email Address". Confirm with "OK". The user is now listed in the user list and receive an email to confirm the email address and set the account password. Note that this email will be from Datameer's internal "keycloak" system so users may want to search their mailboxes for "keycloak" if they are having trouble locating the welcome email.
Note that the following applies for creating a new user:
Username
- must be unique
- cannot be changed after the user is created
- can only contain the following lowercase characters:
abcdefghijklmnopqrstuvwxyz0123456789_-.
Email Address
- must be unique
- must come from one of the domains that were whitelisted as part of your Datameer configuration. Talk to Datameer support if these need to be adjusted.
New Users can't be added if..
If your "+ Add New User" button is greyed out it means you are already using all the available seats in your organization's Datameer license. You cannot add new users unless you deactivate an existing user to free up a spot or talk with Datameer support about increasing your number of seats.
Editing A User#
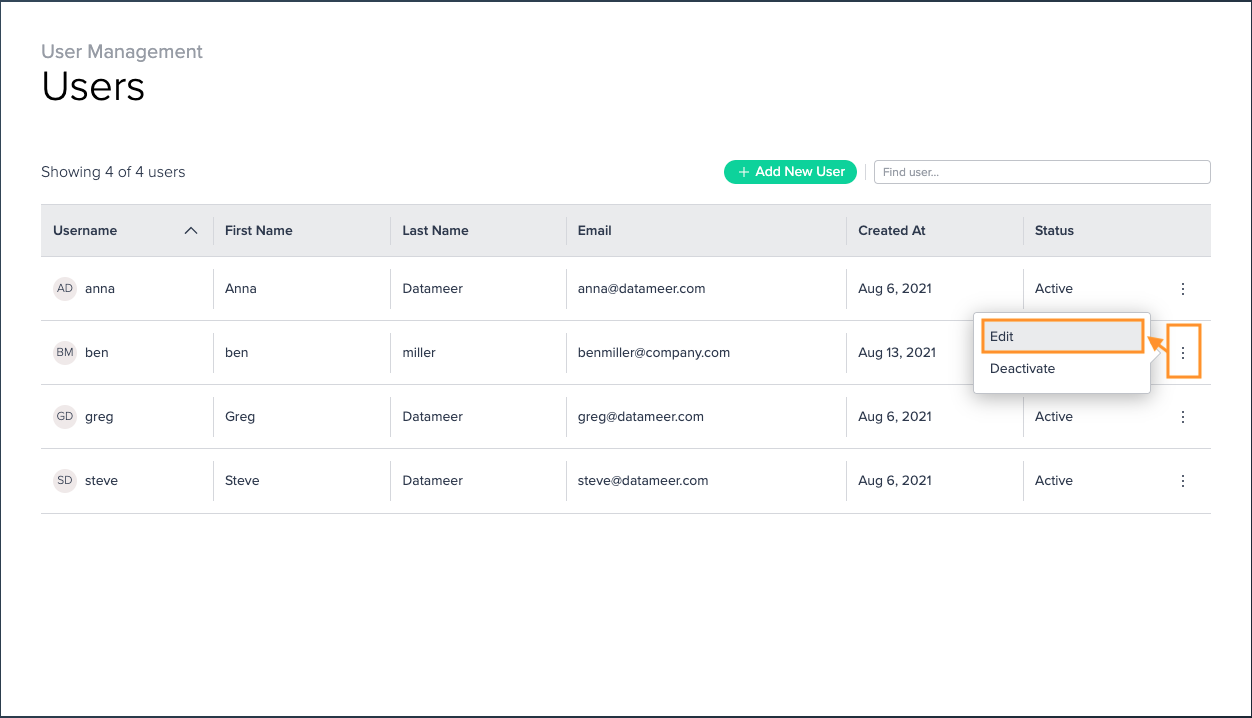
To edit a user:
-
Click on the options button in the user name's line and select "Edit". The dialog 'Edit user information' opens.
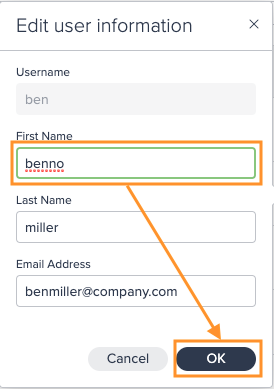
-
Change the needed information and confirm with "Ok". First name, last name, and email address can be edited. All changes are saved. Editing a user is finished.
Deactivating user#
A user cannot be deleted from Datameer but their accounts can be deactivated.
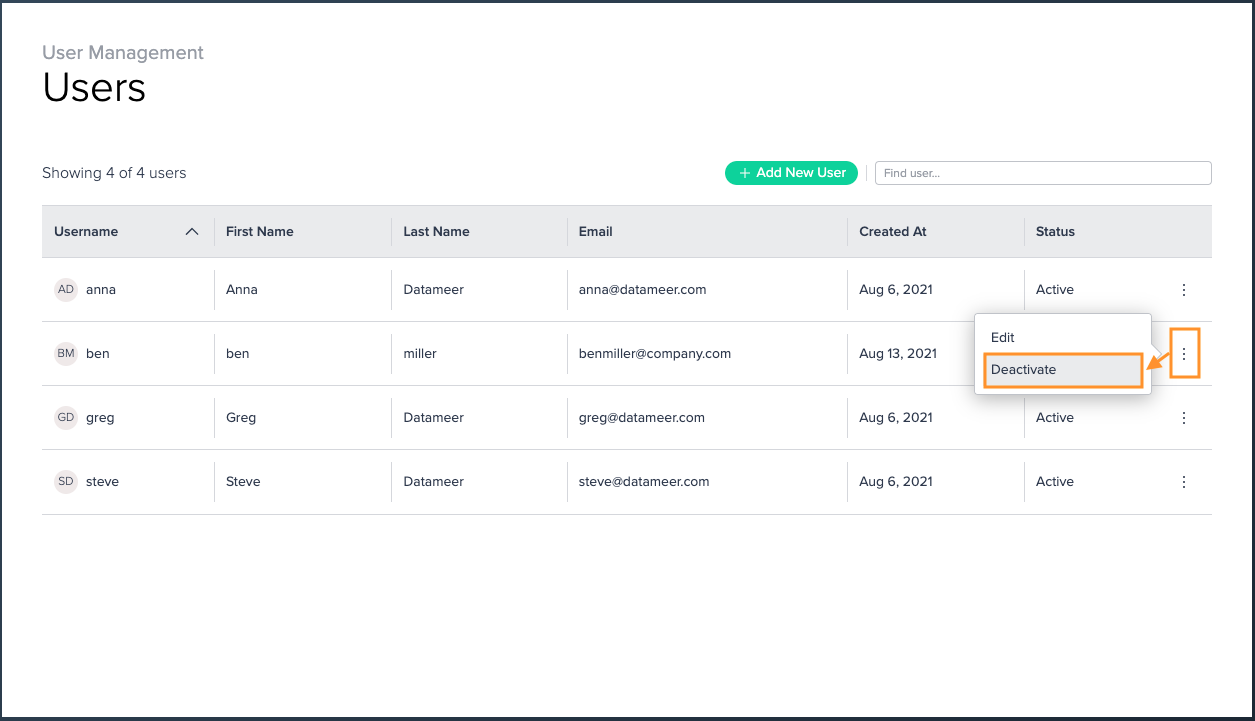
To deactivate a user:
-
Click on the options button in the user name's line and select "Deactivate". A warning dialog is displayed.
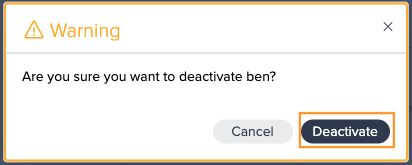
-
Confirm with "Deactivate". The deactivated user is now listed as 'Inactive'. Deactivating the user is finished.
Note that the following applies for deactivating a user:
- Deactivated users cannot log in to Datameer and do not count against your number of licensed users. All work they have done in Datameer will remain in place and their user name will be flagged inside Datameer with a "Deactivated" indication.
- Deactivated users cannot be added as collaborators on Workspaces but they will not be removed from workspaces they were on previously and they will still be listed as the owner for any assets they owned while active. Deactivated users can be reactivated and begin working where they left off.
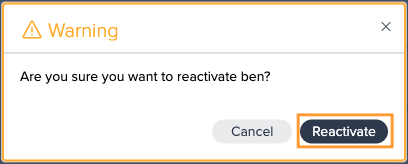
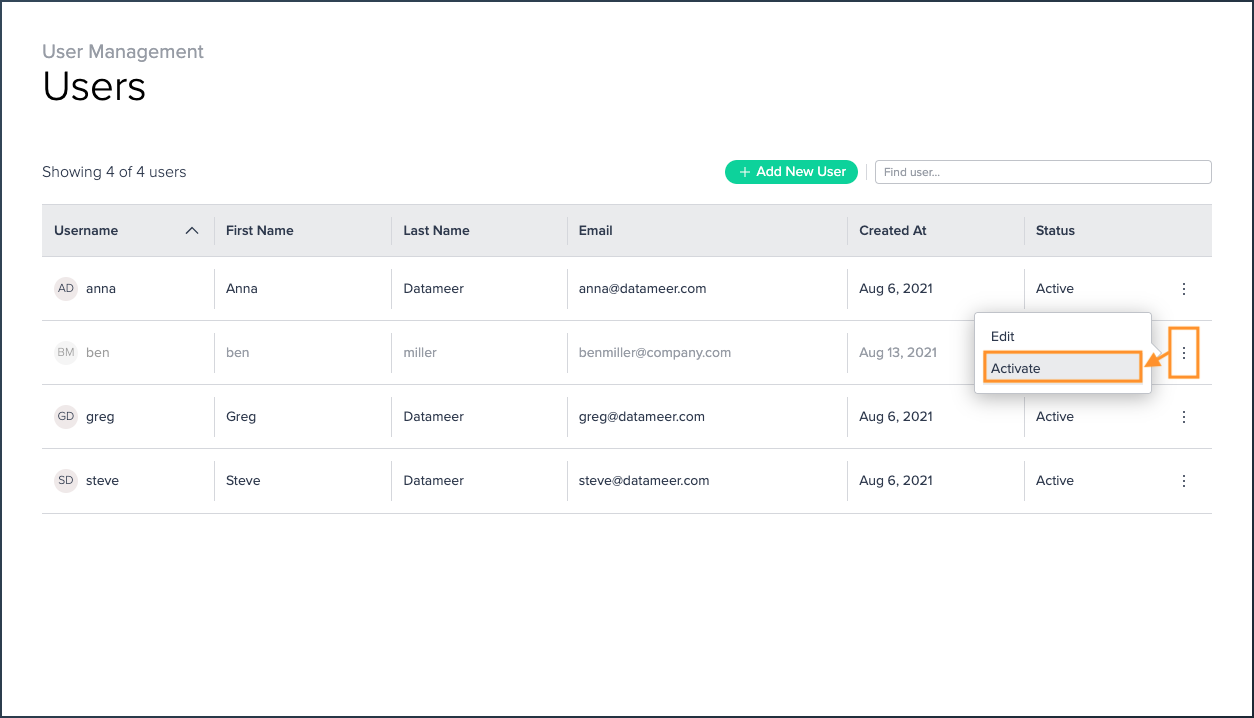
Reactivate user#
A deactivated user can be reactivated again. Reactivated users retain ownership of all their old assets and can immediately log into Datameer using their old password.
To reactivate a user:
-
Click the option button in the user name's line and select "Activate". A warning dialog is displayed.
-
Confirm with "Activate". The reactivated user is now listed as 'Active'. Reactivating the user is finished.