Setup on Azure Marketplace#
Spectrum Administrators can receive and setup Spectrum on an Azure Marketplace environment.
Prerequisites#
As a new user, you will have a 14 days trial license to try out the functionalities and features of Spectrum. After finishing the 14 days trial, you can purchase the production license to preserve the already done work.
The following prerequisites are given:
- an Azure account with access to the Azure Marketplace
- permission to create instances
Setting up Spectrum#
To deploy a Spectrum instance:
-
Login to your Azure account and switch to the Azure Marketplace.
-
Search for "Datameer Spectrum" and select it.
-
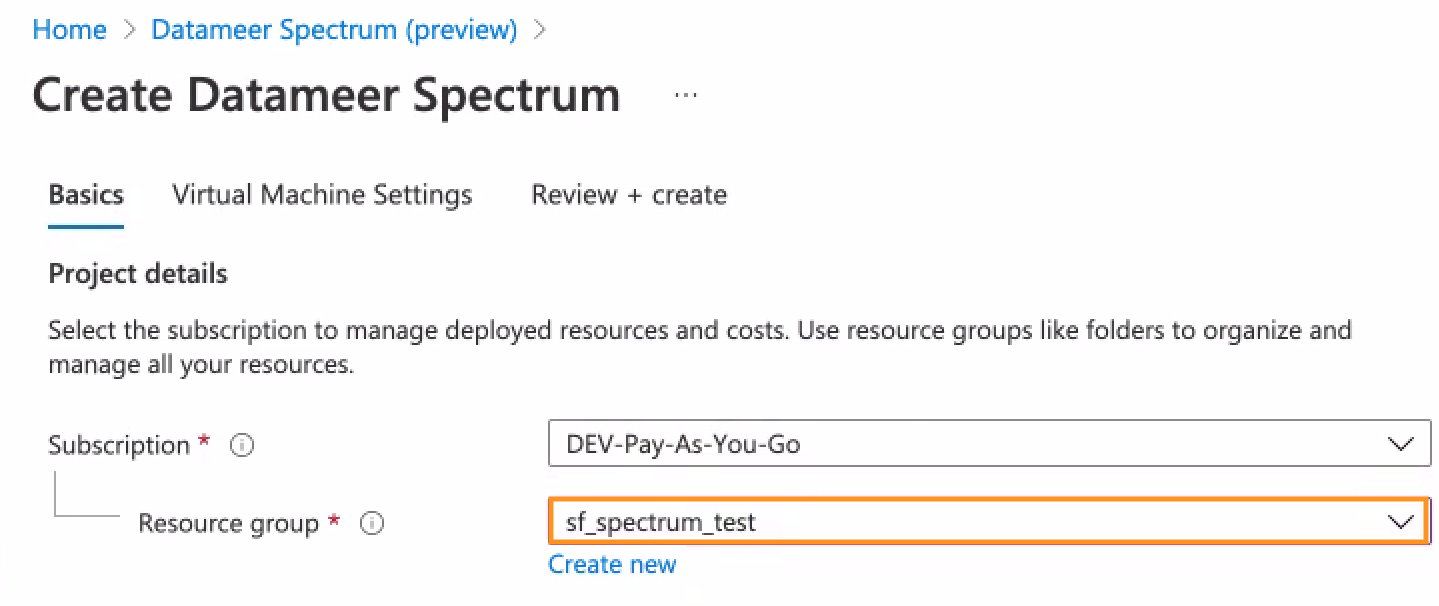
Click on "Create". The page 'Create Datameer Spectrum' opens.
-
Select a "Resource Group" from the drop-down and select a resource group.
-
Select your "Region". We recommend to select the region where most of your data will be located.

-
Define a "Virtual Machine" name, where your web server and database will run on.

-
Define a "Username" for the ssh login. If you won't define a username, the default name will be 'sshuser'.

-
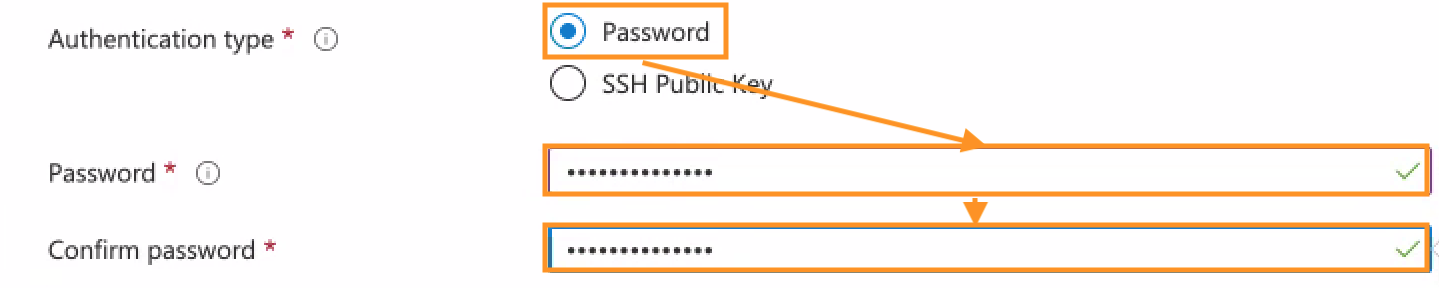
Select "Password" as the authentication type and define a password according to the password rules:
- the password must not include reserved words or unsupported characters
- the password must have 3 of the following: 1 lower case character, 1 upper case character, 1 number, and 1 special character that is not '\' or '-'
- the value is in between 12 and 72 characters long
-
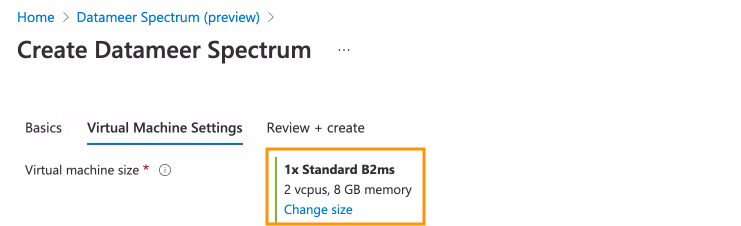
Click on "Next: Virtual Machine Settings" to confirm your configuration. The tab 'Virtual Machine Settings' tab opens.

-
Select the appropriate "Virtual Machine size". Per default, '1x Standard B2ms' is selected. If you want to change the size, click on "Change size".
-
Select a "Diagnostic storage account"" from the drop-down or create a new one by clicking on "Create new".

-
Select the "Public IP Address" for the Virtual Machine or create a new one by clicking on "Create new".

-
Define the "DNS Prefix" for the public IP address.

-
Select the "Virtual Network" from the drop-down or create a new one by clicking on "Create new".

-
Define the "Subnet" from the drop-down.

-
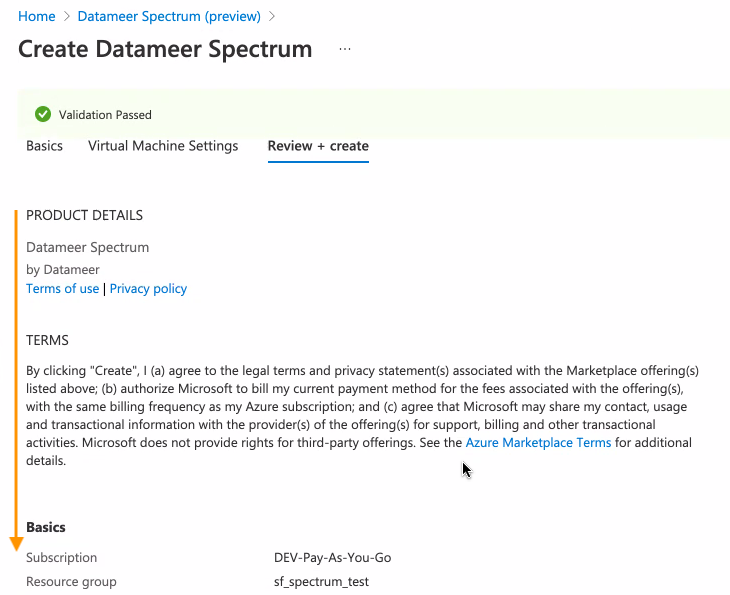
Click on "Next: Review + create" to confirm your configuration. The tab 'Review + create' opens. Your configuration is validated.

-
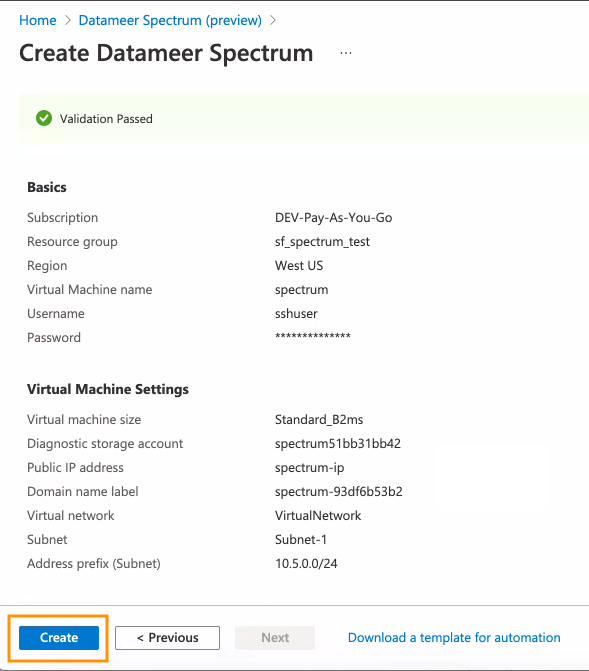
Review your settings and click on "Create". The deployment overview page opens. The deployment will take some time.
-
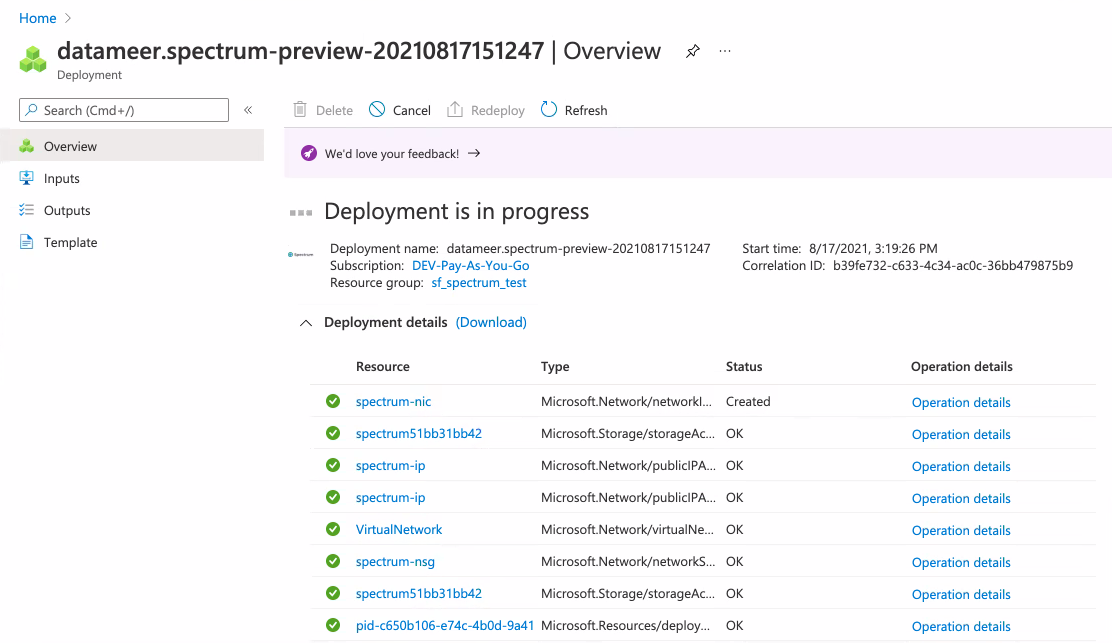
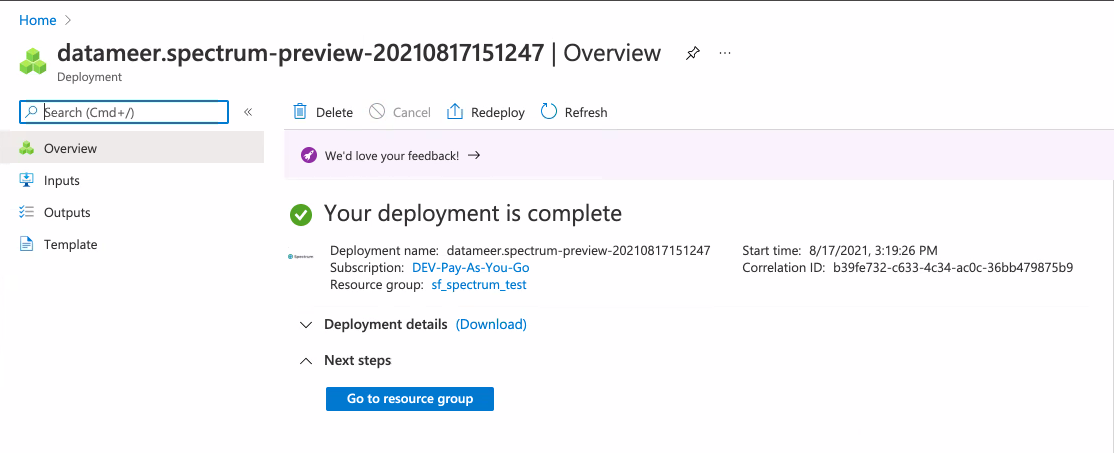
Wait until the deployment is finished. The deployment progress is displayed in the 'Deployment details' section. Your Spectrum trial instance is finished when the "Your deployment is complete" note is displayed. Setting up Spectrum is finished.
Accessing your Spectrum Instance Initially#
To access your Spectrum instance initially:
-
Click on "Outputs". The page 'Outputs' opens.

-
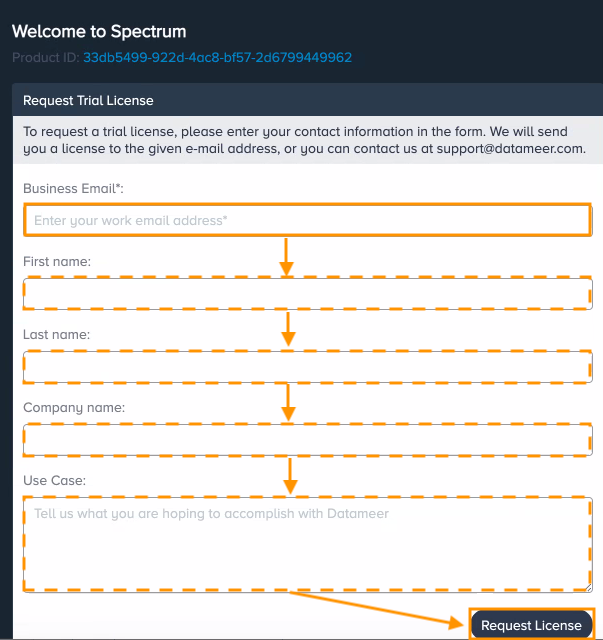
Copy the "Spectrum URL" and enter it in your browser. The 'Spectrum Request Trial License' page opens.

-
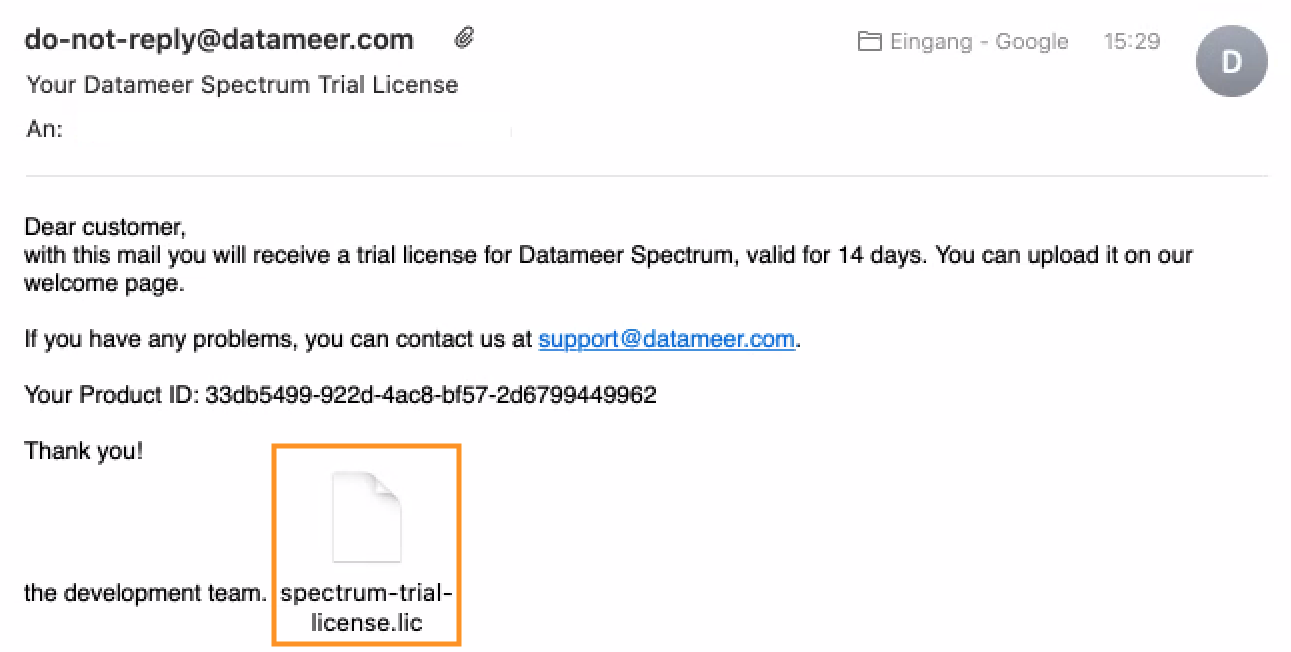
Enter your user information for at least "Business Email" and confirm with "Request Licence". Note that "First name", "last name", "Company name" and "Use Case" can be entered optionally. An email with the license key is sent to your business email address.
-
Download the license key from your email. Note that in case you have not received an email, please check your spam folder.
-
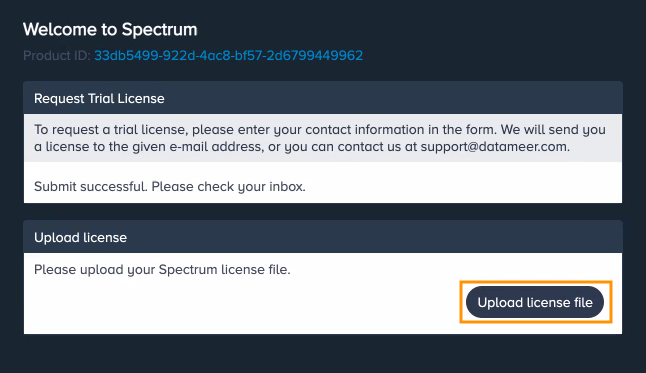
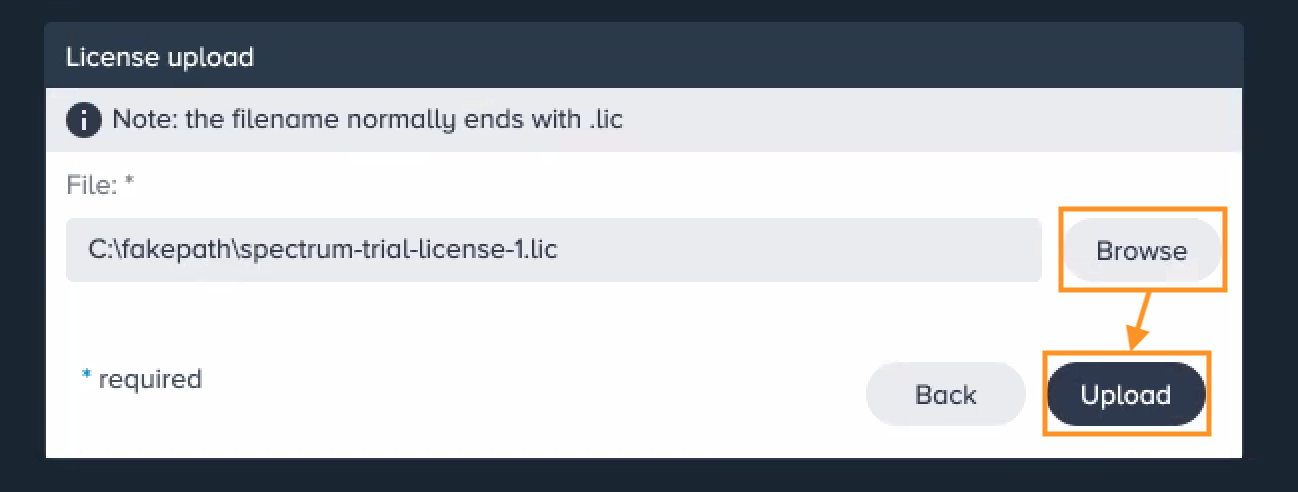
In the browser, click on "Upload licence file". *The dialog 'License upload' opens.
-
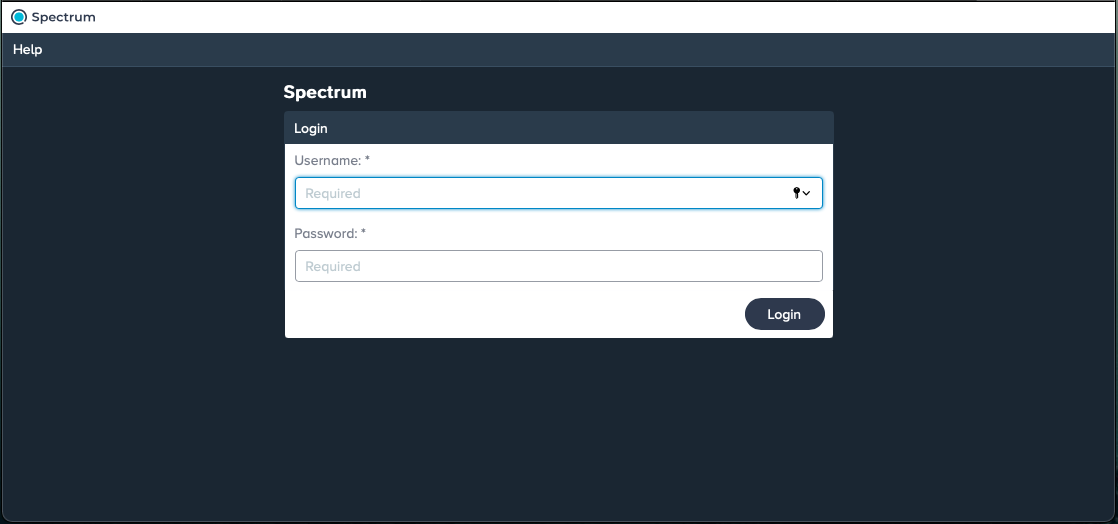
Browse for the license file and confirm with "Upload". The license gets activated. You are redirected to the Spectrum login page.
-
Enter the credentials from your 'Outputs' page: Enter the "username" from 'spectrum User' and the "password" from 'spectrum Password' and confirm with "Login". You are logged in and redirected to the File Browser.