Joining Data
Creating a Join
INFO
The columns from the sheets being joined must have a common key that links the information together, e.g.
Sheet 1 contains:
| Name_docu_join_sample | ZimeZone |
|---|---|
| Alison | East Coast |
| Ben | West Coast |
Sheet 2 contains:
| Name_docu_join_sample_2 | Posts |
|---|---|
| Alison | 54 |
| Ben | 35 |
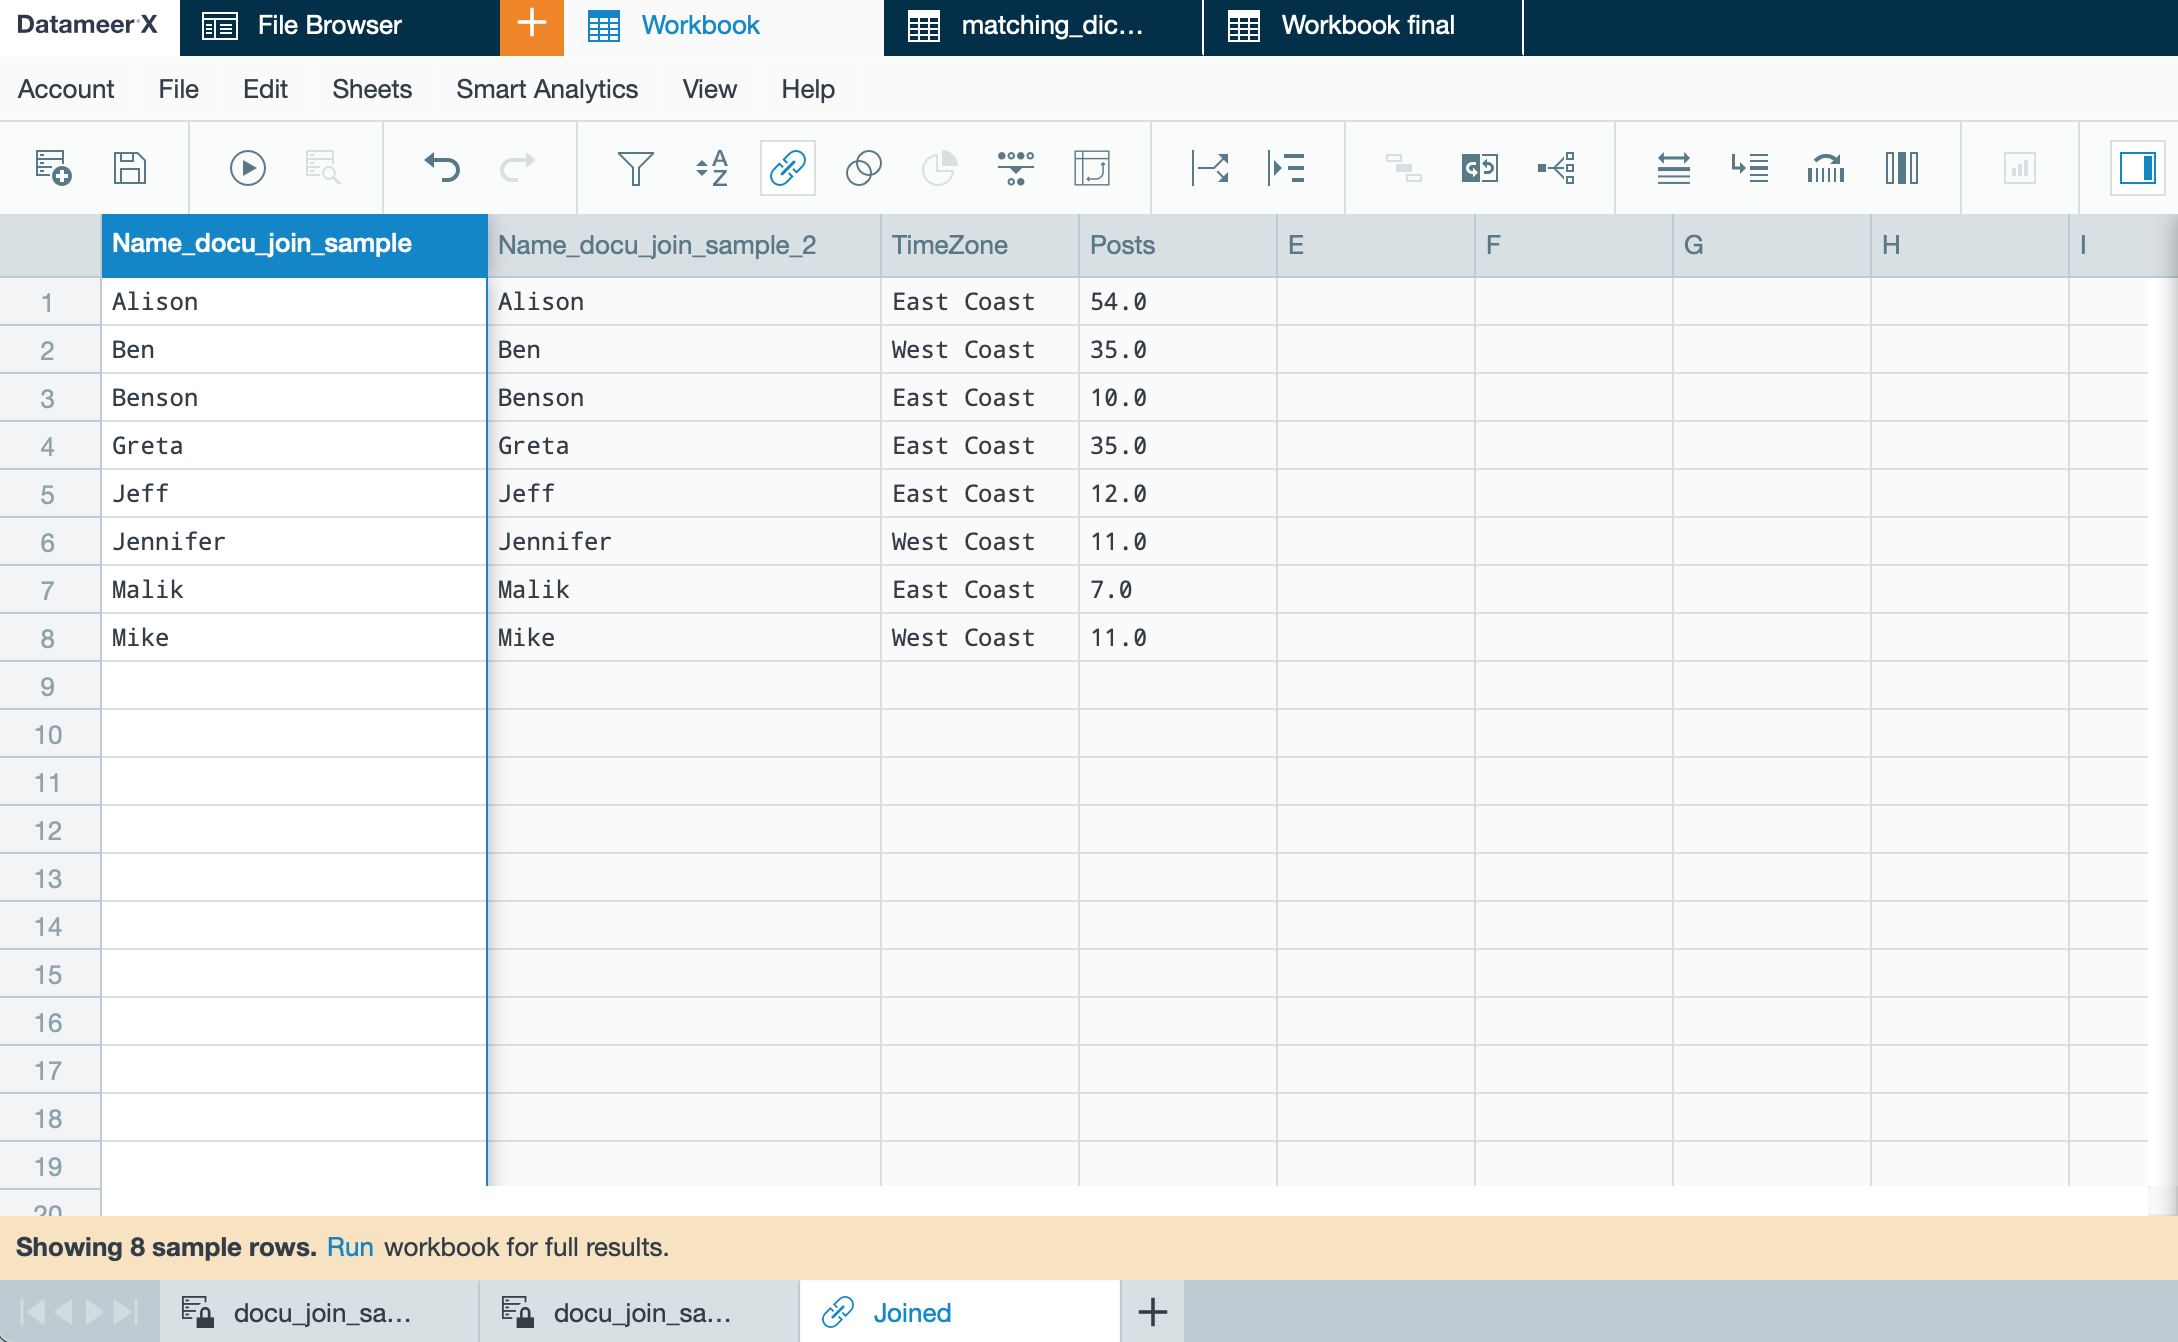
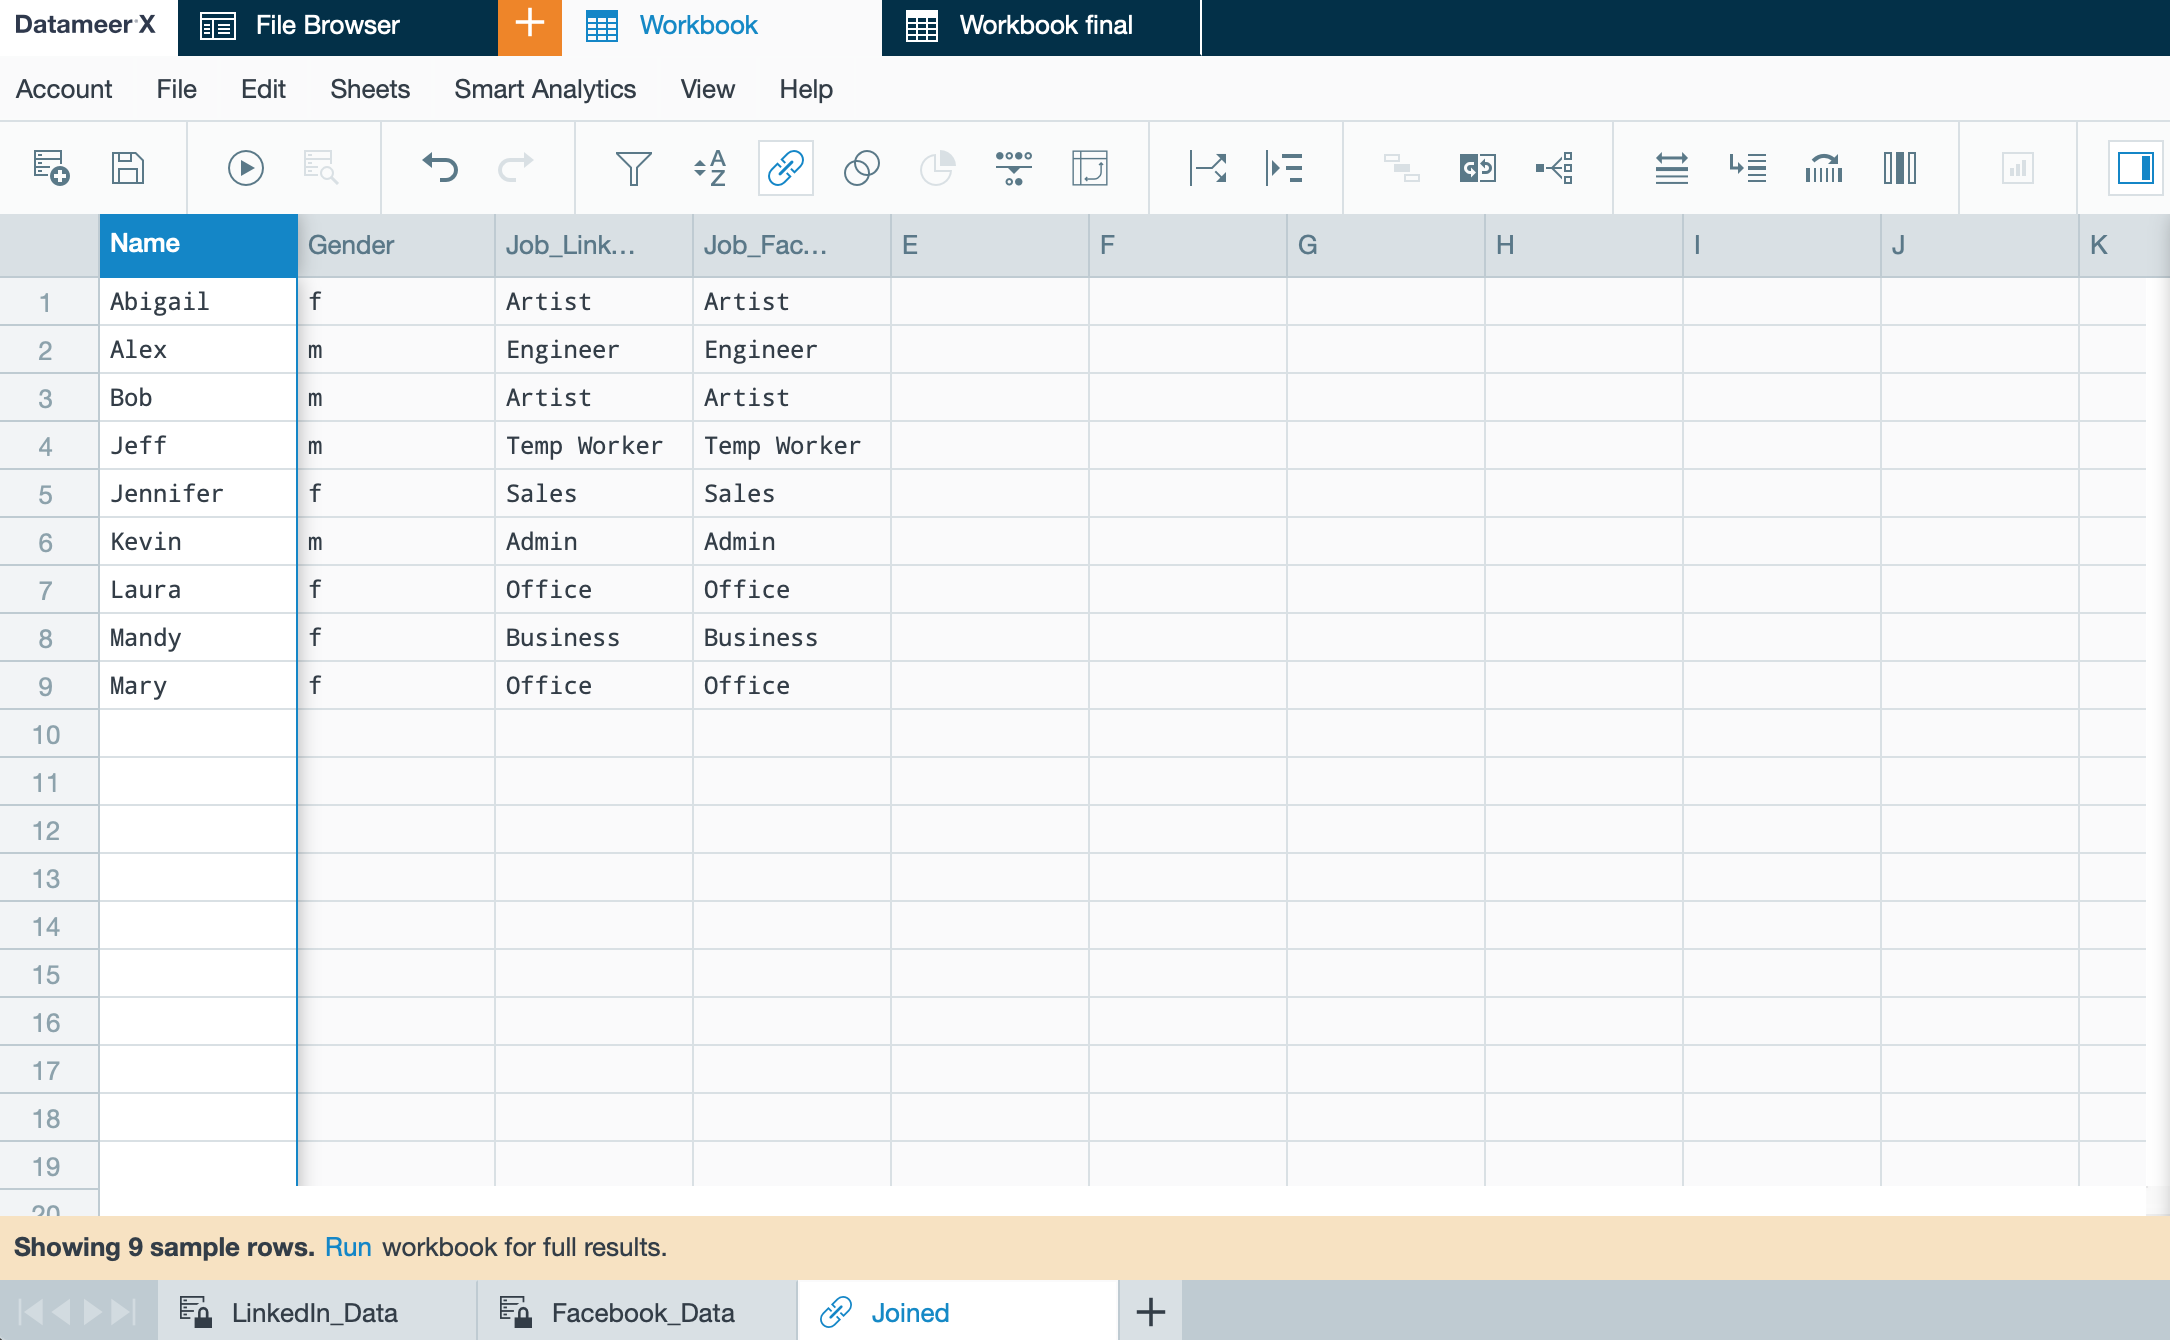
Create an inner join by 'screen name' and get the result:
| Name_docu_join_sample | Name_docu_join_sample_2 | TimeZone | Posts |
|---|---|---|---|
| Alison | Alison | 54 | 54 |
| Ben | Ben | 36 | 35 |
To create a join:
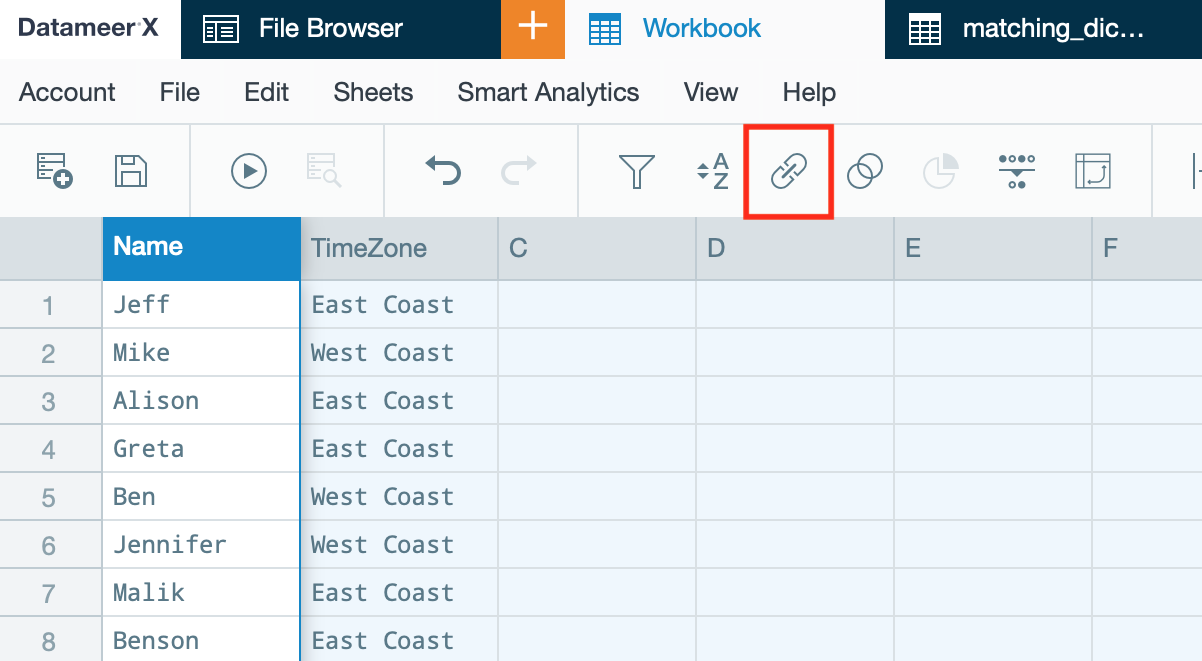
- Open a workbook and click on the "Join" icon or click on "Edit" → "Join". The 'Create a Joined Sheet' dialog opens.
 or
or 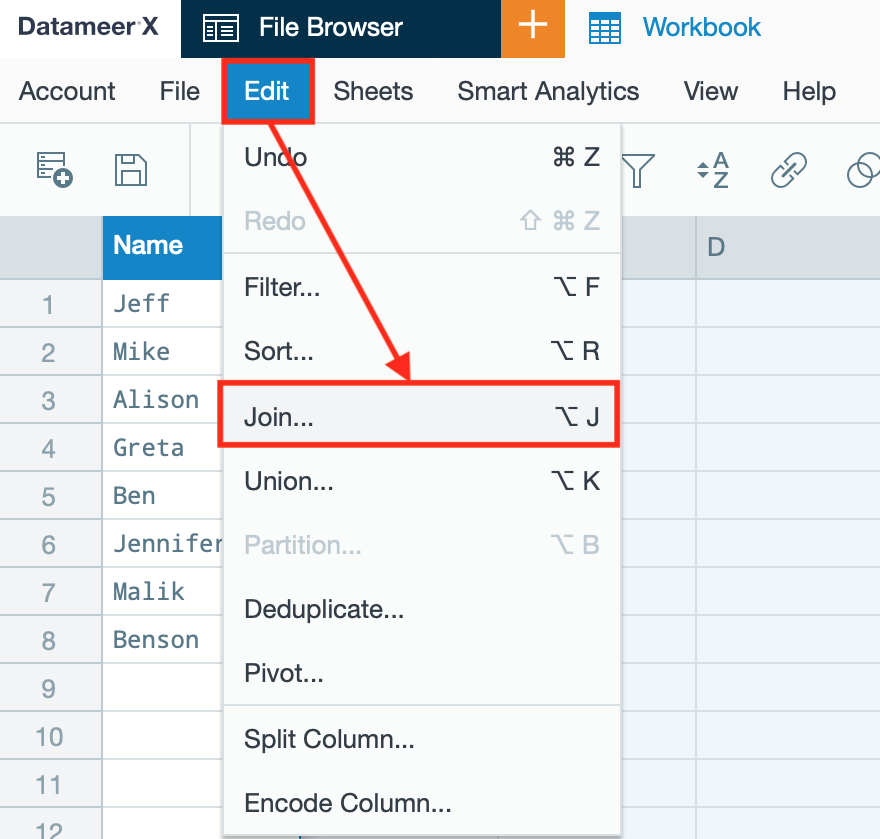
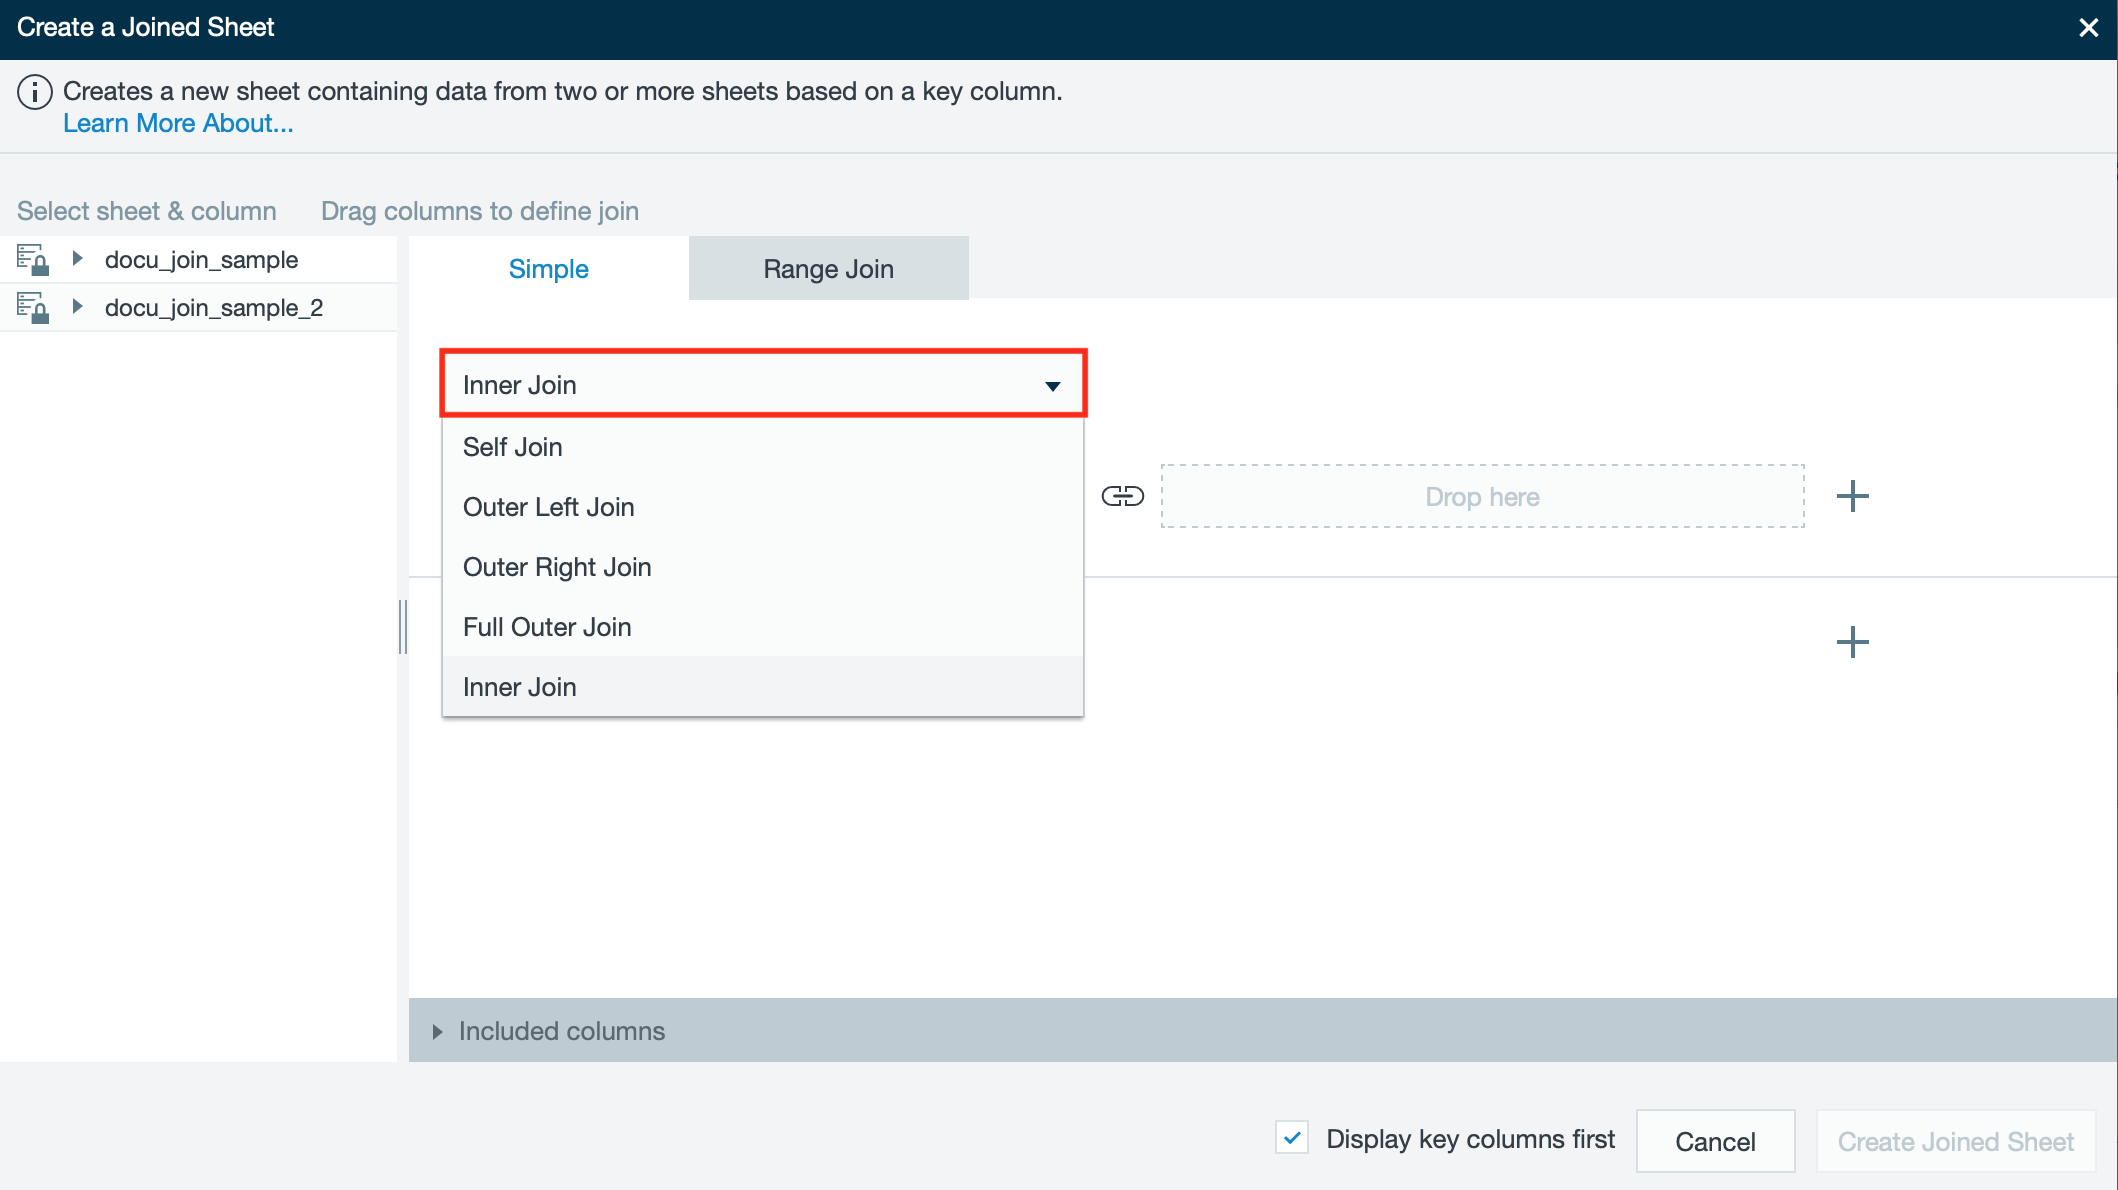
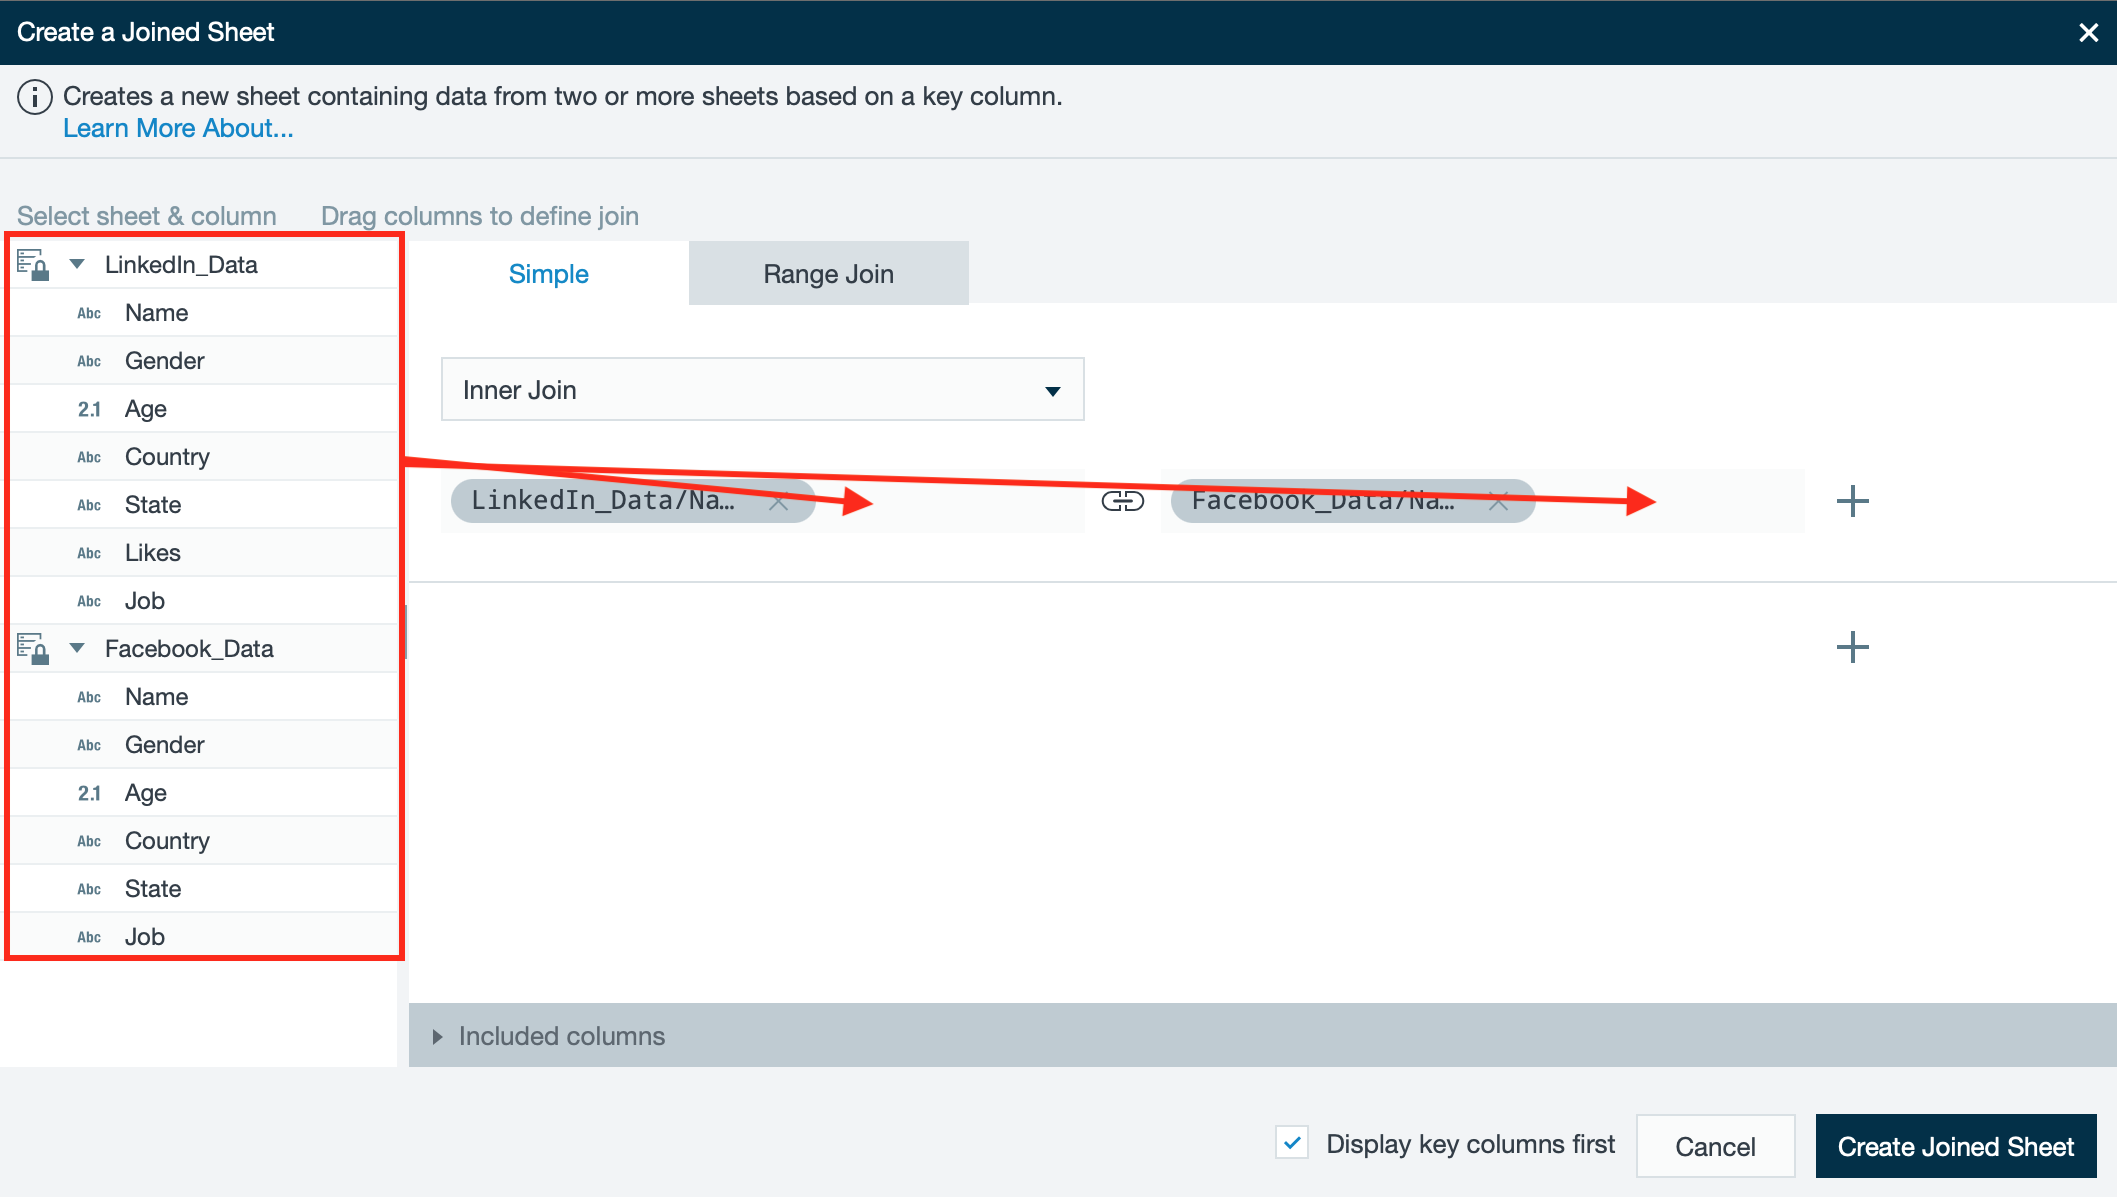
- Select the required /wiki/spaces/DASSB100/pages/32569527080 from the drop-down within the 'Simple' tab.
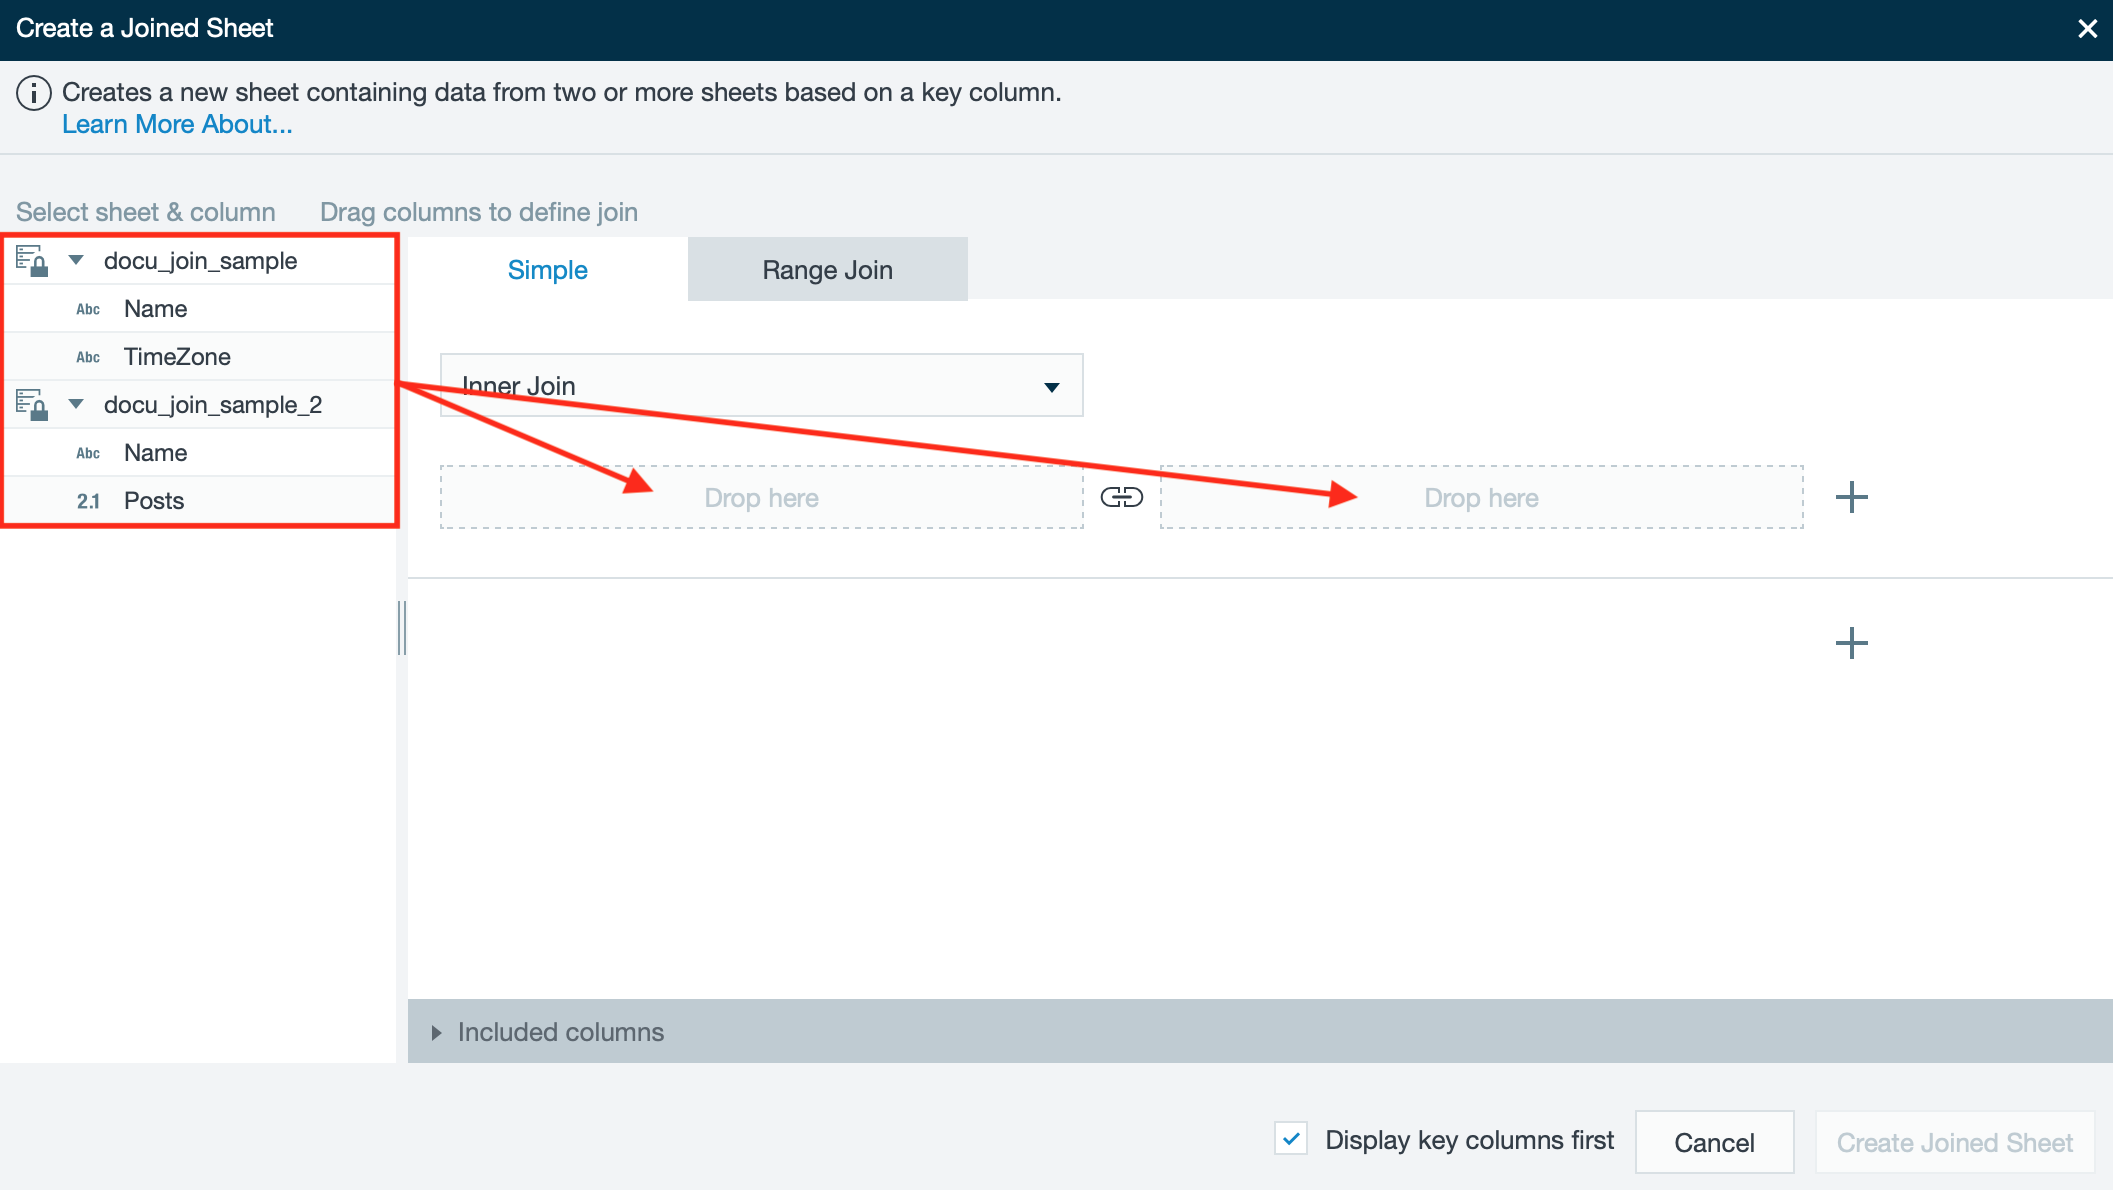
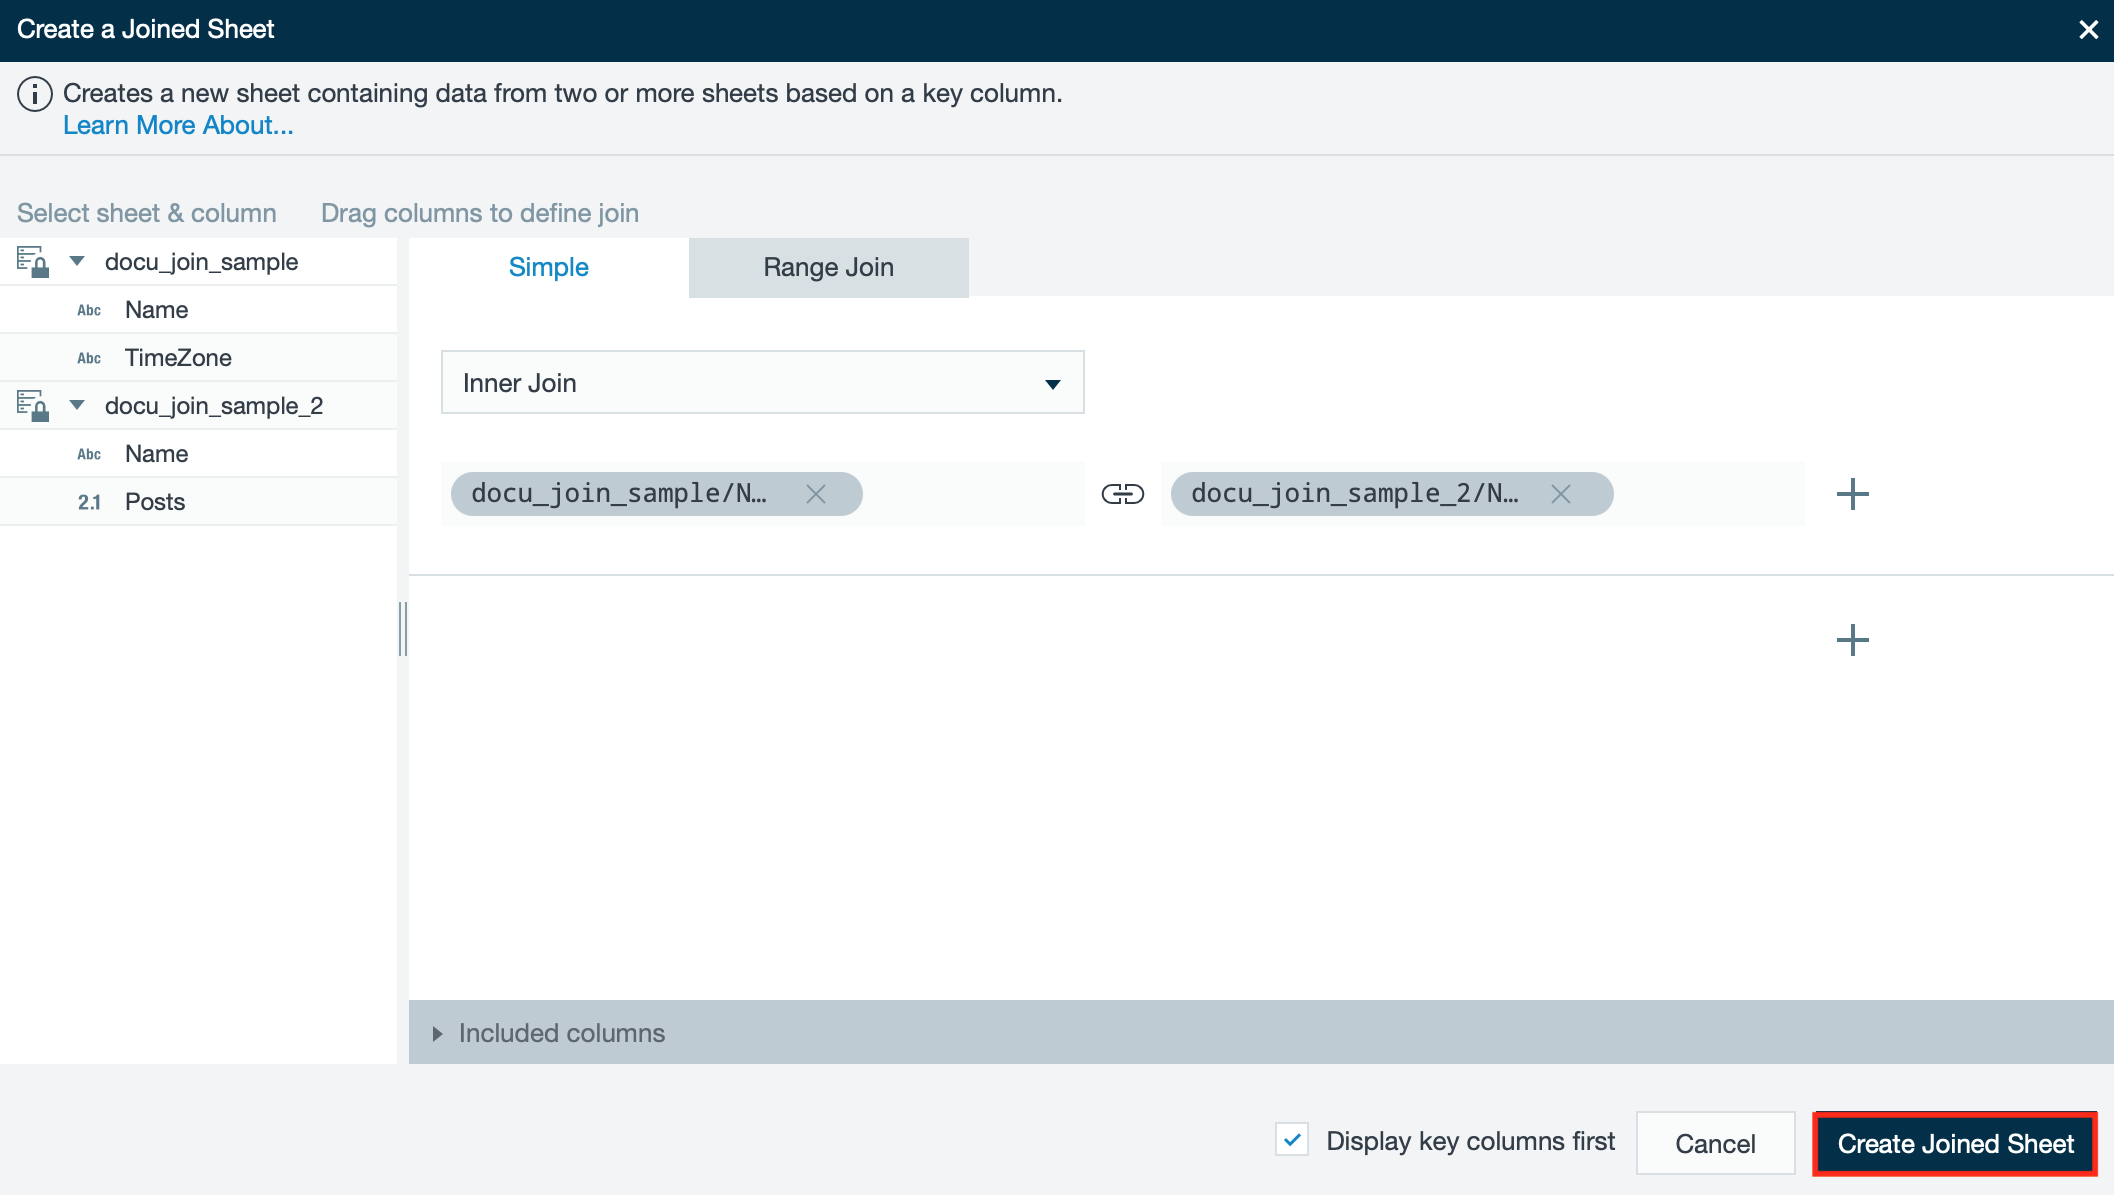
- Unfold the workbook sheet and column menu and position the required columns via drag and drop on the appropriate fields.
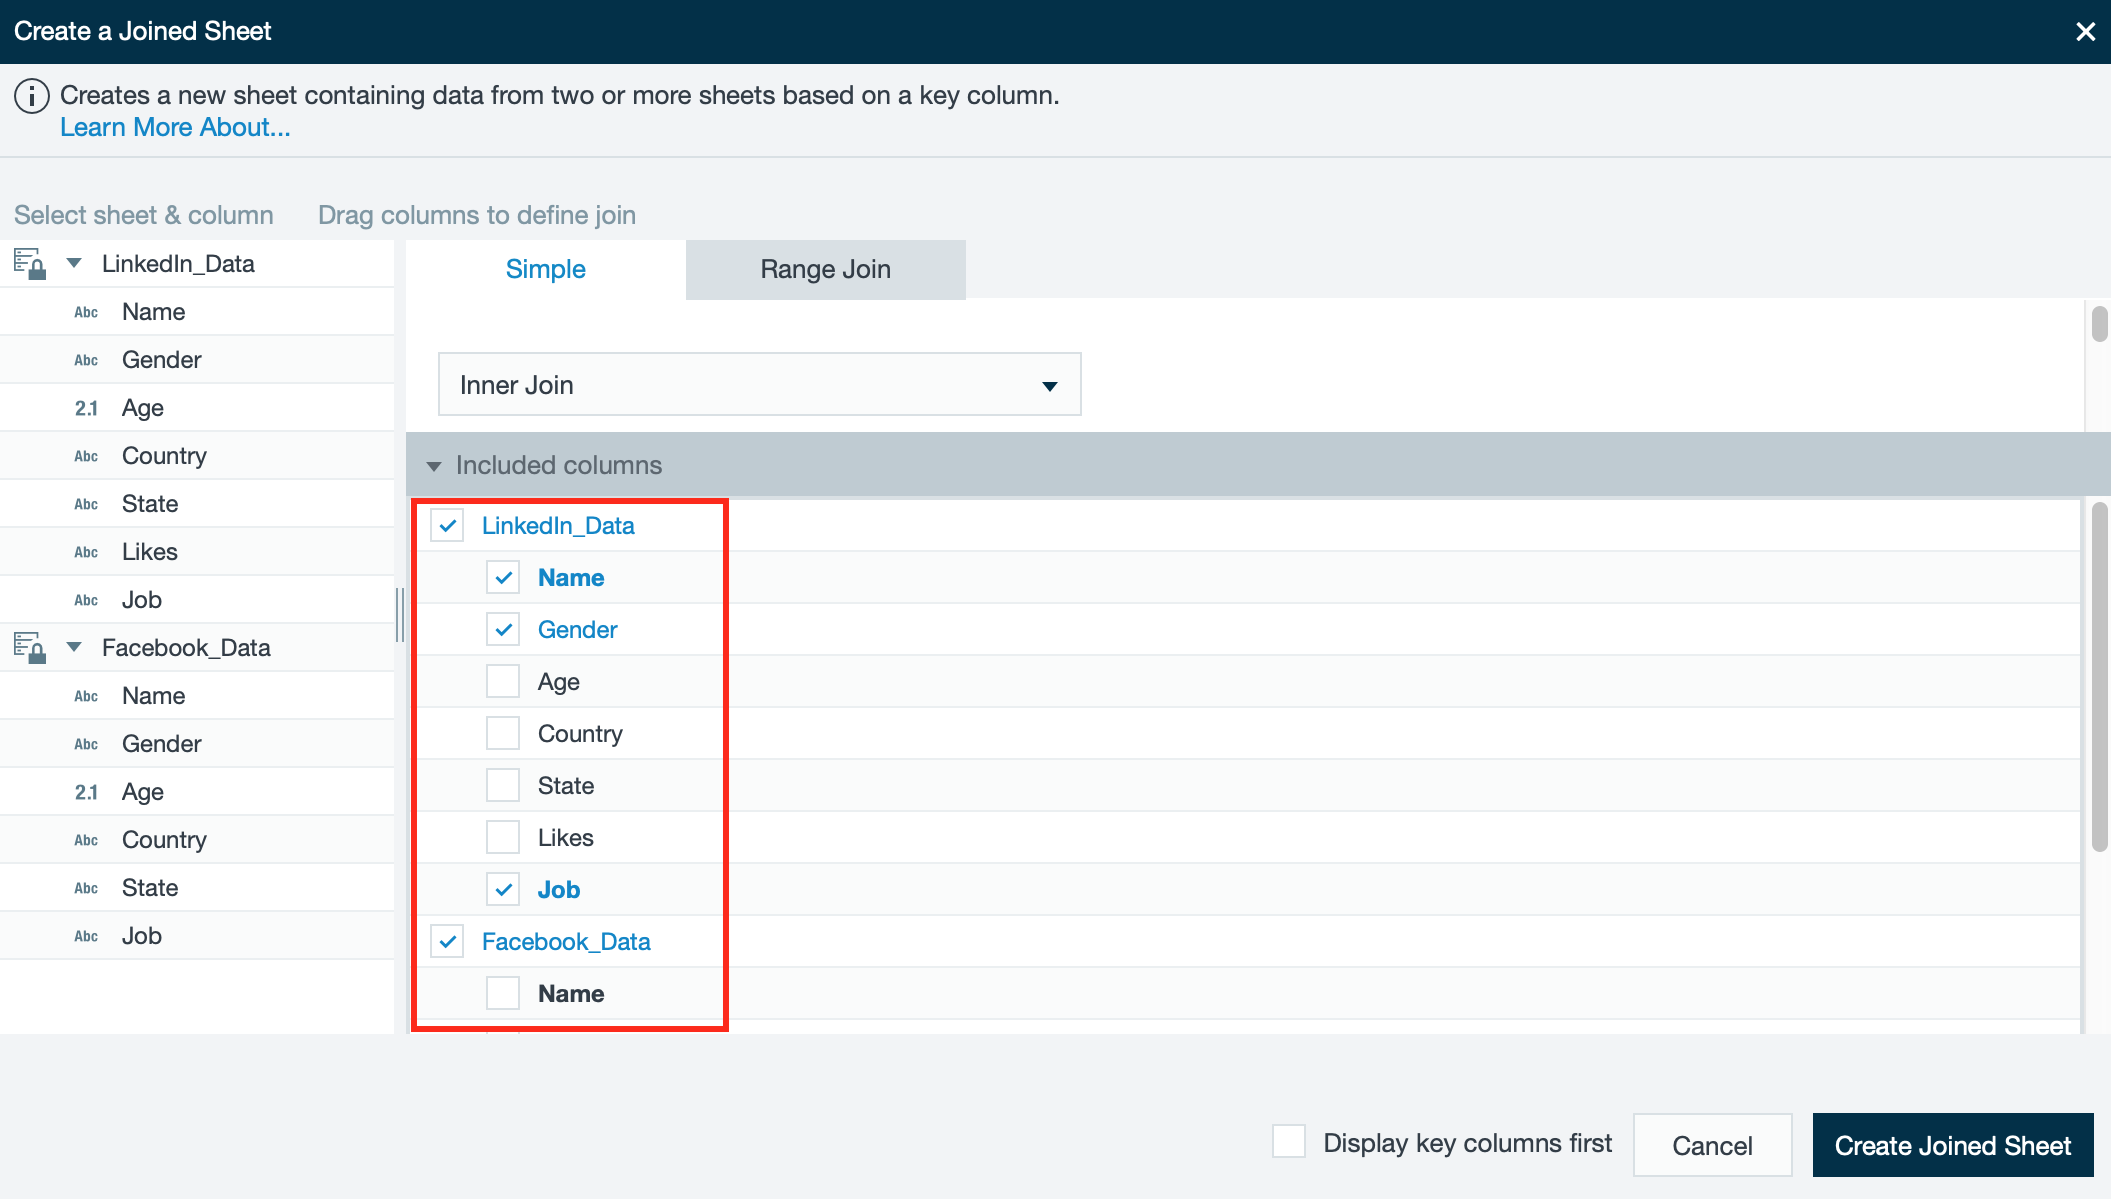
- Select "Included columns" to display the content and select the columns you want to have displayed in the result join sheet.
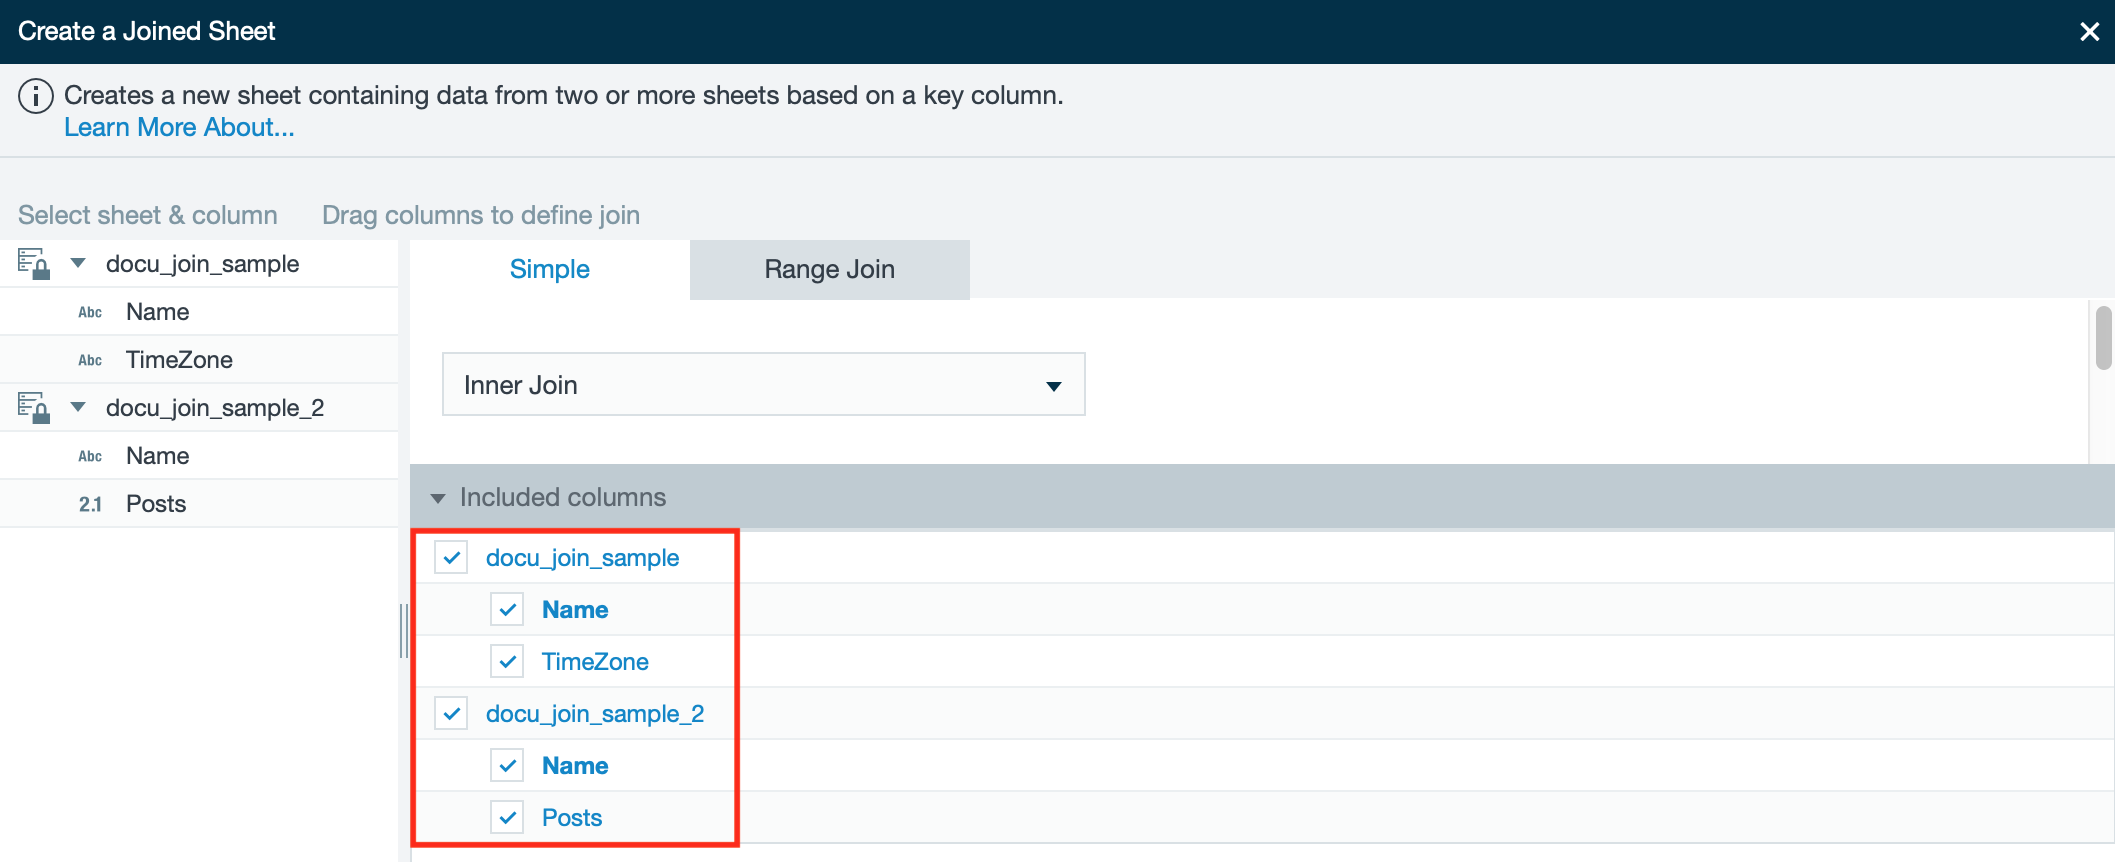
- Confirm with "Create Joined Sheet". The new joined sheet appears in the workbook. Joining Data is finished.
Creating a Join From Multiple Columns
INFO
With the multi-key join, you can specify multiple columns from two different worksheets and join the data together.
To create a join from multiple columns:
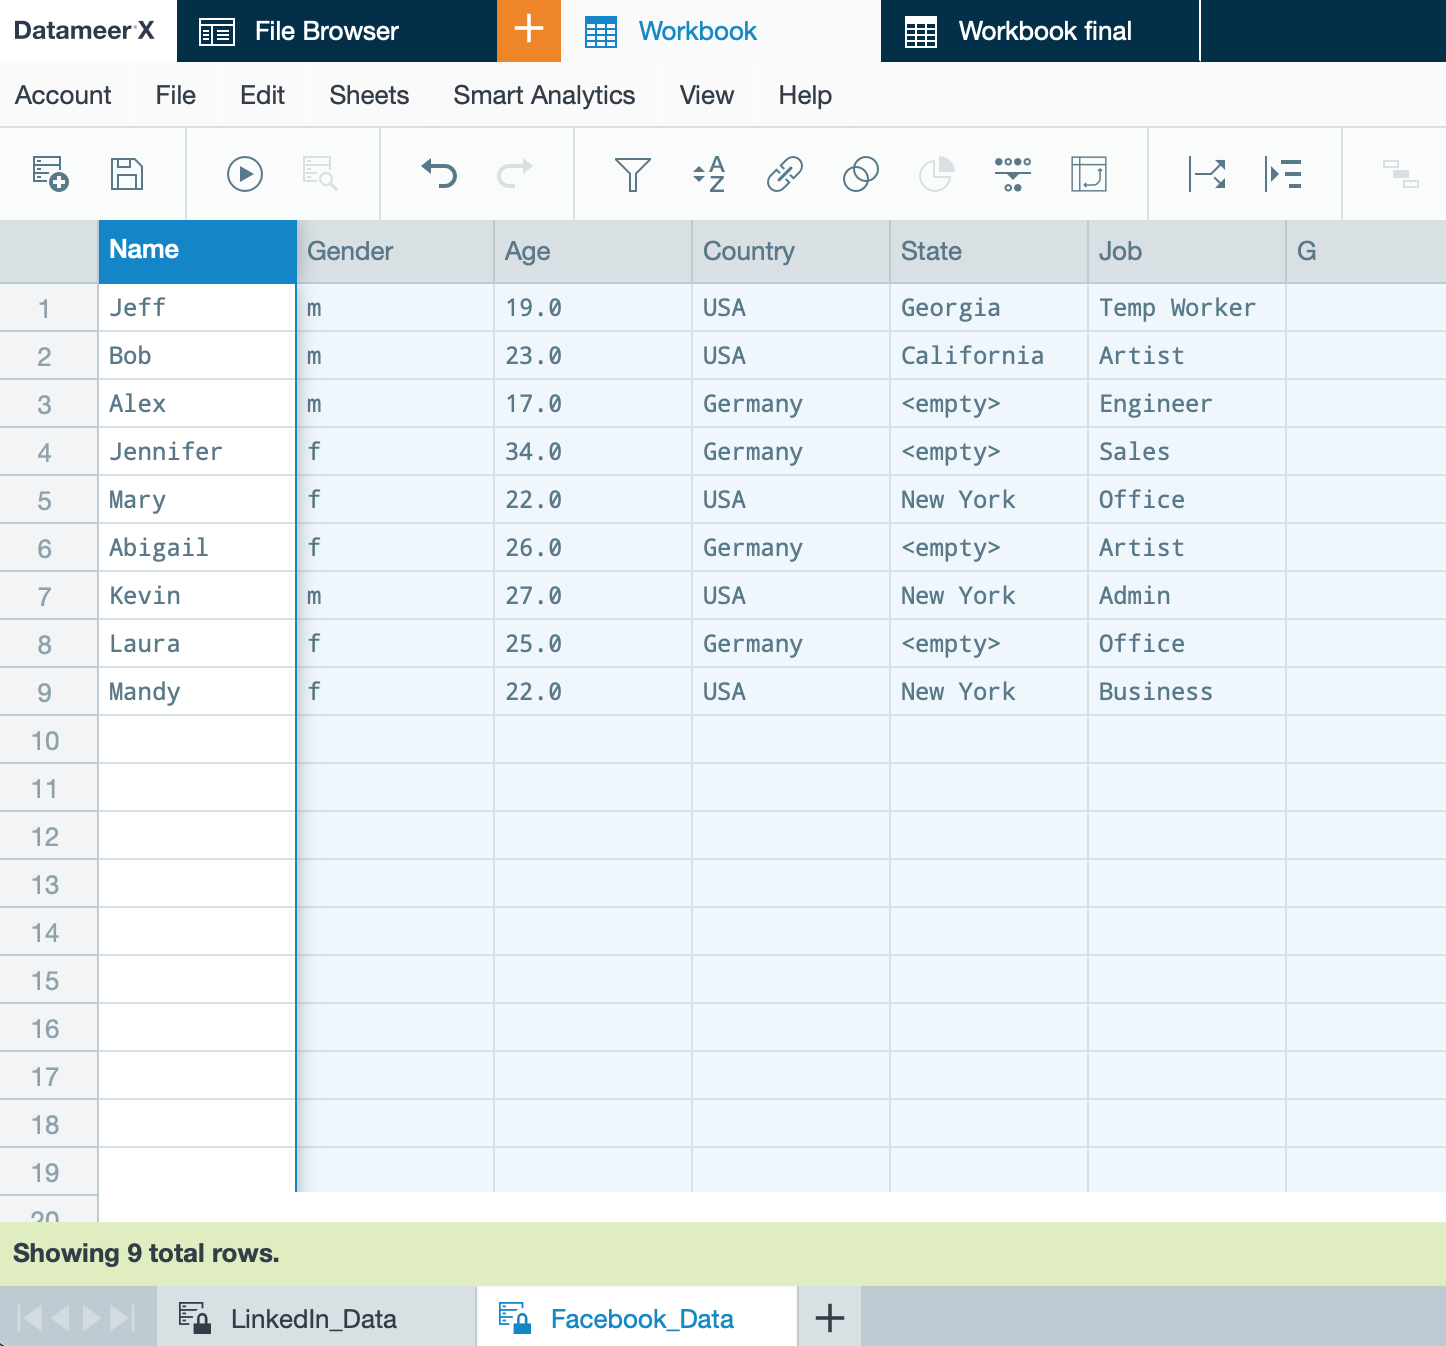
- Open a workbook and add the data sources that need to be joined together in a workbook in different sheets.
- Click on the "Join" icon or click on "Edit" → "Join". The 'Create a Joined Sheet' dialog opens. or
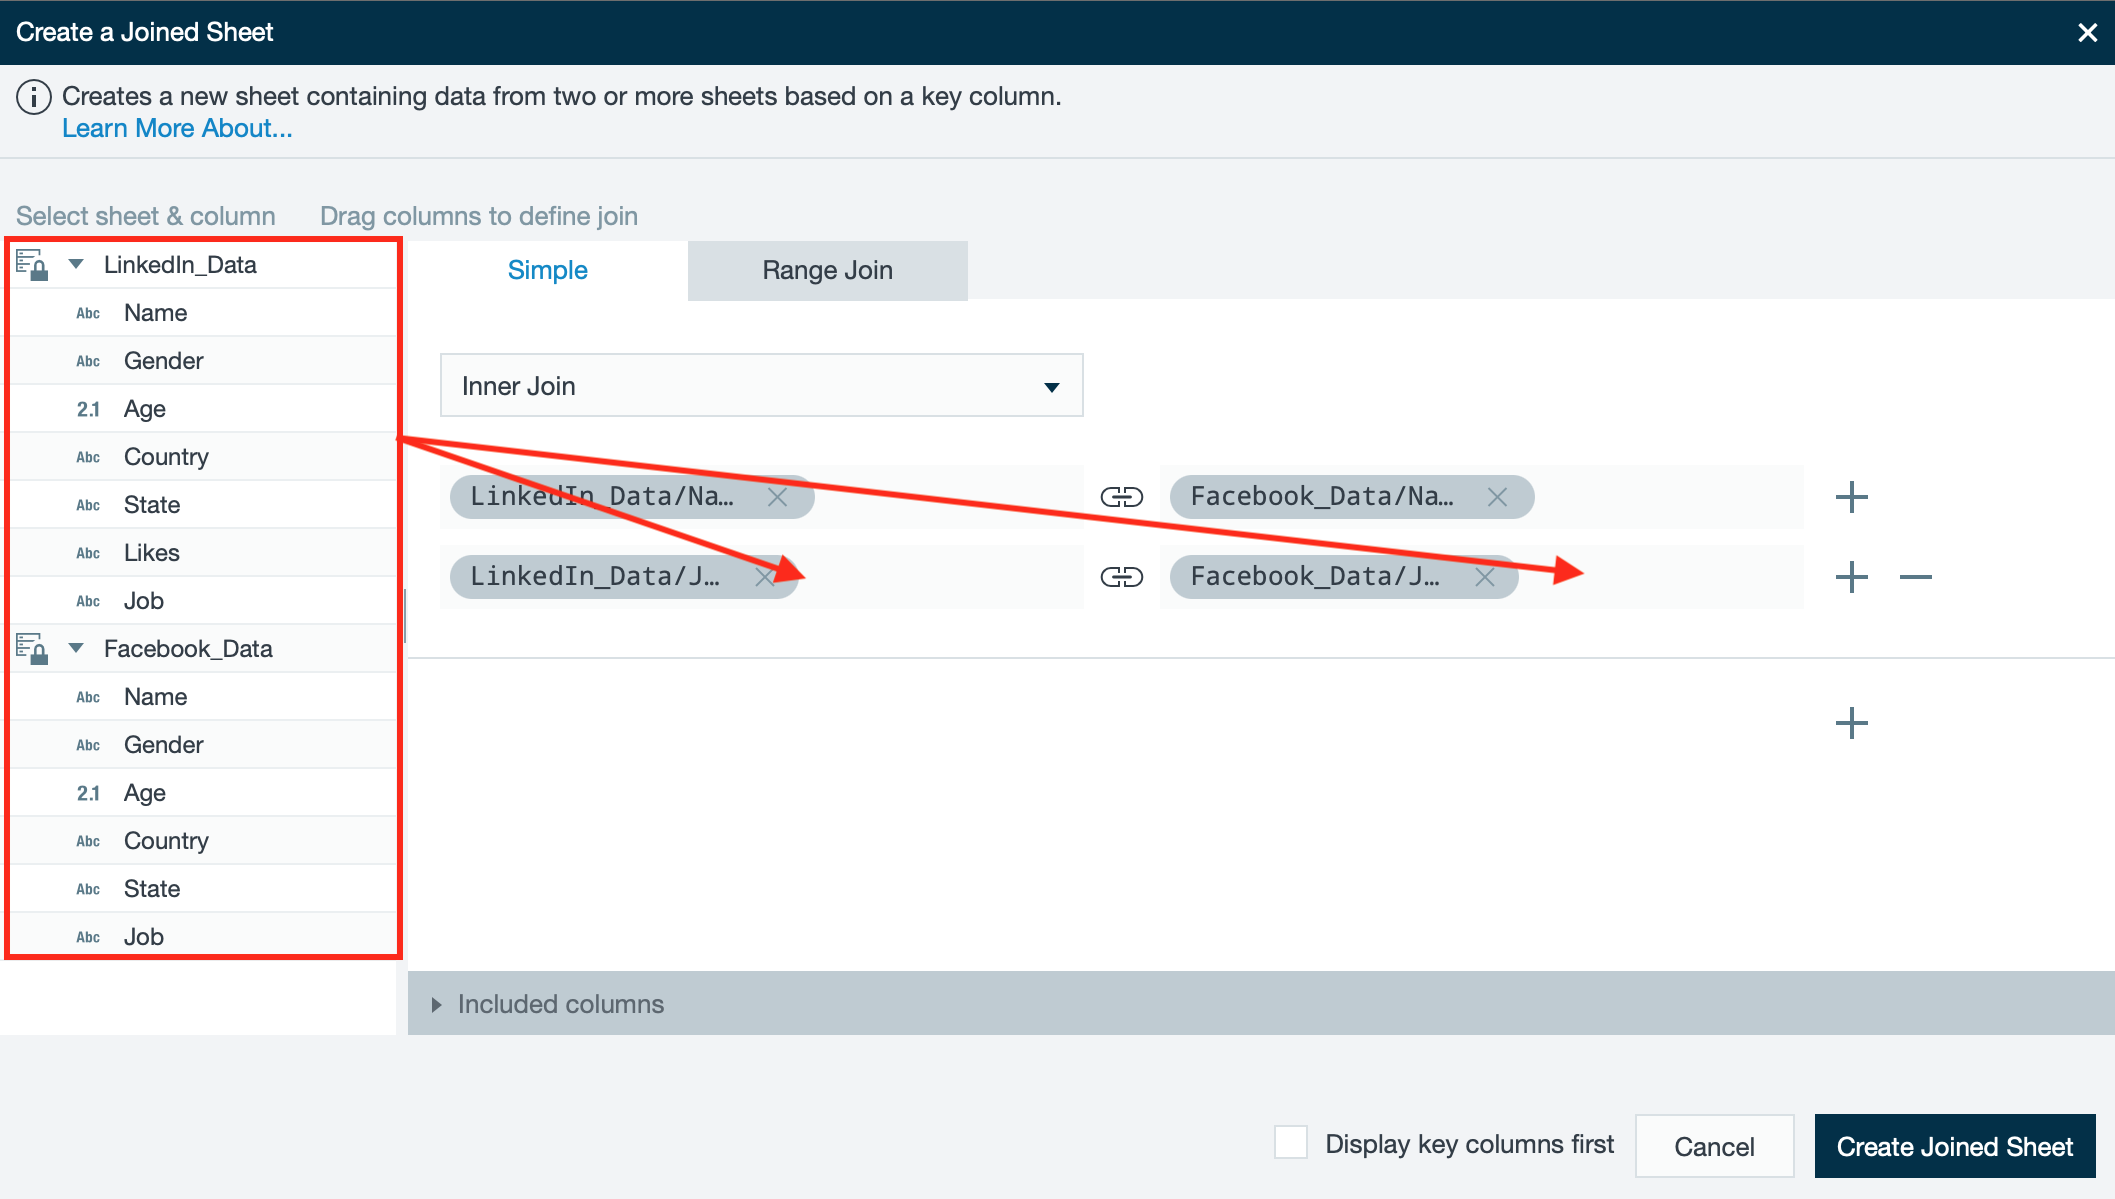
- Unfold the Workbook sheet and column menu and position the required columns via drag and drop on the appropriate fields.
- Click the "+" button and add additional column keys to the join.
INFO: The same data source must be used in the left and right columns as the previous data sources.
INFO: If you want to join data from multiple sheets, use the "+" button at the bottom right side of the tab 'Simple' to create pins from multiple data sources.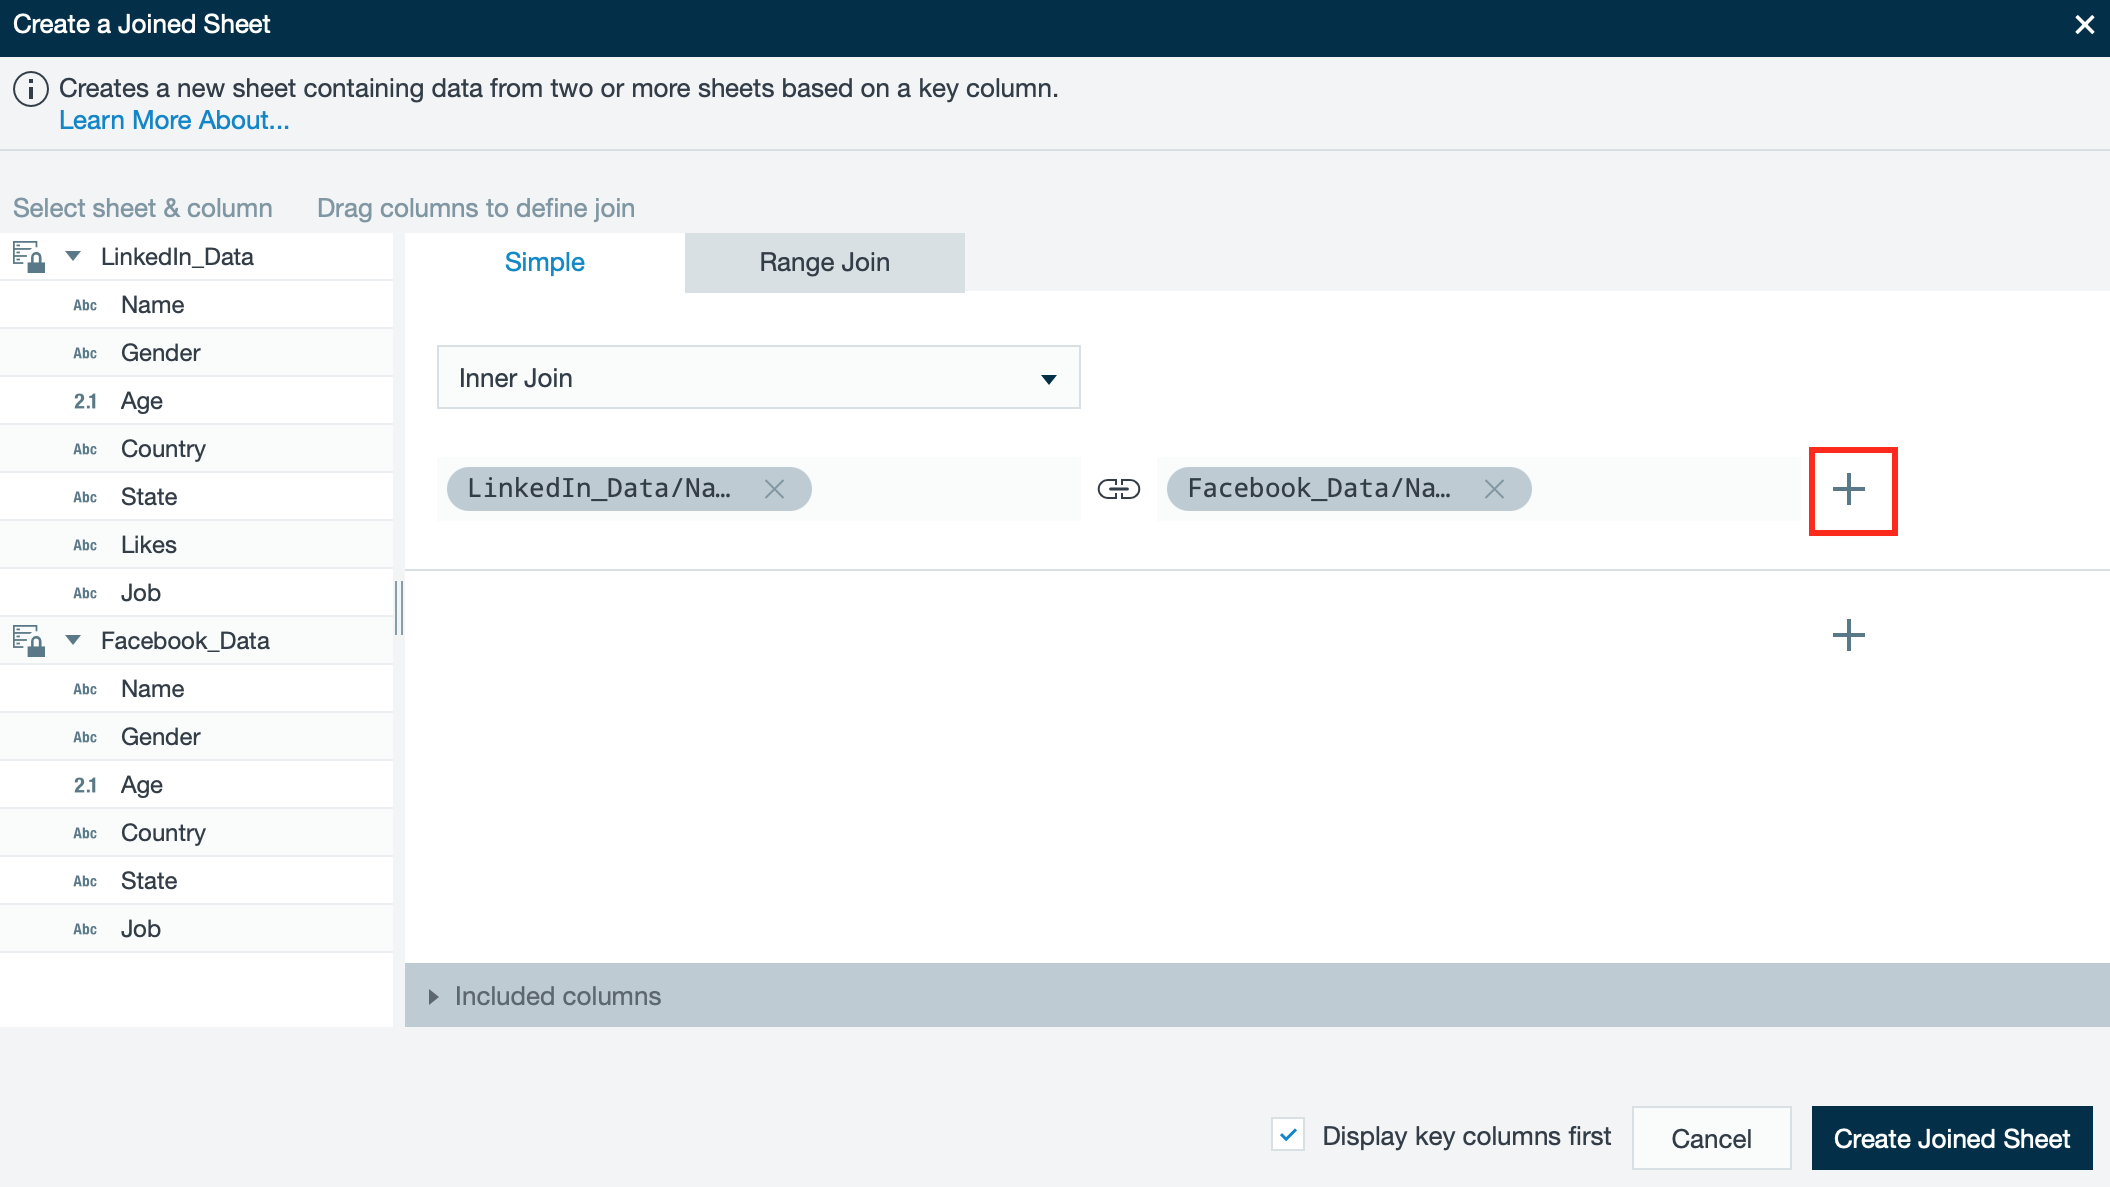
- Select "Included columns" to display the content and select the columns you want to have displayed in the result join sheet.
Confirm with "Create Joined Sheet". The result is displayed in the joined workbook. Multiple joining is finished.

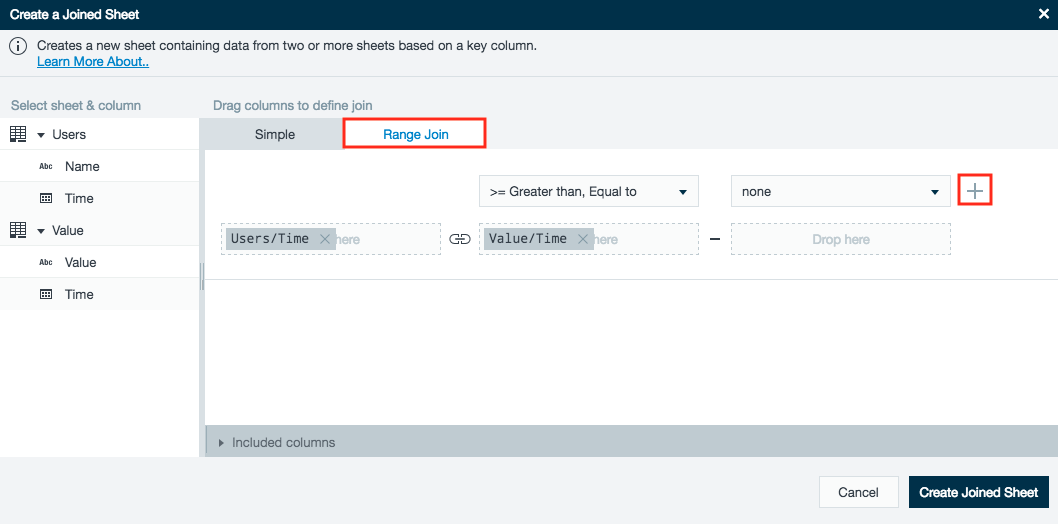
Creating a Ranged Join
INFO
A ranged join is similar to a simple join but has additional versatility. Instead of joining worksheets using an exact matching key column, you can specify a range (greater than, less than) between two worksheet key columns.
Data types allowed by a range join are limited to dates and geolocations, e.g.
Sheet 1
| User | Time |
|---|---|
| Jeff | 17/10/2015 |
| Mike | 17/10/2015 |
Sheet 2
| Value | Time |
|---|---|
| 45345 | 18/10/2015 |
| 92383 | 19/10/2015 |
Create a range join by Sheet 1.Time is less than Sheet 2.Time. Deselect Sheet 2.Time under "Included Columns".
| User | Time | Value |
|---|---|---|
| Jeff | 17/10/2015 | 45345 |
| Jeff | 17/10/2015 | 92383 |
| Mike | 18/10/2015 | 92383 |
To create a ranged join click on the tab "Range Join" and then the "+" button to add additional columns.
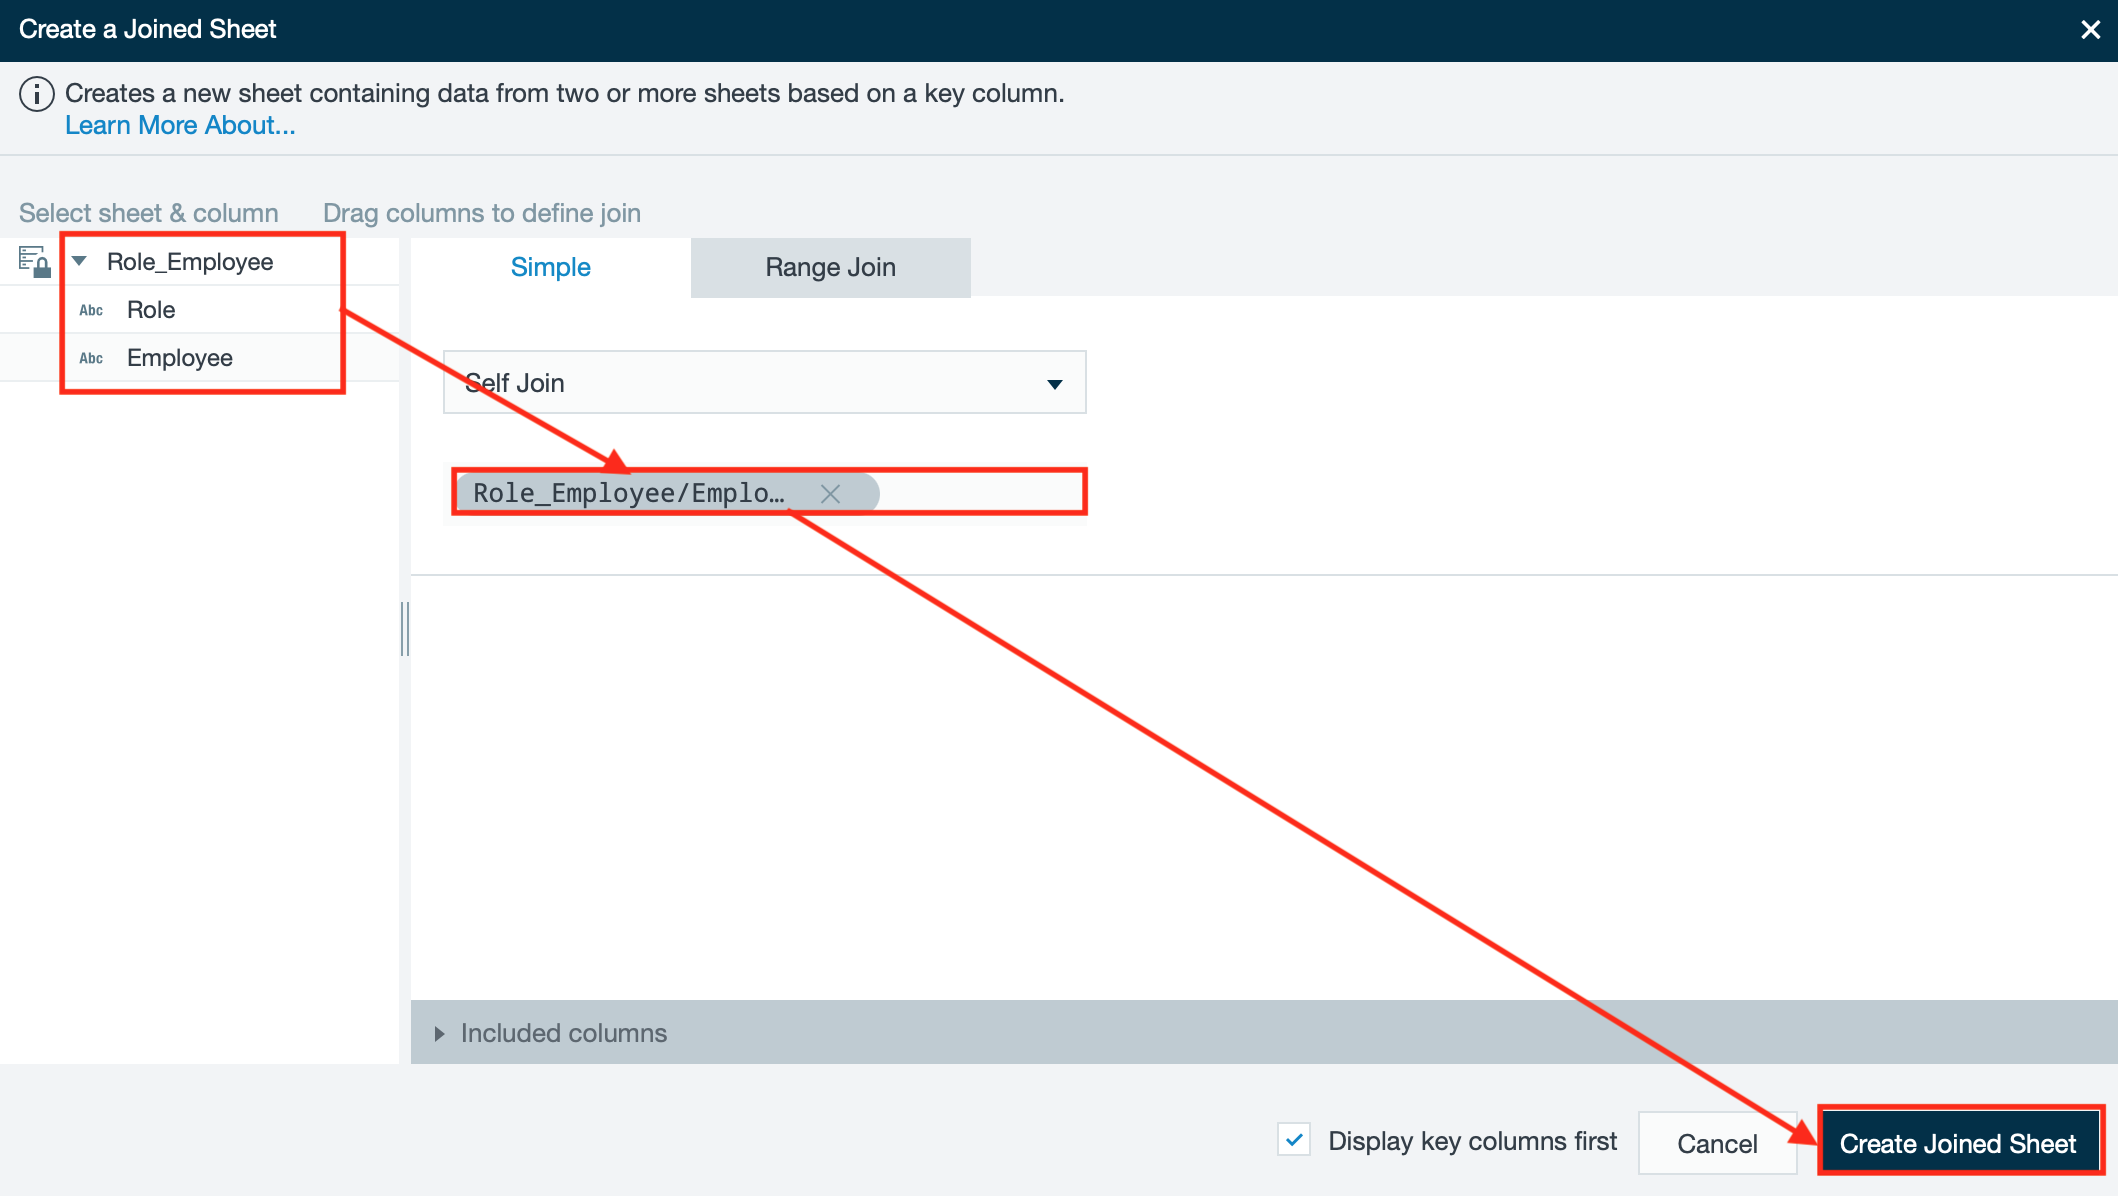
Creating a Self Join
INFO
A self join combines a sheet with itself returning related records from the same sheet. Self joins are useful when one record falls into two or more categories.
To create a self join:
- Open a Workbook and add the data source.
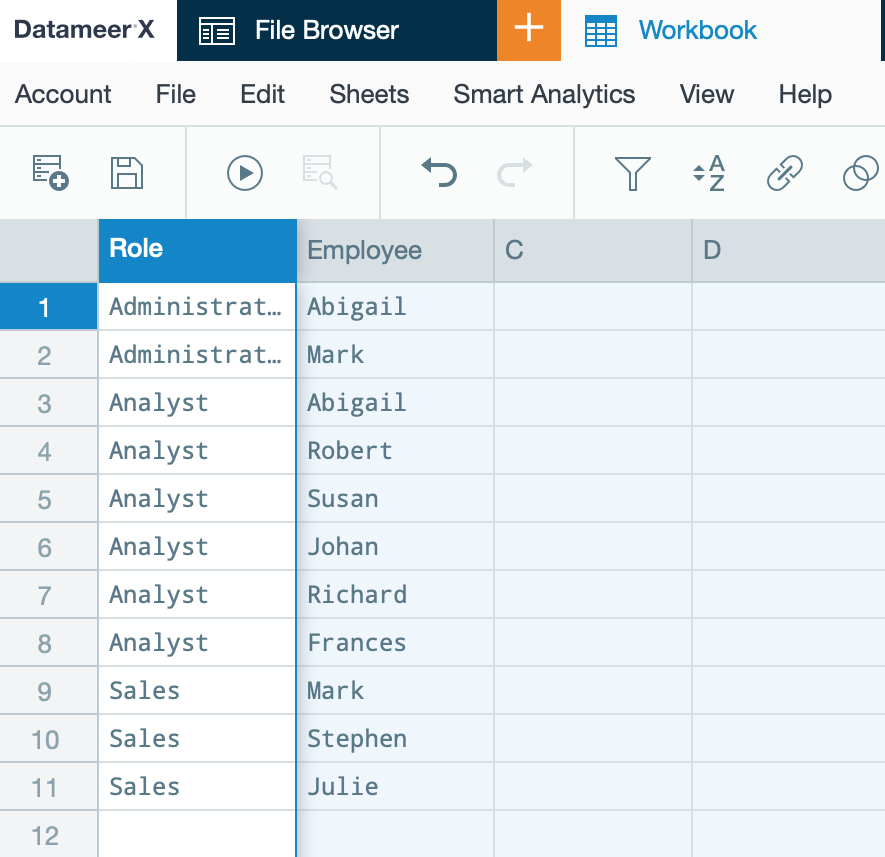
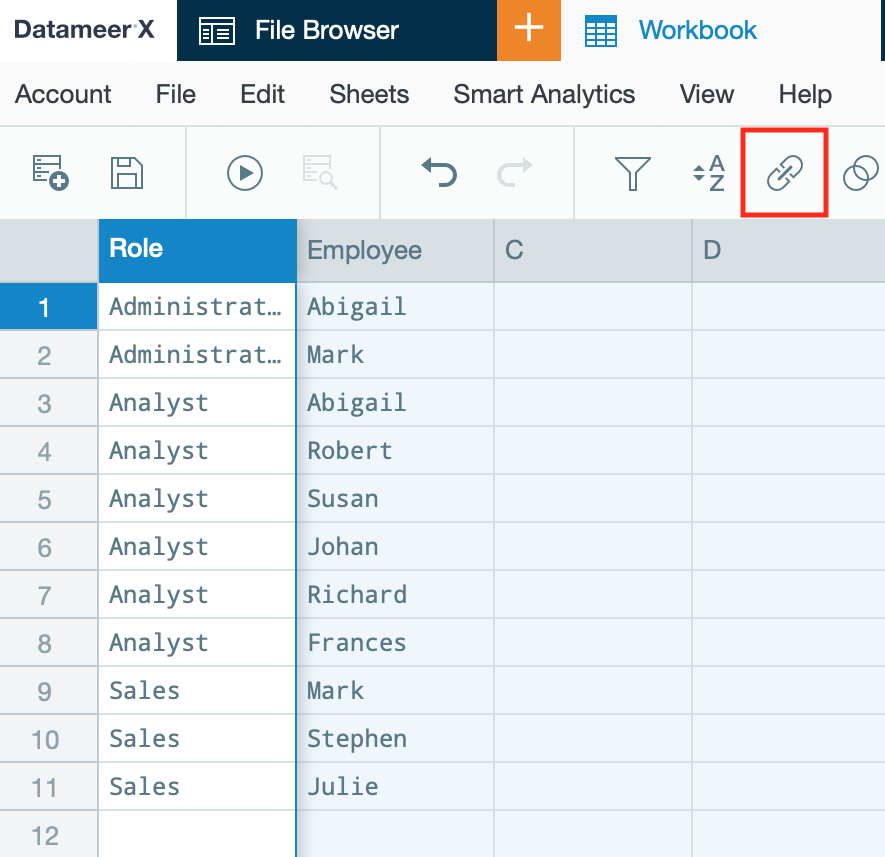
- Click the "Join" icon.
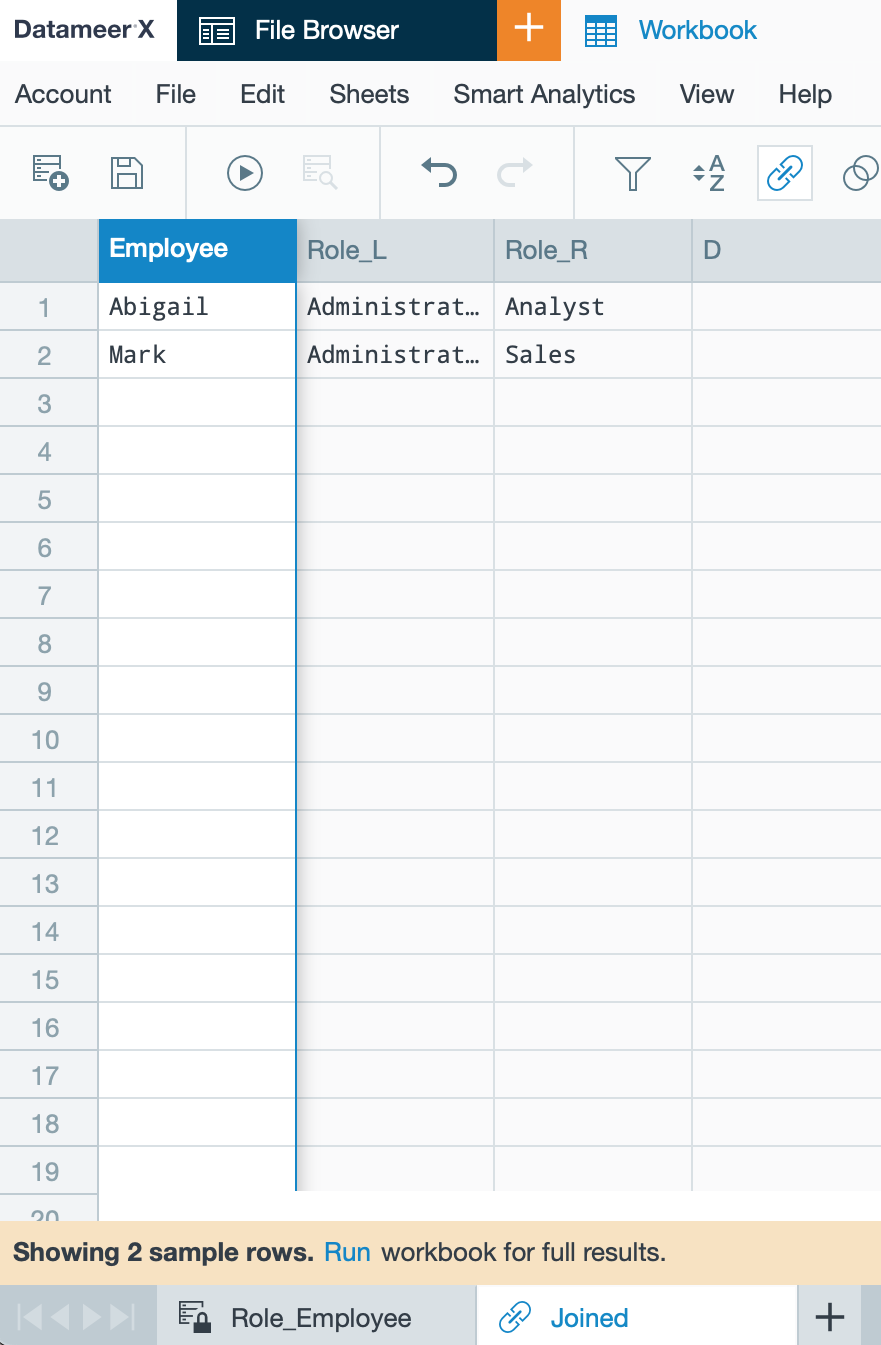
- In this example of a self join, the goal is to use the employee names as a key to find if any employee has multiple roles. To do this, add the employee column and confirm with "Create Joined Sheet".
- The result is a self join using the employee names as a key and displaying matching records.
Joined Sheet Naming
INFO
When creating a join sheet in a workbook, the columns in the join sheet keep their original names unless there is an existing column with the same name.
In that case, the new column has a suffix of the sheet name. Example: "Name" changes to "Name_MarketingData". This new name is stored immediately and not updated when the column name in the source sheet changes.
Avoiding Errors When Using Other Functions After Joining Data
INFO
When joining data and applying other Datameer X functions such as "Unioing Data" afterwards, make sure to enable column transpose when joining data. Key columns must be displayed first.
To enable transposing columns within joining data, make sure the check box "Display key columns first" is checked. This should be checked by default. If not, check it.
